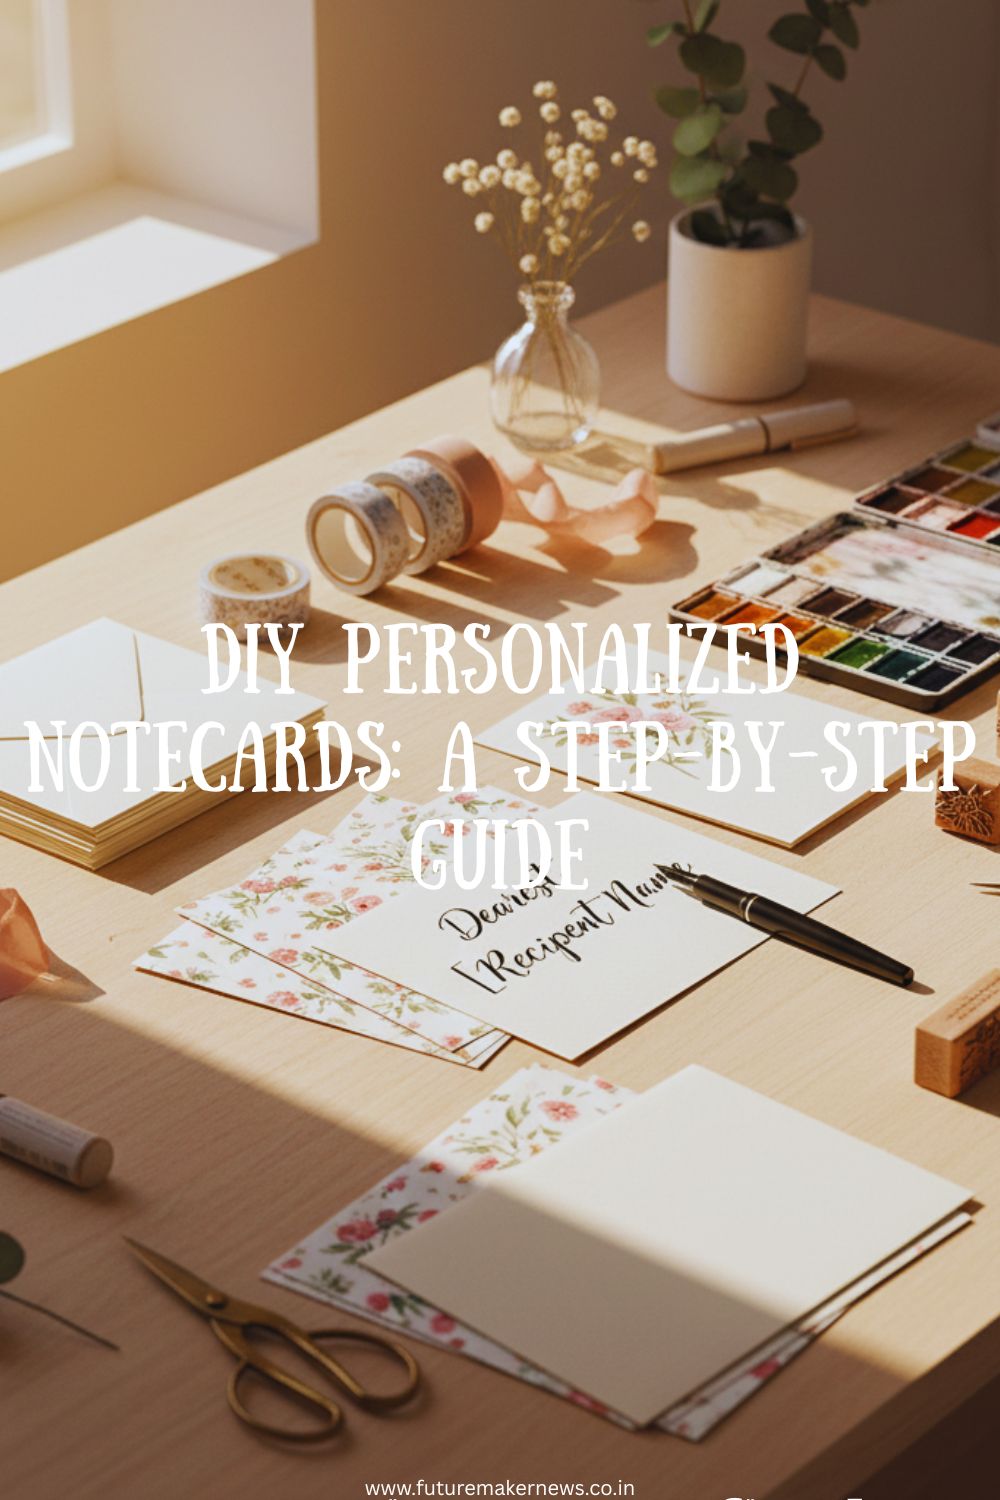
In a world where everything is digital, there’s something incredibly refreshing about sending — or receiving — a handwritten note. A personalized notecard says you cared enough to make it your own. Whether it’s a thank-you message, an invitation, or just a thoughtful hello, custom stationery brings back the charm of meaningful connection.
But here’s the secret: you don’t need to spend $30 on fancy designer stationery sets. You can create stunning, DIY personalized notecards for less than $1 per set — and they’ll look even better than the store-bought kind.
Let’s dive into this creative and budget-friendly project that’s part art, part therapy, and 100% satisfying.
Why You’ll Love Making DIY Custom Stationery
Before we grab the supplies, let’s talk about why DIY notecards are one of the best creative projects you can start today:
- They’re inexpensive but luxurious.
You’ll get that high-end, boutique look without paying high-end prices. - They’re completely customizable.
Choose your own fonts, colors, and styles — your notecards will truly reflect you. - They make meaningful gifts.
Handmade stationery feels thoughtful and personal, perfect for birthdays, holidays, or “just because.” - They boost mindfulness and creativity.
Crafting helps you unwind while creating something beautiful and useful. - They’re eco-friendly.
You can reuse scraps, recycle old paper, and create something new from what you already have.
So, whether you’re an artist, a minimalist, or a stationery addict — this guide will help you design notecards that look expensive but cost almost nothing.
What You’ll Need (for Under $1 Per Set!)
The key to budget-friendly DIY stationery is simplicity + creativity. You don’t need expensive equipment or professional tools — just a few affordable basics and a little imagination.
Here’s what to gather:
- Blank cardstock (you can buy packs for pennies per sheet)
- Paper trimmer or scissors
- Ruler and pencil (for measuring and layout)
- Glue stick or double-sided tape
- Envelopes (bulk sets from discount stores or Amazon)
- Pens, markers, or fine liners for details
- Optional extras: washi tape, rubber stamps, stickers, or printed labels
Step-by-Step: How to Make DIY Personalized Notecards
Ready to get started? Follow these simple steps to create your own custom stationery set that looks straight out of a boutique.
Step 1: Choose Your Style
Before you start cutting and gluing, decide what kind of vibe you want for your stationery.
Ask yourself:
- Do you want minimalist and clean lines?
- Or artsy with watercolor splashes?
- Maybe vintage-inspired, botanical, or monogrammed?
Having a clear vision will help you pick your paper colors, design elements, and finishing touches.
Step 2: Cut the Cardstock
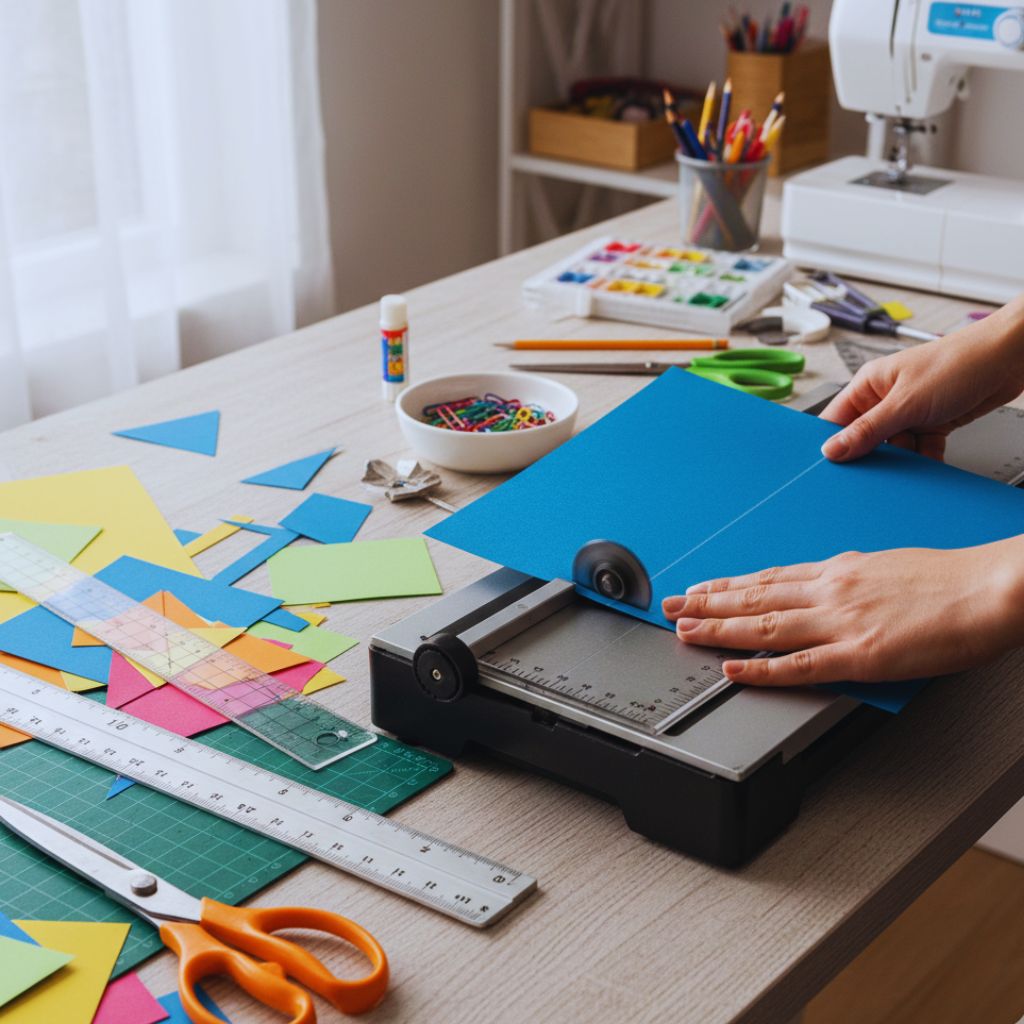
Use a paper trimmer or scissors to cut your cardstock into standard notecard sizes.
Here are some popular options:
- A2 Size (4.25” x 5.5”) – Perfect for thank-you notes and small messages.
- A6 Size (4.5” x 6.25”) – Great for invitations or photo cards.
- Square Size (5” x 5”) – Trendy and unique look.
Try to keep your dimensions consistent so they fit neatly into envelopes.
Step 3: Add a Personalized Header or Monogram
This is what makes your card truly yours. There are a few ways to do it:
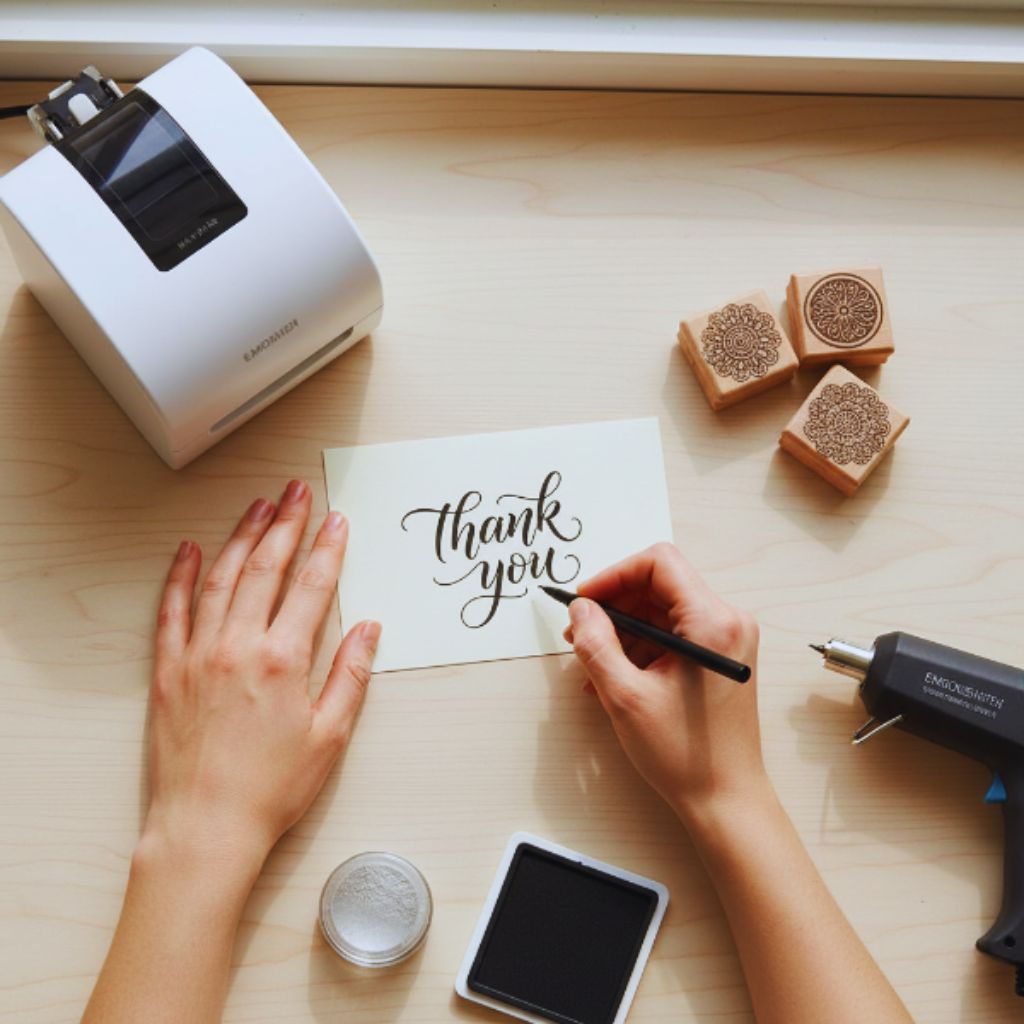
- Hand-lettering:
Use a fine-tip pen or brush pen to write your name, initials, or a short phrase like “Thank You,” “Hello,” or “With Love.” - Printed design:
Print your name or logo using a basic printer. Even a simple serif font can look incredibly elegant when paired with minimal graphics. - Stamp or emboss:
Rubber stamps with initials or custom monograms are a chic, reusable option.
Step 4: Decorate the Borders or Corners
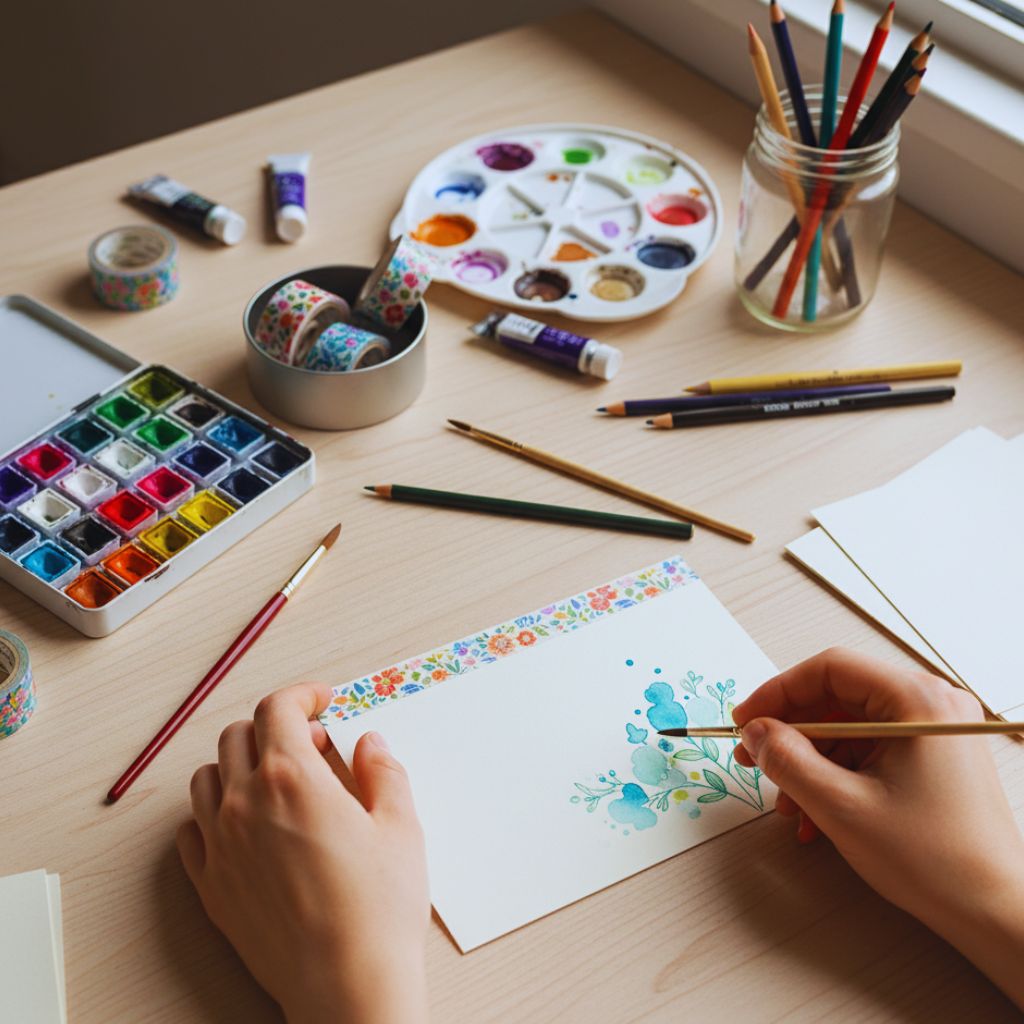
You don’t need to be an artist to add flair! Try one of these budget-friendly design ideas:
- Add washi tape along the edge for color and texture.
- Use rubber stamps (floral, geometric, or seasonal).
- Draw simple botanical doodles or line art.
- Lightly splash watercolor paint for a dreamy effect.
- Stick on a minimal sticker or wax seal.
Step 5: Add Envelope Details
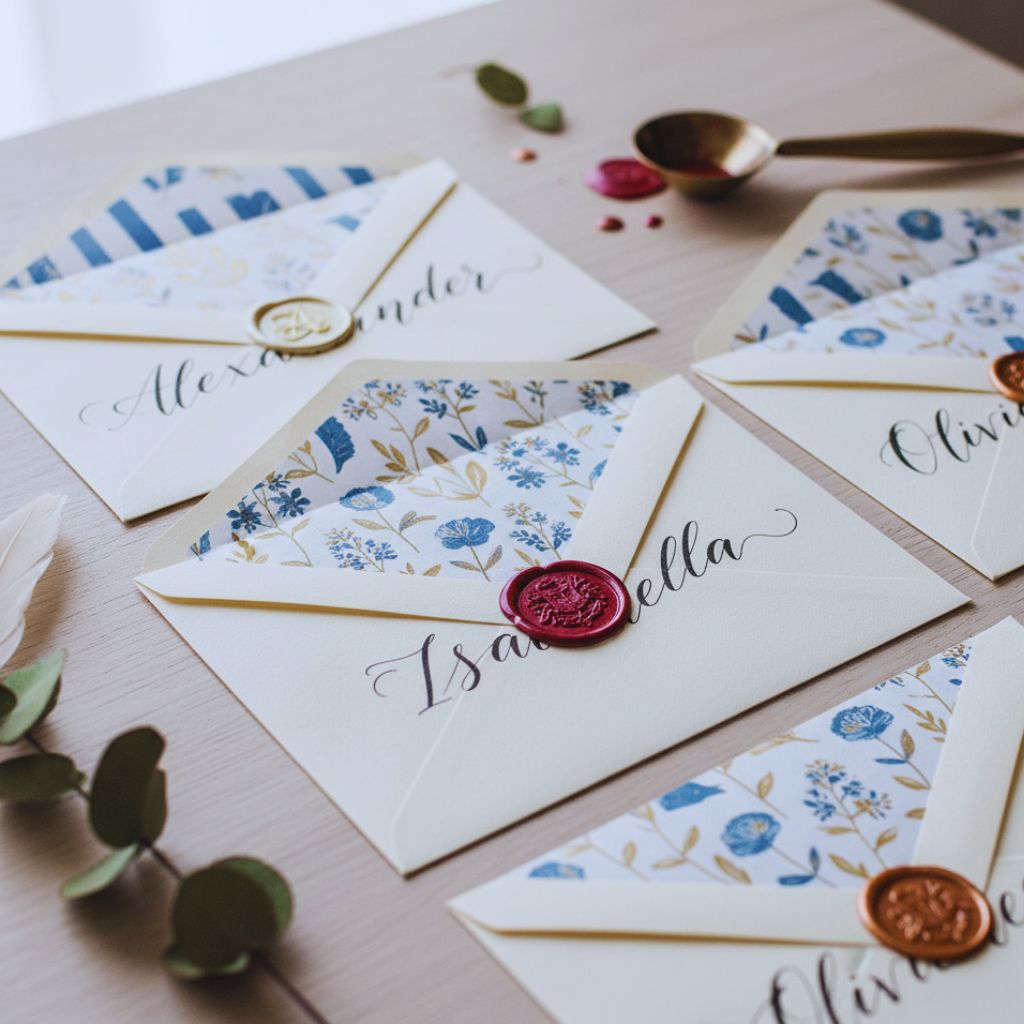
The envelope is the first impression of your stationery — make it count!
Try these ideas:
- Line the inside of the envelope with patterned paper.
- Stamp your return address on the back flap.
- Add a small sticker seal or wax stamp.
- Write names in calligraphy for an elegant finish.
This extra touch instantly upgrades your DIY stationery from simple to sophisticated.
Step 6: Bundle & Store

Once your cards and envelopes are ready, bundle them in sets of five or ten using ribbon, twine, or a small paper band.
Store them in a decorative box or drawer so they’re always ready when inspiration (or a thank-you moment) strikes.
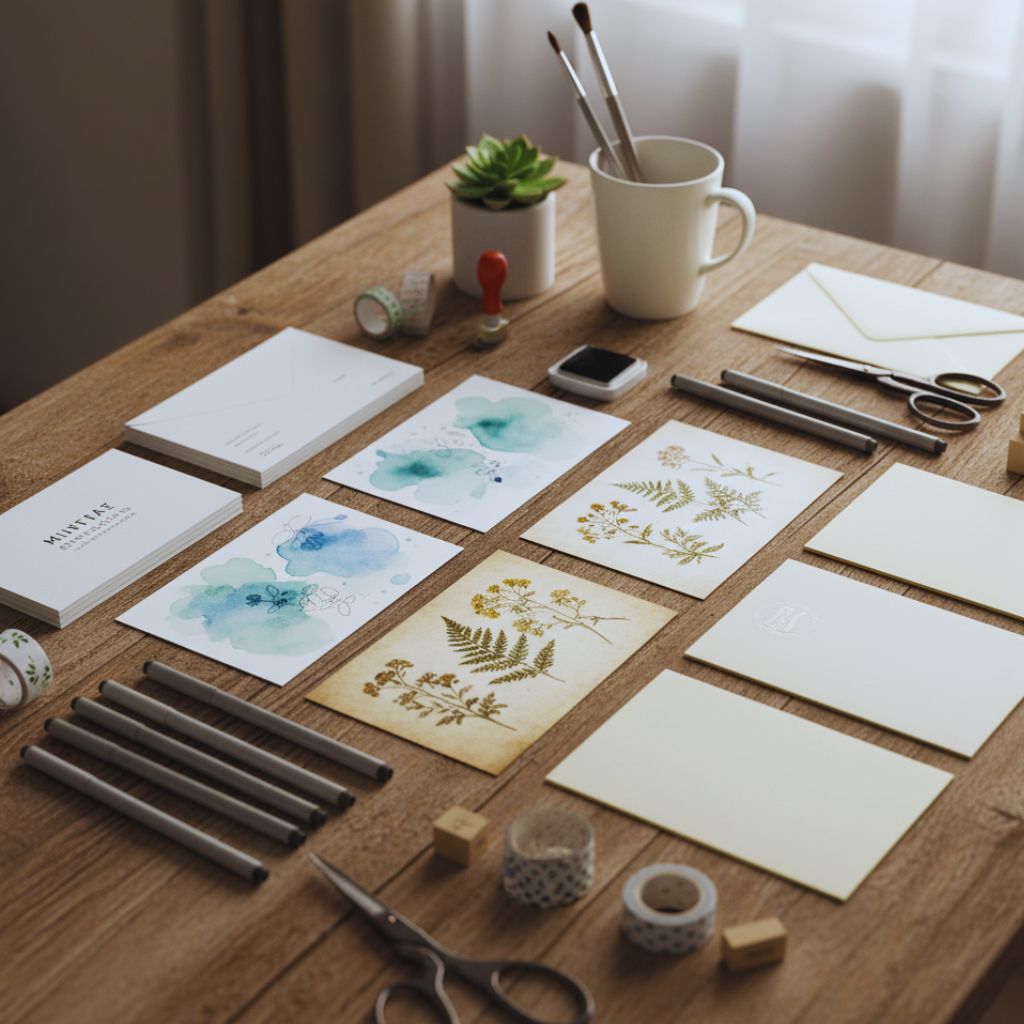
Creative Variations (for Every Style and Occasion)
Want to take your DIY stationery to the next level? Try these themed variations:
- Watercolor Wash Cards:
Lightly brush pastel watercolors across your card, let dry, and write your message in bold black ink. - Pressed Flower Cards:
Glue small dried flowers in one corner for a delicate, vintage feel. - Minimalist Ink Cards:
Simple black ink on white or kraft paper — clean, timeless, and classy. - Foil Accent Cards:
Add gold or silver foil stickers for that luxury touch. - Photo Cards:
Print your favorite photo and attach it with washi tape for a modern, personal twist.
Each design still costs less than a dollar per set, but looks like something you’d find in a high-end boutique.
Why Handmade Stationery Feels So Special
In the age of instant messages, a handwritten note carries rare emotional value.
It says:
“I took time for you.”
“You’re worth the effort.”
“This moment matters.”
That’s the beauty of personalized notecards — they slow things down, make connection tangible, and turn simple communication into art.
Whether you’re sending a thank-you card, a love note, or a “just because” message, your handmade stationery adds warmth that can’t be replicated by a screen.
The Real Cost Breakdown (and Savings!)
Let’s see how this project actually saves you money:
| Item | Approx. Cost | Cards Produced | Cost Per Set (5 Cards) |
|---|---|---|---|
| Cardstock Pack (50 sheets) | $5 | 200 cards | $0.25 |
| Envelopes (100 pack) | $6 | 100 envelopes | $0.30 |
| Ink Pens / Washi / Glue | $3 (used for multiple sets) | – | $0.10 |
| Total Cost Per Set: | – | – | ~$0.65 per set |
You can’t beat that. High-end stationery brands charge $15–$25 for a small pack of notecards. Yours will cost under $1 — and look just as luxurious.
Final Thoughts: Create Beauty, Share Connection
At the end of the day, DIY custom stationery isn’t just about saving money — it’s about creating something meaningful. It’s about reviving the lost art of handwritten notes and adding personality to every message you send.
You’ll rediscover how satisfying it is to write on paper that you designed yourself — how creative, calming, and fulfilling it feels.
So, grab your scissors, some cardstock, and a touch of inspiration. For less than a dollar, you’ll create something that carries a thousand dollars’ worth of charm.