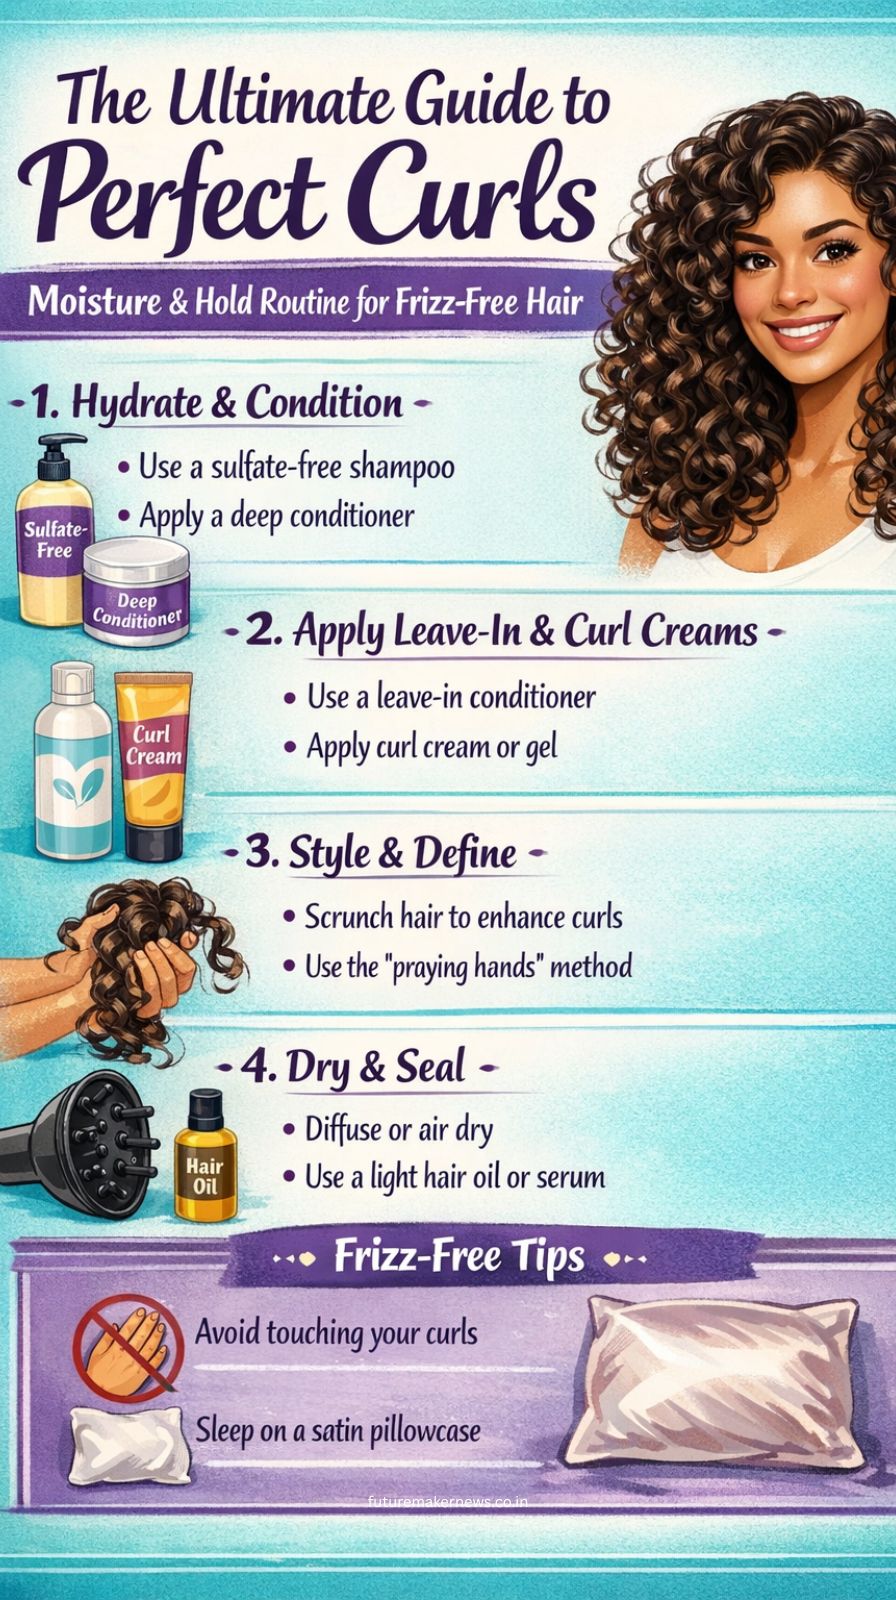
Person with healthy defined curly hair showing frizz-free curls with shine and volume.

Have you ever wondered why your hair looks like a dream while wet but transforms into a frizzy, undefined mess the moment it dries? You aren’t alone. Achieving the perfect curly hair routine isn’t just about buying the most expensive products; it’s about understanding the delicate science of moisture and hold balance.

For years, I struggled with “crunchy” curls or, conversely, curls so soft they lost their shape by noon. After endless experimentation, I’ve perfected a product layering technique that guarantees long-lasting curl definition and incredible shine.

In this comprehensive guide, we are going to dive deep into the steps that will transform your texture. Get ready to fall in love with your natural hair all over again.

Understanding the Foundation: Moisture vs. Hold

Before we pick up a bottle, we need to understand what our hair actually wants. Curly hair is naturally drier than straight hair because the scalp’s natural oils have a harder time traveling down the spiral shaft.

  • Moisture is what gives your hair elasticity, softness, and shine. Without it, hair becomes brittle and prone to breakage.
  • Hold is provided by styling products like gels and mousses. It creates a “cast” around the hair to keep the curl pattern intact as it dries.

The secret to frizz-free curls is ensuring neither side outweighs the other. Too much moisture leads to limp, greasy hair; too much hold leads to stiff, “ramen noodle” hair.

Step 1: The Clean Slate (Clarifying and Conditioning)
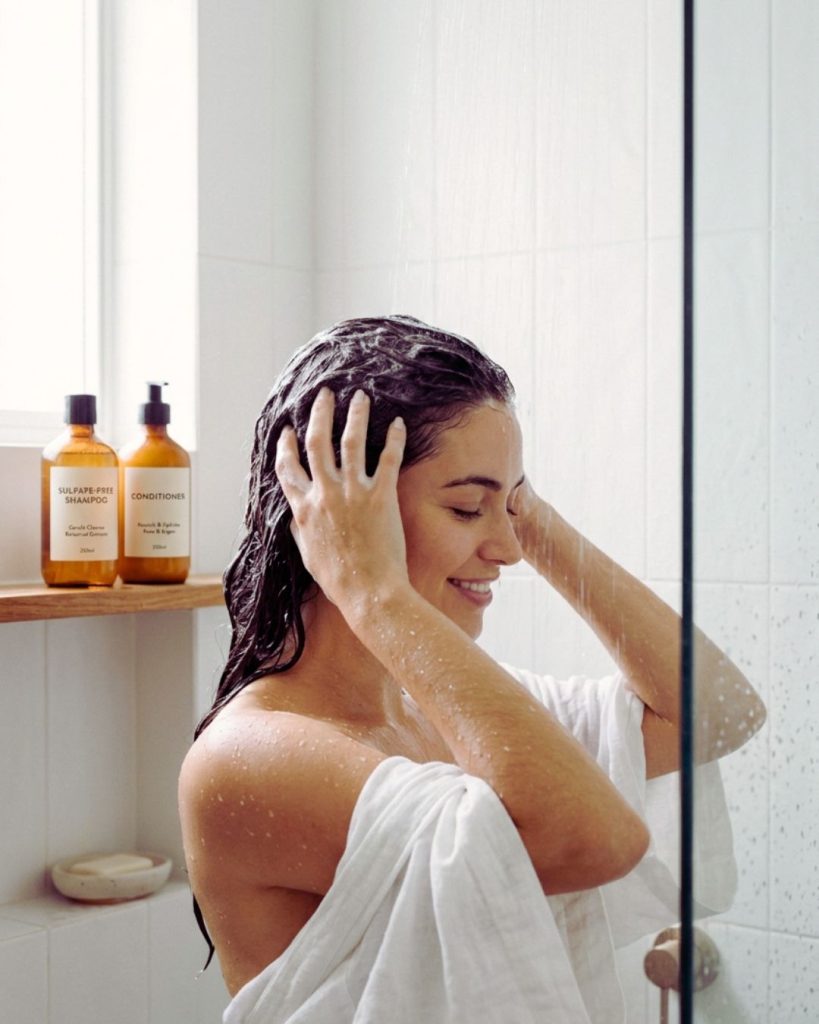
Washing curly hair with sulfate-free shampoo and detangling with conditioner for healthy hair routine.
A clean foundation is everything—clarify, cleanse, and detangle for healthier curls.

Your wash day routine sets the stage for everything else. You cannot layer products effectively on top of old buildup.

  • Clarify Regularly: Use a sulfate-free clarifying shampoo once every two weeks to remove minerals and product residue.
  • Focus on the Scalp: Always massage your shampoo into the scalp to stimulate blood flow and ensure a healthy environment for hair growth.
  • The Power of Detangling: Apply a generous amount of moisturizing conditioner and detangle only when your hair is soaking wet and coated in “slip.” Use your fingers or a wide-tooth comb to prevent snapping the hair fibers.

Step 2: The L.O.C. or L.C.O. Method
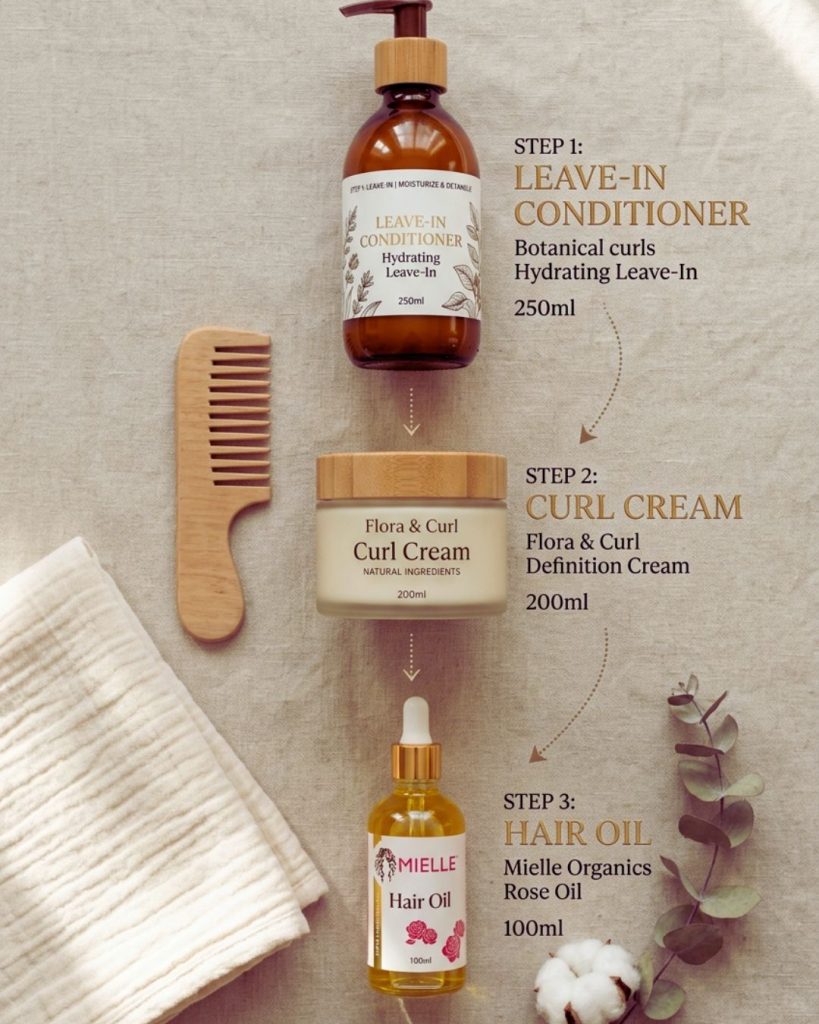
Curly hair LOC method with leave-in conditioner, curl cream, and hair oil arranged for layering routine.
Layer your products the right way—hydration, definition, and seal for perfect curls.

One of the most effective product layering strategies is the LOC method (Leave-in, Oil, Cream) or the LCO method (Leave-in, Cream, Oil).

  1. Leave-in Conditioner: This is your base layer of hydration. Look for ingredients like aloe vera or glycerin to draw moisture into the hair cuticle.
  2. Cream: A curl defining cream provides the weight necessary to prevent “poofiness” and helps the curls clump together.
  3. Oil: A lightweight oil (like jojoba or argan) acts as a sealant, locking all that goodness inside so the air doesn’t suck the moisture back out.

Step 3: The Secret Weapon—Styling for Hold
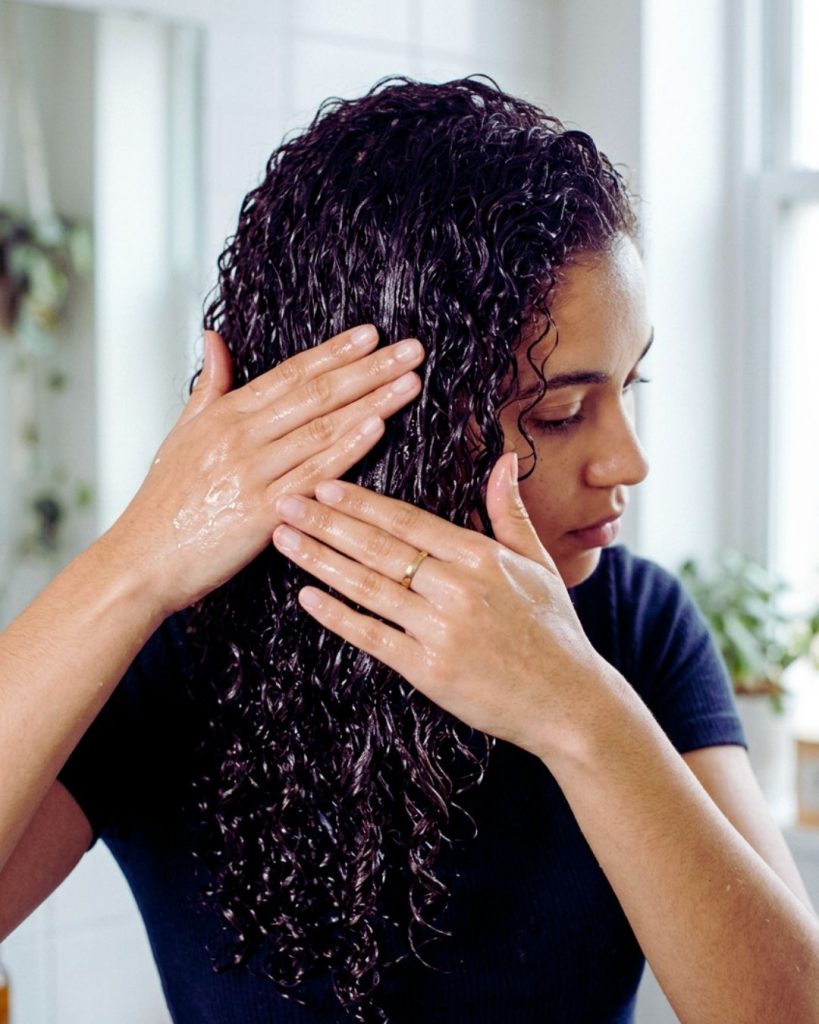
Applying gel to wet curly hair using praying hands technique and scrunching for curl definition.
Lock in definition—apply, smooth, and scrunch for long-lasting curls.

This is where the magic happens. Many people stop at cream, but if you want multi-day curl retention, you need a styler with hold.

  • Apply to Soaking Wet Hair: For the best clump definition, apply your gel or mousse while your hair is still dripping. This traps the water inside the curl.
  • The “Praying Hands” Technique: Rub the product between your palms and smooth it over sections of hair. This flattens the cuticle and reduces frizz.
  • Scrunching: Once the product is distributed, gently scrunch upward toward the scalp. This encourages your natural curl pattern to form.

Step 4: Drying Techniques for Maximum Volume
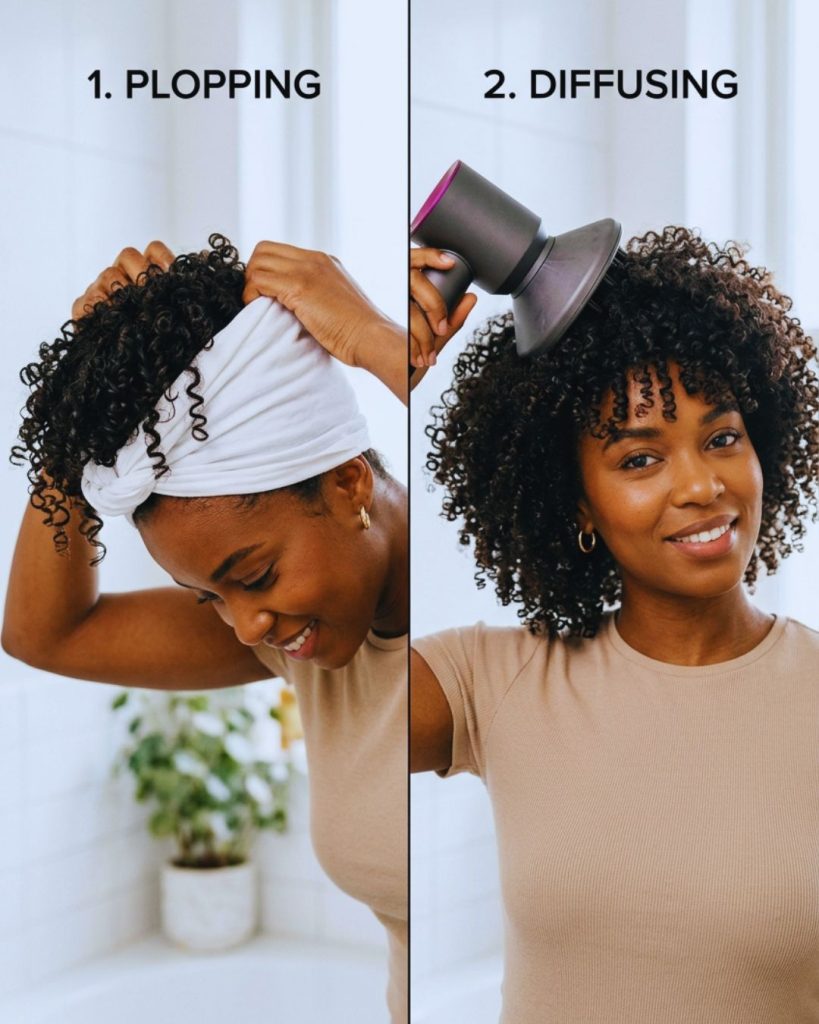
Plopping curly hair with a T-shirt and diffusing with a hair dryer for volume and frizz-free curls.
Dry smarter, not harder—plop for definition and diffuse for volume.

How you dry your hair is just as important as what you put in it. Air drying is great, but it often leads to flat roots due to the weight of the water.

The Art of Plopping

Use a microfiber towel or an old cotton T-shirt to “plop” your hair. Lay the towel on a flat surface, flip your hair over into the center, and tie the towel around your head. This absorbs excess water without ruffling the hair cuticle, preserving the curl shape.

Diffusing for Greatness

If you want maximum volume, use a hair dryer with a diffuser attachment.

  • Use low heat and low airflow.
  • Tilt your head to the side or upside down.
  • Avoid touching the curls with your fingers until they are 100% dry to prevent frizz.

Step 5: Breaking the Cast (SOTM)
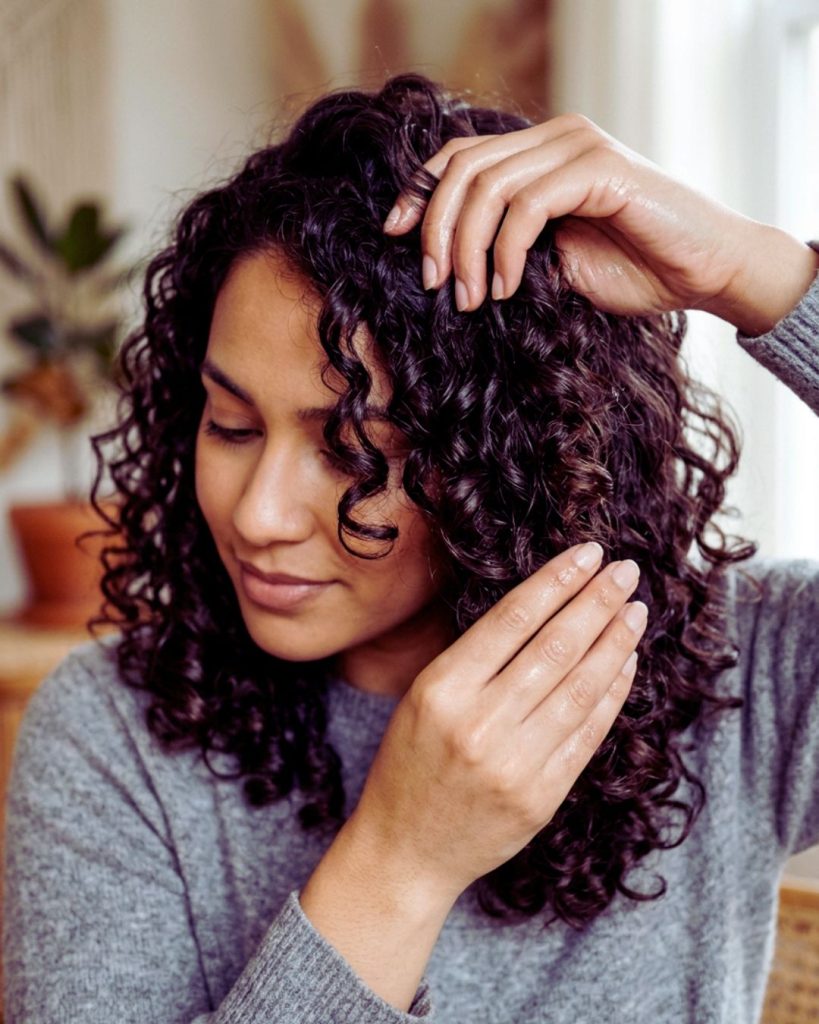
Scrunch out the crunch—reveal soft, defined curls with natural movement.
Scrunching curly hair with oil to break gel cast and create soft defined curls.

Once your hair is completely dry, it might feel stiff or “crunchy.” Don’t panic! This is the gel cast doing its job.

  • S’crunch Out The Crunch (SOTC): Take a few drops of a light hair oil on your hands and gently scrunch your curls.
  • This breaks the hard outer layer of the gel, revealing soft, bouncy, and defined curls underneath.
  • The result? High-definition hair that feels like silk but stays in place all day.

Maintenance: The Pineapple and Silk Strategy

You’ve spent the time getting your curls perfect—don’t ruin them overnight! Proper nighttime hair care is the key to making your routine last for 3, 4, or even 5 days.

  • The Pineapple: Flip your hair forward and tie it in a very loose ponytail at the very top of your head. This prevents you from crushing your curls while you sleep.
  • Silk or Satin Pillowcase: Traditional cotton pillowcases absorb moisture and cause friction. Switching to silk or satin allows your curls to glide smoothly, preventing morning tangles and breakage.
  • Refresh Strategy: On day two or three, don’t re-wash. Simply mist your hair with a mix of water and a little leave-in conditioner to reactivate the products already in your hair.

Troubleshooting Common Curl Issues

Even with a great routine, your hair might act up. Here is how to fix common hurdles:

1. Hair Feels Sticky or Heavy

You likely used too much heavy cream or a product containing too much butter (like shea or cocoa) for your hair’s porosity. Try switching to a lightweight milk or foam.

2. Curls Are Stringy

This usually happens when you apply product to damp hair rather than wet hair. Ensure your hair is “seaweed-like” and soaking wet when you start layering products.

3. Frizz at the Roots

Focus your styling gel application closer to the scalp (while avoiding the skin itself) and ensure you are diffusing the roots thoroughly to set the lift.

Key Ingredients to Look For

When shopping for curly hair products, keep an eye on the label. Your hair’s health depends on quality ingredients:

  • Humectants: Honey, Glycerin, Agave. (Great for drawing in moisture).
  • Emollients: Shea Butter, Coconut Oil, Avocado Oil. (Great for softening).
  • Proteins: Keratin, Silk Amino Acids, Wheat Protein. (Essential for hair elasticity and strength).

Pro Tip: If your hair feels “mushy” or won’t hold a curl, you might need a protein treatment. If it feels like straw, you need more deep conditioning.

Conclusion: Embrace the Journey

Perfecting a curly hair routine is a marathon, not a sprint. Every head of curls is a unique ecosystem of density, porosity, and pattern. By mastering the balance of moisture and hold, you give your hair the tools it needs to thrive.

Consistency is the most important ingredient. Stick to this layering method for a few weeks, and you will notice your hair becoming more manageable, shinier, and infinitely more beautiful. Your curls aren’t “difficult”—they just have high standards!
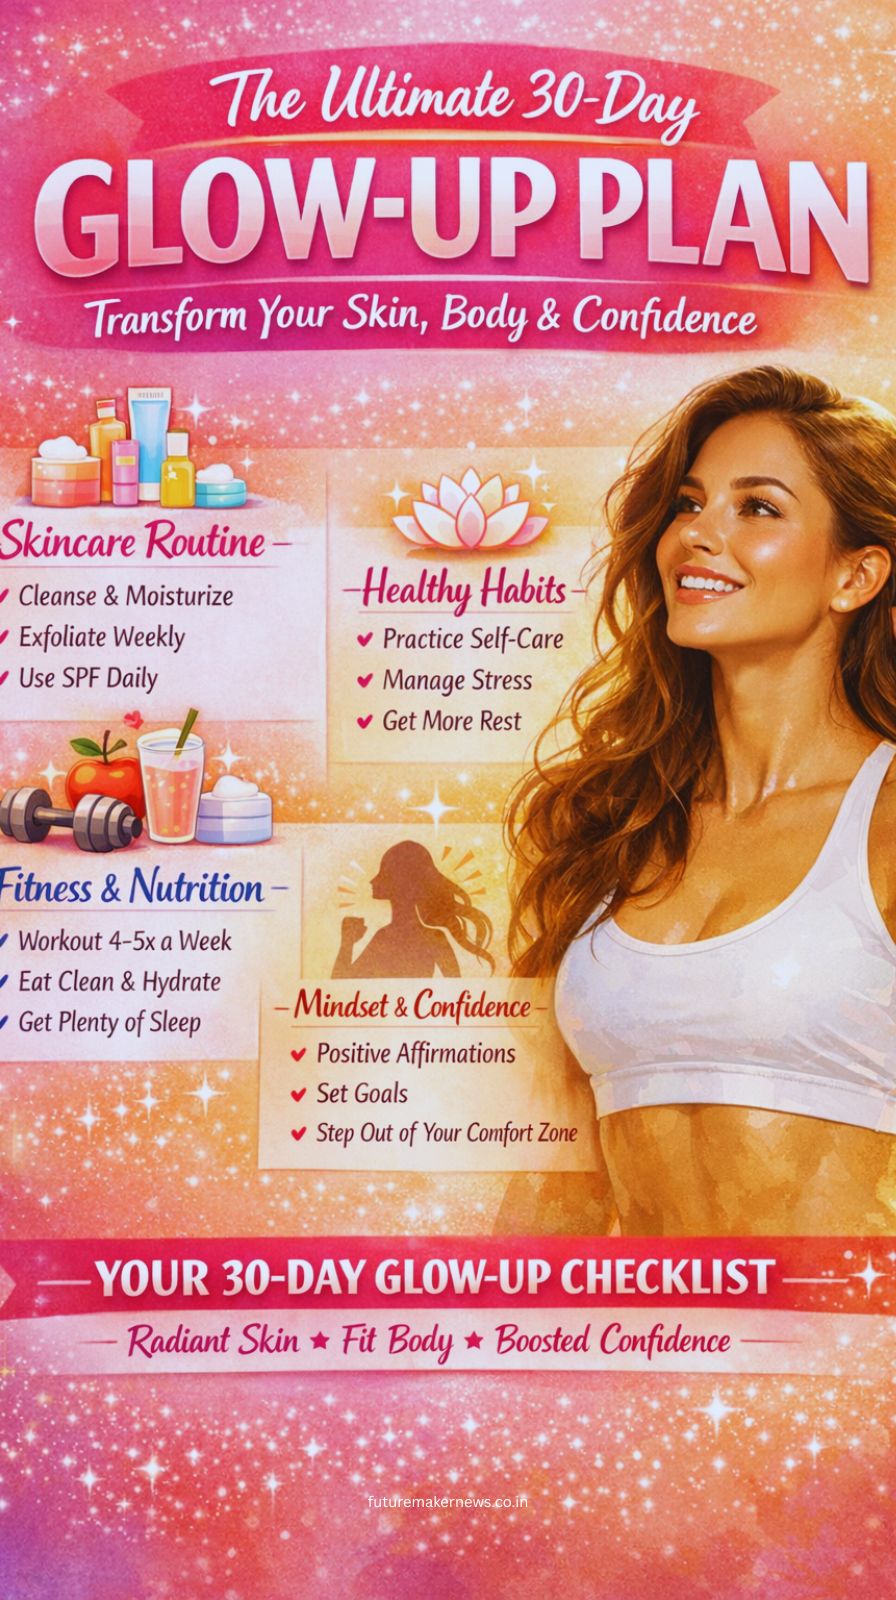

Your 30-day glow-up starts here—transform your skin, body, and confidence with simple daily habits that create a powerful, lasting change.

A “glow-up” isn’t about becoming a different person; it’s about revealing the most vibrant, high-energy version of yourself through habit stacking and discipline. While many try to change everything overnight, the most sustainable results come from a 30-day structured plan that addresses the four pillars of beauty: skin clarity, hair health, functional fitness, and unshakeable confidence.

If you commit to this four-week journey, you won’t just look different in photos—you will carry yourself with the magnetic energy of someone who is deeply taken care of.

Week 1: The Internal Reset & Detox

Woman following a healthy routine with hydration, walking, and skincare representing week one detox and glow up plan.
Week 1 is all about resetting—hydrate, detox, move, and sleep your way to a natural glow.

Before we add the “glam,” we must clear the canvas. The first week is dedicated to reducing systemic inflammation and setting up your skincare foundation.

  • Hydration Overload: Aim for 3 liters of water daily. Water is the most effective natural highlighter for your skin cells.
  • The Sugar Strike: Cut out refined sugars for seven days. This prevents “glycation,” the process that breaks down collagen and causes premature aging.
  • Scalp Detox: Use a clarifying shampoo or an apple cider vinegar rinse to remove product buildup. Healthy hair cannot grow from a suffocated follicle.
  • The 10k Step Challenge: Don’t worry about heavy lifting yet. Focus on low-intensity steady-state (LISS) cardio by hitting 10,000 steps to jumpstart your lymphatic drainage.
  • Circadian Rhythm Alignment: Go to bed at the same time every night. Growth hormone, which repairs skin and muscle, peaks during deep sleep.

Week 2: Skin Transformation & Posture

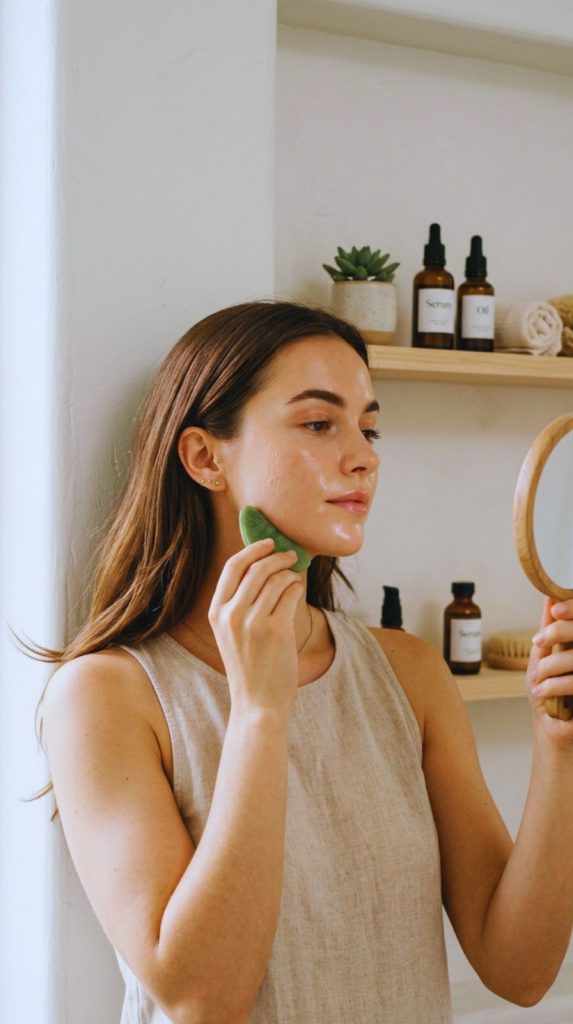
Woman applying skincare and using gua sha while maintaining good posture as part of a glow up transformation routine.
Week 2 is where the glow begins—repair your skin, improve posture, and refine your routine.

By week two, your energy levels will rise. Now, we focus on the “architecture” of your face and body.

  • Active Ingredients: Introduce a Retinoid or Vitamin C serum (depending on your skin needs). These are the “gold standards” for collagen production and evening out skin tone.
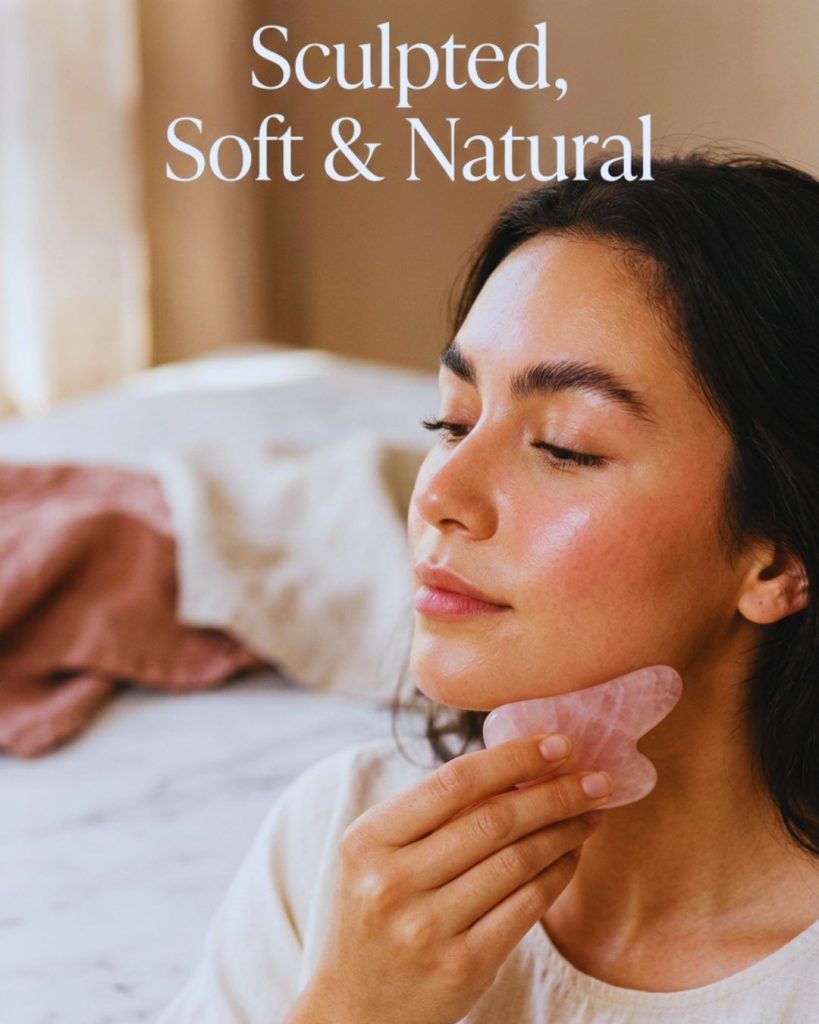
  • Facial Massage/Gua Sha: Spend 5 minutes every morning using a Gua Sha tool or your knuckles to drain puffiness. This defines your jawline and “lifts” the cheekbones naturally.
  • Posture Correction: Spend 10 minutes a day on “wall angels” or yoga. A straight spine instantly makes you look 5kg leaner and 100% more confident.
  • Deep Conditioning: Apply a protein hair mask once this week. Focus on the mid-lengths to ends to repair heat damage and increase light reflectivity (shine).
  • The “No-Mirror” Rule: Stop picking at your skin. In Week 2, we practice “skin neutrality,” allowing the products to work without manual interference.

Week 3: Body Sculpting & Aesthetic Refinement

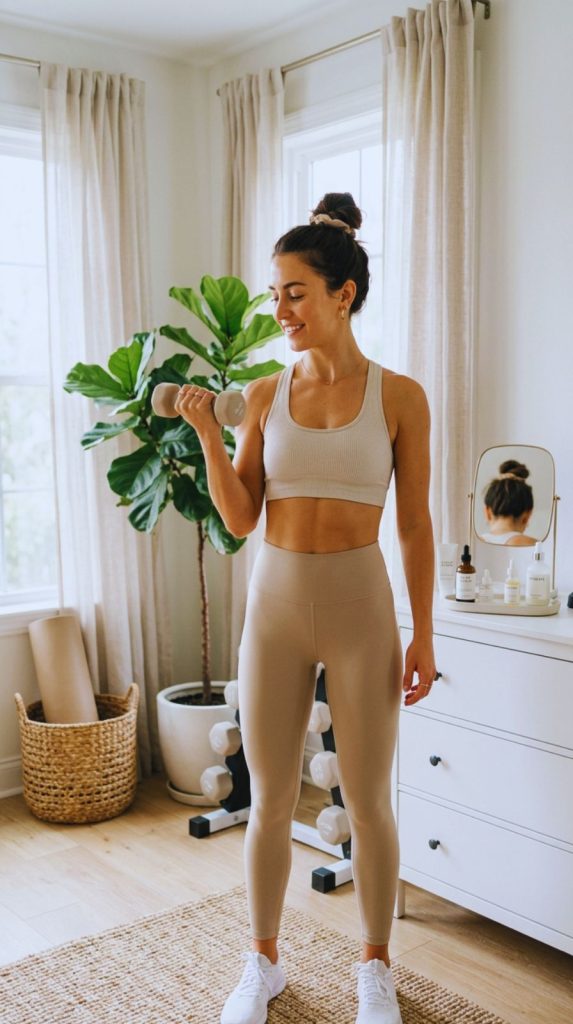
Woman working out and maintaining grooming routine with glowing skin and toned body as part of a glow up transformation plan.
Week 3 is the glow-up grind—build strength, refine your look, and step into your best version.

This is the “work” week. We intensify the physical movement and refine the grooming details that signal high-end maintenance.

  • Resistance Training: Incorporate three 30-minute sessions of bodyweight strength training. Building lean muscle gives the skin a “tight,” youthful appearance.
  • Professional Grooming: This is the week for the “big” maintenance. Get your brows threaded, trim your split ends, and give yourself a thorough pedicure.
  • Body Exfoliation: Use a dry brush or a coffee scrub before showering. This increases circulation and gives your legs that “expensive” satiny glow.
  • Whiten Your Smile: Use a gentle whitening strip or baking soda paste. Bright teeth are a universal sign of health and youth.
  • The Capsule Try-On: Audit your closet. Identify five “power outfits” that fit you perfectly today. Looking expensive is about the fit of the garment, not the price.

Week 4: The Confidence & Presence Phase

Week 4 is your transformation—confidence, presence, and energy that speaks before you do.

The final week is about the “intangibles.” You’ve done the physical work; now you must inhabit the new version of yourself.

  • Affirmation Mirror Work: It sounds cliché, but looking yourself in the eye and acknowledging your progress builds internal charisma.
  • The Signature Scent: Find a fragrance that makes you feel powerful. Scent is tied to memory and emotion; use it to anchor your new confidence.
  • Mindful Eating: Transition from “dieting” to “nourishing.” Focus on omega-3s and antioxidants to maintain the “glow” long-term.
  • Social Battery Check: Surround yourself with people who amplify your energy. A true glow-up includes boundary setting.
  • The Final Reveal: Take a “after” photo. Compare it not to a celebrity, but to the “Week 1” version of you. The difference will be your eye contact and posture.

The 30-Day Glow-Up Checklist

CategoryDaily Non-NegotiableWeekly Peak Task
SkinDouble Cleanse + SPFChemical Exfoliation (AHA/BHA)
HairScalp Massage (2 mins)Deep Conditioning Treatment
Fitness30 Mins Movement1 Session of High Intensity
Mindset5 Mins MeditationDigital Detox (Sunday)

Summary of Key Glow-Up Habits

  1. Sunscreen is King: Never skip SPF 50; it protects the work you’re doing with serums.
  2. Silk Everything: Sleep on a silk pillowcase to protect your hair and prevent sleep lines on your face.
  3. Vitamins: Consult a professional about Biotin or Collagen peptides to support your 30-day internal growth.
  4. The 2-Minute Rule: If a grooming task (like filing a nail) takes less than 2 minutes, do it immediately. Consistency is the secret to looking expensive.

Conclusion

A 30-day glow-up isn’t a miracle cure; it’s a recalibration. By the end of the month, the “effort” of grooming will become your new “normal.” You will find that you are no longer chasing beauty—you are simply maintaining the high standard you’ve set for yourself. The world treats you differently when you look like you invest in yourself.

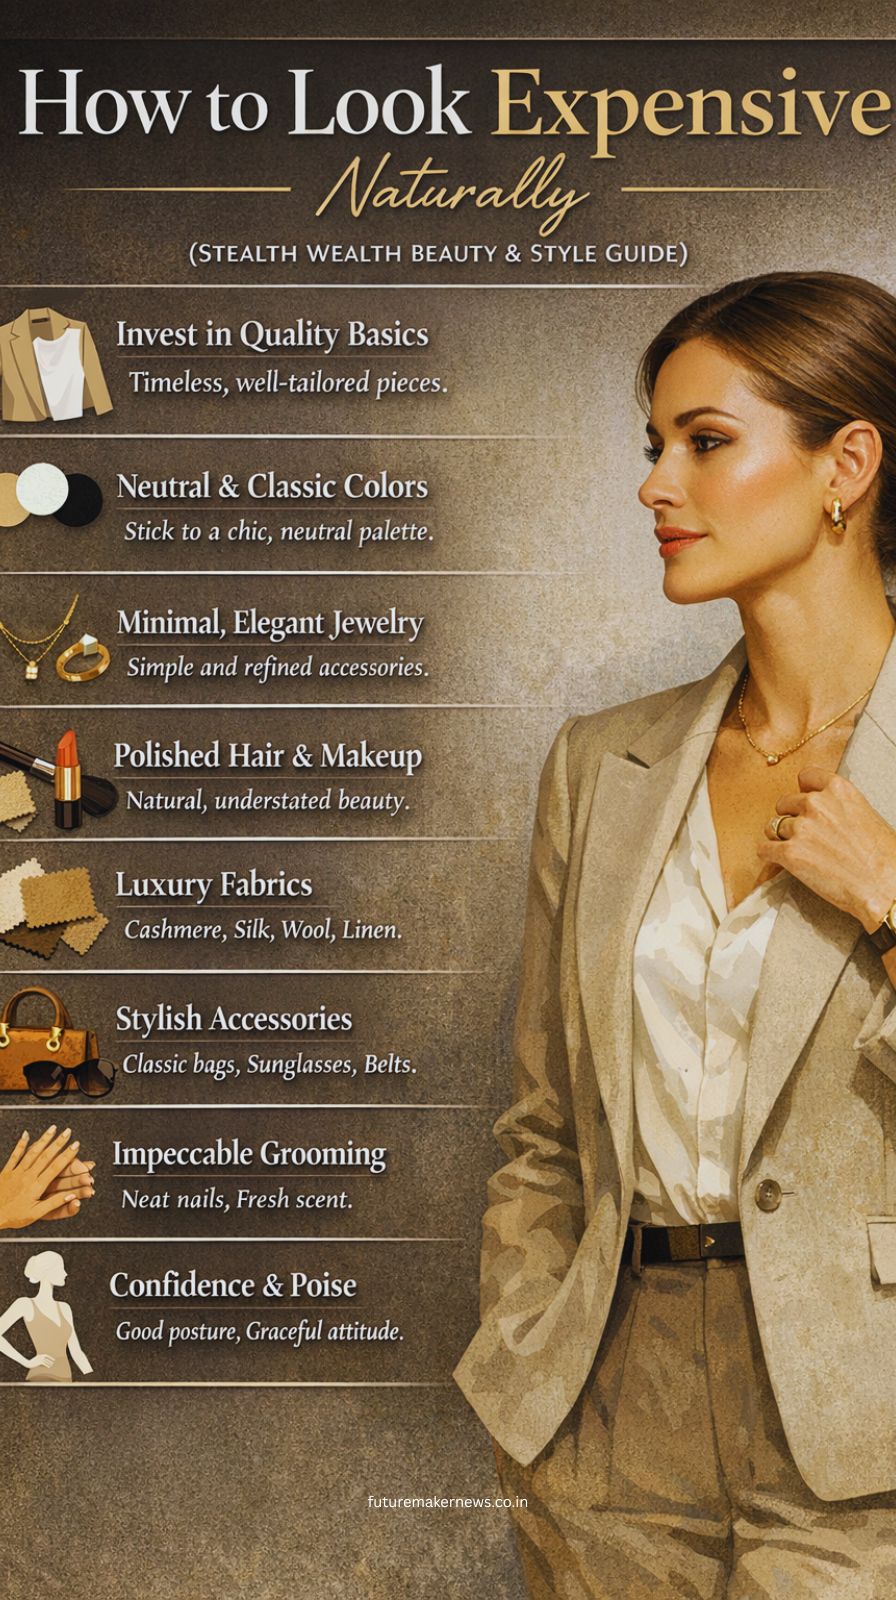
Woman with glowing skin, sleek hair, and minimalist outfit representing stealth wealth style and natural expensive look.

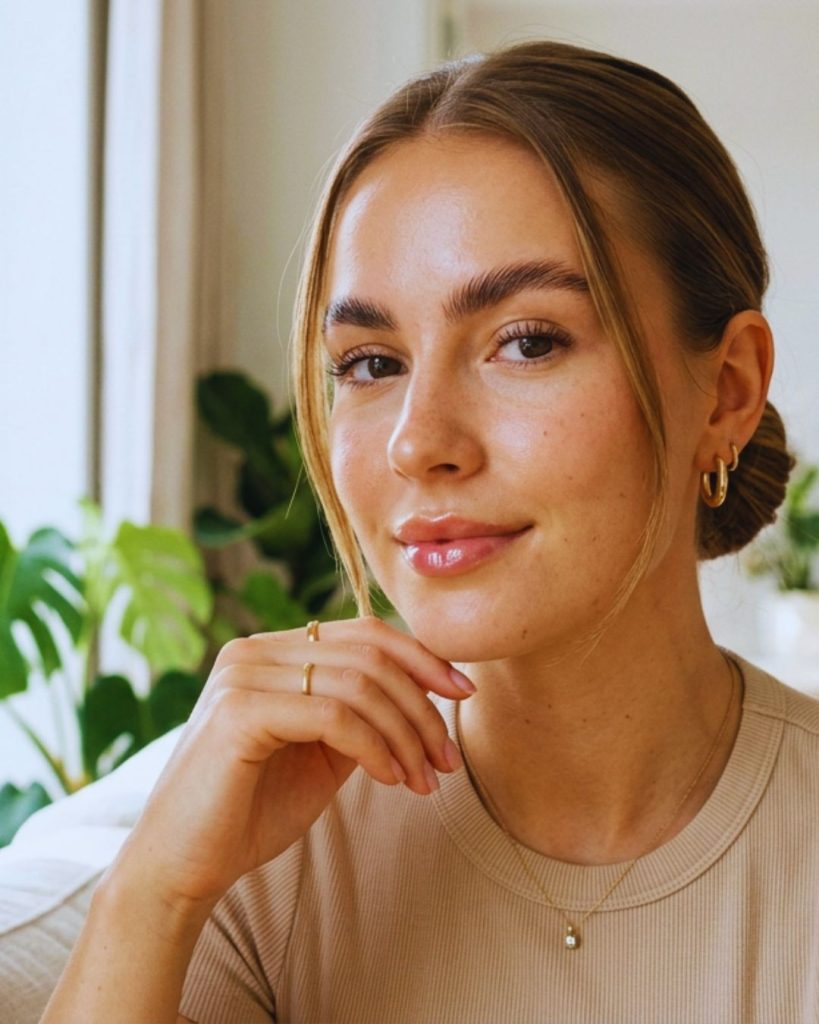
In a world obsessed with fleeting trends and “logomania,” there is a shift toward a more refined aesthetic: Quiet Luxury. Looking “expensive” isn’t about the price tag on your handbag; it’s about a meticulous commitment to personal grooming, radiant health, and understated elegance.

The secret to an upscale appearance is the transition from “decorated” to “polished.” When you focus on the canvas—your skin, hair, and nails—the clothes you wear become secondary to the aura you project.

1. The Foundation: Mastering Skin Basics

Expensive beauty starts with skin—hydrate, protect, and glow from within.

To look expensive, your skin shouldn’t look like it’s covered in makeup; it should look like it’s covered in wealthy hydration.

  • The Glass Skin Effect: High-end beauty is synonymous with a dewy complexion. This is achieved through layers of hydration rather than heavy creams. Think hyaluronic acid and squalane to plump the skin cells.
  • Consistency over Intensity: An expensive look requires a consistent skincare routine. It’s better to use a gentle cleanser and moisturizer every day than to do a harsh chemical peel once a month.
  • Sun Protection is Non-Negotiable: Nothing ages the skin faster than UV damage. Wearing a broad-spectrum SPF 50 daily prevents sunspots and fine lines, maintaining that “ageless” look.
  • Exfoliation for Radiance: Use AHA/BHA exfoliants twice a week. Removing dead skin cells ensures that light reflects off your face evenly, giving you that coveted natural glow.
  • Targeted Eye Care: The skin around the eyes is thin and prone to puffiness. Using a caffeine-infused eye cream can depuff and brighten, making you look well-rested and alert.

2. The Frame: Groomed Brows and Facial Harmony

Close-up of natural feathered brows and lifted lashes enhancing facial harmony and creating a polished look.
Well-groomed brows can lift your entire face—keep them natural, soft, and perfectly shaped.

Your eyebrows are the most important structural feature of your face. They frame your eyes and can literally “lift” your entire countenance if handled correctly.

  • The “Feathered” Look: Move away from heavily filled-in, blocky brows. The expensive aesthetic favors natural brow lamination or a simple clear gel that shows individual hairs.
  • Professional Shaping: Even if you DIY most things, see a professional for an initial brow mapping. This ensures your brows are symmetrical and suited to your specific bone structure.
  • Color Matching: Your brow shade should never be more than one shade darker than your hair. A subtle tint creates depth without looking harsh.
  • The Upper Lip Secret: Unwanted facial hair can dull the complexion. Keeping the upper lip and chin area smooth ensures that your foundation application looks seamless and invisible.
  • Lash Care: Instead of dramatic extensions, opt for a lash lift and tint. It defines the eyes while maintaining the illusion that you “just woke up like this.”

3. The Crown: Achieving Smooth, Expensive Hair

Woman with smooth glossy hair showing healthy shine and rich girl hair aesthetic with minimal styling.
Shiny, healthy hair is the ultimate sign of quiet luxury—smooth, soft, and effortlessly polished.

In the beauty world, “rich girl hair” is a specific term. It refers to hair that looks healthy, vibrant, and incredibly smooth, regardless of the style.

  • The Power of the Trim: Split ends are the enemy of an expensive look. A regular trim every 8–10 weeks keeps the ends blunt and healthy, which makes the hair look thicker.
  • Gloss Treatments: You don’t need a new color to look high-end. A clear hair gloss or “glaze” adds a reflective shine that mimics the look of a professional salon blowout.
  • Scalp Health: Great hair starts at the root. Use a scalp scrub once a week to remove product buildup, ensuring your hair has natural volume and movement.
  • Satin and Silk: Switch to a silk pillowcase. This reduces friction while you sleep, preventing frizz and keeping your hair cuticle smooth.
  • The Low-Heat Rule: Excessive heat creates “fried” textures. Embrace heatless curls or use high-quality ionic blow dryers that seal the cuticle rather than stripping it of moisture.

4. The Silent Language: Manicured Hands and Feet

Close-up of neatly manicured hands with nude nails and soft skin representing minimalist luxury grooming.
Clean, polished hands speak louder than any luxury accessory.

Hands are often the first place people notice a lack of grooming. You don’t need long acrylics; in fact, the “expensive” look leans toward the minimalist manicure.

  • The “Old Money” Palette: Stick to nude tones, sheer pinks, or a classic rich red. These colors are timeless and don’t clash with your outfit.
  • Cuticle Care: Dry, ragged cuticles are a giveaway of neglect. Apply cuticle oil every night before bed to keep the nail bed looking clean and hydrated.
  • Uniform Length: It is better to have short, uniform nails than long ones with one or two breaks. A short, oval shape is the hallmark of sophisticated grooming.
  • Soft Skin Texture: Use a urea-based hand cream to keep the skin on your hands soft and youthful. Remember, your hands age as fast as your face.
  • The Pedicure Standard: Even in winter, keeping your toenails groomed is a psychological boost that translates into confident body language.

5. The Invisible Accessory: Posture and Presence

Elegant woman with straight posture and confident stance representing quiet luxury and polished presence.
Confidence, posture, and presence—the true markers of an expensive aura.

You can have the best skin and hair in the world, but if you slouch, the “expensive” illusion breaks.

  • The Alignment Hack: Imagine a string pulling you up from the crown of your head. This creates an elongated neck and open shoulders, which signals high status and confidence.
  • Mindful Movement: People who project wealth move with deliberate grace. Avoid rushing or fidgeting. Slow, controlled movements suggest you are in control of your environment.
  • The Power of Scent: To look expensive, you must smell expensive. Opt for linear fragrances (scents that stay consistent) with notes of sandalwood, bergamot, or white tea. Apply to pulse points so the scent is discovered, not announced.
  • The Smile Factor: Oral hygiene is a massive part of the beauty basics. Naturally white teeth (not blindingly artificial) and healthy gums contribute to a “polished” face.

6. The Wardrobe of a Minimalist

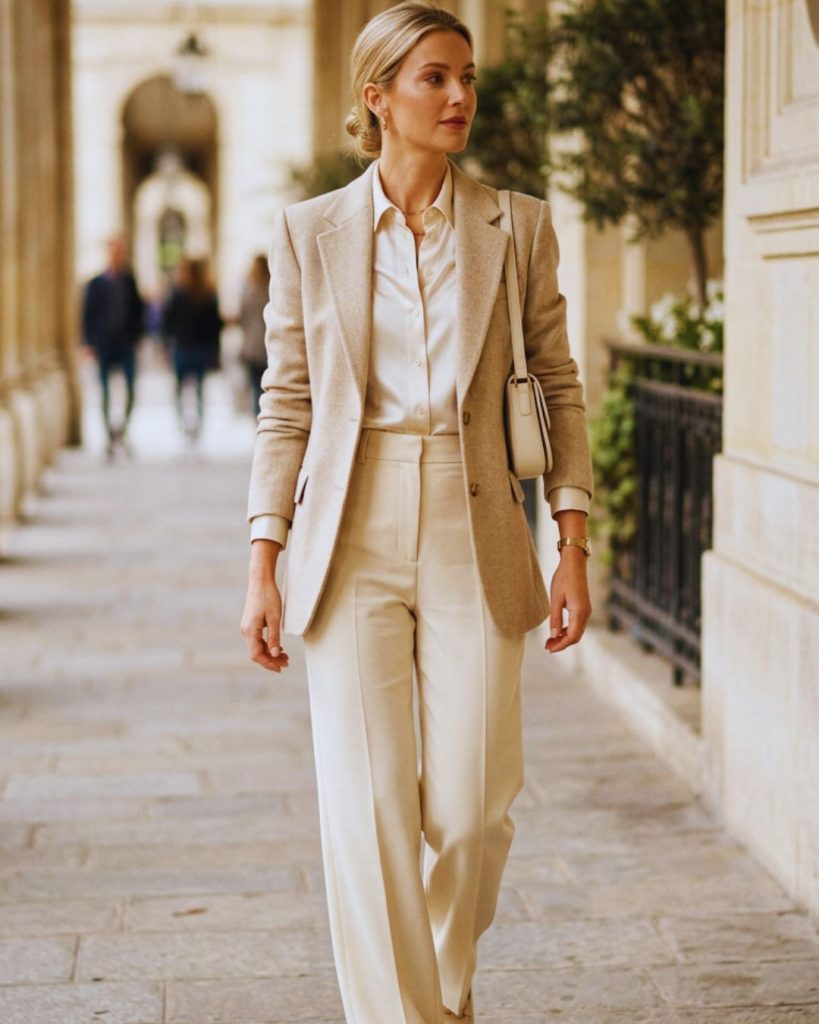
Woman wearing a tailored monochrome outfit in neutral tones representing minimalist luxury fashion and expensive style.
Expensive style isn’t about brands—it’s about fit, fabric, and simplicity.

Looking expensive naturally extends to how you “package” your groomed self. It’s about the fit and fabric, not the brand.

  • Monochromatic Dressing: Wearing varying shades of the same color (like cream, beige, or camel) creates a streamlined silhouette that looks instantly high-end.
  • Tailoring is Key: A $20 shirt that is tailored to your body will always look more expensive than a $200 shirt that fits poorly.
  • Natural Fibers: Choose linen, silk, wool, and cotton. These materials breathe better, drape better, and age more gracefully than synthetic polyesters.
  • The De-Piller: Keep a fabric shaver handy. Removing “pills” from a sweater or coat instantly restores its luxury appearance.
  • Steam, Don’t Iron: Steaming your clothes removes wrinkles without the risk of “shiny” iron marks, keeping the fabric looking brand new.

7. Holistic Habits: The “Inside-Out” Glow

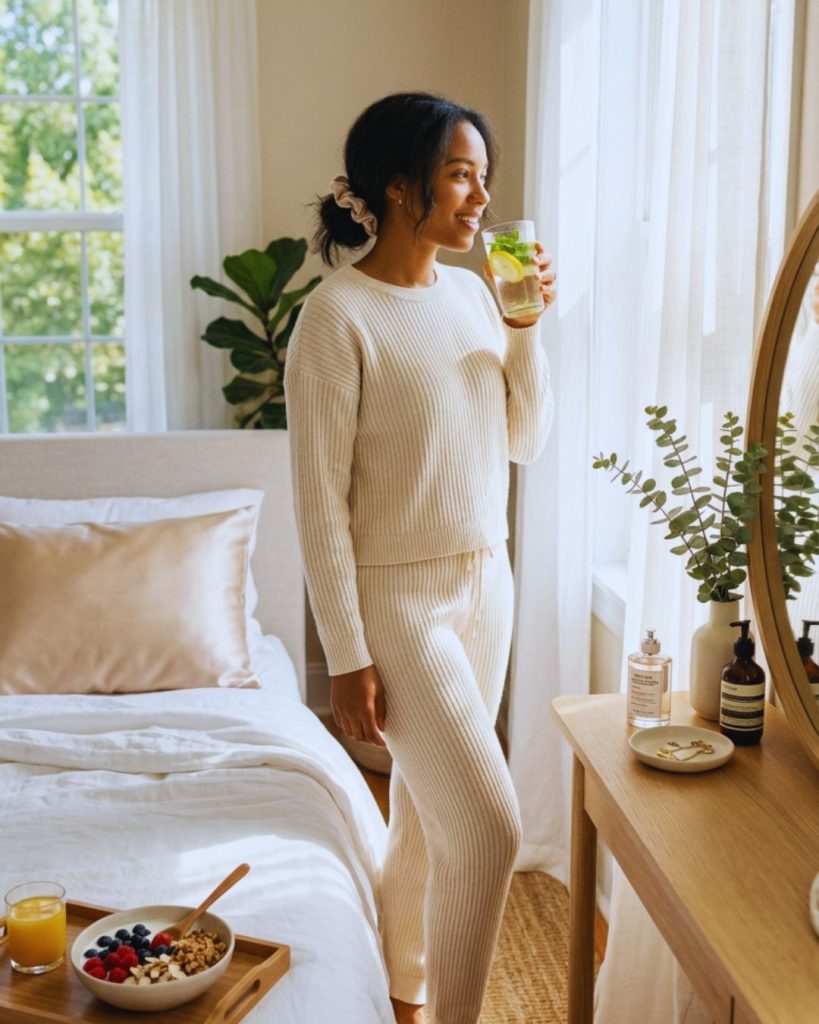
Woman with glowing skin enjoying a healthy morning routine with water and fresh fruits representing natural beauty and wellness.
True luxury starts within—hydration, sleep, and balance create a natural glow no makeup can replace.

Finally, the most expensive look comes from a body that is functioning at its peak. This is the natural beauty that money can’t buy, but discipline can.

  • Hydration from Within: Drinking 2–3 liters of water daily keeps the skin plump and the eyes bright.
  • Sleep Hygiene: They call it “beauty sleep” for a reason. 7–9 hours of quality sleep allows for cellular repair, reducing the need for heavy concealers.
  • Nutrient-Dense Diet: Focus on omega-3 fatty acids (found in walnuts and salmon) for hair shine and antioxidants (berries and greens) for skin clarity.
  • Confidence as a Tool: The ultimate “expensive” trait is a lack of desperation. When you are comfortable in your groomed, natural state, you project an effortless sophistication that is magnetic.

Summary Table: The “Expensive” Checklist

CategoryThe GoalKey Action
SkinRadiance & ClarityDaily SPF & Hyaluronic Acid
HairSmoothness & ShineRegular trims & Silk pillowcases
BrowsDefinition & LiftClear brow gel & Professional mapping
NailsCleanlinessNude tones & Cuticle oil
LifestyleVitality8 hours of sleep & Posture awareness

Conclusion

Looking expensive is a marathon, not a sprint. It’s the result of small, daily investments in yourself. By mastering your skin basics, maintaining groomed brows, and ensuring smooth hair, you create a foundation of beauty that doesn’t rely on logos or labels. You become the luxury.

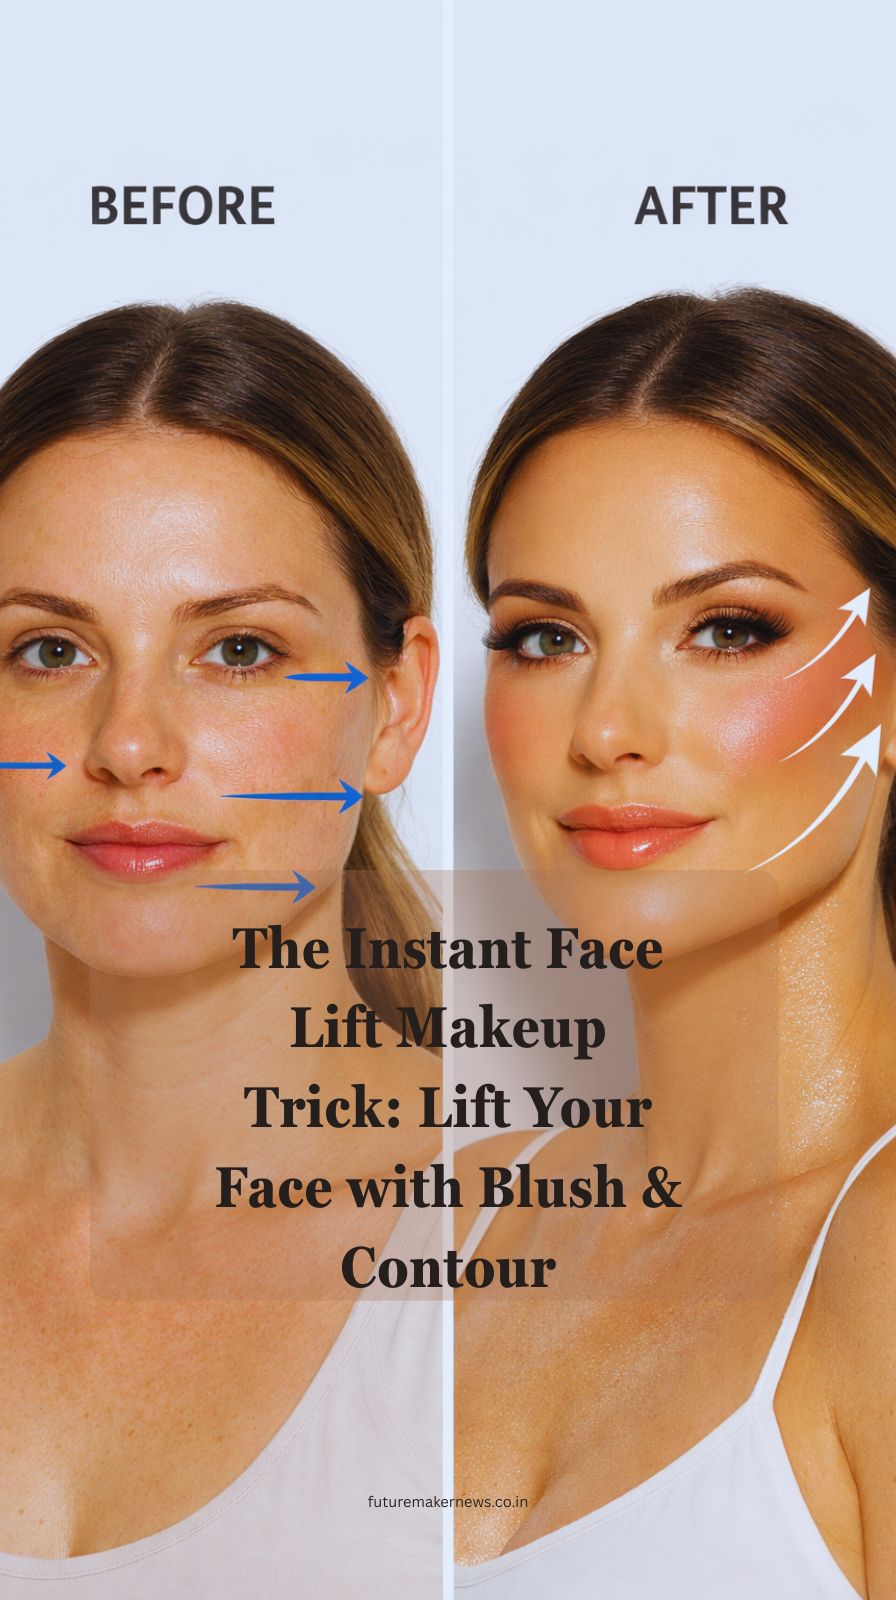
Before and after makeup showing lifted face using blush and contour placement for a snatched look.

We have all been there—staring into the mirror after a long night, wishing we could just “pull” our features upward. While skincare is a long game, makeup artistry offers an immediate solution. You don’t need a surgical thread lift or expensive fillers to achieve a snatched, youthful look.

The secret lies in optical illusions. By mastering strategic blush placement and precise contour angles, you can effectively “remodel” your face shape in under five minutes. This is about working with light and shadow to defy gravity.

1. The Physics of the “Lift”

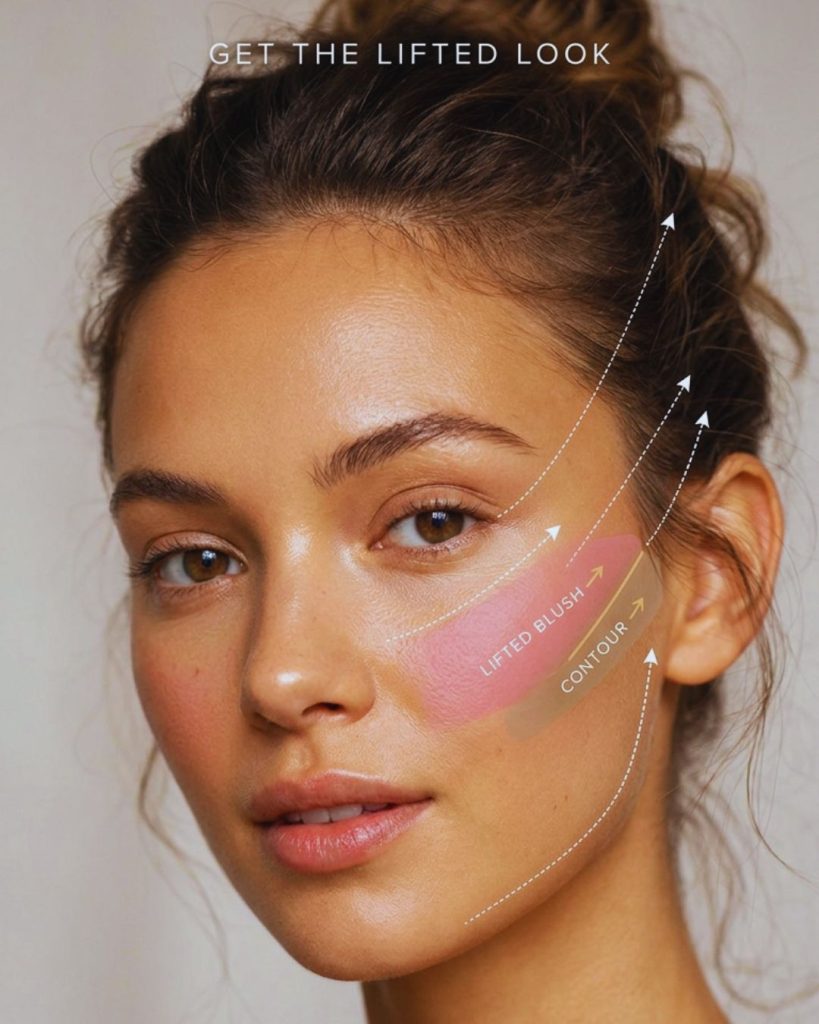
Face diagram showing upward diagonal makeup placement lines for contour and blush to create a lifted appearance.
The secret to a lifted face? Every line goes up—master the upward diagonal technique for an instant sculpted look.

Before picking up a brush, you must understand the “Upward Diagonal” rule. To look lifted, every line you draw on your face—from your eyeliner to your bronzer—should follow a parallel line pointing toward the top of your ears.

  • Gravity Defiance: As we age, the face naturally loses volume, causing features to migrate downward. Makeup can counteract this by creating visual height.
  • The Power of Angle: Horizontal lines widen the face; vertical lines lengthen it; but diagonal lines lift it.
  • Symmetry is Secondary: While we strive for balance, focusing on the upward trajectory is more important for the lifting effect than perfect 1:1 symmetry.
  • Texture Matters: For a natural lift, cream products are superior to powders. They melt into the skin, mimicking the look of natural muscle and fat distribution.
  • The “Shadow” Rule: Contour is meant to mimic a shadow. Shadows fall under structures. To lift, we move these shadows slightly higher than where they naturally occur.

2. High-Altitude Blush Placement

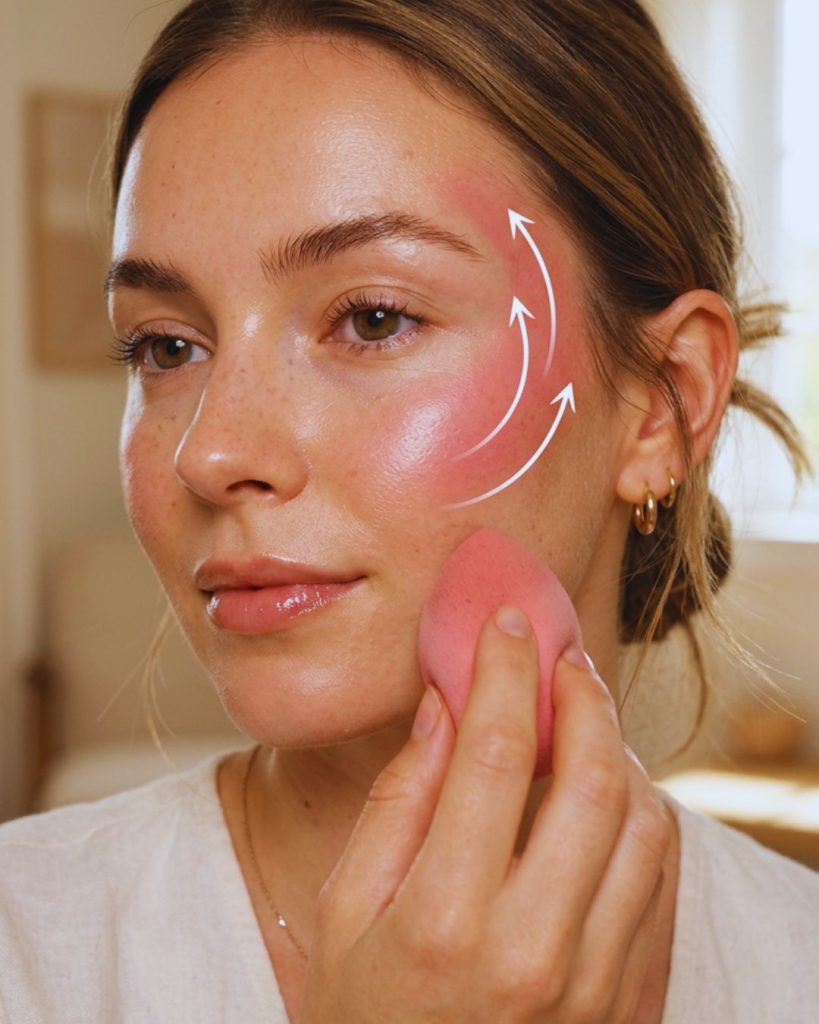
High cheekbone blush placement blended toward temples in upward motion to create a lifted and youthful face look.
Apply blush higher—not wider. This lifted placement instantly sculpts your face and adds a youthful glow.

Forget the old-school advice of “smiling and applying blush to the apples of your cheeks.” For most face shapes, that technique actually pulls the face down once you stop smiling.

  • The Temple Trick: Apply your blush starting at the high point of your cheekbone and blend it upward into your hairline and temples. This creates a “C” shape that draws the eye upward.
  • Avoiding the Nose: Keep your blush at least two fingers’ width away from your nose. Applying color too close to the center of the face adds “weight” and can make you look tired.
  • The Lifted Apple: If you love color on the front of your face, place it on the upper outer quadrant of the cheek apple, never the bottom.
  • Color Selection: Use warm, brightening tones like peach or soft rose. These colors mimic blood flow and vitality, which are hallmarks of a youthful, lifted complexion.
  • Seamless Blending: Use a damp beauty sponge to press the blush into your concealer. There should be no visible line where the color begins—just a seamless transition of “glow.”

3. Precision Contour Angles: The “Snatched” Secret

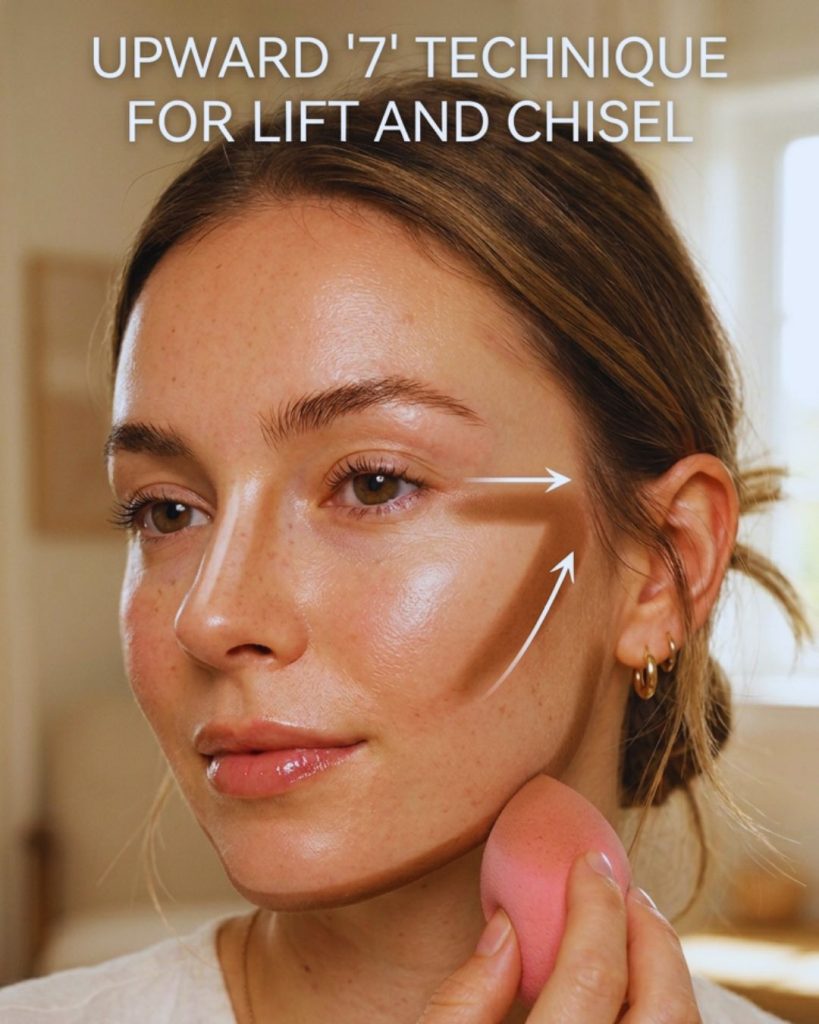
Contour applied above cheekbones and along jawline with upward angles to create a lifted and snatched face look.
Contour higher, not lower—this one placement trick instantly lifts and sculpts your entire face.

Contouring isn’t about “striping” your face; it’s about redefining the bone structure. To achieve an instant lift, we focus on the “hollows” but place them higher than you think.

  • The Cheekbone Elevation: Find your natural cheekbone hollow. Now, apply your contour cream slightly above that line. By darkening the area just above the hollow, you create the illusion that your bone sits higher.
  • The Jawline Refiner: Instead of drawing a line under your jaw, draw it slightly on the edge of the jawbone and blend downward toward the neck. This creates a sharper silhouette.
  • The “3” Technique Revised: Many tutorials suggest a “3” shape (temple, cheek, jaw). For a lift, make this “3” more of a “7” shape, focusing heavily on the upward flick at the end of the cheekbone.
  • The Eye Socket Lift: Take a tiny bit of your contour shade and blend it into the outer crease of your eye, extending it toward the tail of your brow. This opens up the eyes and lifts the brow bone.
  • Nose Sculpting for Height: A thin line of highlighter down the very center of the nose, stopping before the tip, creates a “button” effect that pulls the center of the face upward.

4. The Concealer “Eraser” Method

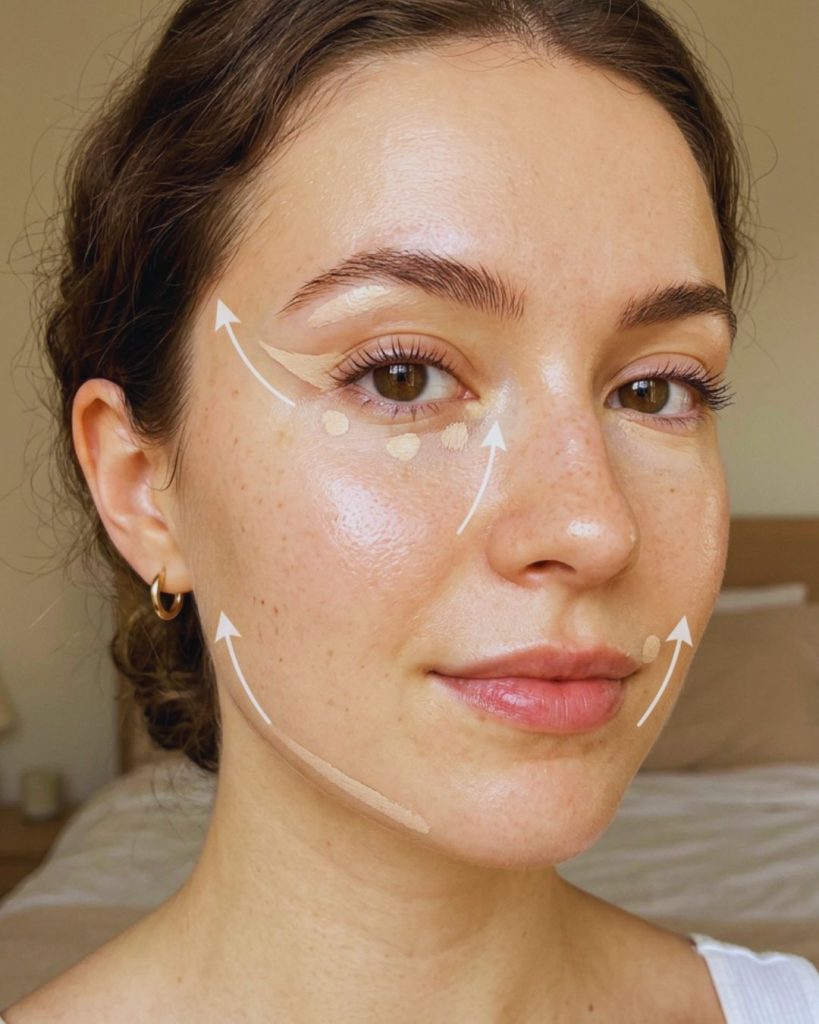
Strategic concealer placement on outer eyes, mouth corners, and under contour to create a lifted and sculpted face effect.
Use concealer as an “eraser”—lift your eyes, sculpt your cheeks, and brighten your face instantly with precise placement.

Concealer isn’t just for hiding dark circles; it is a powerful highlighting tool that cleans up your angles and reinforces the lift.

  • The Outer Eye Flick: Apply a small amount of brightening concealer at the outer corner of your eye, angling it upward toward your temple. Blend this out to “erase” any downward-sloping shadows.
  • The Mouth Corner Lift: As we age, the corners of the mouth can shadow downward. A tiny dot of concealer blended upward at the corners of the lips creates an instant “mini-lift.”
  • The Under-Contour Clean-Up: After applying your cheek contour, run a line of concealer directly underneath it. This sharpens the “shadow” and makes the lift look intentional and professional.
  • The Brow Tail Highlight: A touch of matte highlighter directly under the tail of the eyebrow “pops” the brow bone, making you look more awake.
  • Setting for Longevity: Use a translucent setting powder only on the areas where you applied concealer to lock those “uplifted” points in place all day.

5. Essential Tools for the Lifting Effect

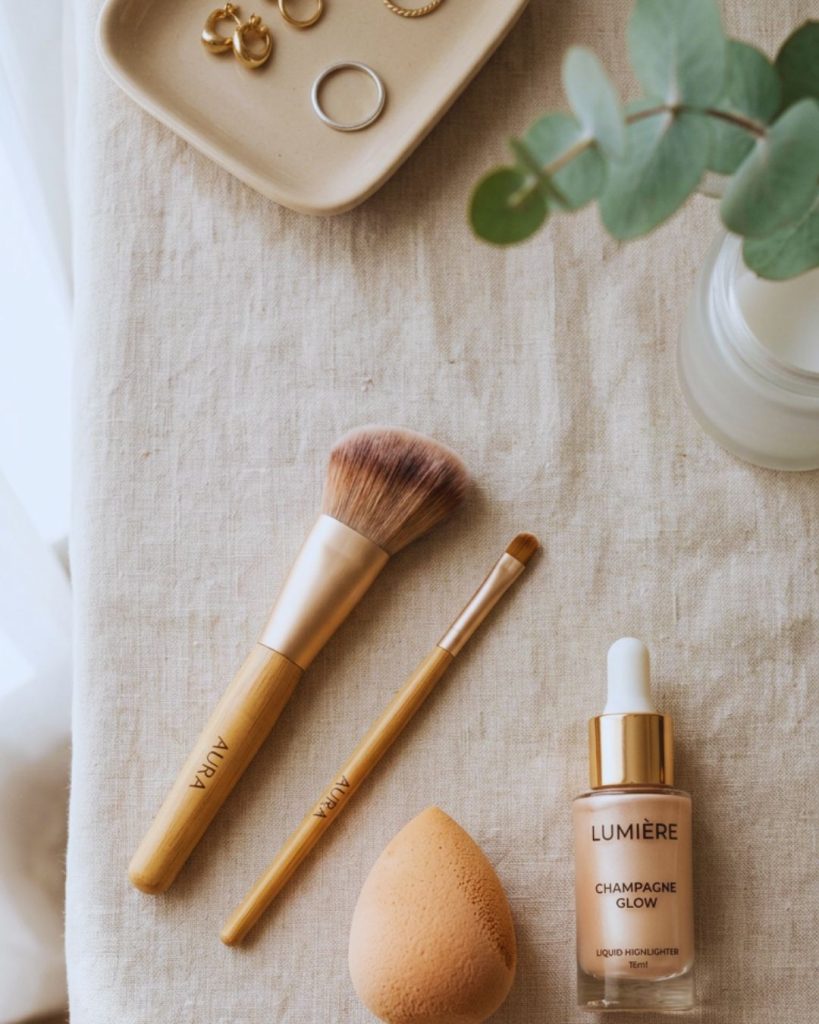
Makeup tools including angled brush, detail brush, beauty sponge, and liquid highlighter used for a lifted face makeup routine.
The right tools make all the difference—these essentials help you blend, sculpt, and lift your face effortlessly.

You can have the best technique in the world, but the wrong tools will muddy the results.

  • Angled Brushes: Use an angled blush brush to naturally follow the slant of your cheekbones. The shape does half the work for you.
  • Small Detail Brushes: For the “eraser” method, use a small, flat synthetic brush. This allows for the surgical precision needed to create sharp, lifted lines.
  • The Beauty Sponge: Always finish by bouncing a damp sponge over your work. This removes excess product and ensures the contour angles look like skin, not paint.
  • Reflective Highlighters: Use a liquid highlighter on the highest points of the face (tops of cheekbones, brow bone). Light-reflecting particles draw the observer’s eye to the “high” points you’ve created.

6. Common Mistakes That “Drop” Your Face

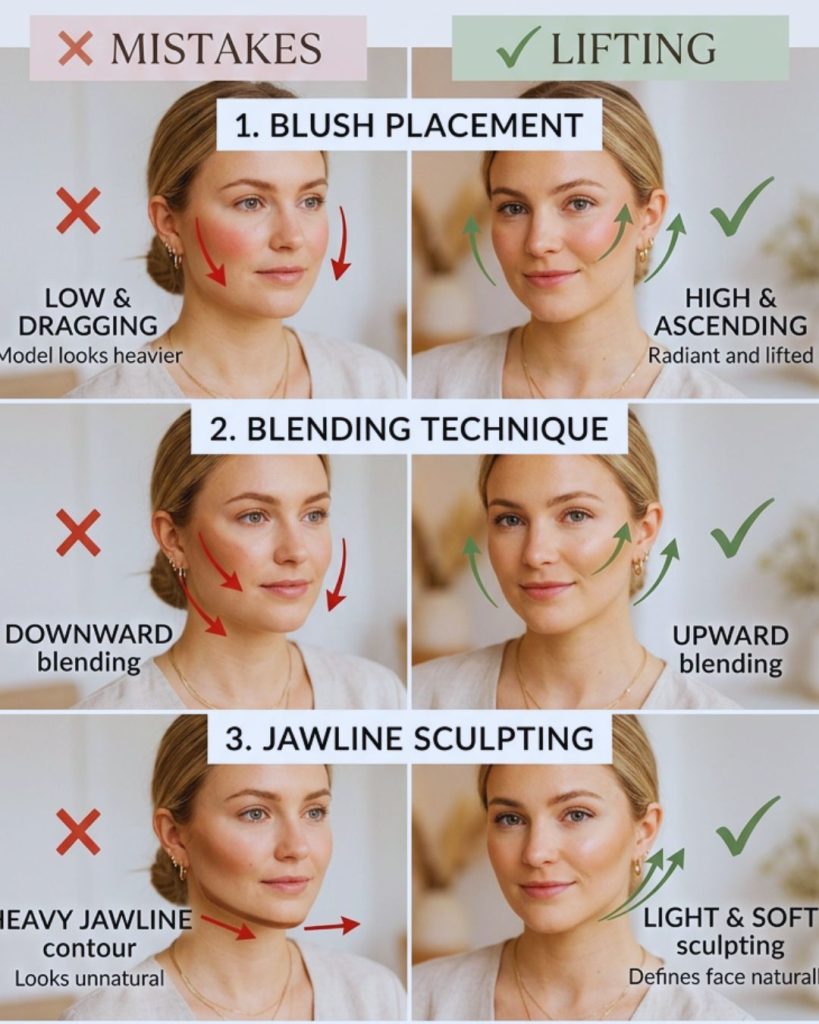
Comparison of makeup mistakes like low blush and downward blending versus lifted techniques that enhance and sculpt the face.
These common makeup mistakes are secretly dragging your face down—fix them for an instant lift.

To look lifted, you must avoid these common pitfalls that add visual weight to the lower half of the face.

  • Too Much Product on the Jaw: Heavy makeup on the jawline emphasizes sagging skin. Keep the lower face as light and “skin-like” as possible.
  • Circular Blending: Avoid buffing your products in circles. Always use upward, sweeping motions.
  • Dragging Down the Eyeshadow: Never let your eyeshadow dip below the level of your lower lash line. This creates a “droopy” eye effect.
  • Low-Hanging Bronzer: Bronzer should be a “sun-kissed” glow on the high points, not a muddy mask. Keep it on the perimeter of the face.
  • Over-lining the Bottom Lip: Focus your lip liner on the cupid’s bow to pull the attention upward, rather than emphasizing the heavy part of the lower lip.

7. The Final Polish: Hair and Brows

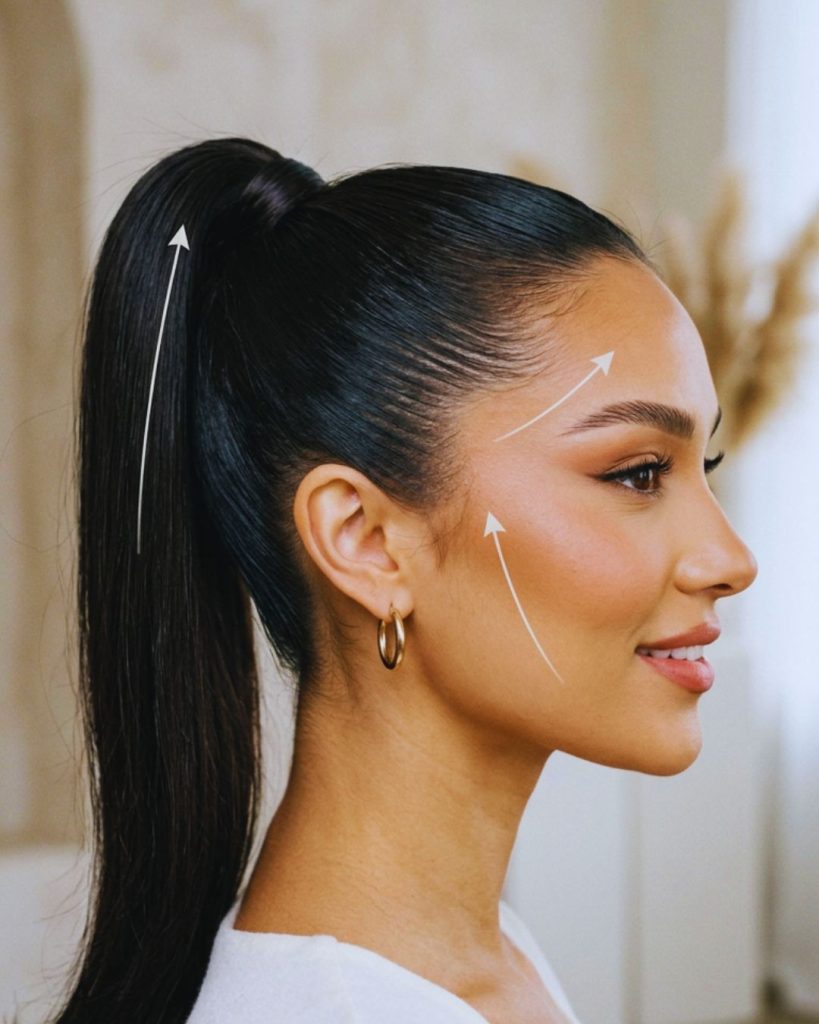
Woman with high ponytail and straight brows styled upward to create a lifted and elongated face appearance.
Your lift isn’t complete without this—straight brows and a high ponytail instantly elevate your entire face.

Your makeup lift is completed by how you frame your face with your hair and brows.

  • The Straight Brow: A slightly straighter brow with a tail that points toward the top of the ear (rather than curving down) provides an instant temple lift.
  • The High Ponytail: If you really want to emphasize your makeup work, a sleek, high hairstyle physically pulls the skin of the face back, amplifying your contouring.
  • Volume at the Crown: Adding height to the hair at the top of the head elongates the face and supports the upward diagonal of your makeup.

Comparison Table: Traditional vs. Lifting Technique

FeatureTraditional MethodThe Instant Lift Method
BlushApples of the cheeksHigh cheekbones & Temples
ContourIn the hollowsSlightly above the hollows
ConcealerTriangle under eyesUpward flicks at corners
BlendingCircular motionsUpward diagonal sweeps
FinishMatte & FlatDewy & Reflective

Conclusion

The “Instant Face Lift” through makeup is a game of strategic placement and light manipulation. By shifting your blush placement higher and perfecting your contour angles, you can transform a tired complexion into a snatched, youthful masterpiece. Remember: in the world of beauty, everything must go up.

Parisian woman in a chic minimalist outfit walking through the city with effortless French girl style.

There is a global fascination with Je Ne Sais Quoi—that indefinable “something” that allows a French woman to look like she just stepped out of a high-fashion editorial, even when she’s just buying a baguette. It isn’t about being born with “better” genes; it is a calculated, culturally ingrained minimal glam philosophy.

The French approach to beauty and fashion is the antithesis of the “more is more” trend. While the rest of the world is layering heavy foundations and chasing fast-fashion fads, the French girl is investing in a simple wardrobe and skin-first grooming. Here is how you can decode the mystery and master the art of looking expensive without trying.

1. The “Skin First, Makeup Second” Mandate

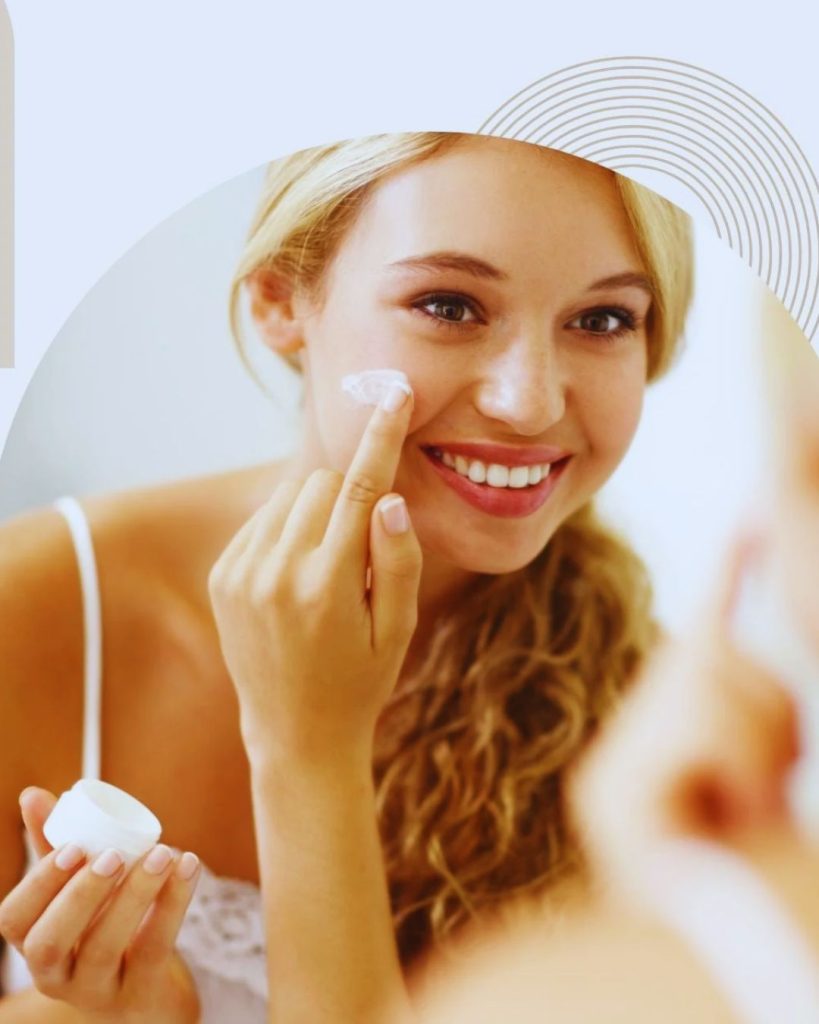
Woman applying minimal skincare routine with glowing natural skin in soft light.
French beauty starts with skincare—healthy, glowing skin over heavy makeup.

In France, beauty starts at the pharmacy, not the makeup counter. The goal is to have skin so healthy that makeup becomes a choice, not a necessity.

  • The Pharmacy Cult: French women swear by “cult” pharmacy brands like La Roche-Posay and Caulie. These products focus on the skin barrier and soothing inflammation rather than harsh stripping.
  • Minimal Coverage: You will rarely see a French girl in a full-coverage foundation. They prefer a tinted moisturizer or just a bit of concealer on redness, allowing their natural freckles and skin texture to breathe.
  • The Power of Thermal Water: A quick spritz of mineral-rich thermal water throughout the day keeps the skin hydrated and gives that “lived-in” glow that looks authentic, not oily.
  • Sun Protection Over Tans: While they love the sun, they prioritize broad-spectrum SPF. A French girl knows that a “sun-kissed” look is better achieved with a light bronzer than with permanent UV damage.
  • Gentle Cleansing: Double cleansing is a ritual. Using micellar water to remove the day ensures the skin is never scrubbed or irritated, maintaining a soft, youthful canvas.

2. The Art of the “Undone” Mane

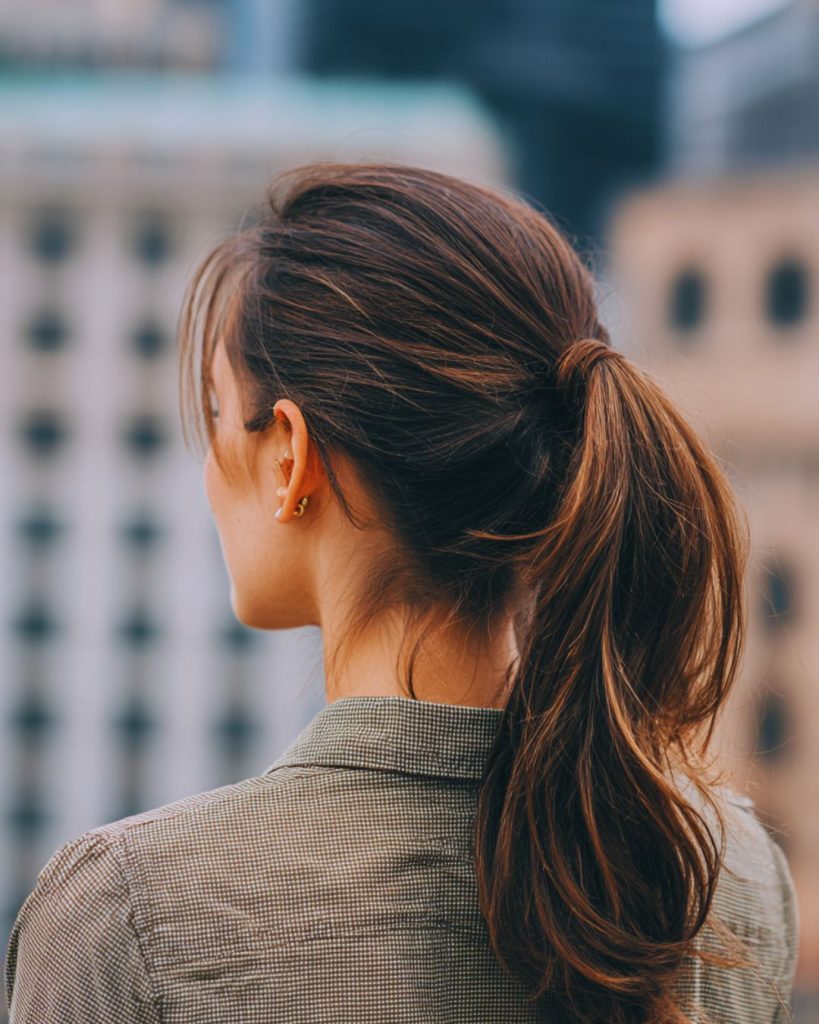
Woman with natural messy bun and soft waves showing effortless French girl hairstyle.
Perfectly imperfect hair is the signature of effortless French beauty.

French hair never looks “done.” There are no stiff hairsprays or overly perfect pageant curls. The secret is hair that looks like it has been air-dried by a Mediterranean breeze.

  • The Day-Two Secret: Most French women believe hair looks best the day after it’s washed. The natural oils provide a gritty texture that is the hallmark of the effortless look.
  • The French Fringe: A soft, “curtain bang” or Jane Birkin-style fringe adds instant style to a simple ponytail. It frames the face and hides forehead lines without the need for Botox.
  • Air-Drying is King: Blowouts are rare. They prefer to apply a nourishing hair oil to damp ends and let the natural wave take over.
  • Discreet Highlights: They opt for balayage—hand-painted highlights that mimic where the sun would naturally hit. This means no “root regrowth” lines and fewer trips to the salon.
  • Embracing Imperfection: If a few strands fall out of a bun, they leave them. It’s that “accidental” beauty that makes the look approachable and chic.

3. The Capsule Wardrobe: Quality Over Quantity

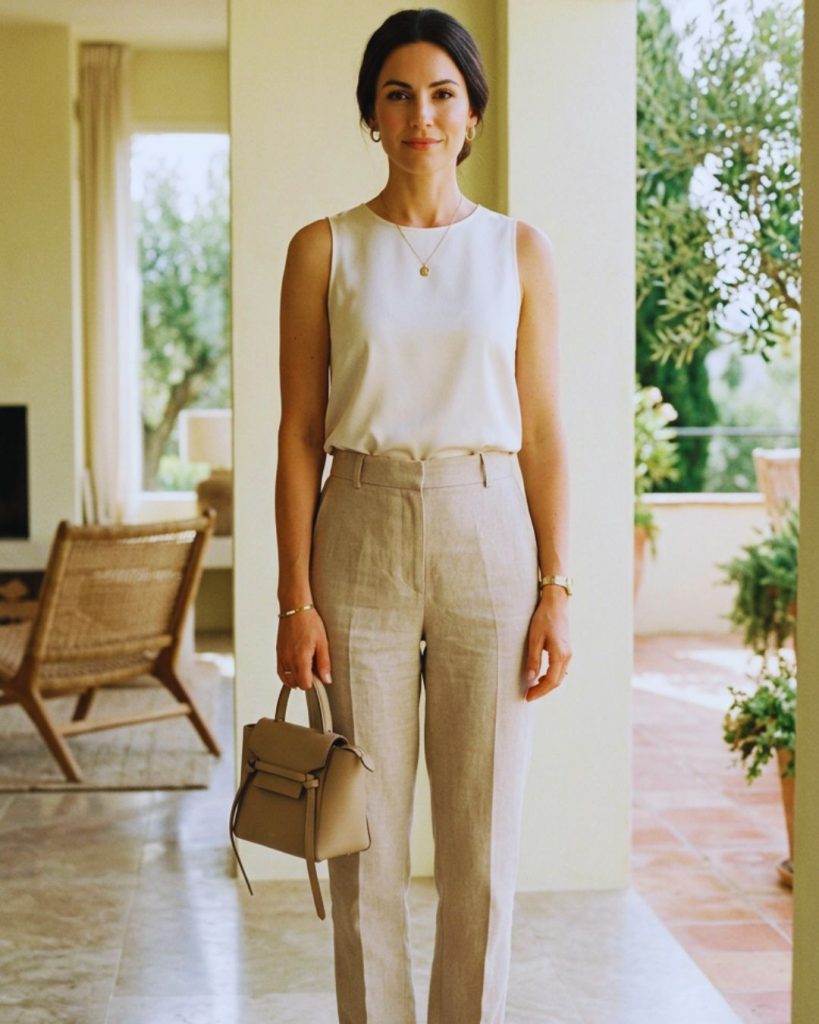
Minimalist capsule wardrobe with neutral clothing pieces like blazer, white shirt, and jeans.
A small wardrobe of high-quality basics creates endless chic outfits.

The French closet is famously small but incredibly high-quality. They don’t shop for “outfits”; they shop for investment pieces that last decades.

  • The “Le Smoking” Blazer: A perfectly tailored black blazer is the ultimate weapon. It can be thrown over a silk slip dress for dinner or paired with jeans for a meeting.
  • The Neutral Palette: By sticking to navy, black, white, and camel, every item in their wardrobe matches. This makes getting dressed in the morning a five-minute task.
  • The White Button-Down: A crisp, slightly oversized poplin shirt is a staple. It’s tucked in loosely to create a relaxed yet professional silhouette.
  • Denim Perfection: French girls don’t chase denim trends. They find one pair of high-waisted, straight-leg jeans that fits their body perfectly and wear them until they fall apart.
  • Strategic Accessories: One high-quality leather handbag and a pair of gold hoop earrings are often the only accessories. They follow the rule: “Before you leave the house, take one thing off.”

4. The Signature “One-Feature” Rule

French beauty is all about balance—highlight one feature, keep the rest natural.

The French glam philosophy is built on balance. If they emphasize one feature, they leave the rest of the face completely “nude.”

  • The Red Lip: A classic matte red lipstick is a French girl’s best friend. When worn with a clean face and messy hair, it looks like a fashion statement rather than “heavy makeup.”
  • The Smudged Liner: If they choose eyes over lips, they use a soft kohl pencil and smudge it with their finger. It should look like you wore it yesterday—perfectly imperfect.
  • Groomed, Not Carved Brows: They brush their brows up with a clear gel but never fill them in so much that they look “stamped on.”
  • Skip the Contour: You won’t find heavy contouring in Paris. They prefer a cream blush on the apples of the cheeks to look “en plein air” (in the open air).
  • Nails are Short and Clean: Long acrylics are a rarity. A short, rounded nail with a clear coat or a deep burgundy is the standard for sophisticated hands.

5. The Lifestyle: Beauty as a Result of Joy

Woman enjoying a relaxed coffee moment in a chic Parisian setting with effortless style.
Effortless beauty comes from a lifestyle of balance, confidence, and simplicity.

Effortless beauty is also a psychological state. The French believe that if you enjoy your life, you will naturally look better.

  • The “Slow” Philosophy: They don’t rush. Rushing creates stress, and stress creates wrinkles. There is beauty in the slow coffee and the long walk.
  • Wine and Water Balance: They enjoy life’s pleasures—cheese, wine, chocolate—but in moderation. This prevents the “puffy” look associated with overindulgence.
  • Posture and Poise: A French girl carries herself with a certain inner confidence. She doesn’t seek external validation for her look; she dresses for herself.
  • The Signature Scent: They don’t switch perfumes based on trends. A French woman finds her scent identity and sticks to it, leaving a trail of “her” wherever she goes.

Comparison: Effortless vs. High-Maintenance

FeatureThe “Effortless” WayThe “High-Maintenance” Way
FoundationSpot concealer / Tinted moisturizerFull-coverage / Baking
HairAir-dried / Natural textureFrequent heat styling / Hairspray
ShoppingInvestment basics / Natural fibersFast fashion / Synthetic trends
LipsOne bold color / Blotted edgesOver-lined / Glossy toppers
AttitudeRelaxed / ConfidentPerceived perfectionism

How to Transition Your Routine

Moving toward an effortless aesthetic requires a “decluttering” of your beauty cabinet and your mind.

  1. Audit Your Wardrobe: Remove anything that doesn’t fit perfectly or isn’t made of a breathable fabric like cotton, silk, or wool.
  2. Focus on Health: Spend your “makeup budget” on a high-quality vitamin C serum or a professional facial instead.
  3. Learn Your Angles: Understand how your hair naturally falls and work with it rather than fighting it with a flat iron every morning.
  4. Buy the Blazer: If you buy one thing this year, make it a high-quality, structured blazer. It is the “instant chic” button for any outfit.

Conclusion

Looking “French-girl effortless” is actually an act of rebellion. It’s a rebellion against the pressure to be perfect and the constant need to buy more. By focusing on simple wardrobe staples, minimal glam, and a “skin-first” mindset, you don’t just look better—you feel freer. The most expensive thing you can wear is the confidence that you are “enough” just as you are.

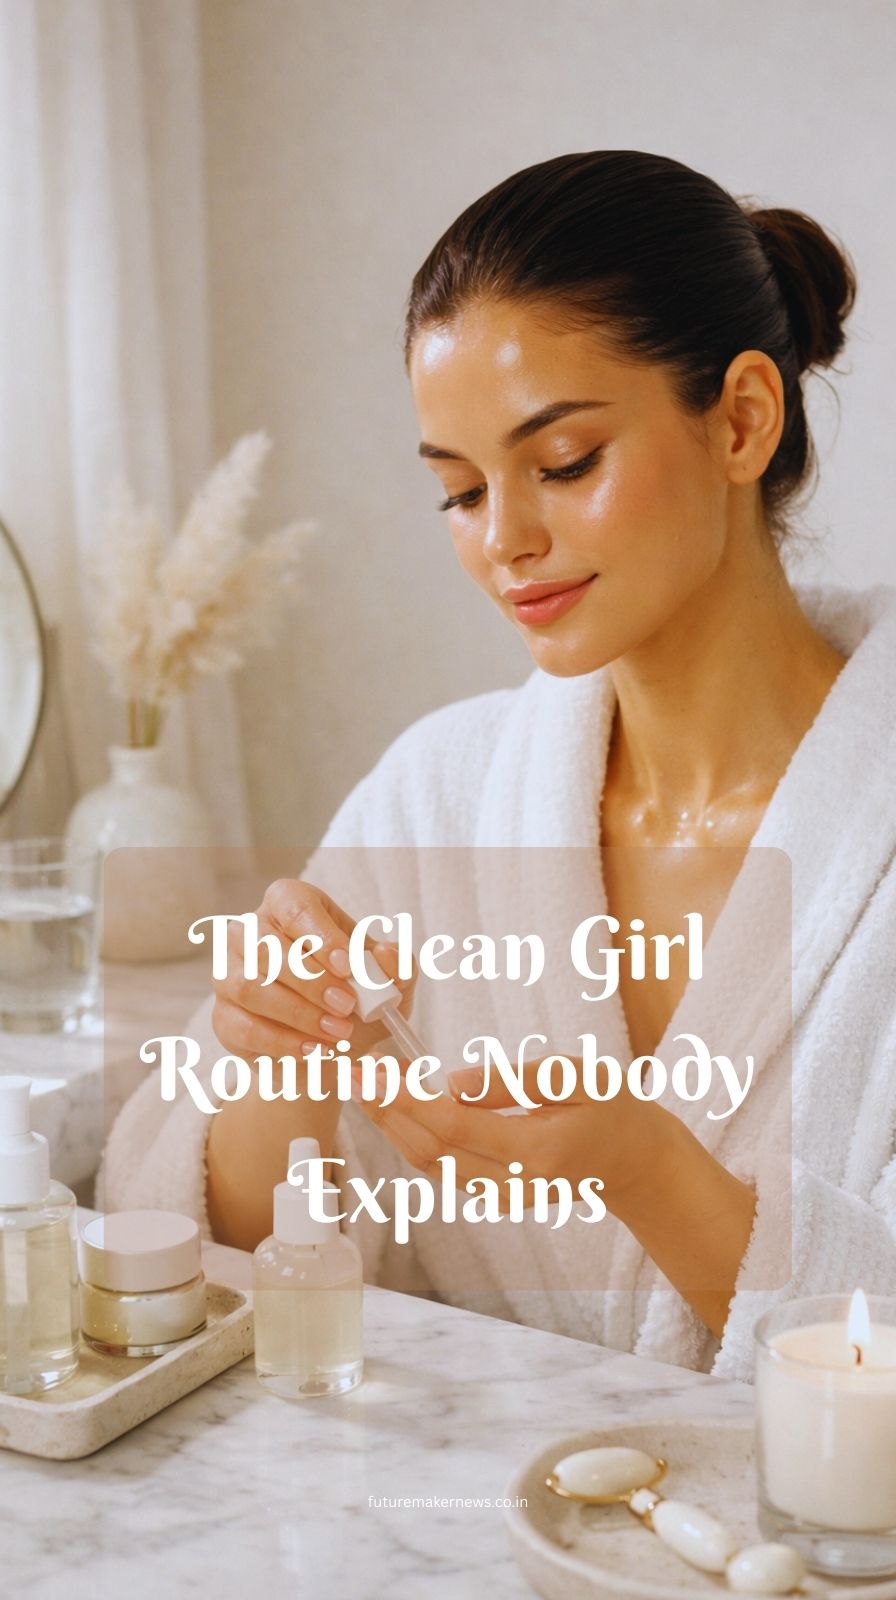
Woman with glowing skin and slicked-back bun doing a clean girl skincare routine in a minimalist aesthetic bathroom.

The “Clean Girl” aesthetic isn’t just a fleeting trend; it’s a lifestyle shift toward intentionality, health, and polished simplicity. We’ve all seen the look: glowing skin that looks like it’s never seen a blemish, hair slicked back into a perfect bun, and a vibe that screams “I drink three liters of water a day.”

But here is the secret: that “effortless” look actually requires a very specific, strategic routine. Most tutorials show you the products, but they don’t explain the why or the how.

In this guide, we are pulling back the curtain on the Clean Girl routine that nobody explains. We’re moving past the surface to focus on the skin prep, the minimal makeup techniques, and the wellness habits that make this look sustainable.

Phase 1: The Canvas (Advanced Skin Prep)

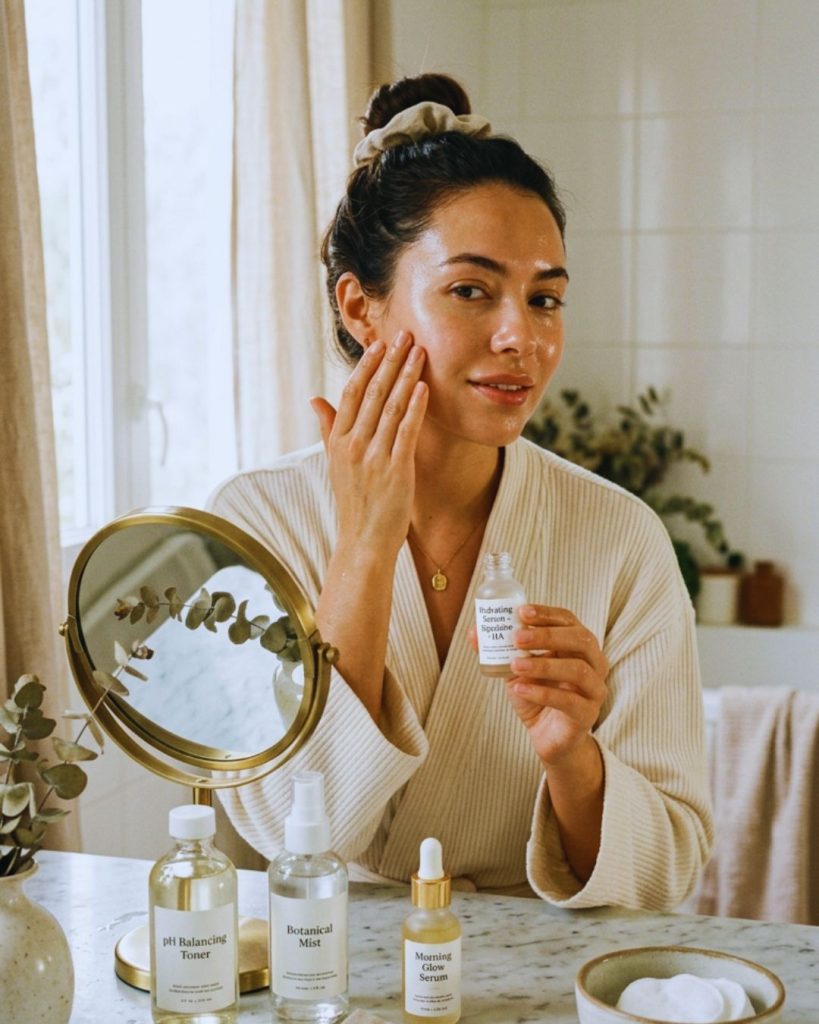
Woman applying hydrating skincare products with gua sha tool on marble vanity as part of a clean girl skincare routine.
The secret to the Clean Girl glow starts with skin prep—double cleansing, gentle exfoliation, and layered hydration for naturally radiant skin.

The foundation of the Clean Girl look isn’t foundation—it’s hydration. If your skin isn’t prepped correctly, even the best makeup will look like it’s sitting on top of your face rather than melting into it.

1. The Double Cleanse Philosophy

To achieve that glass skin finish, you must start with a perfectly clean base.

  • Oil-Based Cleanser: Use a balm or oil to dissolve sunscreen and sebum. This prevents clogged pores that ruin a minimalist makeup look.
  • Water-Based Cleanser: Follow up with a gentle, non-stripping cleanser to ensure every trace of debris is gone.

2. Exfoliation Without Irritation

Texture is the enemy of the Clean Girl aesthetic. However, physical scrubs can cause redness. Instead, opt for a liquid exfoliant (like a gentle Lactic Acid or PHA).

  • Exfoliating twice a week ensures a smooth surface for light-reflecting products.
  • It helps remove dead skin cells that cause “dullness,” allowing your natural inner glow to shine through.

3. Strategic Hydration Layering

The “clean” look relies on moisturized skin. Instead of one thick cream, layer your moisture:

  • Hydrating Toner: Pat in 2-3 layers of a milky toner.
  • Hyaluronic Acid: Apply to damp skin to lock in water.
  • Barrier Cream: Use a lightweight moisturizer with ceramides to seal everything in without feeling greasy.

4. The Depuffing Ritual

You’ll notice most Clean Girl icons have very sculpted features. This is often achieved through lymphatic drainage.

  • Spend two minutes with a Gua Sha or just your knuckles.
  • Move from the center of the face outward toward the ears.
  • This reduces morning puffiness and defines the jawline, making your natural beauty pop.

Phase 2: The Base (The “Non-Makeup” Makeup)

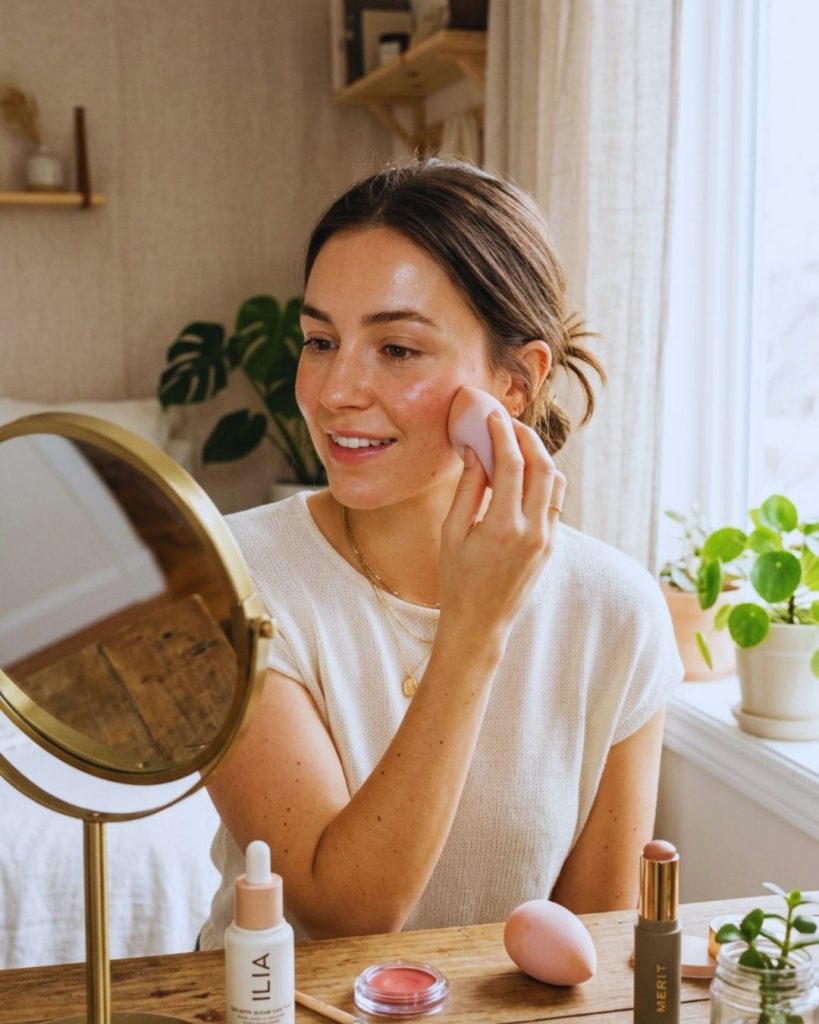
Woman applying lightweight skin tint and cream blush for a natural clean girl makeup look with glowing skin.
The Clean Girl base is all about skin-first makeup—lightweight skin tints, micro-concealing, and cream products for a natural, dewy glow.

The goal here is skin-first makeup. We want to enhance, not hide. If someone can tell you’re wearing foundation, you’ve gone too far.

1. Ditch the Full-Coverage Foundation

Traditional foundations are too heavy for this look. Instead, switch to a skin tint or a CC cream.

  • These products offer a sheer wash of color that evens out redness while letting your freckles show.
  • Pro Tip: Mix a drop of your facial oil into your tint for an extra dewy finish.

2. Micro-Concealing

Instead of “triangle” concealing under the eyes, use the micro-concealing method.

  • Place a tiny dot of high-coverage concealer only on the innermost corner of the eye and the outermost corner for a lifted effect.
  • Only cover active blemishes. Let the rest of your skin breathe. This creates the illusion of a flawless complexion.

3. The Power of Cream Products

Powder is the “Clean Girl’s” kryptonite. It can look cakey and flat.

  • Cream Blush: Apply high on the cheekbones for a “sun-kissed” look.
  • Cream Bronzer: Use a cool-toned cream to subtly contour the hollows of your cheeks and the temples.
  • Blending: Always use a damp beauty sponge or your fingers. The warmth of your hands helps the product melt into the skin.

4. That “Lit-From-Within” Highlight

Forget the blinding, glittery highlighters of 2016.

  • The Clean Girl aesthetic uses balm highlighters or even just a bit of clear face balm.
  • Apply to the high points of the face: cheekbones, brow bone, and the bridge of the nose. This mimics the look of healthy, hydrated skin.

Phase 3: The Features (Brows, Lashes, and Lips)

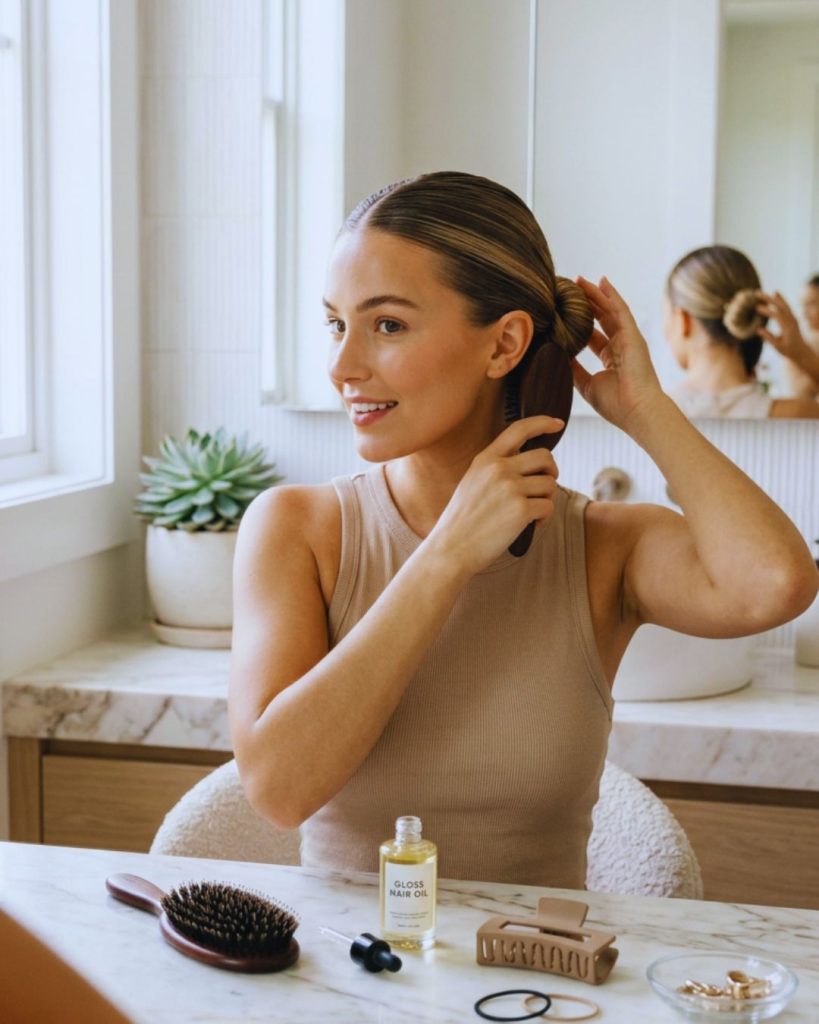
Woman styling a sleek slicked-back bun with hair oil and brush as part of a clean girl aesthetic beauty routine.
The signature Clean Girl hairstyle—sleek, glossy hair styled into a polished bun or effortless claw clip look.

When the makeup is minimal, the grooming must be impeccable. This is where the “polished” part of the routine comes in.

1. Fluffy, Feathered Brows

Brows are the frame of the face. The Clean Girl brow is groomed but not “blocked” out.

  • Use a clear brow gel or a brow soap to brush the hairs upward.
  • If you have gaps, use a fine-tipped eyebrow pencil to draw individual hair-like strokes.
  • Avoid dark, heavy pomades. The goal is a laminated brow look that looks natural.

2. The “Invisible” Mascara Technique

Heavy, clumpy lashes ruin the minimalist vibe.

  • Curl your lashes—this is non-negotiable for an “awake” look.
  • Use a brown mascara instead of black for a softer, more natural appearance.
  • Apply only one coat, focusing on the roots to give volume without the “spider leg” effect.

3. The Blurred Lip

A harsh lip liner or matte lipstick is too high-maintenance for this look.

  • Lip Oils: These provide the shine of a gloss with the comfort of a treatment.
  • Lip Tints: Apply a tint to the center of the lips and blur it out with your finger.
  • Finish with a hydrating lip balm to keep the lips looking plump and healthy.

Phase 4: The Hair (The Slicked-Back Standard)

Woman styling a sleek slicked-back bun with hair oil and brush as part of a clean girl aesthetic beauty routine.
The signature Clean Girl hairstyle—sleek, glossy hair styled into a polished bun or effortless claw clip look.

You can’t talk about the Clean Girl routine without mentioning the hair. It’s the ultimate “I have my life together” hairstyle.

1. The Sleek Bun or Clip

The slicked-back bun is the signature move.

  • Use a boar bristle brush to smooth out bumps.
  • Apply a hair wax stick or a nourishing hair oil to tame flyaways and add a high-shine finish.
  • If a bun is too much, use a claw clip for a more relaxed, “off-duty model” vibe.

2. Scalp Health

Clean hair starts with a clean scalp.

  • Incorporate a scalp scrub once a week to remove product buildup.
  • Healthy hair reflects more light, contributing to that overall radiant aesthetic.

Phase 5: The “Clean” Lifestyle (The Hidden Secrets)

Clean girl lifestyle routine showing hydration, healthy foods, silk pillowcase, and minimalist fragrance for natural glowing beauty.
The real Clean Girl glow starts with healthy habits—hydration, good sleep, silk pillowcases, and fresh minimalist fragrances.

The reason nobody can quite replicate the look just with makeup is that half of it happens before you even touch a brush.

1. Internal Hydration

If you aren’t hydrated, your skin will look dull no matter how much hyaluronic acid you apply.

  • Drink water with electrolytes.
  • Prioritize anti-inflammatory foods like berries, walnuts, and leafy greens to keep skin redness at bay.

2. The “Silk” Rule

To prevent frizz and skin irritation, switch to a silk pillowcase.

  • It prevents “sleep creases” on your face and keeps your hair smooth, making your morning beauty routine much faster.

3. Consistent Sleep Hygiene

The “Clean Girl” always looks well-rested.

  • A consistent 8-hour sleep cycle reduces under-eye circles and allows your skin to go into repair mode.
  • This is the most underrated step in any skincare routine.

4. Minimalist Fragrance

The aesthetic extends to how you smell.

  • Instead of heavy, spicy perfumes, opt for skin scents—fragrances that feature notes of musk, ambroxan, or clean laundry.
  • It should smell like you just stepped out of a luxury shower.

Why the Clean Girl Routine Works

The reason this routine has taken over the world is that it prioritizes self-care over concealment. It encourages women to invest in their skin, their health, and their natural features rather than covering them up with layers of product.

It is a sustainable beauty approach. When you focus on skin prep and health, you find you need less makeup over time. You save time in the morning, and you feel more confident in your own skin.

Summary Checklist for the Ultimate Clean Girl Look:

  • Double cleanse every night.
  • Layer hydrating serums on damp skin.
  • Use a Gua Sha to define features.
  • Swap foundation for a lightweight skin tint.
  • Use cream-based blush and bronzer.
  • Keep brows fluffy and feathered.
  • Master the slicked-back hairstyle.
  • Prioritize internal wellness and hydration.

The Clean Girl routine is about more than just looking good; it’s about feeling organized, refreshed, and ready to take on the day with a clear mind and a glowing face. By focusing on the details that “nobody explains”—like the importance of damp skin or the direction of your lymphatic drainage—you can achieve a level of polish that feels both high-end and completely natural.

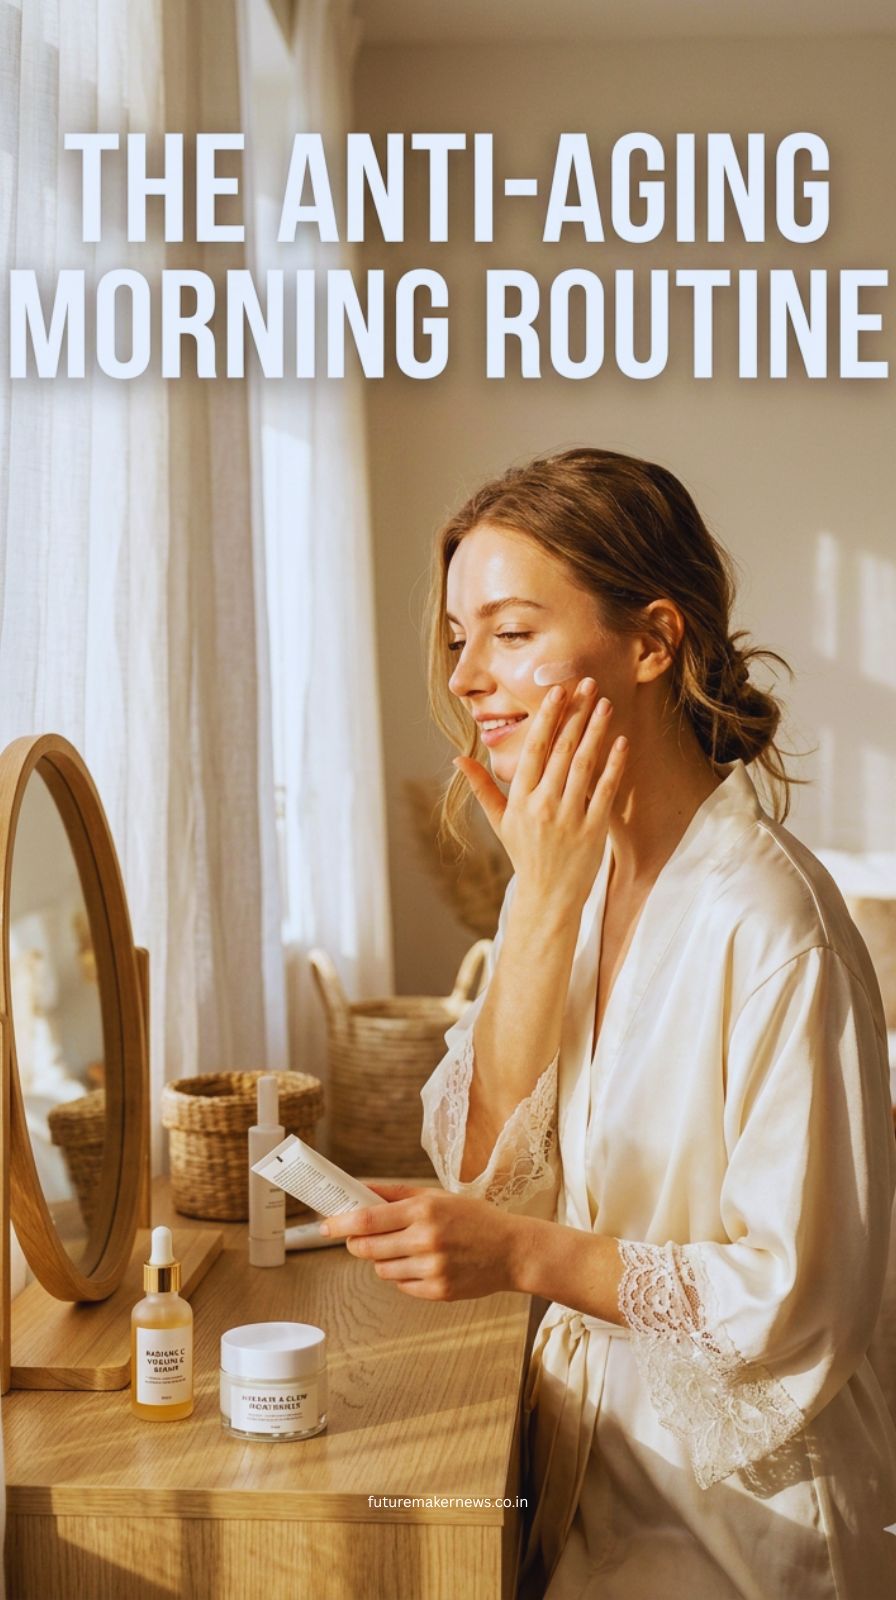
Woman applying sunscreen in soft morning light with vitamin C serum and moisturizer on a minimal vanity.

The secret to youthful skin isn’t found in a surgeon’s office or a $500 night cream. It is found in the first thirty minutes of your day. While evening routines focus on repair, your morning beauty habit is all about defense.

Think of your face as a masterpiece; you wouldn’t leave a Renaissance painting out in the wind, rain, and sun without protection. Aging is essentially the accumulation of environmental damage and internal stress. By mastering a preventative skincare morning ritual, you are effectively slowing down the biological clock.

Here is how to build a high-impact, low-effort morning routine that preserves your collagen and keeps your skin vibrant for decades to home.

1. The Power of the Gentle Cleanse

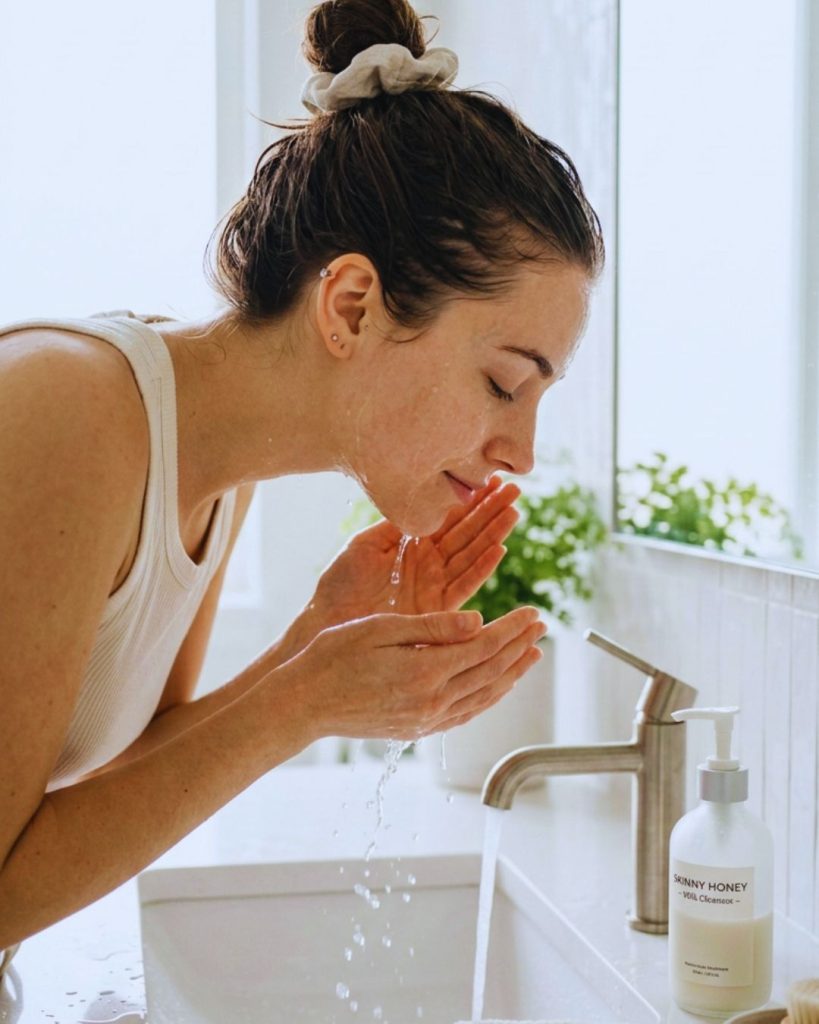
Woman rinsing face with lukewarm water in a bright minimalist bathroom.
Gentle cleansing protects your skin barrier and prevents dehydration.

Many people wake up and immediately reach for a harsh, foaming cleanser to “strip” the oils from the night before. This is the first mistake of anti-aging.

Preserve Your Natural Mantle

  • Overnight, your skin produces natural oils and lipids that are essential for a strong skin barrier.
  • Over-cleansing in the morning creates “micro-cracks” in the skin, allowing moisture to escape and pollutants to enter.

The Fix: Lukewarm Water or Milky Cleansers

  • If you have dry or sensitive skin, simply rinsing with lukewarm water is enough to refresh the face while keeping your hydration intact.
  • If you are oily, use a soap-free, pH-balanced cleanser. This ensures you start your day with a “supple” canvas rather than a tight, dehydrated one.

2. Sunscreen: The Ultimate Anti-Aging Tool

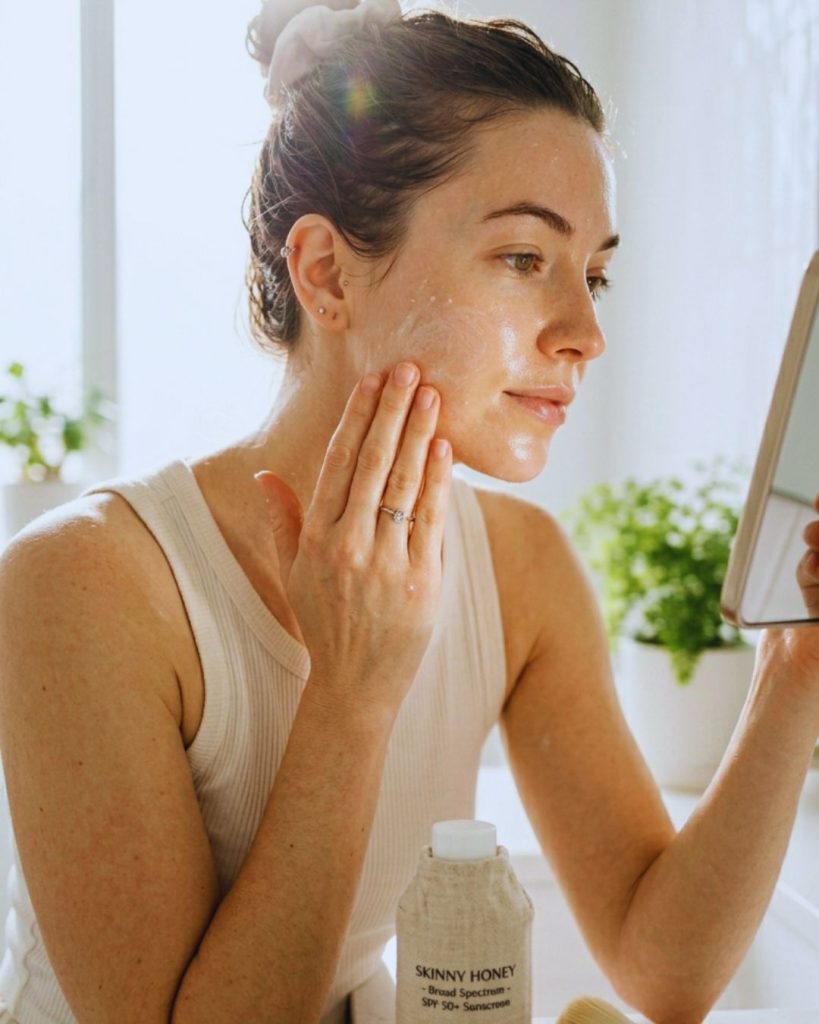
Woman applying sunscreen to face and neck in bright natural light.
SPF is the most powerful anti-aging product you own.

If you did nothing else for your skin, wearing broad-spectrum SPF would still slow down aging more than any other habit. 90% of visible skin changes—wrinkles, leathery texture, and “age spots”—are caused by UV radiation, not by birthdays.

The Science of Photoaging

  • UVA Rays: These are the “Aging” rays. They penetrate deep into the dermis, shattering elastin fibers and causing the skin to sag.
  • Blue Light: In the modern world, our screens also emit HEV light, which can contribute to hyperpigmentation.

The Habit: The “Non-Negotiable” Layer

  • Apply a nickel-sized amount of SPF 30 or higher every single day, regardless of the weather.
  • Pro Tip: Don’t forget your ears, neck, and the backs of your hands. These areas are the first to give away someone’s true age because they are so often neglected in sun protection routines.

3. Cortisol Control: The “Internal” Facelift

Woman practicing morning breathing exercise with phone turned away in soft natural light.
Five minutes of calm protects your collagen.

High levels of cortisol (the stress hormone) are toxic to your skin. Stress triggers a process called “glycation,” where sugar molecules attach to your collagen, making it brittle and prone to breaking.

The “Stress-Free” Morning Window

  • Checking your emails or social media the second you wake up spikes your adrenaline and cortisol.
  • This “fight or flight” state constricts blood vessels, depriving your skin of the oxygen it needs to look radiant.

The Habit: 5 Minutes of Stillness

  • Before touching your phone, practice deep belly breathing or a light stretch.
  • Lowering your heart rate in the morning sets a “calm” baseline for your hormones.
  • Result: Reduced under-eye puffiness and a clearer, more even skin tone. A calm mind truly equals a “soft” face.

4. Antioxidants: The Invisible Shield

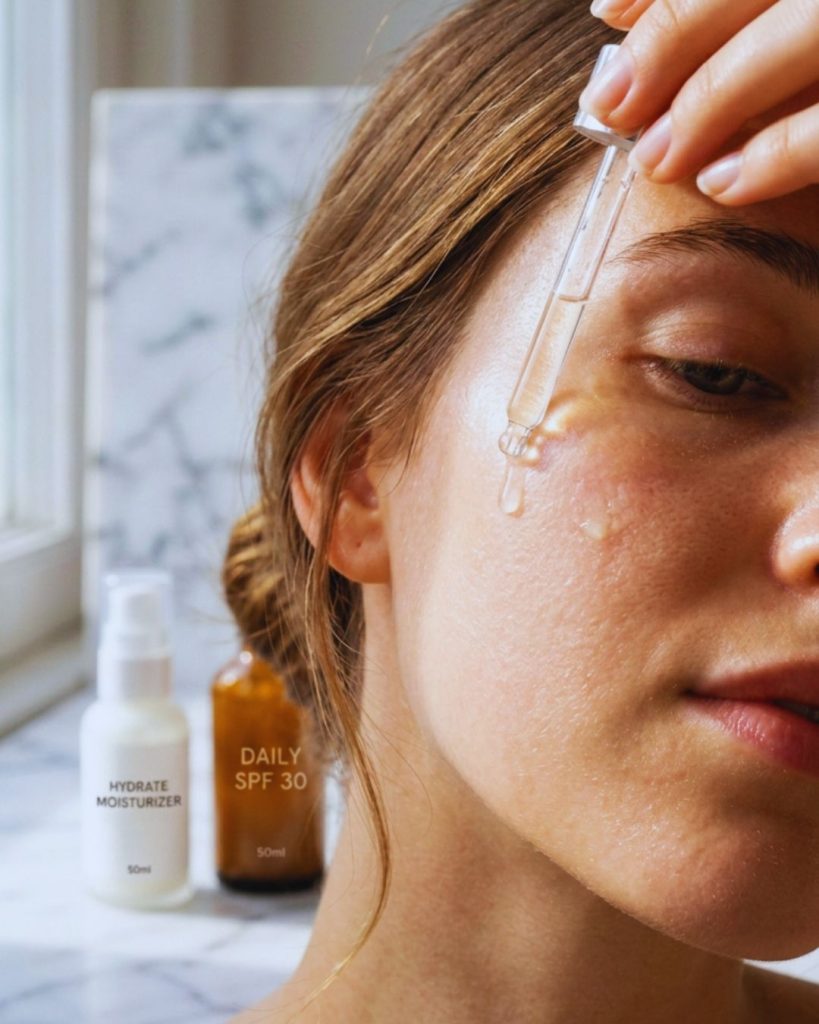
Close-up of vitamin C serum being applied to skin in bright morning light.
Vitamin C + SPF = the ultimate morning defense shield.

To amplify your morning beauty habit, you need to neutralize “free radicals”—unstable molecules from pollution and smoke that eat away at your skin cells.

The Vitamin C Gold Standard

  • Applying a Vitamin C serum in the morning acts like a secondary shield underneath your sunscreen.
  • It brightens existing dark spots and provides “environmental insurance” against city smog.
  • Layering Technique: Cleanse -> Vitamin C -> Moisturizer -> Sunscreen.

Summary of the Anti-Aging Morning Routine

Consistency is the only “miracle” in beauty. Follow this simple checklist to protect your future self:

StepActionBenefit
CleanseUse lukewarm water or a gentle milk.Protects the acid mantle.
ProtectApply an Antioxidant Serum (Vit C).Fights pollution and oxidative stress.
SealApply a lightweight moisturizer.Prevents dehydration lines.
ShieldApply Broad-Spectrum SPF.Prevents 90% of future wrinkles.
Mindset5 minutes of no-phone time.Keeps cortisol from breaking down collagen.

Why “Gentle” is Always Better Than “Aggressive”

The biggest trend in dermatology right now is a return to simplicity. We have learned that “hitting” the skin with too many actives in the morning makes it vulnerable.

By choosing a gentle routine, you are allowing your skin to do what it does best: protect you. When you stop causing inflammation through harsh scrubbing and start providing a shield through SPF and stress control, your skin stays “bouncy” and resilient.

Aging is a privilege, but looking “tired” is optional. By adopting these morning habits, you aren’t just changing your look; you are changing how your skin cells function at a biological level.

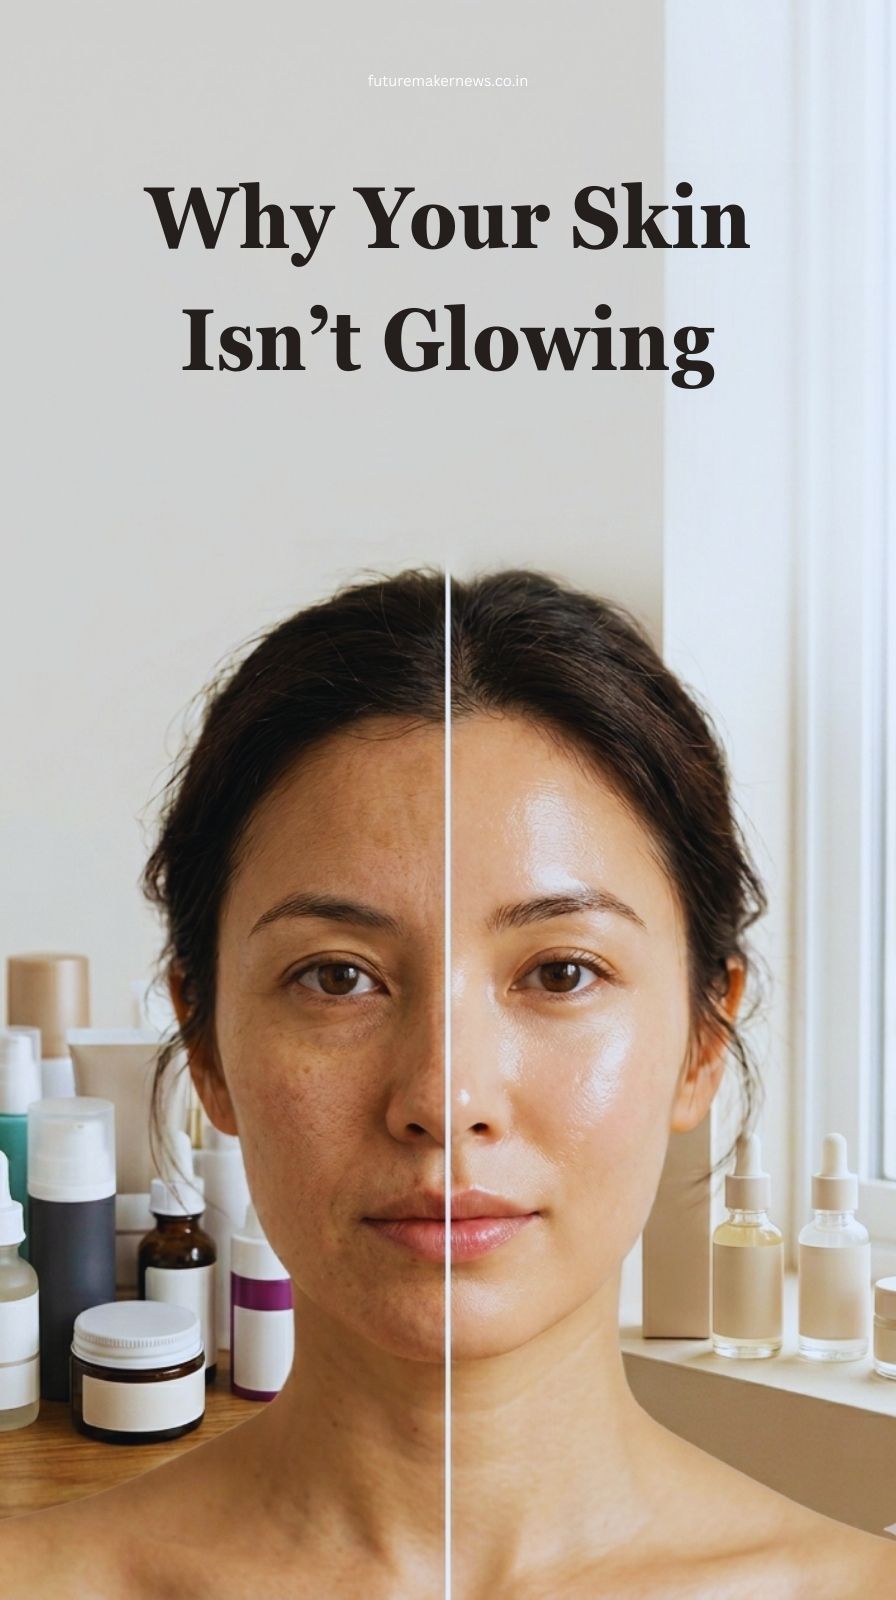
Split image showing dull skin with cluttered skincare versus glowing skin with a minimal routine.

We have all been in this situation: you have bought all the skincare products that everyone is talking about you have followed all the skincare routines that you see online. You have spent a lot of money on creams that are suppose to be really good for your skin but your skin still looks dull, rough or it breaks out easily. It is really frustrating to spend much time and money on skincare and not see any good results.

The truth is that having skin is not just about what you put on your face it is also about what you stop doing to it. Sometimes the things we do to try to help our skin are actually hurting it.

If you feel like you are not getting the results you want from your skincare routine it is time to take a look at what you are doing. Here are some common mistakes that can hurt your skin and how to fix them.

1. Over-Exfoliating

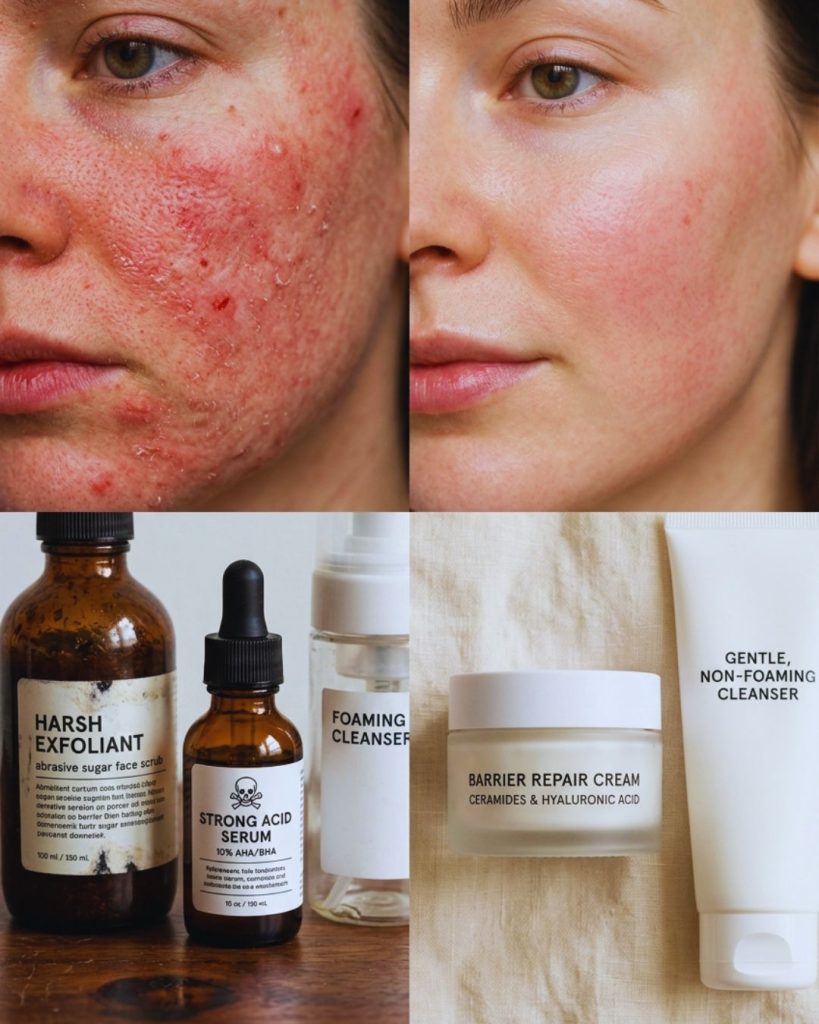
Harsh exfoliating products beside gentle cleanser and moisturizer to show skin barrier repair concept.
Over-exfoliating can damage your skin barrier and cause breakouts.

A lot of people are trying to get skin that looks really smooth and clear so they use a lot of products that contain acids. They scrub their skin too much.. This can actually hurt your skin and make it look worse.

If your skin looks shiny but feels tight and dry or if products that used to be okay for you now sting or burn or if you are getting breakouts or your skin is more sensitive than usual then you might be over-exfoliating.

To fix this you should stop using any products that contain acids or other harsh ingredients for least two weeks. Instead use products that help repair your skin like ceramides and centella asiatica. And do not exfoliate much. Once or twice a week is enough.

2. Not Staying Hydrated

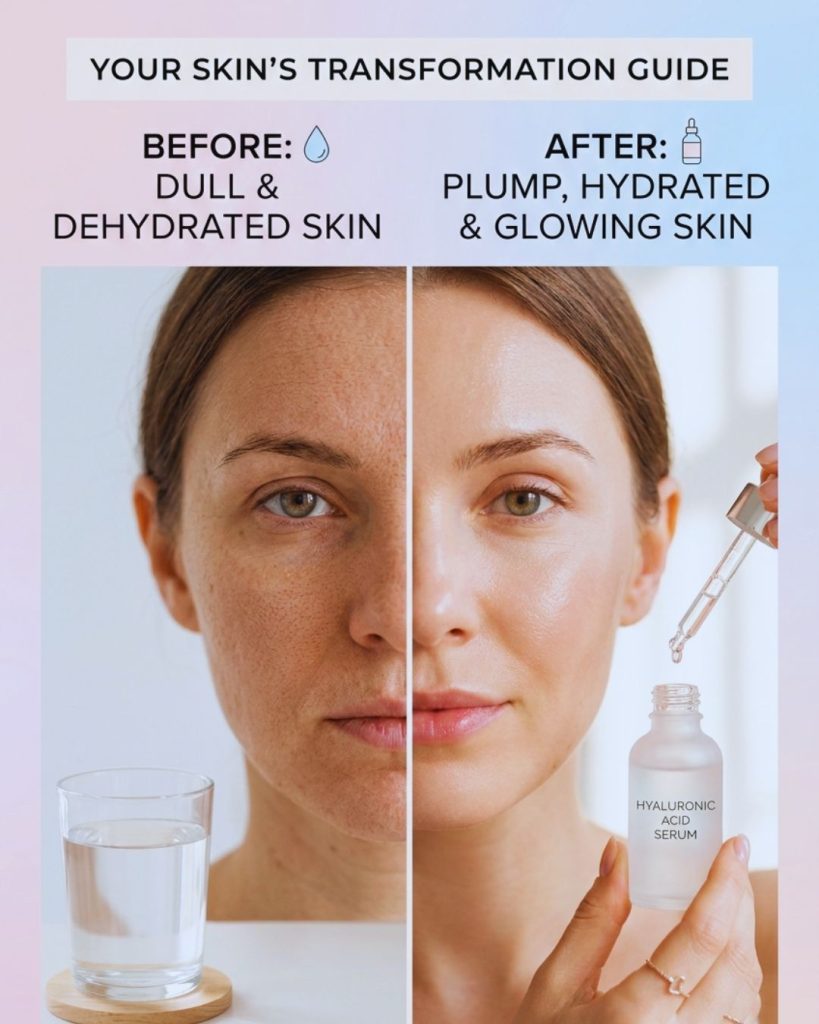
Comparison of dull dehydrated skin and plump glowing hydrated skin with water and serum.
Hydrated skin looks bouncy and radiant—dehydrated skin looks flat.

There is a difference between skin that is dry and skin that is dehydrate. Even if you have skin you can still be dehydrated and this can make your skin look dull and flat.

Think of your skin like a sponge. When a sponge is wet it is soft and bouncy. When it is dry it is hard and dull. When your skin is dehydrated it loses its moisture. Becomes dull and flat.

To fix this you should apply your skincare products to damp skin, not skin. Use products that contain acid or glycerin to help your skin hold onto moisture.. Use a facial oil or a thick cream to lock it all in.

3. Not Wearing Sunscreen Every Day

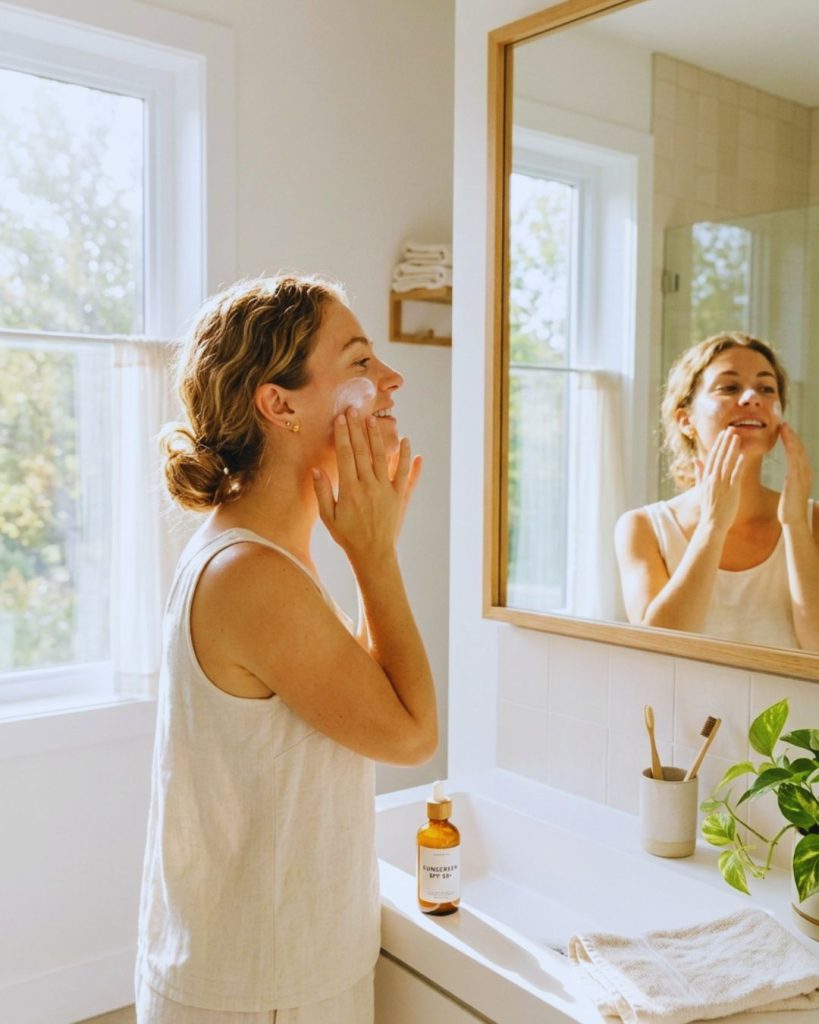
Woman applying sunscreen in morning light to protect skin from UV damage.
Skipping SPF is undoing all your skincare progress.

If you only wear sunscreen when it is sunny outside you are not protecting your skin enough. The suns rays can still hurt your skin on cloudy days or when you are inside.

The suns rays can break down the collagen in your skin. Make it look dull and uneven.. If you do not wear sunscreen every day you are undoing all the good work that your skincare routine is doing.

To fix this you should apply sunscreen every morning even if it is cloudy or you are staying inside. Use a broad-spectrum sunscreen with least SPF 30 and apply it as the last step in your skincare routine.

4. Not Taking Care of Your Body

Woman stretching in morning light with water and antioxidant-rich foods nearby to represent healthy habits for glowing skin.
Your glow starts with sleep, hydration, and what’s on your plate.

Your skin is connected to your body. If you are not taking care of your body it will show on your skin. If you are stressed, tired or not eating well your skin will look dull and rough.

When you are stressed your body produces cortisol, which can make your skin look oily and break out.. If you are not sleeping enough your skin will not be able to repair itself overnight which can make it look dull and tired.

To fix this you should try to get sleep stay hydrated and eat foods that are rich in antioxidants, like berries, leafy greens and fatty fish.

5. Using Many Skincare Products

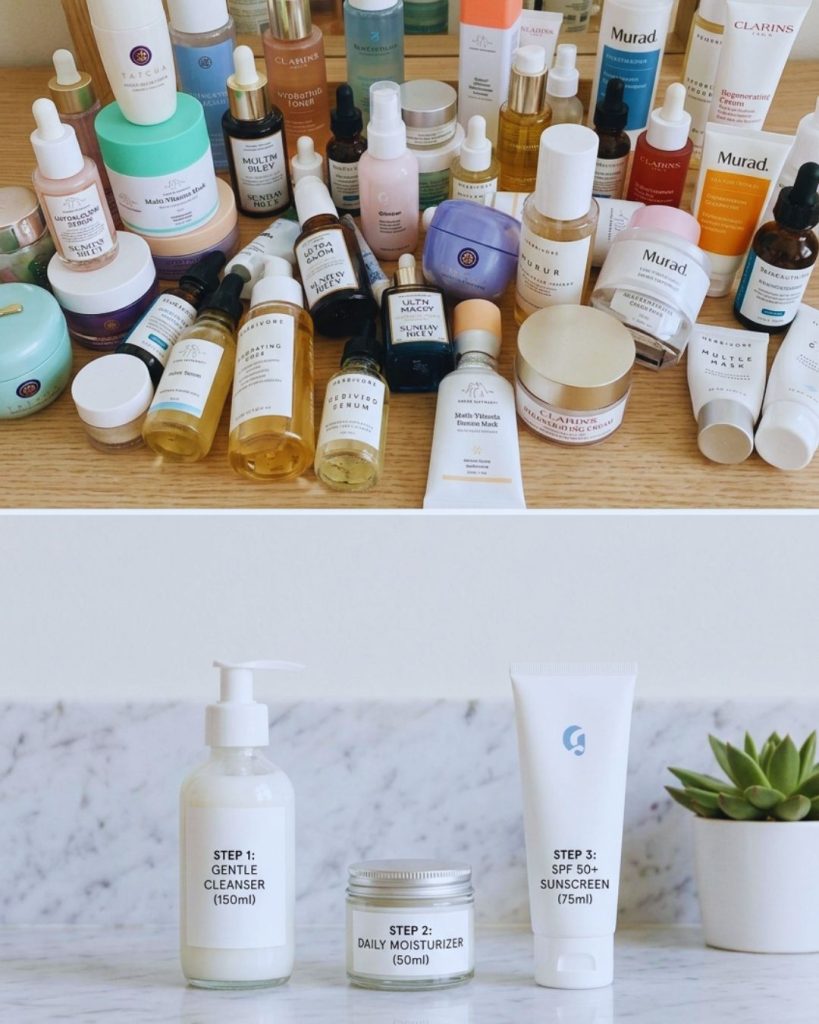
Cluttered skincare collection compared to simple minimal routine setup.
More products don’t equal better skin—simplify to amplify.

Using too many skincare products can actually hurt your skin. When you mix many products together you can create a reaction that can cause irritation and breakouts.

Of using a lot of products try to keep your skincare routine simple. Use a cleanser, a moisturizer and a sunscreen and do not be afraid to take breaks from products that are too harsh.

If you want to see a difference in your skin you should stop guessing and start following a skincare routine. Stop exfoliating start wearing sunscreen every day and take care of your body.. Most importantly be patient. Good skin takes time.

Remember your skin wants to be healthy and it will glow if you take care of it. So simplify your skincare routine. You will see the difference. The beautiful skin is not the one with the most products, on it it is the one that is respected and taken care of.

The Checklist for an Instant Glow-Up

If you want to see a difference by next week, stop the “guesswork” and follow this beauty audit:

MistakeImmediate Solution
Over-scrubbingSwitch to a gentle cleanser and put the scrubs away.
Skipping SunscreenWear broad-spectrum SPF even if you’re working from home.
Using Hot WaterWash your face with lukewarm or cool water to prevent redness.
Touching Your FaceStop leaning on your hands to prevent “friction acne” and bacteria spread.
Ignoring Your NeckExtend all skincare layering down to your chest for a uniform glow.

The Psychological Component: Patience

We live in a world of instant gratification, but skin health is a long game. Most cells take about 28 to 40 days to turn over. If you switch your routine every three days because you don’t see a “glow,” you are just stressing your skin further.

True radiance comes from a state of balance. It is the result of a calm mind, a protected barrier, and a consistent, simple routine. When you stop attacking your skin with harsh treatments and start supporting its natural functions, the glow will return naturally.

Summary: Simplify to Amplify

Your skin wants to be healthy. It is designed to heal and glow on its own. Your job is simply to provide the environment for it to do so. By avoiding over-exfoliation, prioritizing hydration, and never skipping your SPF, you are removing the obstacles between you and the best skin of your life.

The most beautiful skin isn’t the one with the most products on it—it’s the one that is the most respected.

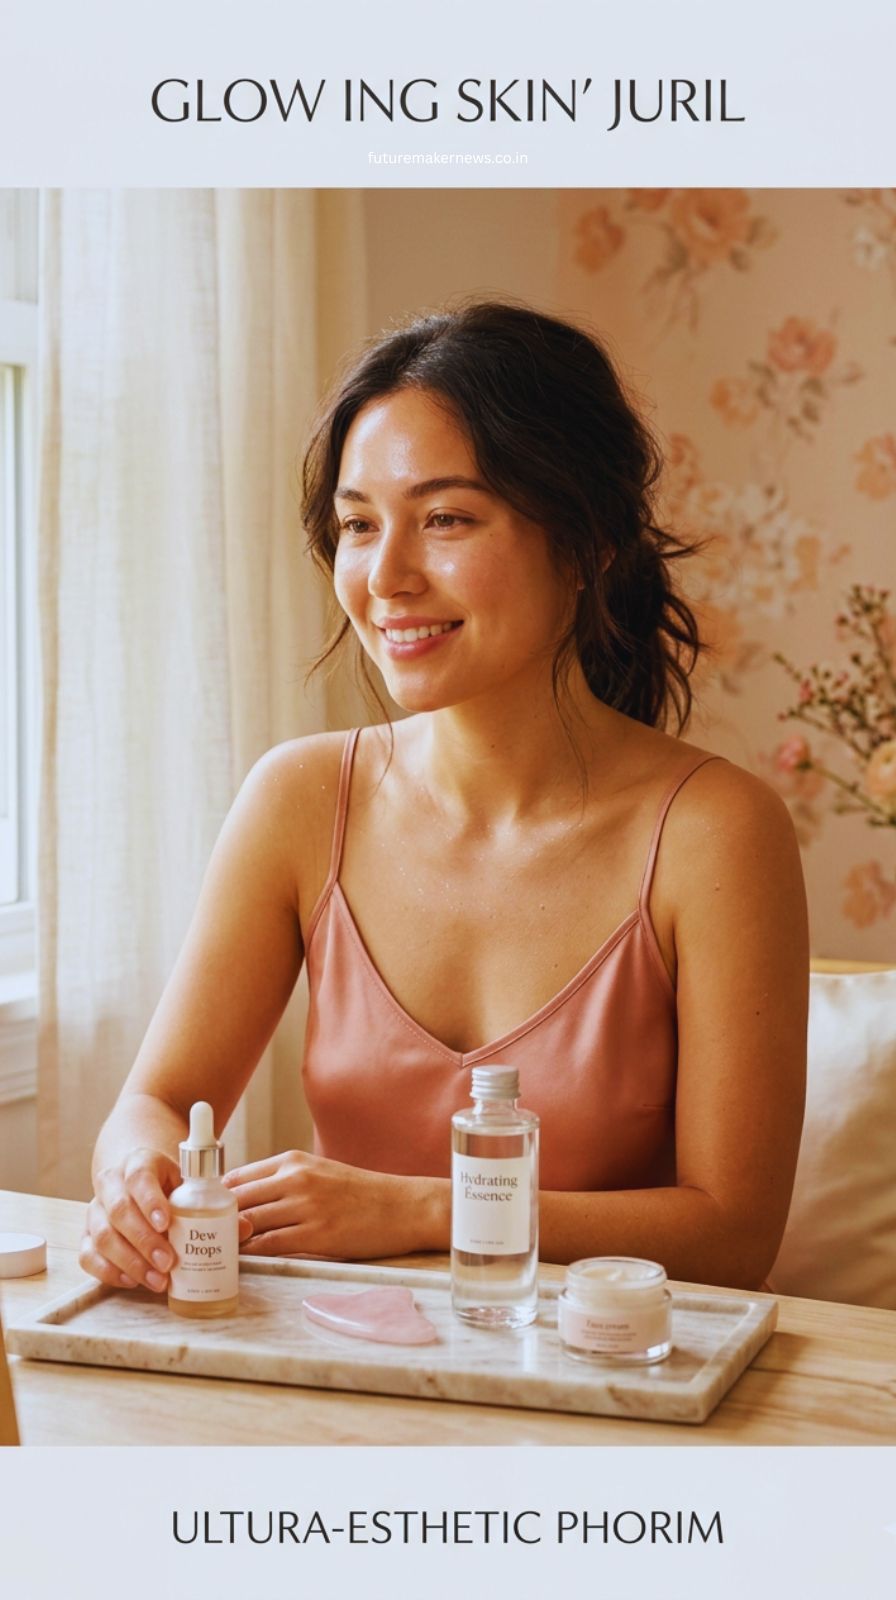
Glowing woman with dewy skin sitting at a vanity with skincare products and gua sha tool in a soft pastel bedroom aesthetic.

The “Soft Girl” aesthetic is more than just a viral trend; it is a philosophy of self-care that prioritizes a radiant, dewy, and effortless appearance. Unlike heavy “insta-glam” makeup that masks the skin, the soft girl beauty routine focuses on enhancing your natural features through meticulous skincare layering, deep hydration, and restorative habits.

When people say this routine “changes your face,” they aren’t talking about surgery. They are talking about the visible transformation that happens when your skin barrier is healthy, your lymphatic system is drained, and your cells are deeply nourished.

Here is the definitive guide to achieving that ethereal, lit-from-within glow through a dedicated holistic beauty approach.

Phase 1: The Art of Skincare Layering

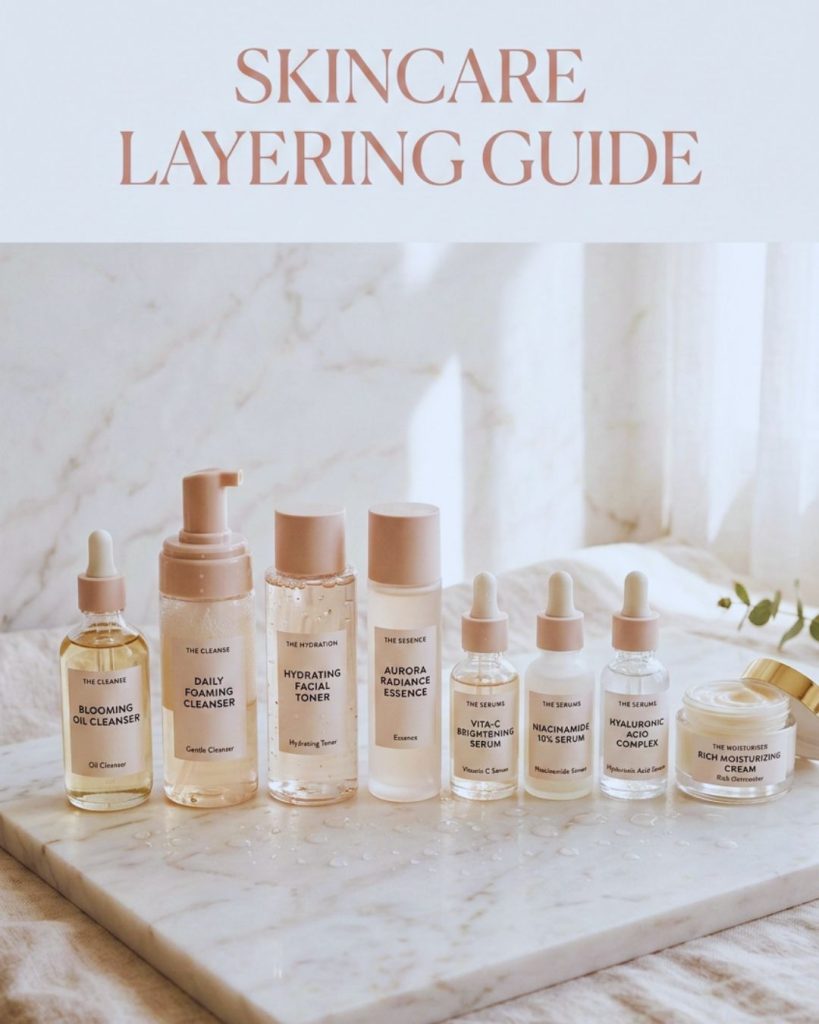
Flat lay of skincare products arranged in layering order including oil cleanser, toner, serums, and moisturizer on a soft pastel background.
The secret to glass skin? Layer your skincare from thinnest to thickest for maximum glow.

The foundation of the soft girl look is skin that looks like glass. To achieve this, you must master the sequence of your products. The rule is simple: layer from thinnest to thickest consistency to ensure maximum product absorption.

1. The Double Cleanse (The Non-Negotiable)

  • Step A: Use an oil-based cleanser or balm to dissolve SPF, makeup, and sebum.
  • Step B: Follow with a gentle, pH-balanced water-based cleanser.
  • Why it works: It prevents “congested skin” and ensures your expensive serums aren’t sitting on top of a layer of dirt.

2. Hydrating Toners and Essences

  • Instead of harsh astringents, use hydrating toners packed with rose water or rice ferment.
  • Pro Tip: Apply 3 to 7 layers of toner (the “7-Skin Method”) for an instant plumping effect.

3. Targeted Serums (The Transformers)

  • Vitamin C: For morning brightness and protection against environmental stressors.
  • Niacinamide: To minimize pores and regulate oil production.
  • Hyaluronic Acid: The gold standard for moisture retention. Always apply this to damp skin to avoid drawing moisture out of your face.

4. Barrier Repair Moisturizer

  • Look for ingredients like ceramides, fatty acids, and squalane.
  • A healthy skin barrier is what gives you that “soft” texture and prevents redness or irritation.

Phase 2: The Hydration Architecture

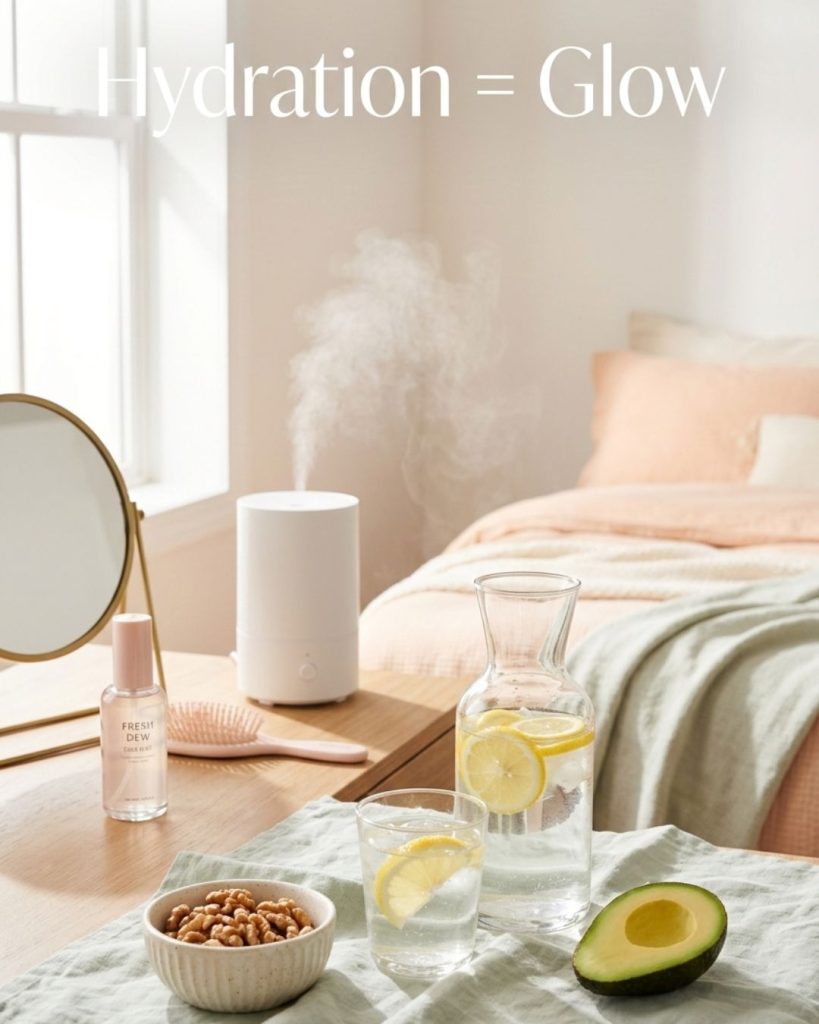
Aesthetic setup with water bottle and lemon, avocado and walnuts, humidifier misting, and face spray on a soft pastel background.
Glowing skin starts with hydration—inside and out.

True hydration isn’t just about what you put on your face; it’s about how your body manages water. For the soft girl aesthetic, we want “bouncy” skin that reflects light.

Internal Hydration

  • The 3-Liter Rule: Drinking enough water is the cheapest beauty treatment in existence.
  • Electrolytes: Add a pinch of sea salt or a lemon slice to your water. Pure water can sometimes pass through you; electrolytes help it actually enter your cells.
  • Omega-3s: Incorporating healthy fats (avocados, walnuts, salmon) creates a natural oil seal for your skin from the inside out.

External Humidity

  • The Humidifier Hack: If you live in a dry climate or use air conditioning, a humidifier is essential. It prevents trans-epidermal water loss while you sleep.
  • Face Mists: Keep a thermal water spray at your desk. A quick spritz during the day keeps your dewy finish intact without ruining your makeup.

Phase 3: The Sleep-Skin Connection

Woman resting on a silk pillowcase in a softly lit bedroom with skincare products on the nightstand.
Your skin repairs while you sleep—make your nighttime routine work harder.

They call it beauty sleep for a reason. During the REM cycle, your body’s growth hormones kick in, repairing tissue and producing new collagen.

1. The Silk Pillowcase Advantage

  • Cotton absorbs moisture and creates friction, leading to “sleep lines” and frizzy hair.
  • Silk or Satin: These fabrics allow your face to glide, preserving your skincare products on your skin rather than your pillow.

2. The Overnight Repair Window

  • Between 10 PM and 2 AM, skin cell turnover is at its peak.
  • Using a sleeping mask or a thicker “slugging” layer of petrolatum-based ointment can lock in active ingredients and transform a tired complexion by morning.

3. Elevation for Drainage

  • Sleeping slightly elevated on two pillows can prevent fluid from pooling under your eyes.
  • This simple shift drastically reduces morning puffiness and dark circles.

Phase 4: Consistency and the “Compound Effect”

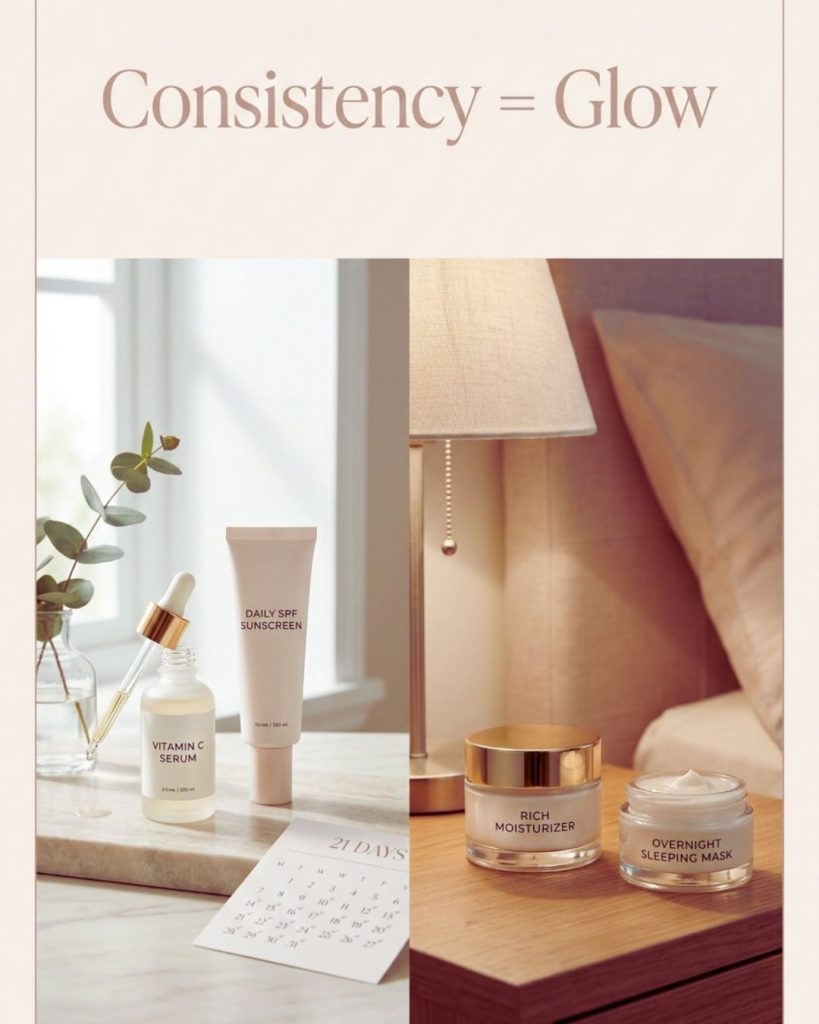
Split image of morning vitamin C and SPF routine beside nighttime moisturizer and sleeping mask in a soft aesthetic setting.
Great skin isn’t about one miracle product—it’s about what you do every single day.

The biggest mistake in beauty routines is the “hero product” myth. No single cream will change your face overnight. It is the consistency routine that yields results.

The 21-Day Rule

  • Skin cells take about 28 days to renew.
  • Commit to your skincare steps for at least three weeks before deciding if a product “works.”
  • Consistency is the bridge between a “good skin day” and a “good skin life.”

Morning vs. Evening Discipline

  • Morning: Focus on Antioxidant Protection and high-SPF sun protection.
  • Evening: Focus on Cellular Repair and deep nourishment.
  • Never skip your evening routine, no matter how tired you are. The pollutants of the day are the primary cause of premature aging.

Phase 5: Sculpting the Soft Girl Features

Close-up of a woman using a gua sha tool with glowing skin, fluffy brows, and natural lashes in soft lighting.
Sculpt your features naturally with daily facial massage and soft grooming rituals.

To “change your face,” you must address the underlying structure. Soft girl beauty is about soft contours and a relaxed expression.

1. Manual Lymphatic Drainage (Gua Sha)

  • Using a Gua Sha tool or even your fingers can move stagnant lymph fluid.
  • Focus on the jawline, cheekbones, and brow bone.
  • Result: A more snatched, “sculpted” look without the need for heavy contour makeup.

2. The Power of Facial Massage

  • Massaging your face for 2 minutes during your oil cleanse increases blood flow.
  • Increased circulation brings fresh oxygen to the skin, creating a natural, healthy rosy flush.

3. Brow and Lash Care

  • The soft girl look relies on “fluffy” brows and long, natural lashes.
  • Use a growth serum or castor oil nightly. Well-groomed, full brows frame the face and provide a youthful, “soft” lift.

The Soft Girl Mindset: Stress and Skin

You cannot have “soft” skin if your body is in a “hard” state of stress. Cortisol, the stress hormone, breaks down collagen and triggers inflammatory conditions like acne and eczema.

Mindful Beauty

  • Turn your skincare routine into a meditative ritual.
  • Light a candle, play lo-fi music, and focus on the sensation of the products on your skin.
  • Lowering your stress levels is a form of anti-aging that no cream can replicate.

Summary of the Soft Girl Formula

To truly transform your complexion, follow this checklist daily:

CategoryEssential Action
CleansingDouble cleanse every night to remove environmental pollutants.
LayeringApply products from watery to creamy; never skip SPF 30+.
MoistureDrink 2-3L of water and use a humidifier at night.
RecoveryAim for 7-9 hours of sleep on a silk pillowcase.
MovementPerform 5 minutes of facial massage or Gua Sha daily.

Final Thoughts: The Journey to Radiance

The soft girl routine is an investment in yourself. It is the rejection of the “hustle” in favor of a slower, more intentional way of living and grooming. When you treat your face with kindness and provide it with the hydration and nutrients it craves, it will reward you with a glow that transcends makeup.

Changing your face isn’t about changing who you are; it’s about revealing the most vibrant, hydrated, and rested version of yourself.

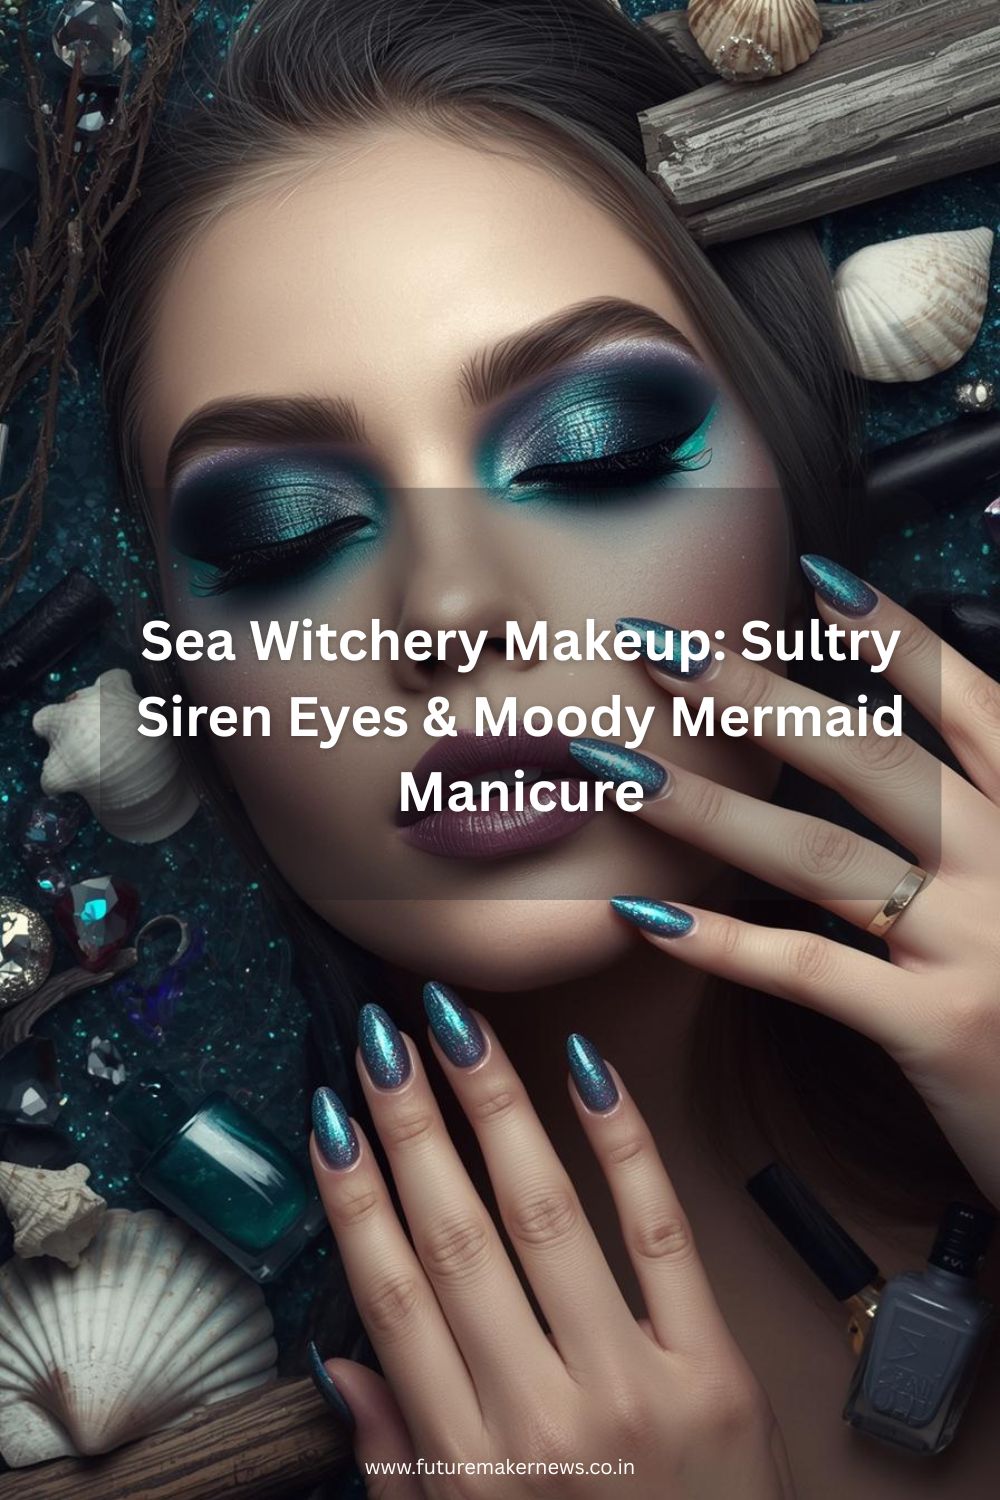
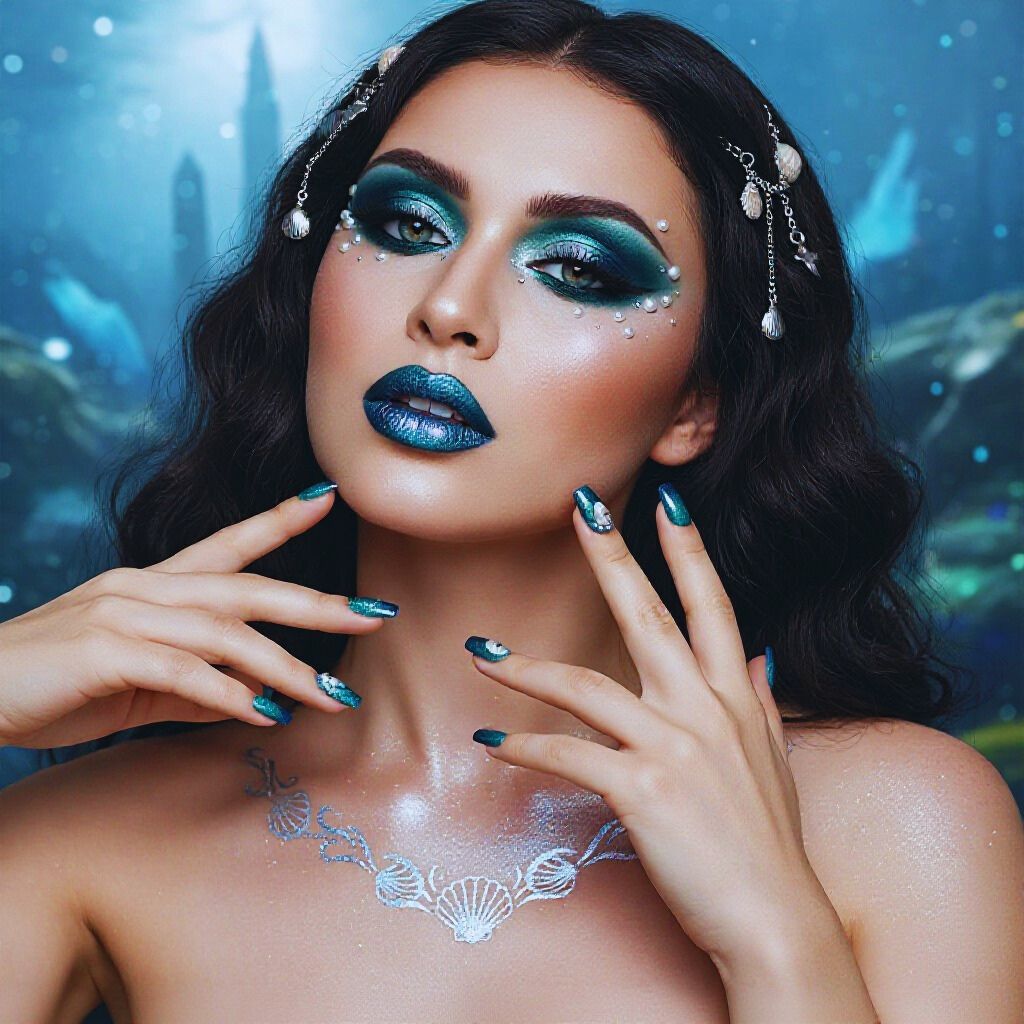
Flat lay of sea-inspired makeup and nails, featuring teal and navy eye shadow with shimmer, mermaid gradient manicure, seashell props, and makeup tools arranged artistically.

There’s something irresistibly mystical about the ocean — the glint of moonlight on waves, the secrets whispered by the tide, and the call of mythic sirens who rule the sea’s deepest mysteries. Now imagine bottling that energy in your makeup look. Welcome to the world of Sea Witchery Makeup, where dark glamour intersects with otherworldly ocean magic.

Whether you’re heading out for a night on the town, a themed party, or simply want to unleash your inner sea goddess, this tutorial will teach you to master Sultry Siren Eyes and Moody Mermaid Manicures step by step. You’ll be ready to dive into an ocean of beauty.

What is Sea Witchery Makeup?

Sea Witchery Makeup is not a trend — it’s an attitude, an atmosphere, and a proclamation. Drawing inspiration from the eerie undertow of the sea, this look combines iridescent hues, ocean blues, sea greens, smoky grays, and pearlescent whites to give the wearer a look that’s feminine and fearless.

The backbone of this look is:

  • Dewy, radiant skin (as smooth as sunlight on waves)
  • Sultry, shimmery eyes(tapping into sirens’ strength)
  • Dark, dramatic lips (adding depth and drama added)
  • Pearlescent or holographic shimmer on nautical nails

It’s the ultimate combination of fantasy and fierce glamour — perfect for anyone who adores dramatic, out-of-this-world makeup looks.

Step 1: Prepping the Canvas — Sea Goddess Skin

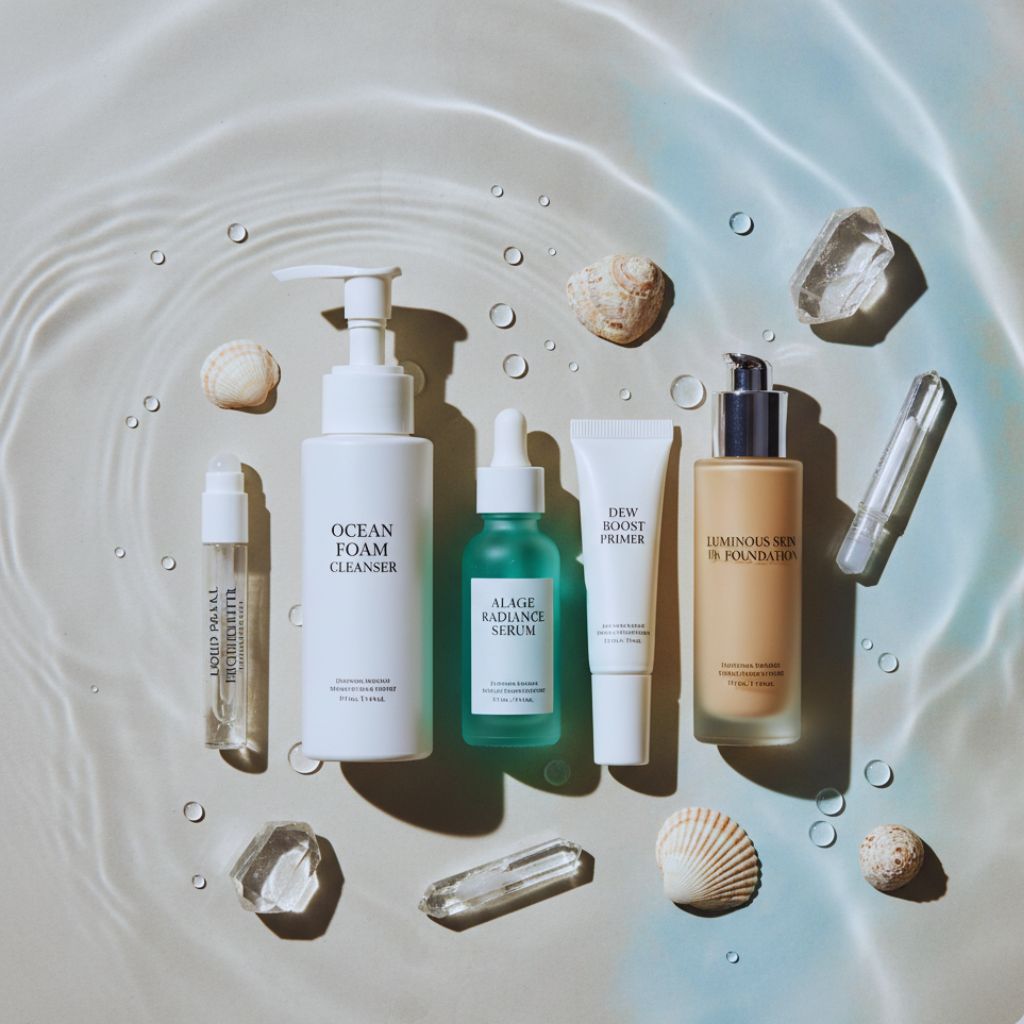
Skincare products including serum, primer, foundation, and highlighter arranged on a neutral surface with seashells, for a glowing Sea Witch makeup base.
“Start with radiant, hydrated skin — your Sea Goddess canvas for a luminous, ocean-inspired glow.”

Before diving into your eyes and nails, start with your skin. The foundation of any good sea witch makeup look is radiant, hydrated skin that glows like morning light over calm waters.

Step-by-Step:

  1. Cleanse your face with a gentle foaming cleanser to remove any residue.
  2. Apply a hydrating serum with marine ingredients like algae, seaweed, or hyaluronic acid.
  3. Use a dewy primer to give your skin that wet, luminous finish.
  4. Choose a lightweight, glowy foundation — avoid heavy matte formulas.
  5. Add liquid highlighter to the high points of your face: cheekbones, brow bones, and the tip of your nose.

Step 2: Sultry Siren Eyes — The Heart of Sea Witchery Makeup

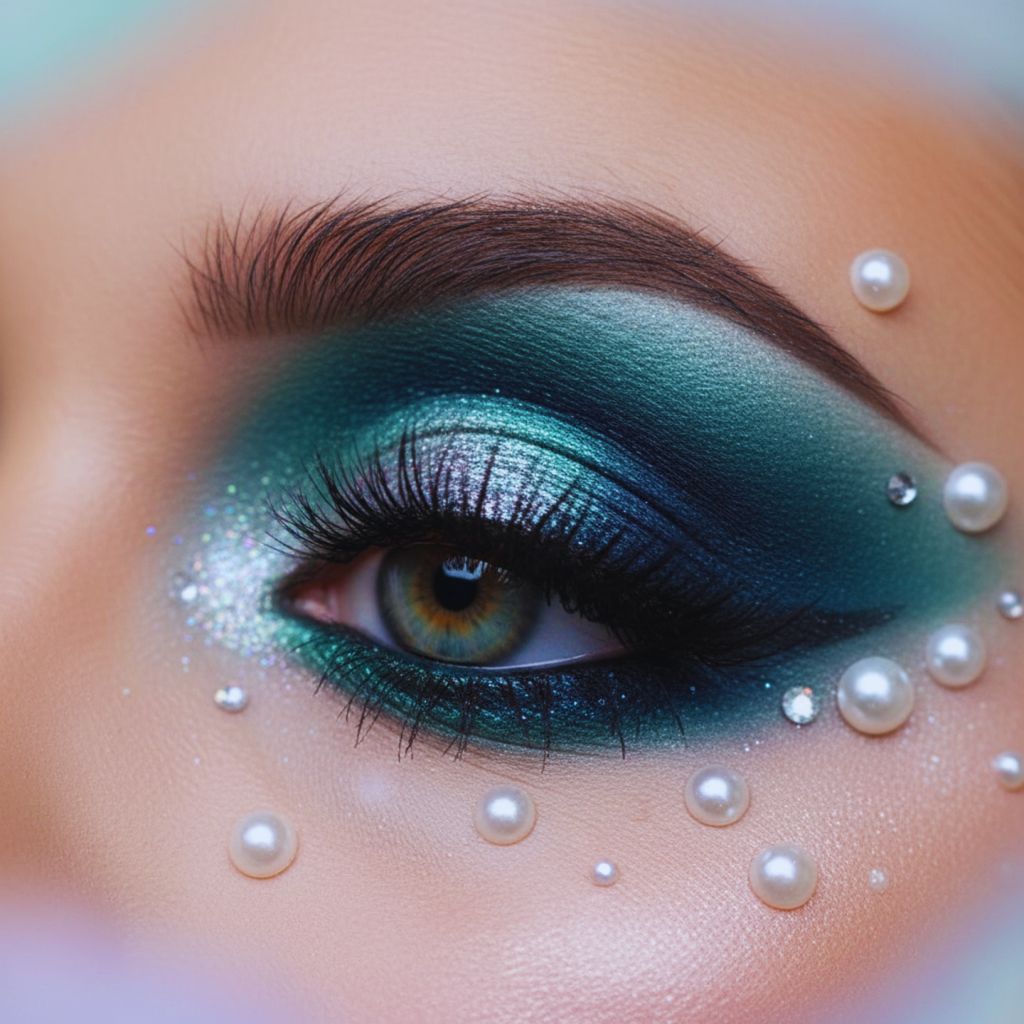
Close-up of eyes with teal, navy, and emerald smoky eyeshadow, metallic liner, and shimmering inner corners, styled for a Sea Witch look.
“Sultry Siren Eyes — shimmer, depth, and oceanic mystery to captivate and mesmerize.”

Nothing defines the Sea Witchery look quite like the eyes. Sultry Siren Eyes are all about shimmer, depth, and seduction — think shimmering sea tones, smoky blends, and captivating contrast.

You’ll Need:

  • Eyeshadow primer
  • Seashore-hued eyeshadows (teal, turquoise, navy, emerald, silver)
  • Deep navy or black eyeliner
  • Mascara or faux lashes
  • Highlighter or shimmer pigment

Step-by-Step Guide:

  1. Prep your lids to get your colors to pop and crease-free.
  2. Apply a light teal or seafoam color all over your eyelid as a base.
  3. Line your crease with navy or emerald green, blending the color out in a wing shape for that smoky siren look.
  4. Add metallic sheen (silver, pearl, or aqua) to the center of your lid to create a light reflecting on water effect.
  5. Smudge a dark liner (black or navy) along your upper and lower lash lines for added depth.
  6. Highlight the inner corners with a pop of iridescent silver or pearl.
  7. Finish with volumizing mascara or make it bold with wispy false lashes.

Step 3: Sea Spell Lips — The Perfect Finishing Touch

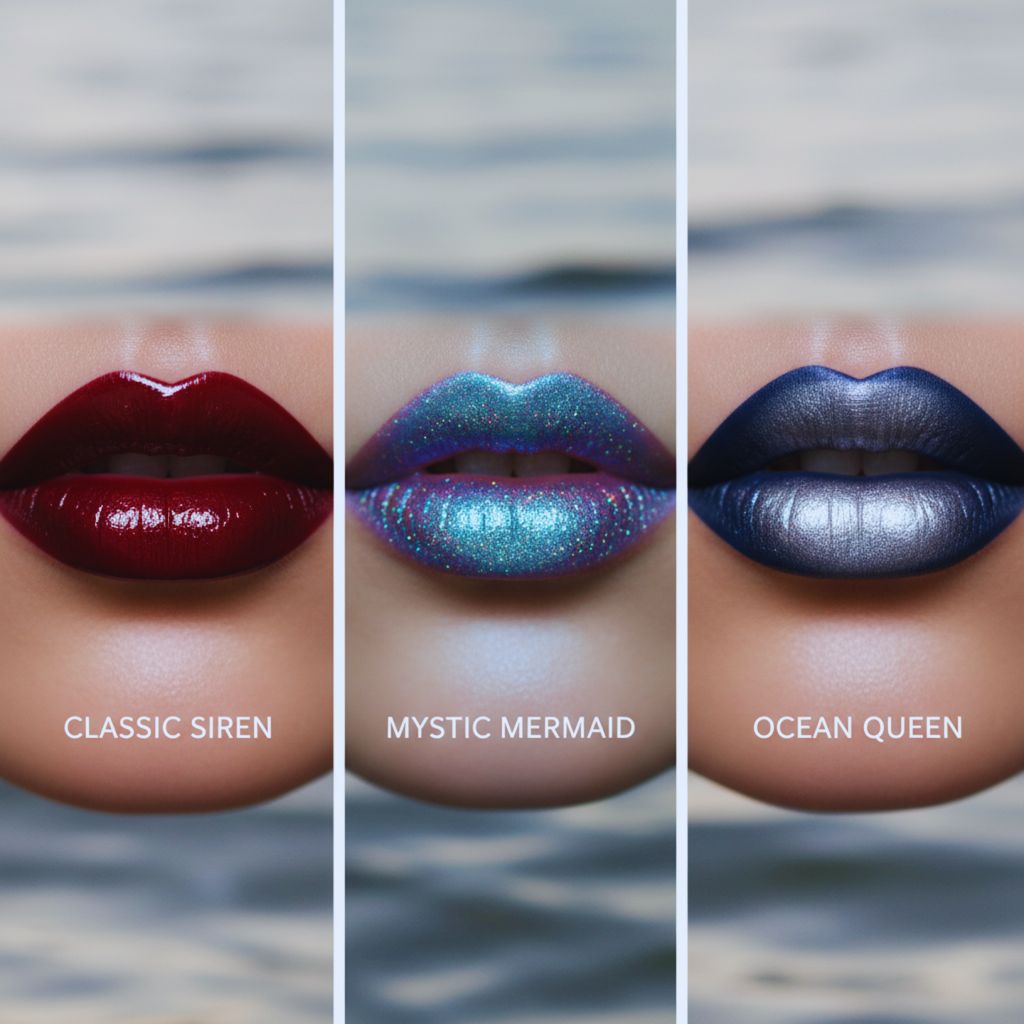
Three Sea Witch lip styles: glossy deep berry, iridescent blue-purple, and navy-to-silver ombre, inspired by oceanic themes.
“Seal your spell with Sea Spell Lips — from deep berry to iridescent ombre, let your lips whisper ocean magic.”

Your lips are your magic spell — the last whisper of oceanic enigma. For Sea Witchery Makeup, lips need to harmonize bold eyes with deep enigma or iridescent softness.

Select Your Sea Witch Lip Style:

  • Classic Siren: Deep berry or wine-color lipstick with a glossy shine.
  • Mystic Mermaid: Iridescent gloss with hints of blue, purple, or pearl undertones.
  • Ocean Queen: Ombre lips that transition from deep navy into silver shimmer.

How to Get the Look:

  1. Exfoliate the lips for a smooth canvas.
  2. Use a hydrating lip balm.
  3. Define with a coordinating lip pencil for a defined look.
  4. Color with your desired bold or shimmery lipstick.
  5. Finish with gloss or a touch of highlighter in the center for that 3D glow.

Step 4: Moody Mermaid Manicures — Deep, Dreamy, and Dazzling

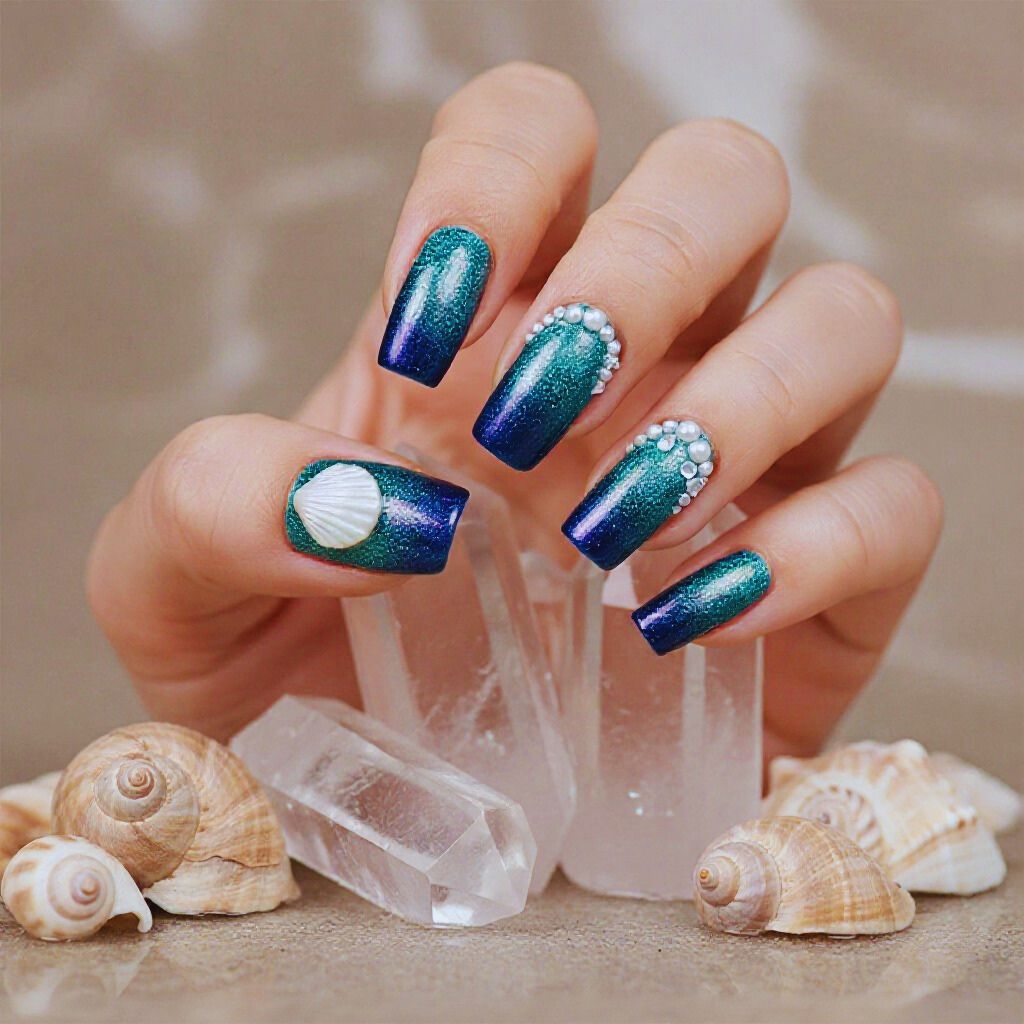
Hand with gradient teal and navy manicure, holographic shine, and shell accents, styled with seashells and mystical props.
“Moody Mermaid Manicures — nails that shimmer like ocean depths, perfect for mystical Sea Witch vibes.”

Your manicure finishes off your Sea Witchery Makeup look. Imagine mystical ocean bottoms, pearlescent shells, and churning waves trapped on your nails.

Nail Color Palette Inspiration:

  • Dark teal, midnight blue, sea green
  • Chrome silver, holographic pearl
  • Black with shimmer
  • Gradient blues or ombre ocean colors

Step-by-Step Sea Witch Manicure:

  1. Shape and buff your nails for a smooth base.
  2. Apply a fortifying base coat.
  3. Paint nails in a rich oceanic shade (such as navy or emerald).
  4. Finish with shimmer or holographic topcoat for a splash of underwater sparkle.
  5. For added drama, highlight a few nails with shell decals, pearls, or small rhinestones.
  6. Cap off with a high-gloss topcoat to lock in your sea magic.

Step 5: Finishing Touches — Tap Into the Ocean Energy

Full Sea Witch makeup and manicure look with glowing skin, beachy waves, iridescent lips, shimmering eyes, and metallic seashell tattoos.
“Complete your Sea Witch look — glowing skin, ocean-inspired hair, and subtle magical details to channel ocean energy.”

After your eyes, lips, and nails are done, accentuate your overall sea witch look with understated yet potent finishing touches.

Final Touch Ideas:

  • Accentuate your collarbones and shoulders with a pearlescent shine.
  • Get natural beachy waves in your hair with a sea salt texturizing spray.
  • Spritz your face with a setting spray that provides a dewy, hydrated look.
  • Top with temporary metallic tattoos in seashell or wave patterns.

All the details must whisper sea — mysterious, wild, and magical.

Bonus: Channeling Your Inner Sea Witch Energy

The magic of Sea Witchery Makeup isn’t all about the shine — it’s about the confidence that comes with it. When you leave the house with your Sultry Siren Eyes and Moody Mermaid Manicure, you own mystery, grace, and a little bit of rebellion.

So next time you’re getting ready, remember:
You’re not simply wearing makeup. You’re channeling the essence of the sea — wild, strong, and untamed.

Final Thoughts

Sea Witchery Makeup is not a look — it’s an aesthetic movement that honors the harmony between beauty and enigma, light and darkness, feminine and ferocious. From radiant skin and Sultry Siren Eyes to Moody Mermaid Nails, each move encourages you to be unafraid.

So take out your shimmer shadows, paint your nails with the rich blues, and awaken your inner sea witch.

Because real beauty is not about perfection — it’s about power, presence, and a little bit of ocean magic.