A bright flat lay of a DIY notecard-making workspace with paper, pens, washi tape, and envelopes arranged on a wooden table.

In a world where everything is digital, there’s something incredibly refreshing about sending — or receiving — a handwritten note. A personalized notecard says you cared enough to make it your own. Whether it’s a thank-you message, an invitation, or just a thoughtful hello, custom stationery brings back the charm of meaningful connection.

But here’s the secret: you don’t need to spend $30 on fancy designer stationery sets. You can create stunning, DIY personalized notecards for less than $1 per set — and they’ll look even better than the store-bought kind.

Let’s dive into this creative and budget-friendly project that’s part art, part therapy, and 100% satisfying.

Why You’ll Love Making DIY Custom Stationery

Before we grab the supplies, let’s talk about why DIY notecards are one of the best creative projects you can start today:

  1. They’re inexpensive but luxurious.
    You’ll get that high-end, boutique look without paying high-end prices.
  2. They’re completely customizable.
    Choose your own fonts, colors, and styles — your notecards will truly reflect you.
  3. They make meaningful gifts.
    Handmade stationery feels thoughtful and personal, perfect for birthdays, holidays, or “just because.”
  4. They boost mindfulness and creativity.
    Crafting helps you unwind while creating something beautiful and useful.
  5. They’re eco-friendly.
    You can reuse scraps, recycle old paper, and create something new from what you already have.

So, whether you’re an artist, a minimalist, or a stationery addict — this guide will help you design notecards that look expensive but cost almost nothing.

What You’ll Need (for Under $1 Per Set!)

The key to budget-friendly DIY stationery is simplicity + creativity. You don’t need expensive equipment or professional tools — just a few affordable basics and a little imagination.

Here’s what to gather:

  • Blank cardstock (you can buy packs for pennies per sheet)
  • Paper trimmer or scissors
  • Ruler and pencil (for measuring and layout)
  • Glue stick or double-sided tape
  • Envelopes (bulk sets from discount stores or Amazon)
  • Pens, markers, or fine liners for details
  • Optional extras: washi tape, rubber stamps, stickers, or printed labels

Step-by-Step: How to Make DIY Personalized Notecards

Ready to get started? Follow these simple steps to create your own custom stationery set that looks straight out of a boutique.

Step 1: Choose Your Style
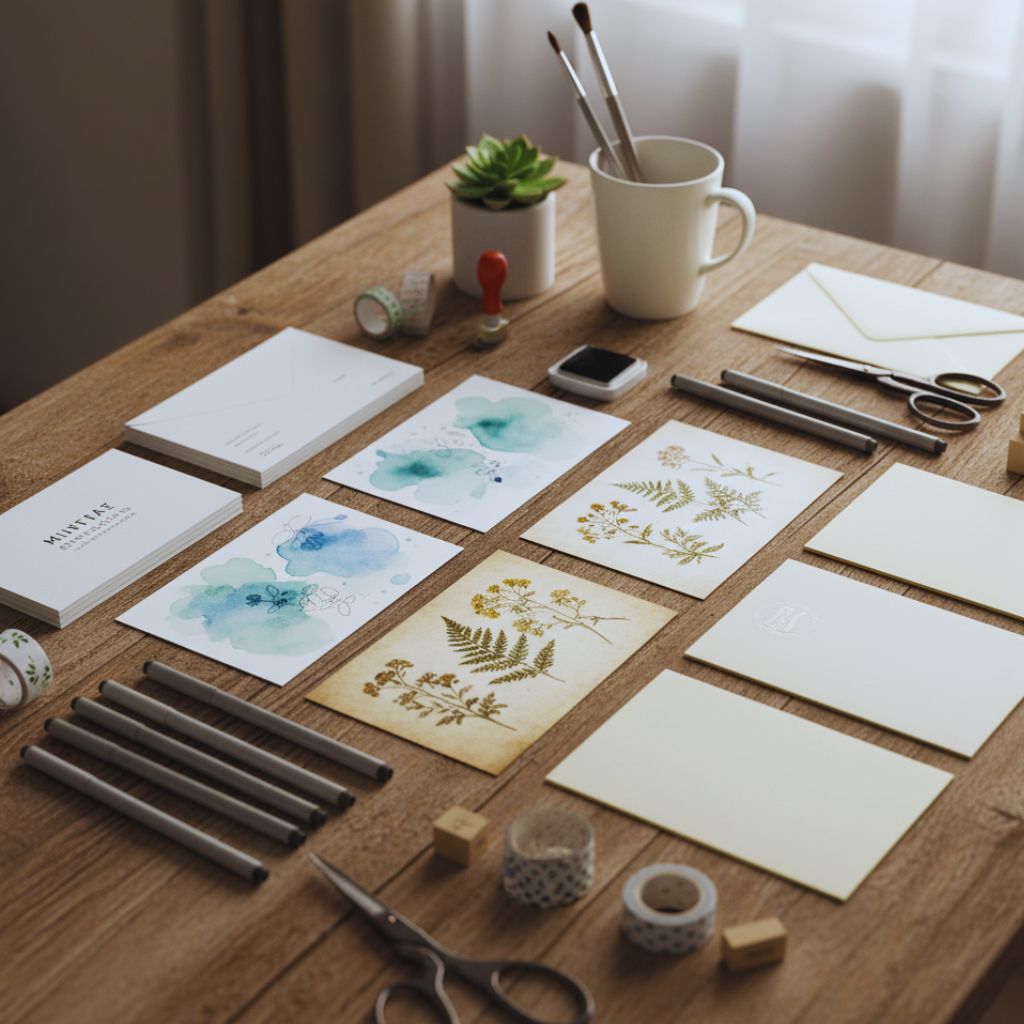
A flat lay of various DIY notecard styles with pens, envelopes, and decorative paper on a wooden table.
minimalist, artsy, vintage, or monogrammed. Your design vision sets the tone for your notecards.”

Before you start cutting and gluing, decide what kind of vibe you want for your stationery.
Ask yourself:

  • Do you want minimalist and clean lines?
  • Or artsy with watercolor splashes?
  • Maybe vintage-inspired, botanical, or monogrammed?

Having a clear vision will help you pick your paper colors, design elements, and finishing touches.

Step 2: Cut the Cardstock
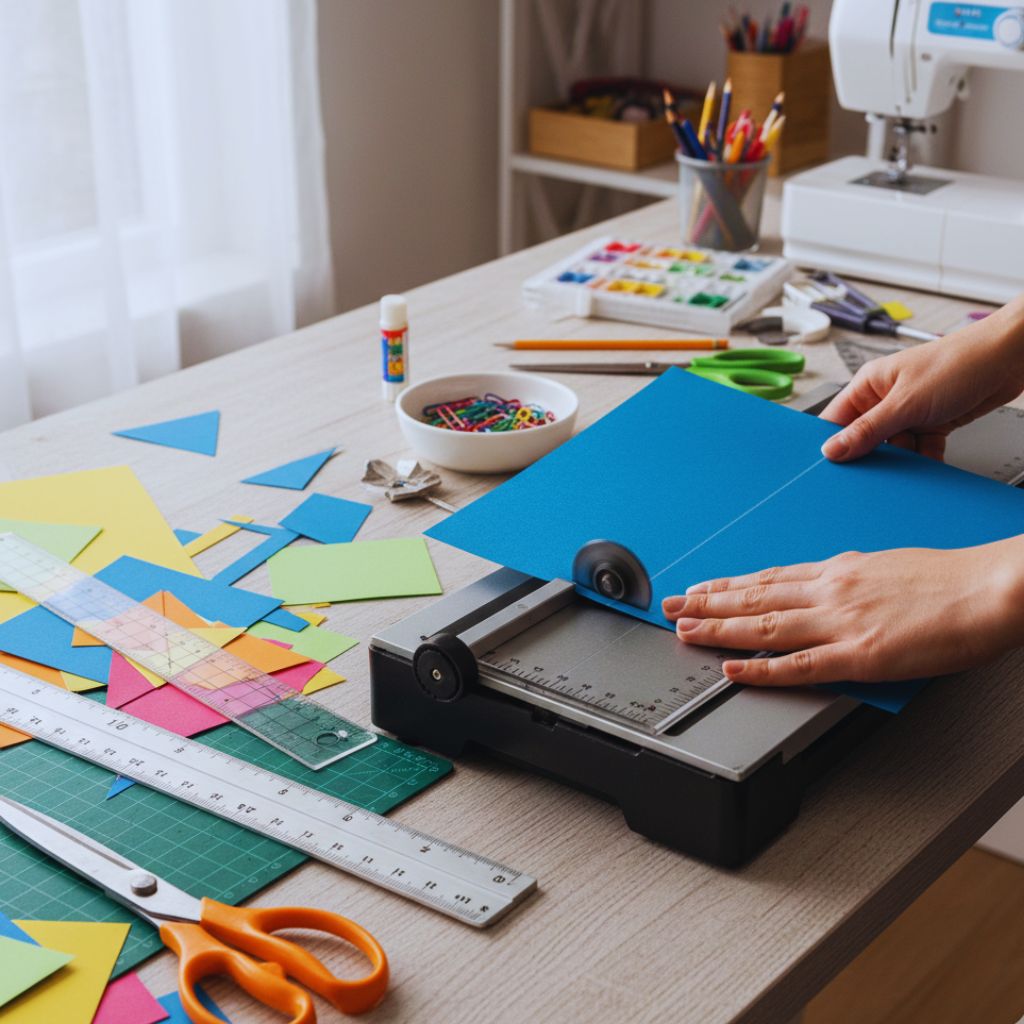
Hands cutting cardstock using a paper trimmer, with rulers and scissors on a craft desk.
Trim your cardstock to size — A2 or A6 are perfect for personal notes and invitations.

Use a paper trimmer or scissors to cut your cardstock into standard notecard sizes.
Here are some popular options:

  • A2 Size (4.25” x 5.5”) – Perfect for thank-you notes and small messages.
  • A6 Size (4.5” x 6.25”) – Great for invitations or photo cards.
  • Square Size (5” x 5”) – Trendy and unique look.

Try to keep your dimensions consistent so they fit neatly into envelopes.

Step 3: Add a Personalized Header or Monogram

Person hand-lettering a monogram on a white notecard with pens and stamps around.
Personalize your cards with your name, initials, or a simple phrase using hand lettering, stamping, or printing.

This is what makes your card truly yours. There are a few ways to do it:

  1. Hand-lettering:
    Use a fine-tip pen or brush pen to write your name, initials, or a short phrase like “Thank You,” “Hello,” or “With Love.”
  2. Printed design:
    Print your name or logo using a basic printer. Even a simple serif font can look incredibly elegant when paired with minimal graphics.
  3. Stamp or emboss:
    Rubber stamps with initials or custom monograms are a chic, reusable option.

Step 4: Decorate the Borders or Corners
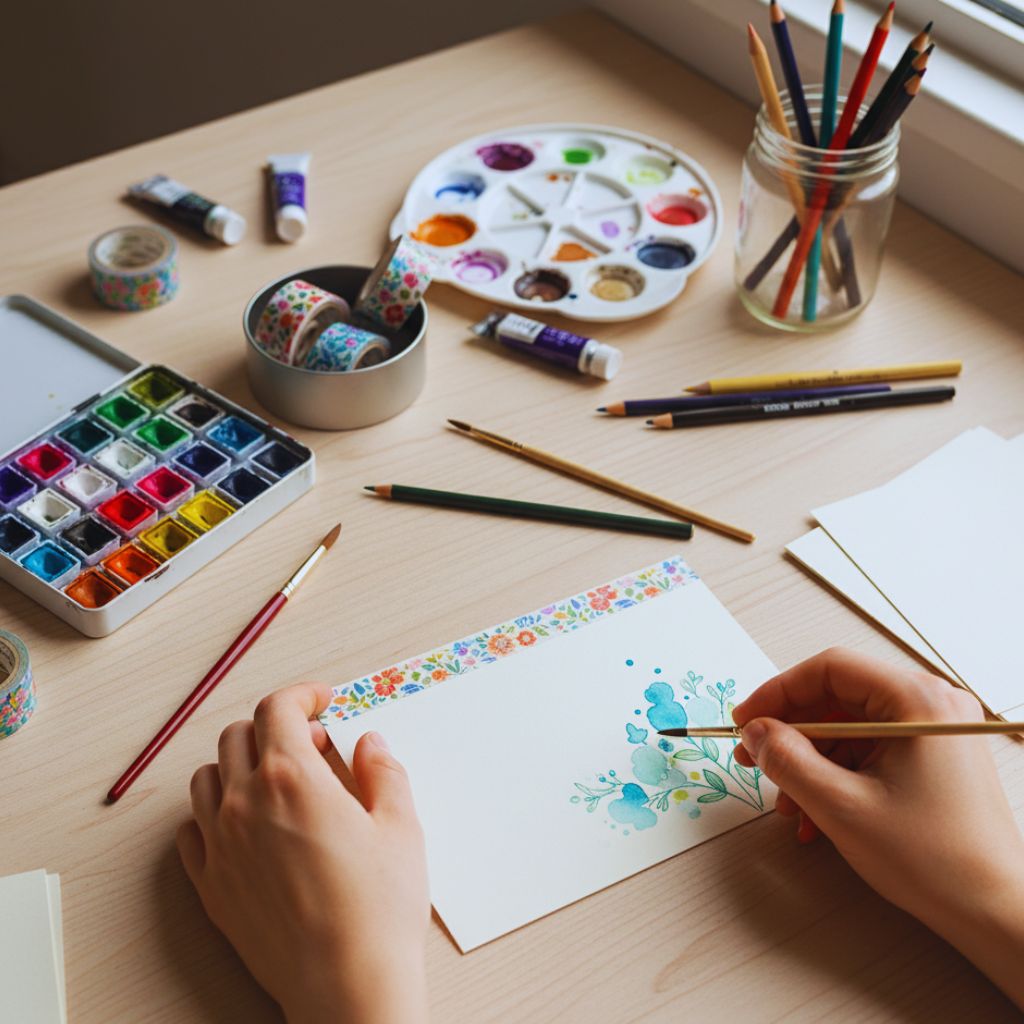
DIY notecard being decorated with washi tape and watercolor paint on a craft table.
Add creative touches — washi tape, watercolor edges, or simple doodles make each card unique.

You don’t need to be an artist to add flair! Try one of these budget-friendly design ideas:

  • Add washi tape along the edge for color and texture.
  • Use rubber stamps (floral, geometric, or seasonal).
  • Draw simple botanical doodles or line art.
  • Lightly splash watercolor paint for a dreamy effect.
  • Stick on a minimal sticker or wax seal.

Step 5: Add Envelope Details
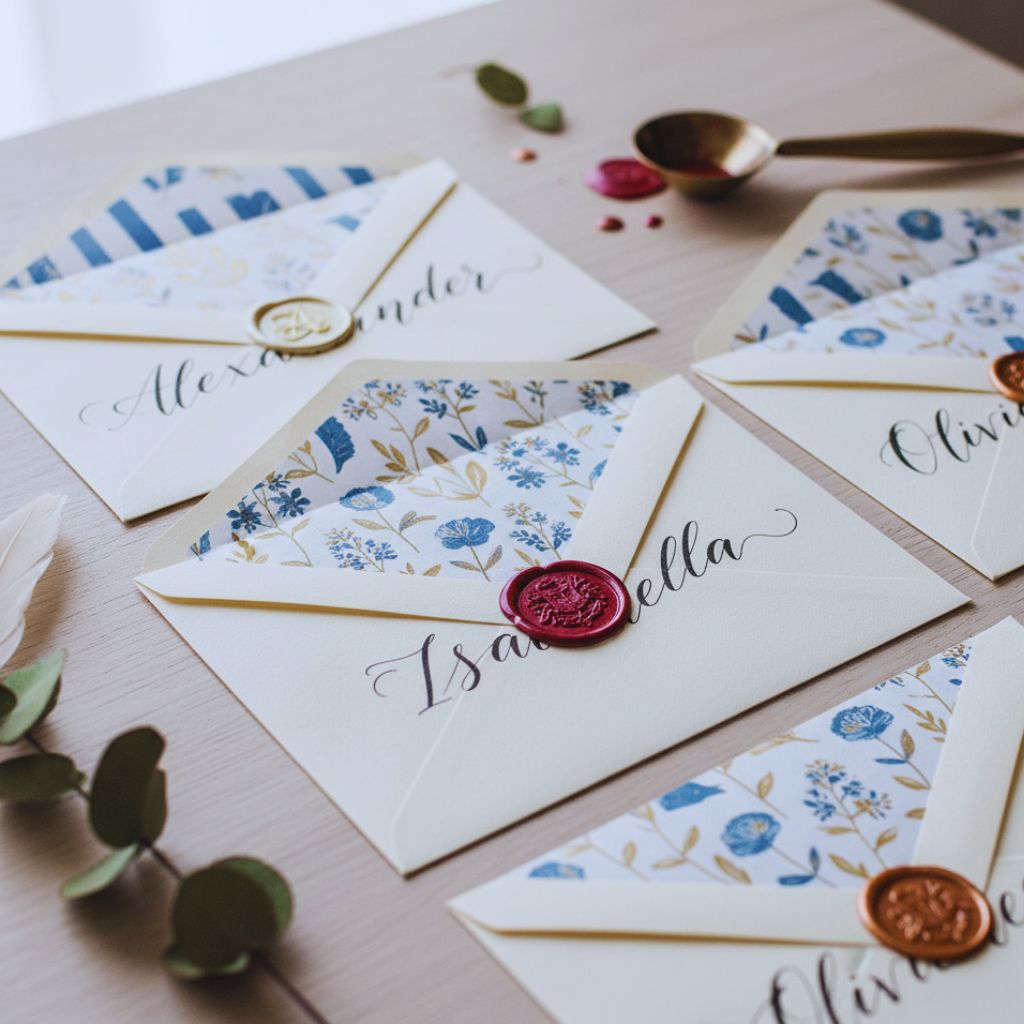
Decorated envelopes with wax seals and hand-lettered names on a wooden surface.
Elevate your envelopes with liners, wax seals, or calligraphy — the small details make a big impact.

The envelope is the first impression of your stationery — make it count!

Try these ideas:

  • Line the inside of the envelope with patterned paper.
  • Stamp your return address on the back flap.
  • Add a small sticker seal or wax stamp.
  • Write names in calligraphy for an elegant finish.

This extra touch instantly upgrades your DIY stationery from simple to sophisticated.

Step 6: Bundle & Store

Bundles of handmade notecards tied with twine inside a decorative box.
Bundle your cards and store them beautifully — ready for any occasion.

Once your cards and envelopes are ready, bundle them in sets of five or ten using ribbon, twine, or a small paper band.

Store them in a decorative box or drawer so they’re always ready when inspiration (or a thank-you moment) strikes.

Creative Variations (for Every Style and Occasion)

Want to take your DIY stationery to the next level? Try these themed variations:

  1. Watercolor Wash Cards:
    Lightly brush pastel watercolors across your card, let dry, and write your message in bold black ink.
  2. Pressed Flower Cards:
    Glue small dried flowers in one corner for a delicate, vintage feel.
  3. Minimalist Ink Cards:
    Simple black ink on white or kraft paper — clean, timeless, and classy.
  4. Foil Accent Cards:
    Add gold or silver foil stickers for that luxury touch.
  5. Photo Cards:
    Print your favorite photo and attach it with washi tape for a modern, personal twist.

Each design still costs less than a dollar per set, but looks like something you’d find in a high-end boutique.

Why Handmade Stationery Feels So Special

In the age of instant messages, a handwritten note carries rare emotional value.
It says:

“I took time for you.”
“You’re worth the effort.”
“This moment matters.”

That’s the beauty of personalized notecards — they slow things down, make connection tangible, and turn simple communication into art.

Whether you’re sending a thank-you card, a love note, or a “just because” message, your handmade stationery adds warmth that can’t be replicated by a screen.

The Real Cost Breakdown (and Savings!)

Let’s see how this project actually saves you money:

ItemApprox. CostCards ProducedCost Per Set (5 Cards)
Cardstock Pack (50 sheets)$5200 cards$0.25
Envelopes (100 pack)$6100 envelopes$0.30
Ink Pens / Washi / Glue$3 (used for multiple sets)$0.10
Total Cost Per Set:~$0.65 per set

You can’t beat that. High-end stationery brands charge $15–$25 for a small pack of notecards. Yours will cost under $1 — and look just as luxurious.

Final Thoughts: Create Beauty, Share Connection

At the end of the day, DIY custom stationery isn’t just about saving money — it’s about creating something meaningful. It’s about reviving the lost art of handwritten notes and adding personality to every message you send.

You’ll rediscover how satisfying it is to write on paper that you designed yourself — how creative, calming, and fulfilling it feels.

So, grab your scissors, some cardstock, and a touch of inspiration. For less than a dollar, you’ll create something that carries a thousand dollars’ worth of charm.
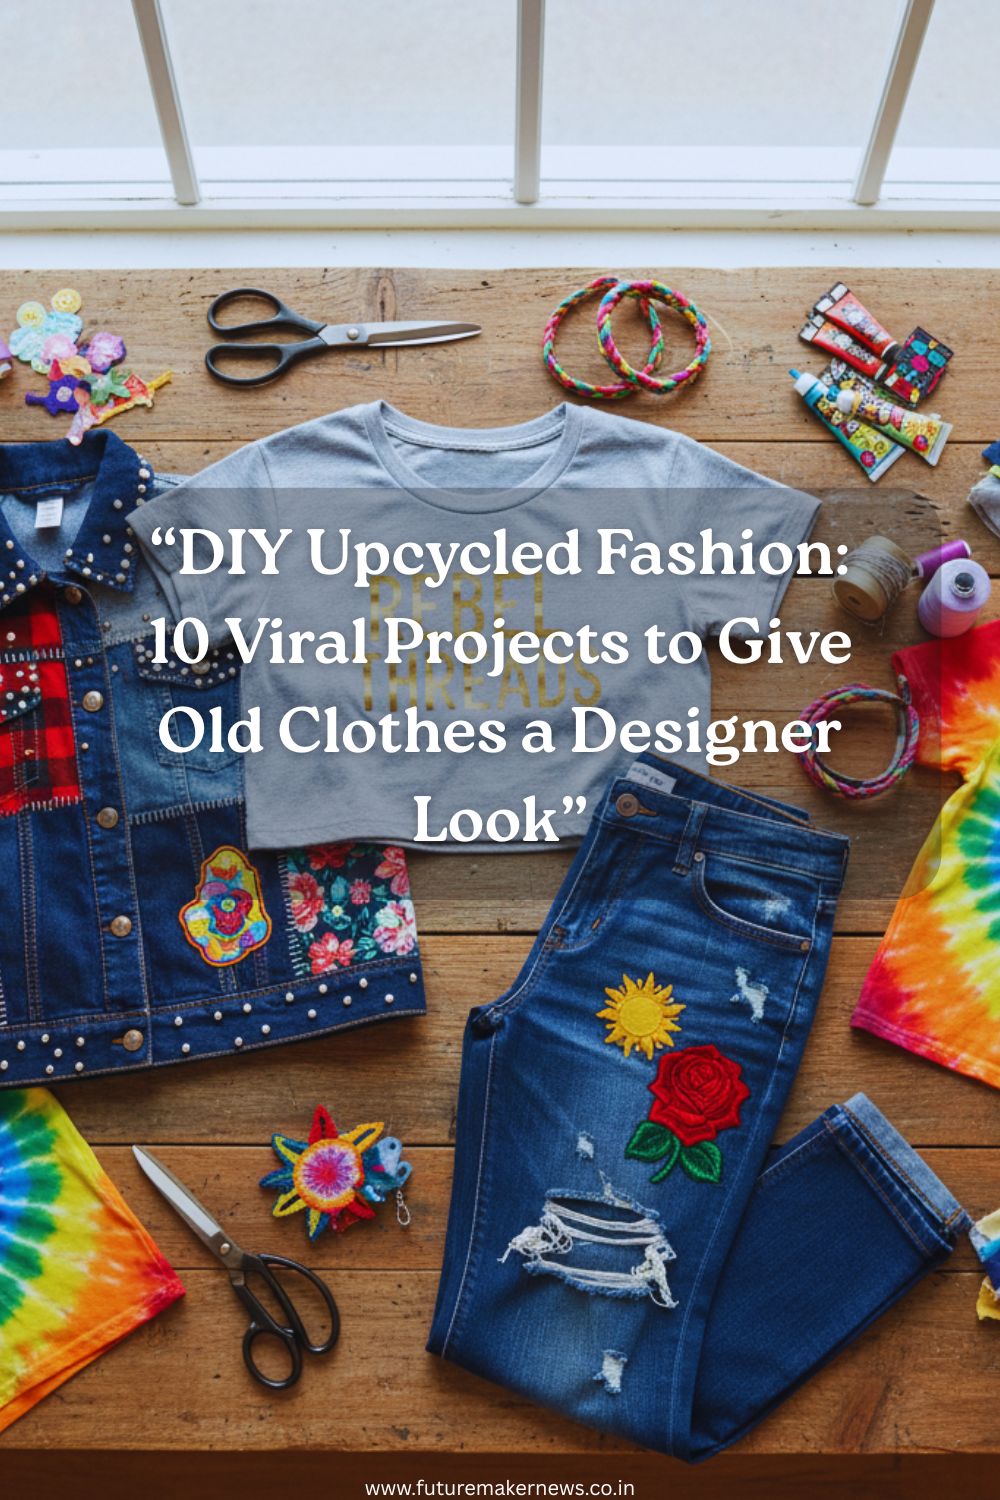
A creative flat-lay showing upcycled fashion items like a tie-dye shirt, embroidered jeans, and a patchwork jacket with sewing tools, representing sustainable DIY fashion projects.

In a world where sustainability meets style, DIY upcycled fashion is a movement rather than a trend. This involves transforming your long-forgotten clothes into fresh, chic, high-fashion masterpieces. Whether you’re tired of the same old wardrobe or just want to flex your creativity, upcycling clothes can turn you into your own personal designer.

And the best part? You don’t need to be a fashion expert. All you need is a pair of scissors, a needle and thread, and a little imagination.

Let’s dive into 10 viral upcycled fashion projects that can give your old clothes a designer makeover — saving money, saving the planet, and turning heads while you’re at it.

1. The Crop Top Makeover: From Boring Tee to Trendy Statement

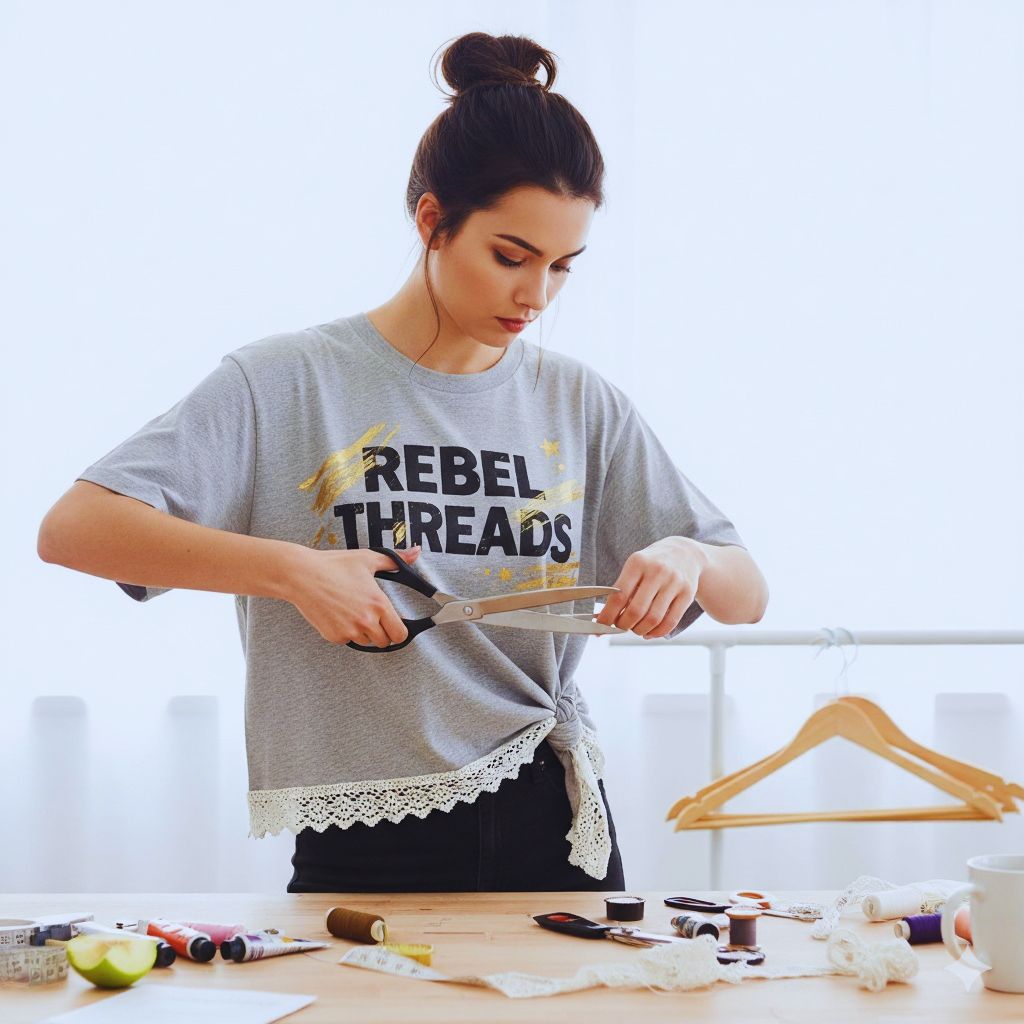
A woman cutting an oversized t-shirt into a crop top with lace and painted slogans, representing DIY upcycling.
“Transform your old tee into a trendy crop top — fast, fun, and fashion-forward.”

That oversized t-shirt buried in your closet? It’s your new fashion statement.

  • Cut it just above the waistline to create a crop top — the easiest and fastest upcycle you’ll ever do.
  • Add tie knots, lace trims, or painted slogans for a streetwear twist.
  • For a designer look, use fabric bleach pens to draw chic patterns or logos.

Pro Tip: Pair your DIY crop top with high-waisted jeans or skirts for an effortless, runway-inspired outfit.

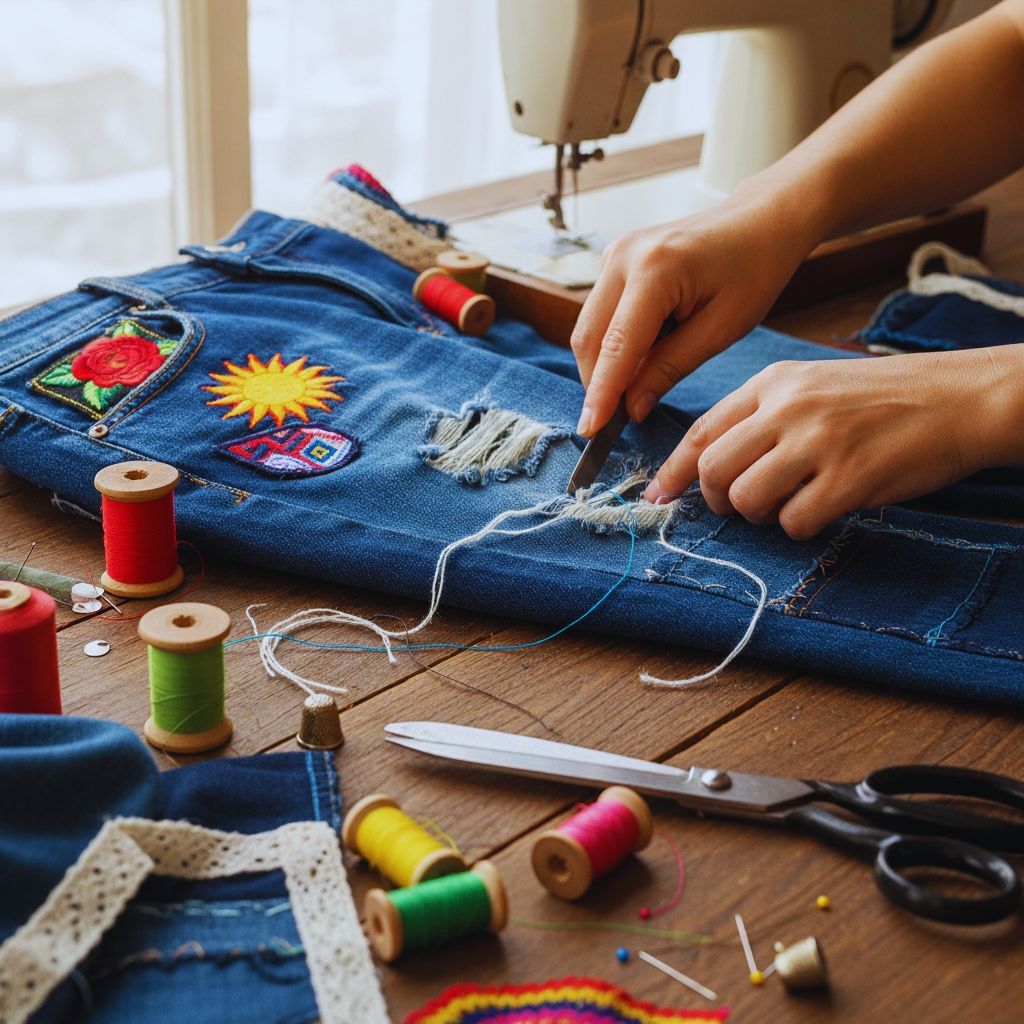
2. Denim Reinvention: Turn Old Jeans into Designer Dreams

Hands distressing and patching denim jeans with colorful fabric pieces, symbolizing denim upcycling.
“Give your old jeans a designer twist — patchwork, distressing, or turning them into chic denim bags.”

Old jeans never die — they just become cooler.

Try these denim upcycling ideas that are going viral on social media:

  • Distressed Jeans: Give your jeans that ripped vintage appeal with the use of a razor or sandpaper.
  • Patchwork Art: Sew colorful patches or old fabric pieces to create a designer patchwork effect.
  • Denim Corset or Bag: Cut and stitch your jeans into a trendy denim corset top or a mini handbag.

Denim is durable and easy to experiment with. You’ll love how your old pair transforms into a high-fashion statement piece.

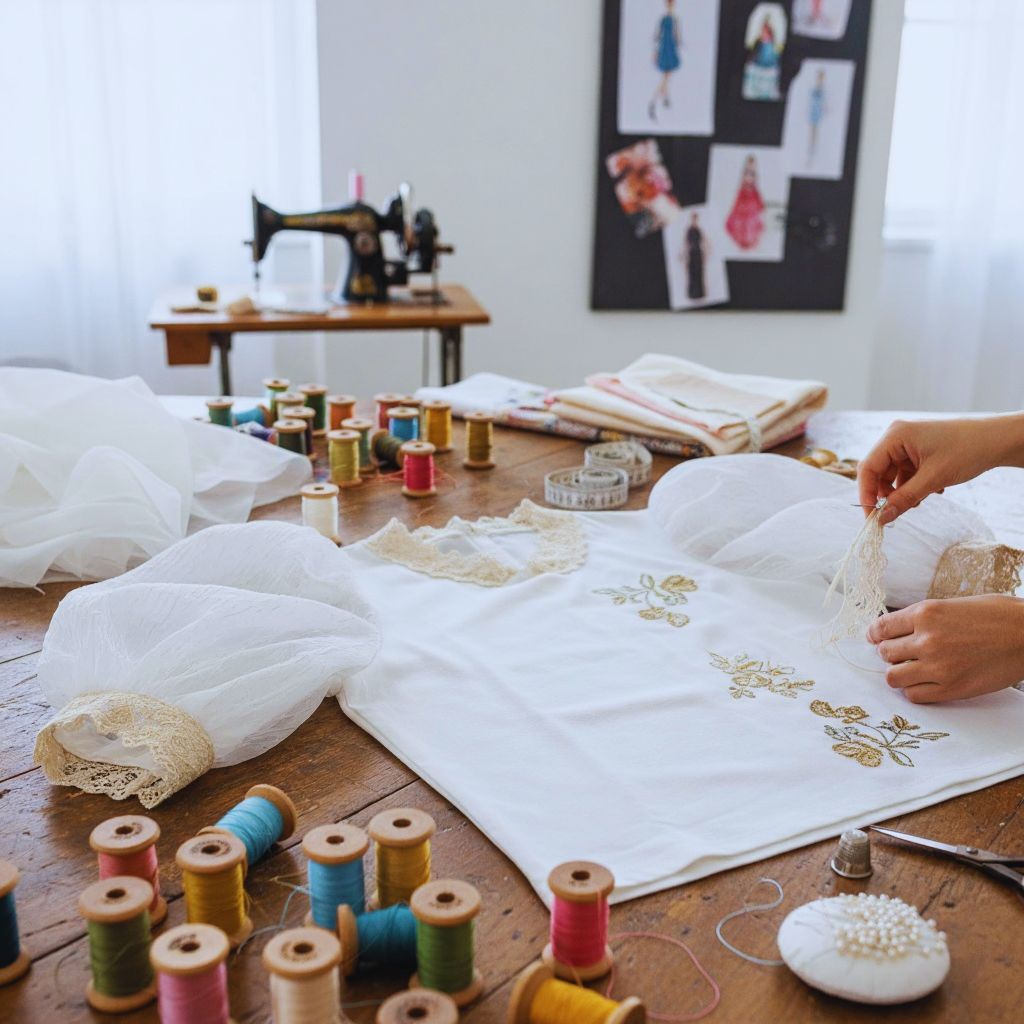
3. Statement Sleeves: Transform Plain Shirts into Runway Pieces

A white blouse with newly added puffed sleeves and lace, symbolizing DIY fashion transformation.
“Turn plain shirts into showstoppers — puffed sleeves, ruffles, and romantic flair.”

Puffed sleeves and ruffles are ruling the fashion world — and you can easily create them.

Here’s how to upcycle your old button-downs or blouses:

  • Cut off the sleeves and reattach them with extra gathered fabric for a dramatic puff effect.
  • Lace, netting, or ruffles on the sleeves create a romantically bohemian effect.
  • Paint or embroider the cuffs for a unique designer detail.

This DIY trick adds instant drama and sophistication — turning something old into something editorial-worthy.

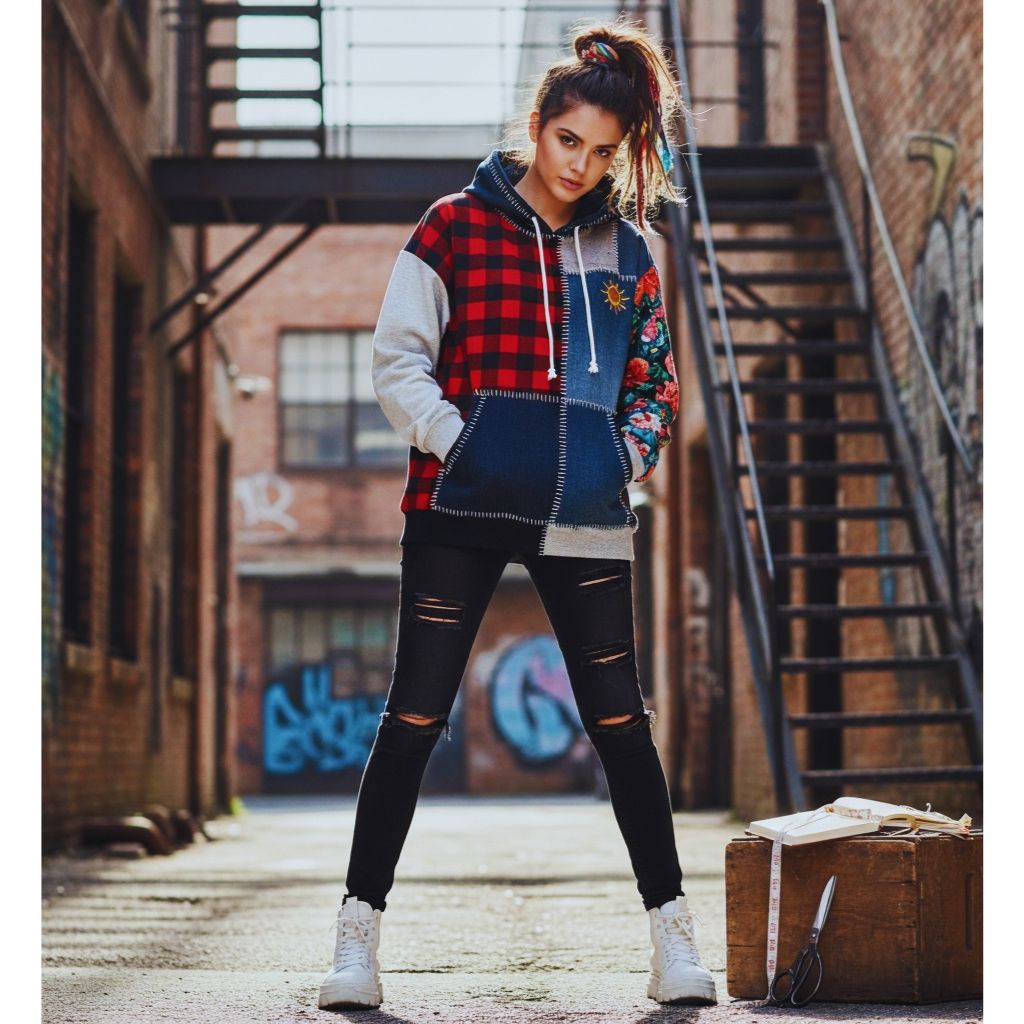
4. The Patchwork Hoodie Trend

A colorful patchwork hoodie made from mixed fabrics, representing DIY streetwear fashion.
“Patchwork perfection — craft your own streetwear masterpiece from old fabrics.”

Patchwork hoodies are all over Instagram-colorful, artistic, and uniquely stylish. Why buy one when you can make your own?

  • Gather scraps from old t-shirts, sweatshirts, or flannels.
  • Cut them into squares or random shapes.
  • Sew or glue them together to form a funky patchwork pattern on your hoodie.

Finish with iron-on patches or embroidery for a streetwear-meets-designer vibe.

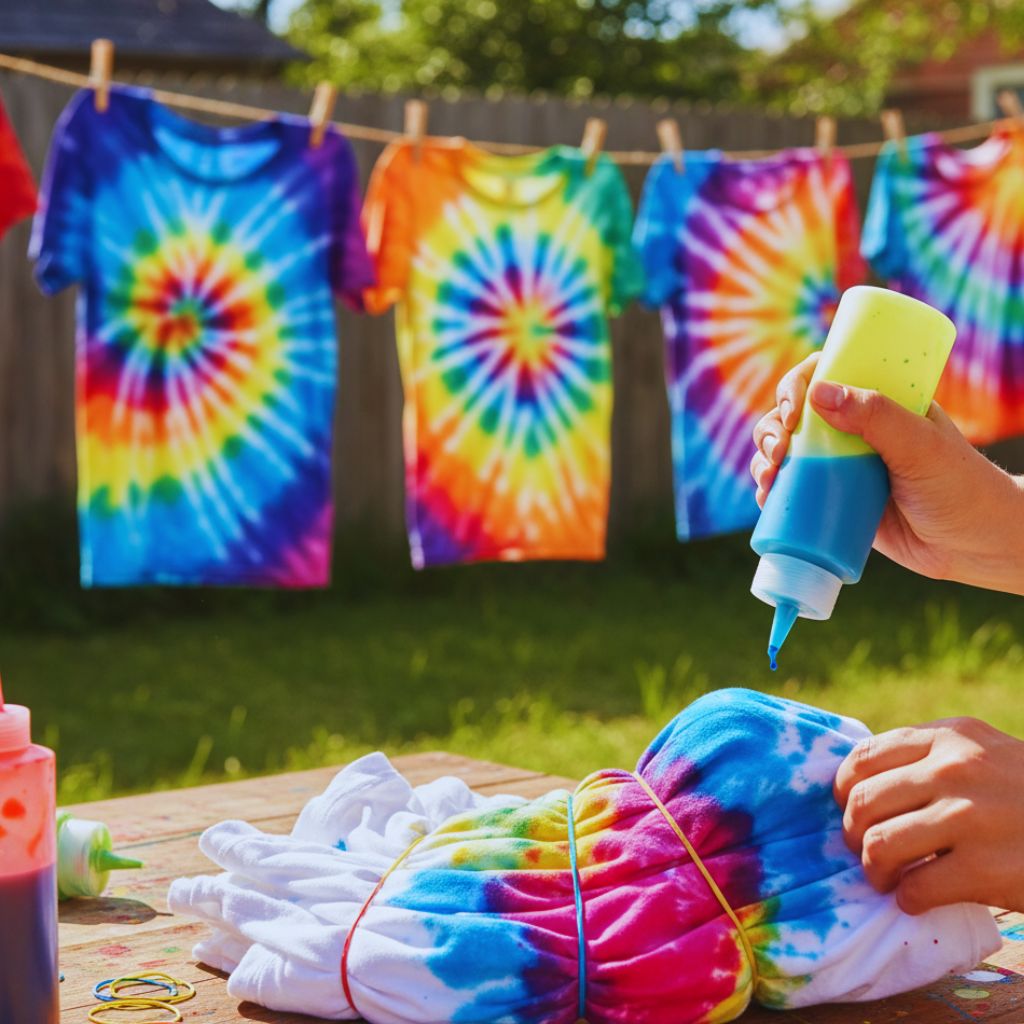
5. Tie-Dye Revival: Classic Technique, Modern Look

Hands applying bright dyes to tied shirts for a colorful tie-dye effect, representing DIY fashion revival.
“Twist, tie, and dye — bring color and creativity back into your wardrobe.”

Tie-dye is back and hotter than ever. The best part? You can never mess it up.

  • Use eco-friendly dyes and rubber bands to twist and tie your old tees, sweatshirts, or dresses.
  • Experiment with color combinations — pastels, neons, or monochromes.
  • Try the ombre or spiral technique for an Instagram-ready finish.

Tie-dye gives any outfit a boho-chic, designer boutique feel that’s perfect for summer festivals or casual outings.

6. The Vintage Denim Jacket Upgrade

A denim jacket adorned with pearls, embroidery, and painted designs, symbolizing a vintage-inspired upcycle.
“Reinvent your denim jacket — from classic staple to couture-inspired statement piece.”

Your old denim jacket has endless potential. Give it a couture makeover with these tricks:

  • Add pearl beads, chains, or studs to the collar and sleeves.
  • Sew on embroidered floral patches or vintage appliqués.
  • Paint the back panel with your favorite art design, quote, or graffiti.

The goal? To make your jacket look like it walked straight off a Gucci or Off-White runway — without spending a dime.

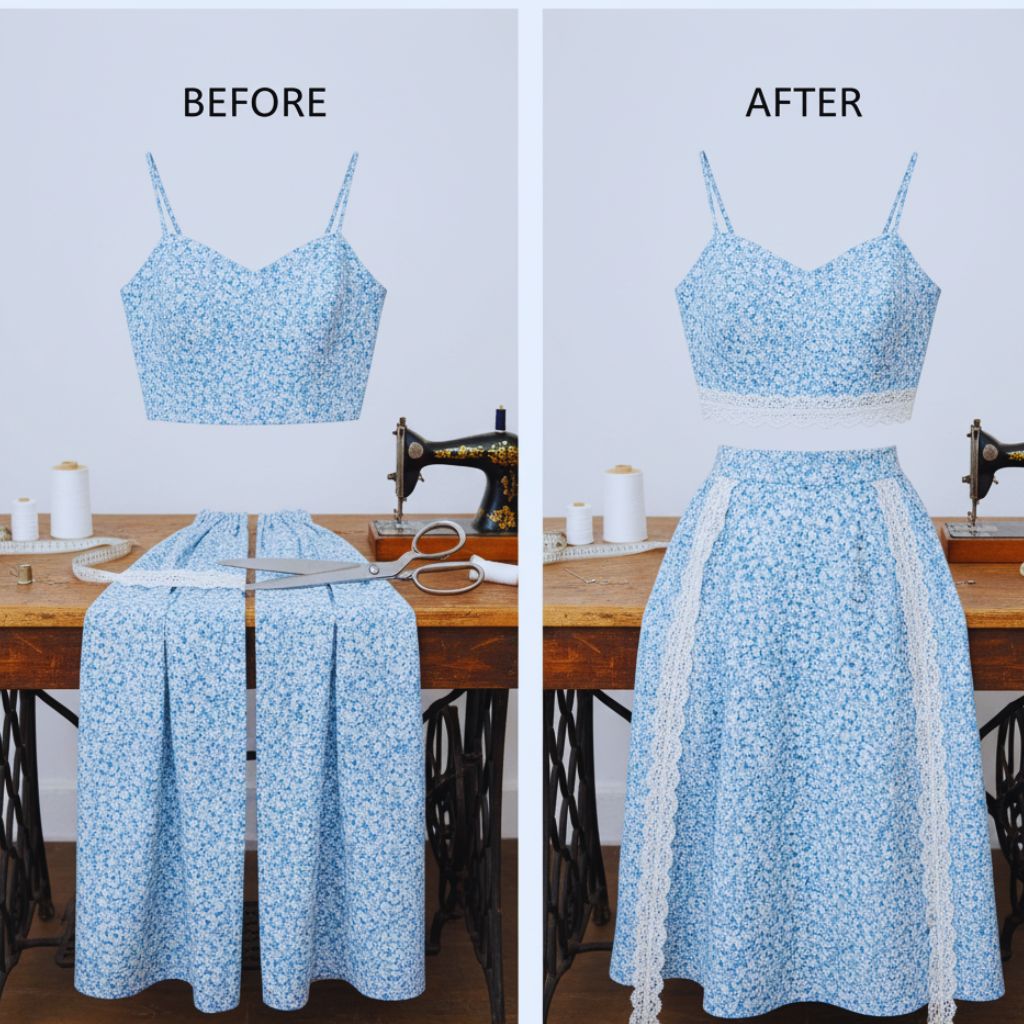
7. Transform Old Dresses into Chic Two-Piece Sets

A woman cutting a dress into a matching two-piece set, symbolizing sustainable fashion transformation.
“One dress, two outfits — turn forgotten fashion into your next viral look.”

That outdated dress at the back of your wardrobe? It’s about to become your next viral outfit.

  • Cut the dress at the waistline to create a two-piece co-ord set.
  • Hem the edges neatly, or use lace trim for a delicate touch.
  • Mix and match — pair the new top with jeans, or the skirt with a crisp shirt.

This simple upcycle gives you multiple outfit options from one forgotten dress. Talk about sustainability in style!

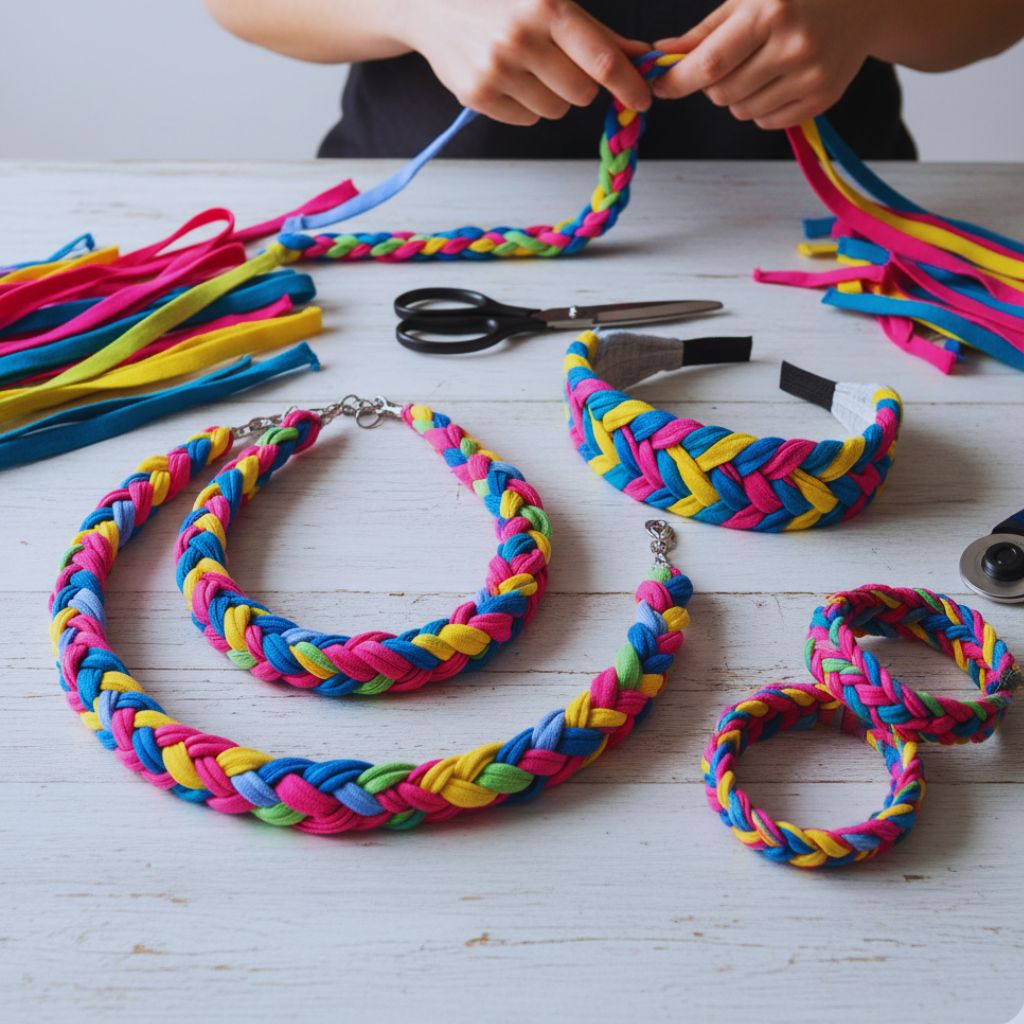
8. T-Shirt Yarn Accessories

Braided t-shirt yarn necklaces and bracelets made from colorful fabric strips.
“Don’t toss it — twist it! Make bold, eco-chic accessories from old t-shirts.”

Old t-shirts can become more than clothing — they can become fashion accessories.

  • Cut t-shirts into long strips and stretch them to make t-shirt yarn.
  • Braid the yarn into necklaces, bracelets, headbands, or even belts.
  • Mix colors for a bold, artistic vibe.

This project is super fun, especially for beginners who want to create DIY eco-friendly fashion accessories.

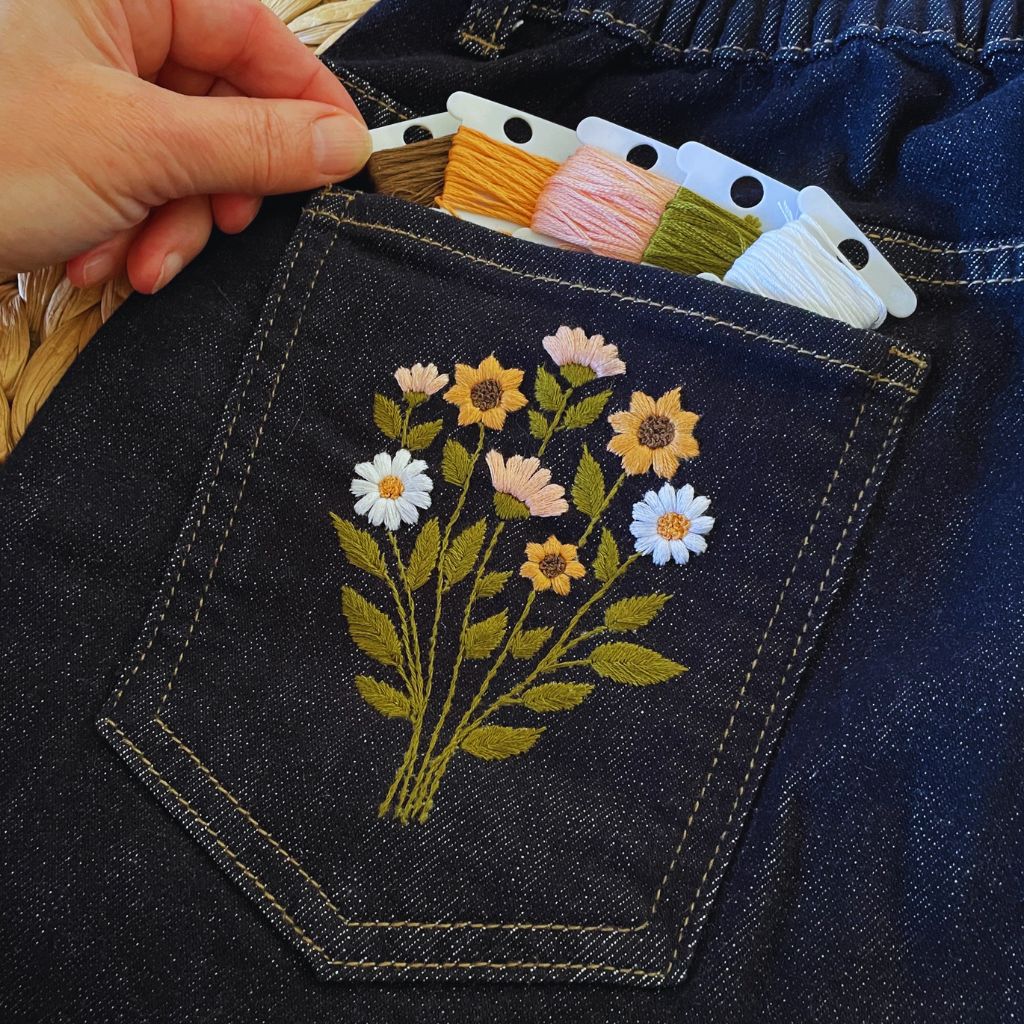
9. Embroidery Magic: Add Art to Your Clothes

Hands embroidering floral patterns on denim, representing creative DIY embroidery fashion.
“Stitch your story — embroidery adds timeless artistry and personal touch to any outfit.”

Embroidery is one of the most timeless ways to upgrade old clothes into artistic statements.

  • Hand-stitch small floral or geometric designs on jeans, shirts, or scarves.
  • Add embroidered text or initials for a personal, designer touch.
  • Use contrasting thread colors to make the design pop.

This not only makes your piece one-of-a-kind but also adds a luxurious handmade feel.

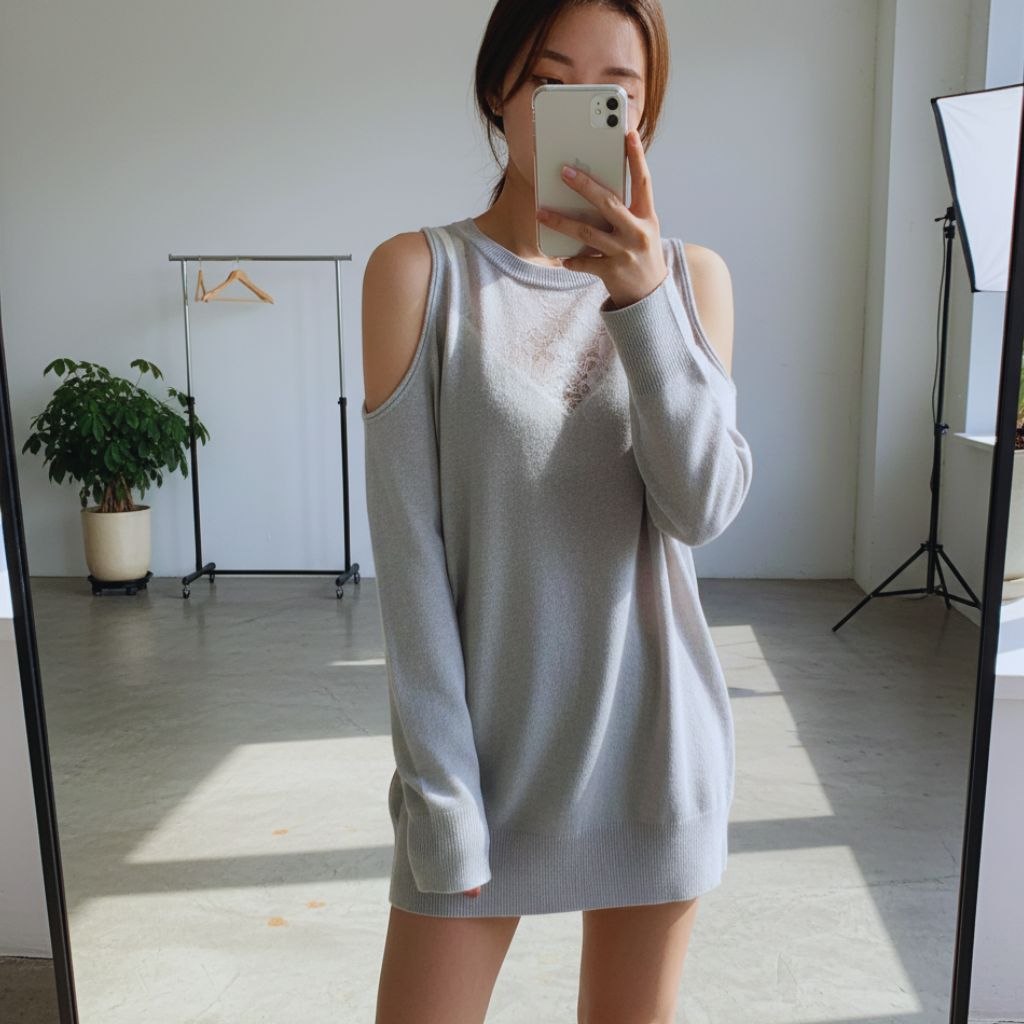
10. The Creative Cut-Out Trend

A woman wearing a cut-out top layered with lace underneath, representing edgy DIY fashion.
edgy designs that turn simple outfits into bold fashion statements.

Want something edgy and modern? The cut-out trend is your go-to.

  • Use scissors to cut strategic holes on the shoulders, back, or sides of tops and dresses.
  • Layer the outfit with a lace bralette or mesh fabric underneath.
  • Experiment with asymmetrical cuts for a runway-inspired aesthetic.

Cut-outs instantly make a simple outfit look expensive, bold, and fashion-forward.

Why DIY Upcycled Fashion Is the Future

Upcycling fashion is more than creativity — it’s conscious living. Because the fashion industry is among the most polluting industries in the world, giving clothes a second life helps reduce waste and save money while promoting individuality.

Here’s why more people are falling in love with DIY fashion projects:

  1. Eco-Friendly: You’re reducing textile waste and promoting sustainable fashion.
  2. Budget-Friendly: Why buy designer when you can create your own?
  3. Unique Style: Every piece you make is 100% yours — no duplicates anywhere.
  4. Therapeutic: The process of cutting, sewing, and designing can be surprisingly relaxing.
  5. Viral Potential: Unique DIY pieces are social media gold. One creative post could go viral!

Tips to Make Your Upcycled Fashion Look Designer-Level

Before you start cutting and stitching, keep these golden tips in mind:

  • Plan first. Visualize your design or sketch it out.
  • Use quality stitching or fabric glue to ensure durability.
  • Add finishing touches like beads, lace, or patches to elevate the look.
  • Stay inspired. Follow DIY fashion creators on Instagram, Pinterest, or TikTok for fresh ideas.

Remember, fashion is an art form — and upcycling lets you be both the artist and the model.

Final Thoughts

Your closet is a treasure chest waiting to be rediscovered. Each old outfit has the potential to become a viral fashion statement — all it takes is creativity, scissors, and a little confidence.

By embracing DIY upcycled fashion, you’re not just saving clothes — you’re saving the planet, expressing your individuality, and inspiring others to do the same.

So, grab that old shirt, snip away, and make something beautiful, sustainable, and uniquely you.

Because fashion with purpose never goes out of style.

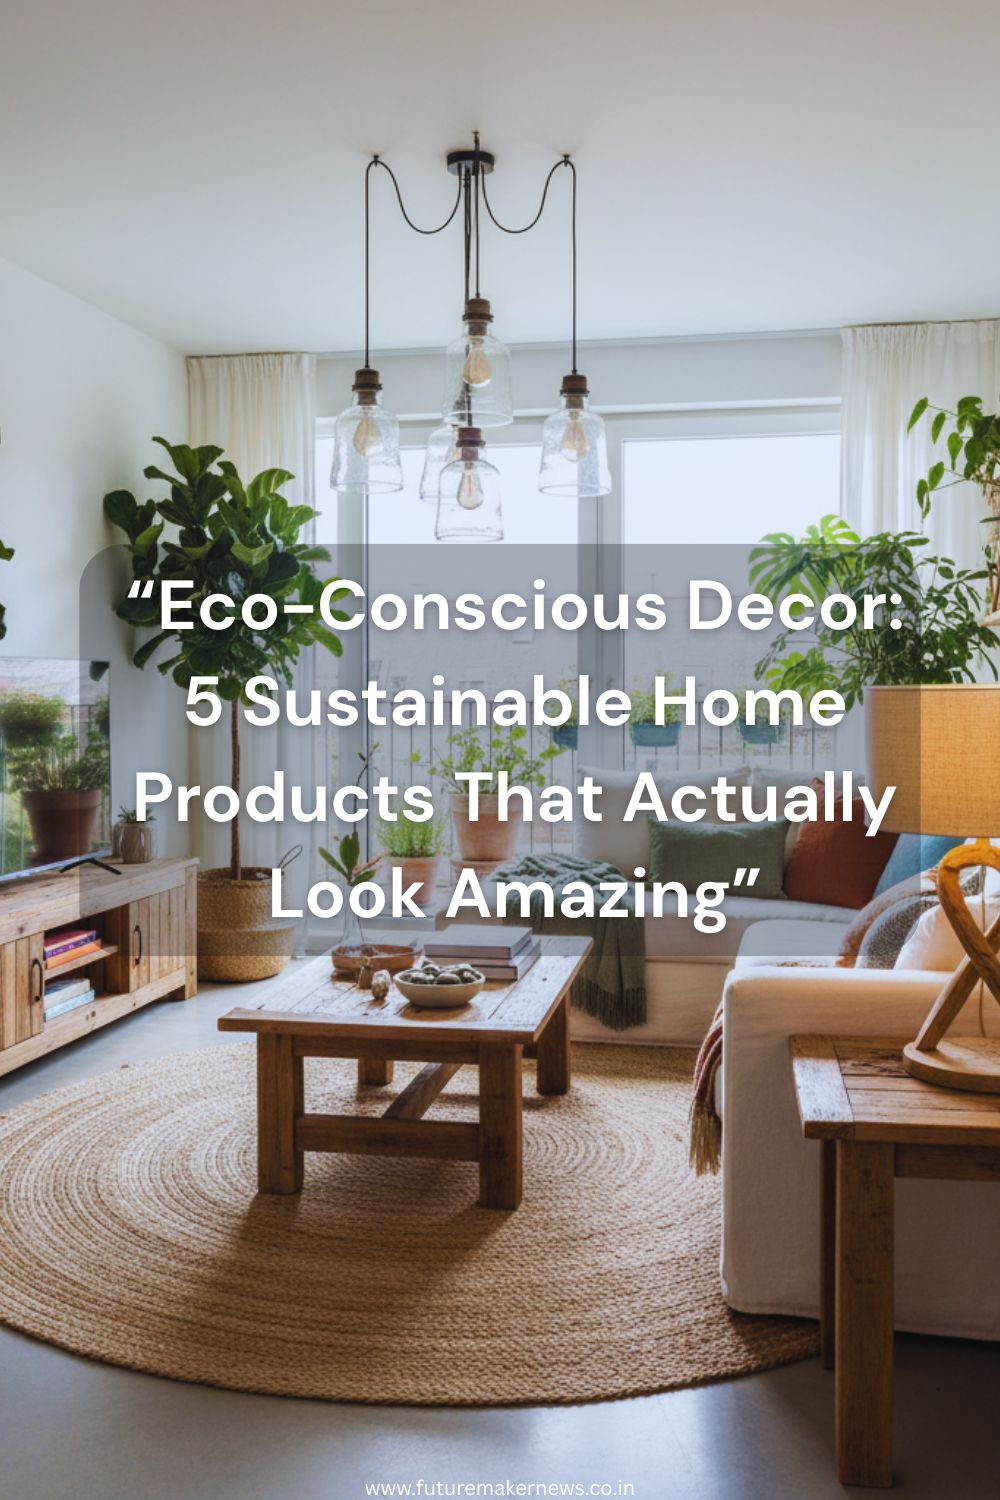
“Modern living room with reclaimed wood furniture, organic cotton textiles, bamboo decor, upcycled lighting, and indoor plants in eco-friendly planters, showcasing elegant sustainable home design.”

Let’s be real — sustainability isn’t just a trend anymore; it’s a lifestyle. And when it comes to designing your dream home, the future of style is eco-conscious decor — where beauty meets responsibility.

Gone are the days when “eco-friendly” meant bland, boring, or rustic-only designs. Today’s sustainable home products are stunning, modern, and crafted to last — helping you reduce waste and carbon footprint without sacrificing style.

If you want to turn your home into a sustainable sanctuary that looks straight out of an interior design magazine, this guide is for you.

Here are 5 eco-conscious home decor pieces that not only help the planet but also make your home look incredible.

1. Reclaimed Wood Furniture — Style With a Story

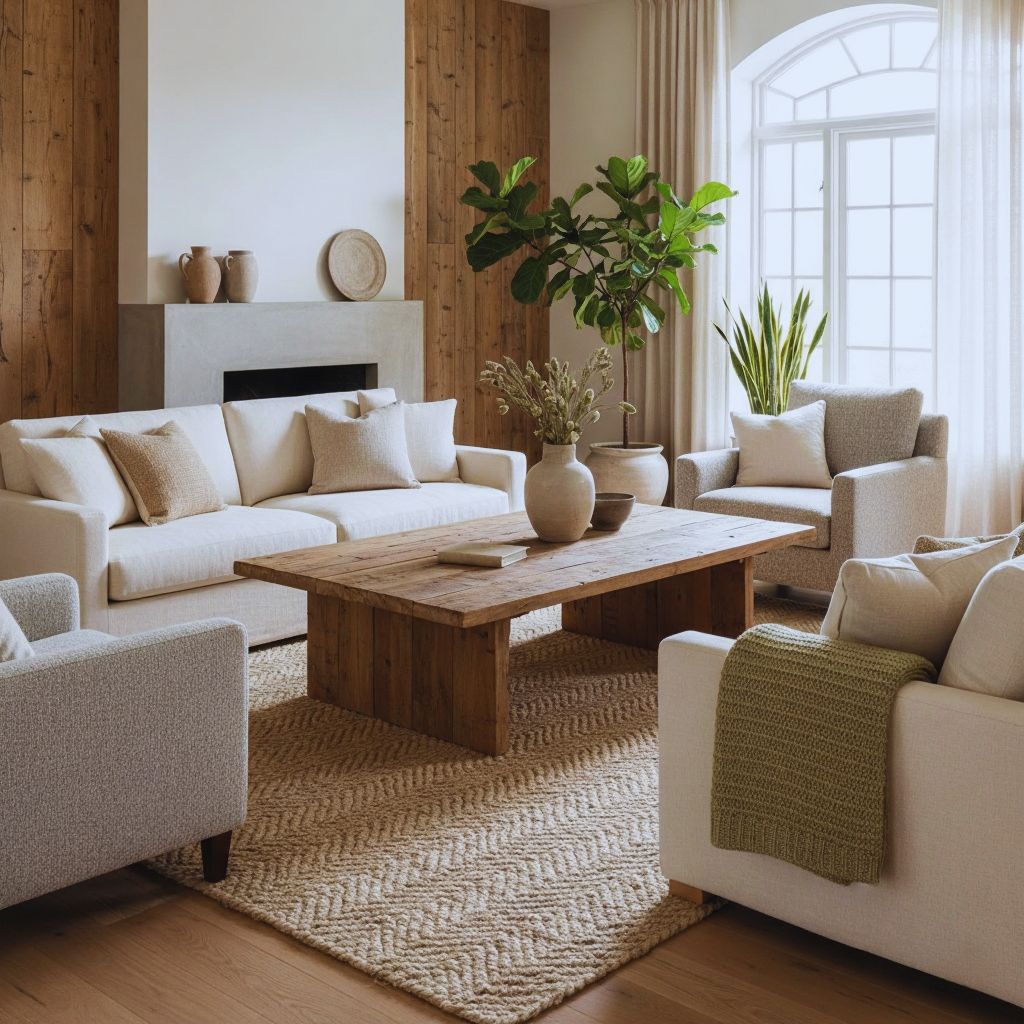
“Living room with reclaimed wood coffee table and neutral decor, showcasing rustic textures and eco-friendly design.”
timeless character, modern sustainability.

There’s something timeless and grounding about reclaimed wood. Every piece tells a story — perhaps from an old barn, a vintage ship deck, or even a historic building.

Why It’s Sustainable:
Reclaimed wood gives new life to materials that would otherwise go to waste. By using it, you help reduce deforestation and lower the demand for new timber.

Why It’s Stylish:

  • Each piece is one-of-a-kind with unique grain patterns and textures.
  • It adds instant warmth, depth, and character to any space.
  • Works beautifully in rustic, modern, and industrial interiors.

2. Organic Cotton Textiles — Soft, Stylish, and Sustainable

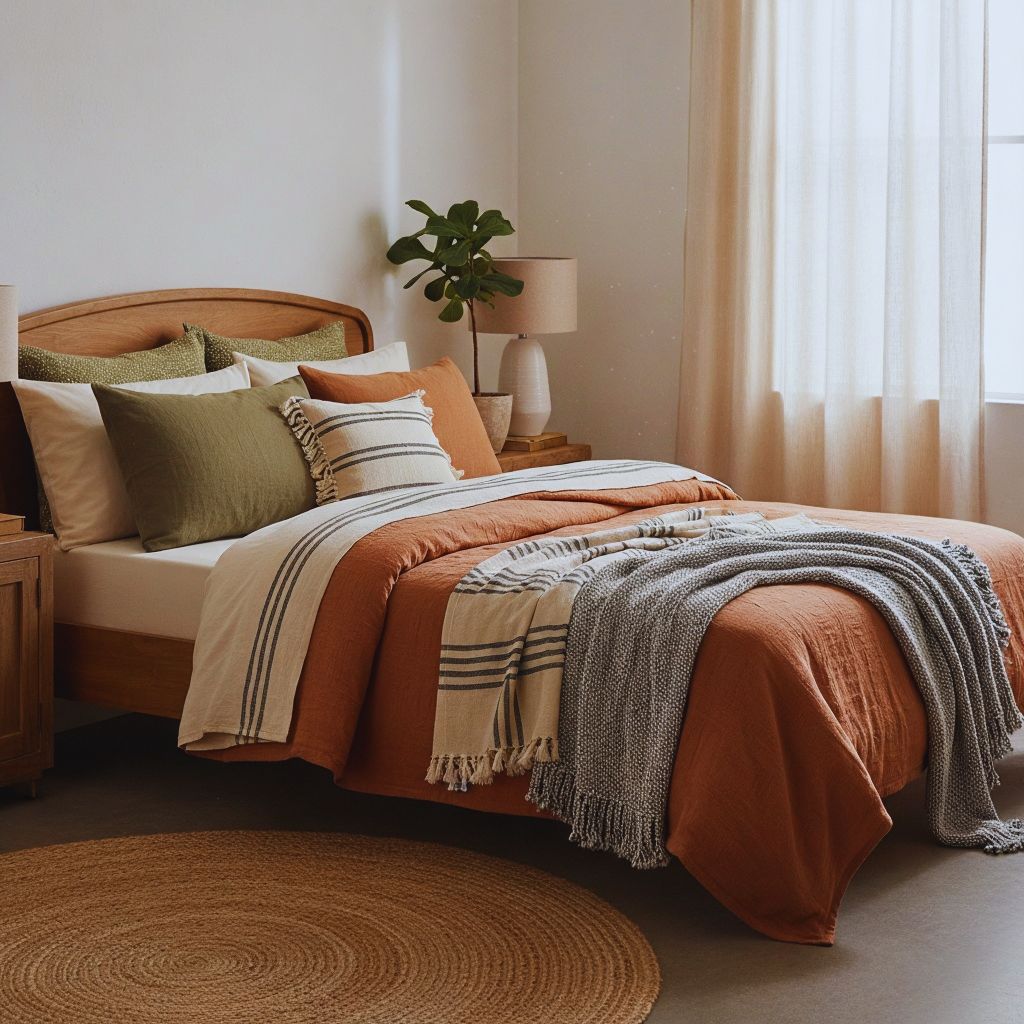
“Bedroom styled with organic cotton bedding, throws, and cushions in earthy tones, emphasizing softness and eco-friendly luxury.”
comfort you can feel good about.

If your goal is to make your home feel luxurious yet planet-friendly, start with your textiles.

Why It’s Sustainable:
Organic cotton is grown without synthetic pesticides or fertilizers, making it better for both the environment and the farmers who produce it. It also consumes less water compared to traditional cotton farming.

Why It’s Stylish:

  • It feels softer and more breathable — perfect for bedding, throws, and cushions.
  • Comes in rich, earthy tones and minimalist designs.
  • Complements every decor style, from boho to modern farmhouse.

3. Bamboo Decor Pieces — Nature’s Powerhouse Material

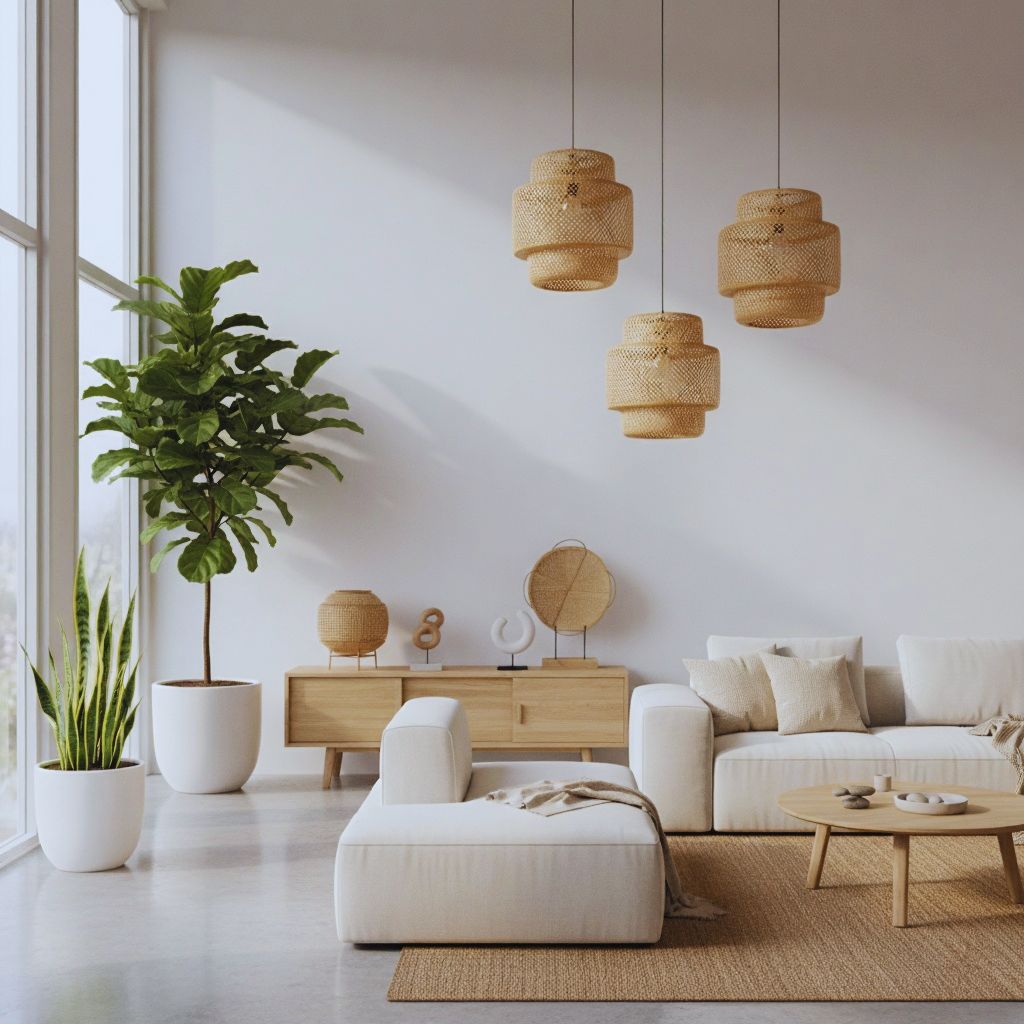
“Modern interior with bamboo pendant lights, planters, and decor pieces in a minimalist neutral setting.”
sleek, strong, and effortlessly sustainable.

If there’s one material that screams sustainability, it’s bamboo. This fast-growing plant regenerates quickly and absorbs more carbon dioxide than most trees — making it a superstar of eco-friendly materials.

Why It’s Sustainable:
Bamboo grows rapidly without pesticides and can be harvested without replanting, making it a highly renewable resource.

Why It’s Stylish:

  • It’s sleek, lightweight, and versatile.
  • Its smooth texture and warm tones blend seamlessly with modern aesthetics.
  • Works for everything from bamboo planters to lighting fixtures and bathroom accessories.

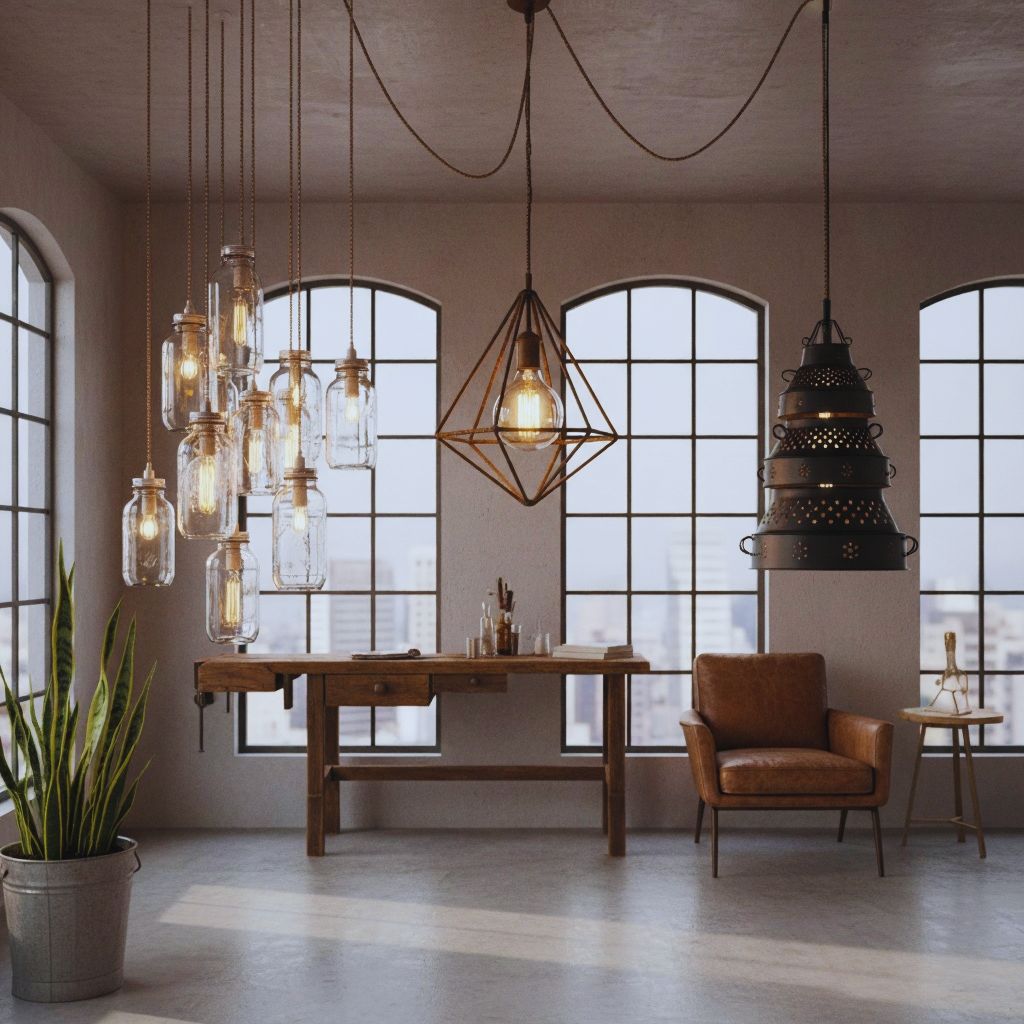
4. Upcycled Lighting — Bright Ideas With a Conscience

“Room featuring pendant lamps made from repurposed materials like glass and metal, representing upcycled eco-friendly lighting.”
“Light up your home with creativity and conscience.”

Lighting can make or break your home’s ambiance — and when you choose upcycled or recycled lighting fixtures, you’re adding more than just illumination; you’re adding purpose.

Why It’s Sustainable:
Upcycling takes discarded materials — like glass bottles, metals, or even wood scraps — and turns them into something completely new and functional. This reduces landfill waste and promotes creative reuse.

Why It’s Stylish:

  • Each piece is unique and tells a creative story.
  • You’ll find everything from industrial-chic lamps to modern minimalist pendants made from repurposed materials.
  • Adds instant personality and eco-charm to your interiors.

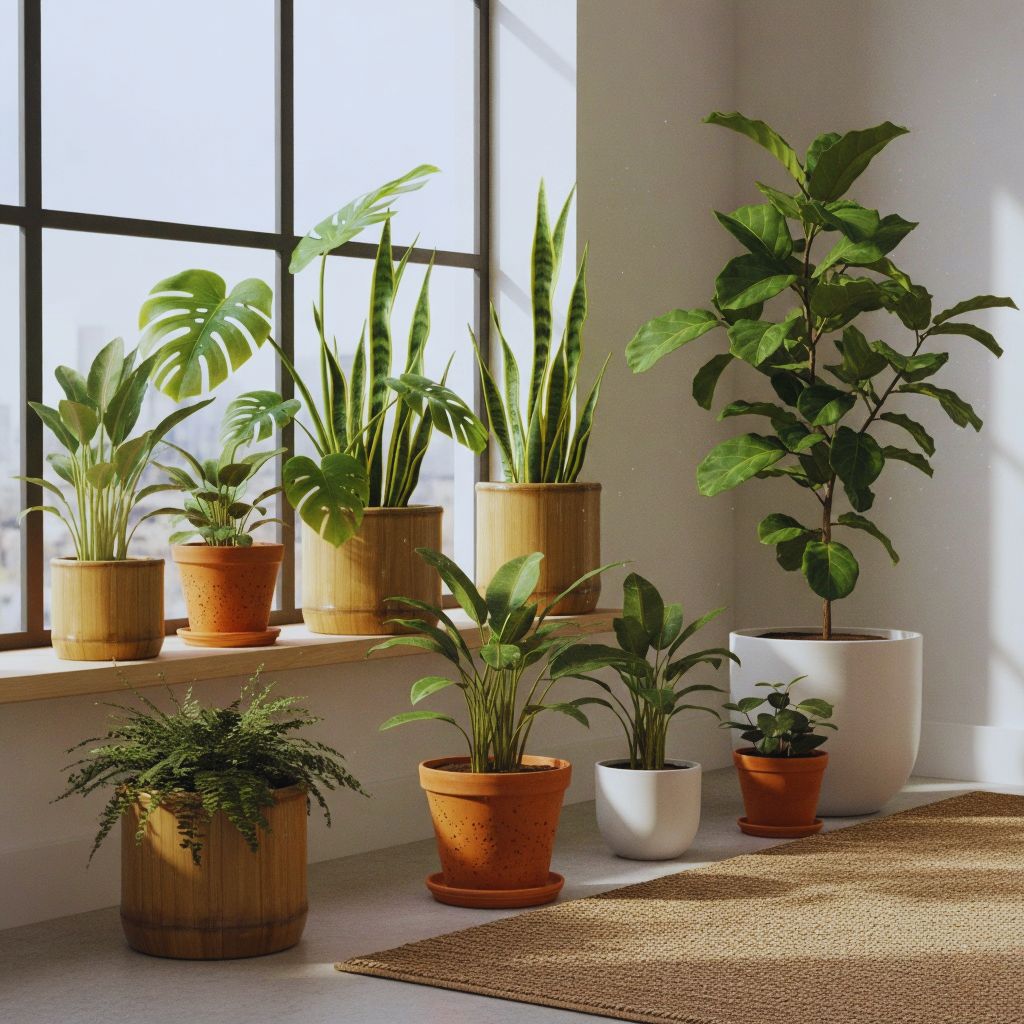
5. Indoor Plants & Eco-Friendly Planters — Natural Beauty That Cleans Your Air

“Indoor plants in eco-friendly terracotta and bamboo planters by a sunlit window, symbolizing natural and sustainable home decor.”
“Breathe easy — nature’s best decor cleans your air and lifts your mood.”

No eco-conscious home is complete without greenery. Plants not only beautify your space but also help purify the air — a win-win for your health and the planet.

Why It’s Sustainable:
Plants improve indoor air quality, reduce toxins, and connect you with nature — promoting mental well-being and calm. Using eco-friendly planters made from recycled materials or biodegradable fibers further enhances sustainability.

Why It’s Stylish:

  • Plants instantly make your home feel more alive and inviting.
  • They fit any style — from minimal Scandinavian to lush tropical.
  • Eco-friendly pots made from terracotta, bamboo fiber, or recycled plastic look just as good as traditional ones — sometimes even better!

Bonus: 3 Easy Ways to Make Your Decor More Eco-Friendly

You don’t have to overhaul your entire home to live sustainably. Small, intentional changes go a long way:

  1. Buy less, choose well. Focus on quality, durable pieces instead of fast-decor trends that wear out quickly.
  2. Shop local and handmade. Supporting artisans and small brands reduces your carbon footprint and encourages craftsmanship.
  3. Repurpose and refresh. Before throwing things out, think: can this be painted, refinished, or reused in another room?

Sustainability isn’t about perfection — it’s about progress. Each eco-friendly choice adds up, making your home and the planet healthier.

Final Thoughts: Sustainable Living Never Looked So Good

Your home should reflect your values — and with eco-conscious decor, you get to express your style and make a positive impact.

Whether it’s a reclaimed wood table that tells a story, a bamboo lamp that glows softly in your living room, or organic cotton sheets that wrap you in comfort — every choice counts.

Sustainability is not about giving up beauty; it’s about redefining it. The most beautiful spaces today are those built with intention, purpose, and planet-friendly design.

So, as you redesign your space, remember:
Every eco-friendly product you choose is a step toward a greener, more elegant home — one that looks amazing and feels even better.

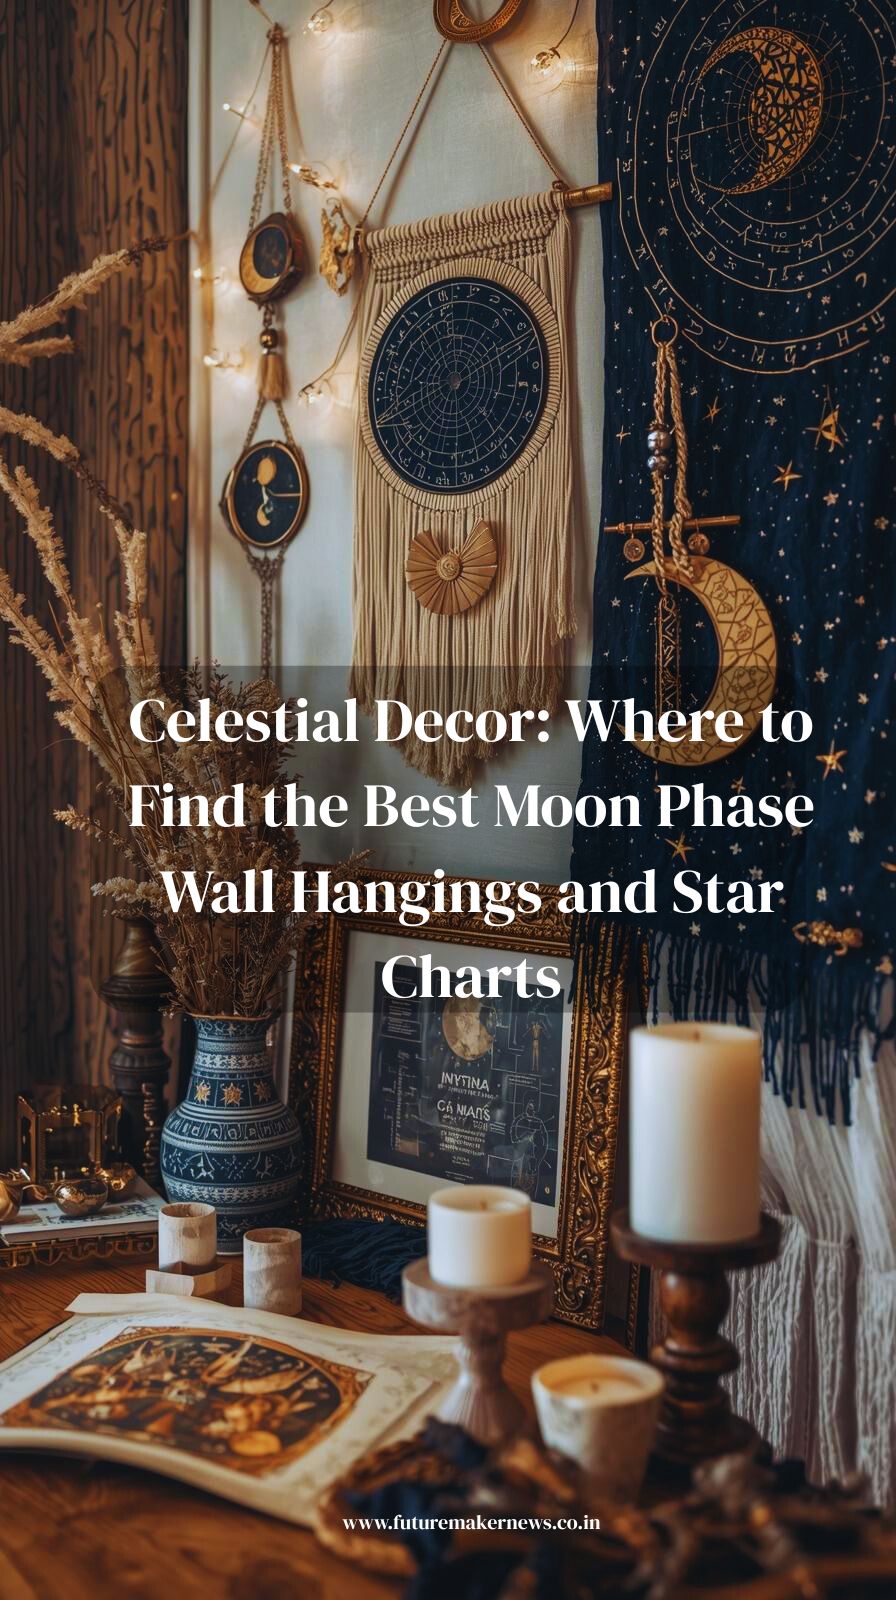
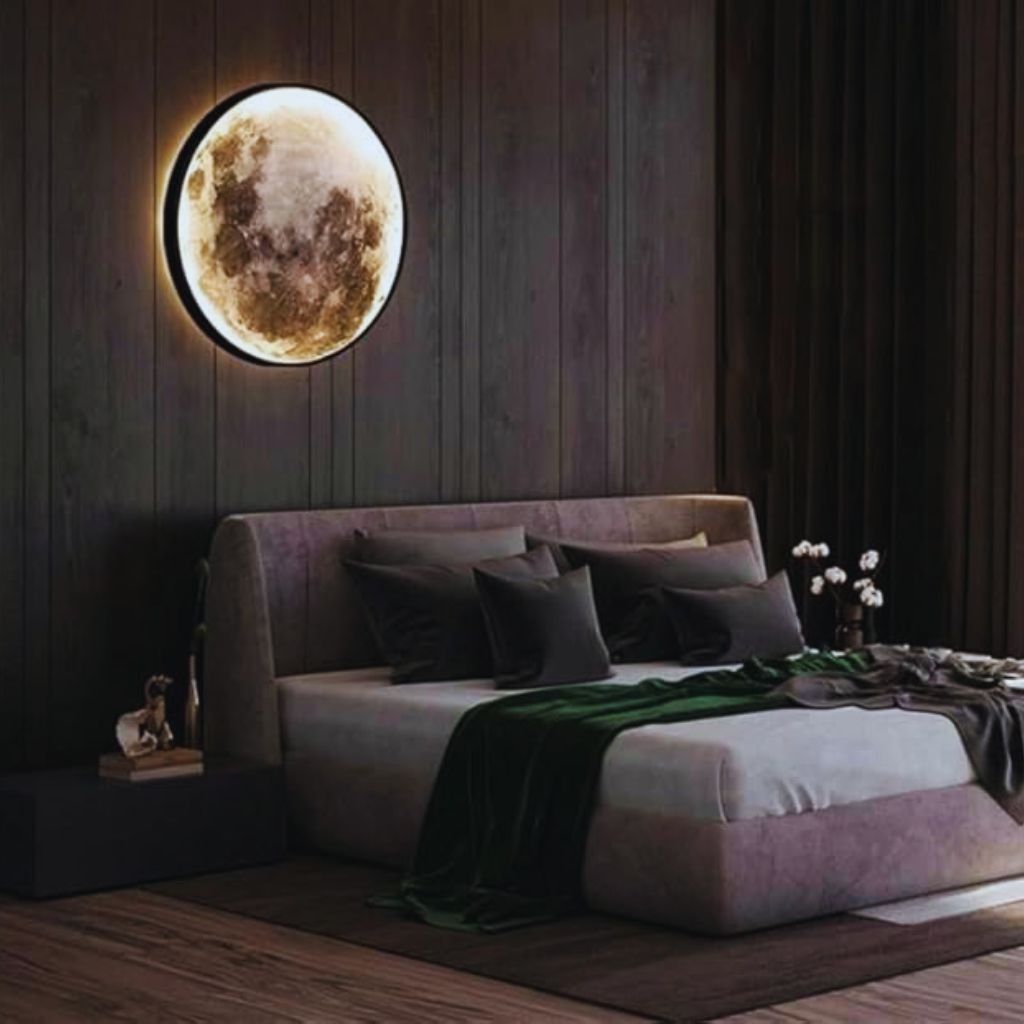
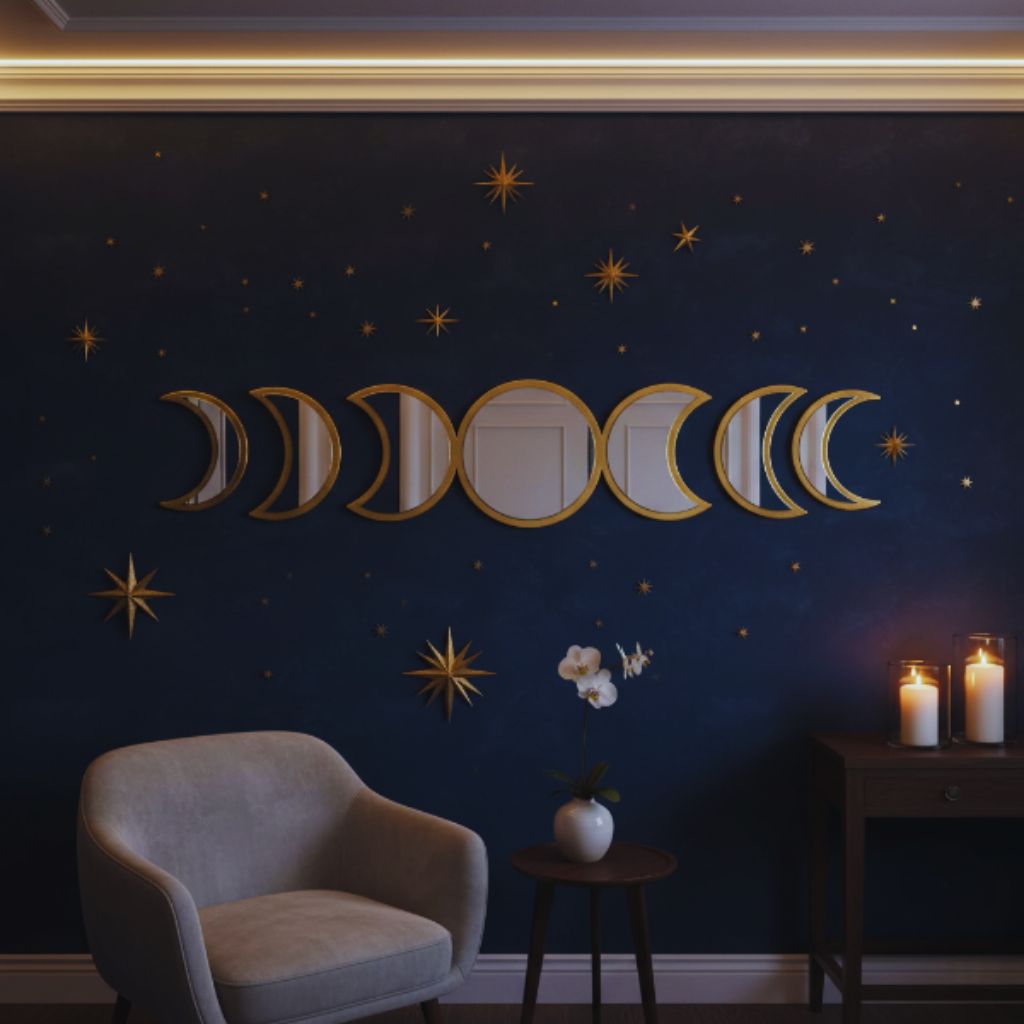
“Boho living room featuring moon phase wall hangings and star charts illuminated by fairy lights.”

Are you captivated by the night sky — the soft glow of the moon, the mysterious constellations, and the endless wonder of stars that sparkle like diamonds above us? If so, celestial decor might be exactly what your home or workspace needs.

In recent years, moon phase wall hangings and star charts have become some of the most enchanting and meaningful home decor trends. They don’t just beautify your walls; they tell a story — a story of time, nature, and the universe’s magical rhythm.

Whether you’re an astrology lover, a stargazer, or simply someone who appreciates aesthetic design, celestial wall art brings a touch of cosmic mystery into your space. Let’s explore everything about this rising trend — from the best moon phase decor ideas to where you can find the most stunning star maps online.

Why Celestial Decor Is So Popular

The fascination with celestial decor isn’t just a passing trend — it’s a timeless celebration of our connection to the universe. People have always looked to the sky for inspiration, guidance, and beauty.

Here’s why moon and star wall art has captured so many hearts:

  • Spiritual Meaning – The moon symbolizes cycles, change, and emotional energy. Having moon phase wall art can remind us to stay in tune with nature’s rhythm.
  • Calming Aesthetic – Celestial tones like deep navy, gold, silver, and white create a soothing atmosphere — perfect for bedrooms, meditation spaces, or living rooms.
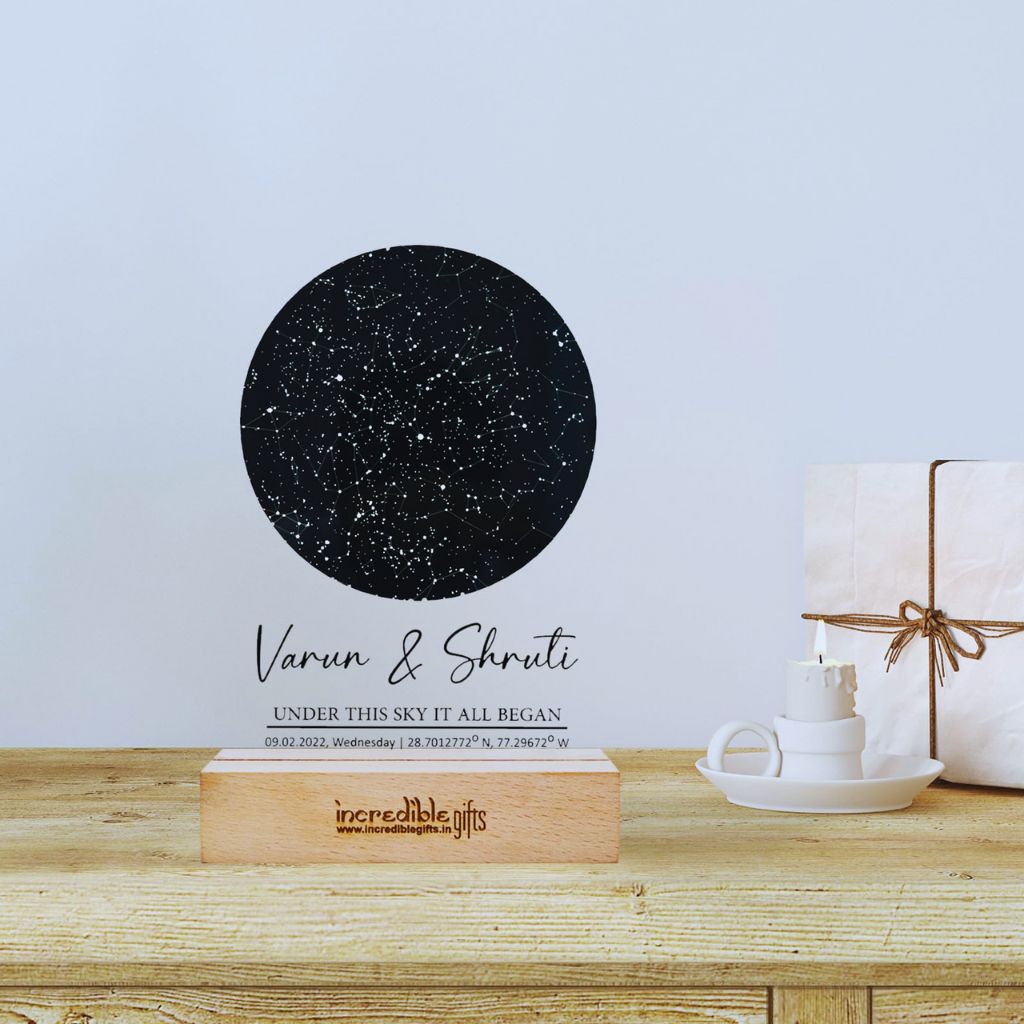
  • Personal Connection – A custom star chart that shows the night sky from your birthday or wedding day makes for a deeply meaningful keepsake.
  • Timeless Elegance – Celestial themes never go out of style. They blend perfectly with boho, modern, minimalist, or rustic interiors.

Whether you’re drawn to the mystical moon, the sparkling stars, or the astrological symbols, celestial decor brings a sense of wonder and harmony to any space.

The Magic of Moon Phase Wall Hangings

Among all celestial decor items, moon phase wall hangings stand out for their symbolism and elegance. These art pieces display the different phases of the moon — from the new moon to the full moon — often crafted in metal, wood, or macramé.

Symbolism of Moon Phases

Each phase of the moon has a spiritual and emotional meaning:

  1. New Moon – New beginnings and fresh starts.
  2. Waxing Crescent – Growth and intention setting.
  3. First Quarter – Challenges and decision-making.
  4. Waxing Gibbous – Refinement and focus.
  5. Full Moon – Fulfillment and abundance.
  6. Waning Gibbous – Gratitude and reflection.
  7. Last Quarter – Release and forgiveness.
  8. Waning Crescent – Rest and renewal.

When you display a moon phase wall hanging, you’re not just decorating — you’re inviting this cosmic energy into your home.

Styles of Moon Phase Decor

Moon phase hangings come in various materials and designs, each offering a unique vibe:

  • Metal Moon Phase Garlands – Sleek and minimalistic, perfect for modern interiors.
  • Wooden Moon Phase Panels – Earthy and rustic, ideal for boho or farmhouse-style homes.
  • Macramé Moon Phase Tapestries – Soft and handmade, great for cozy corners or bedrooms.
  • Resin or Crystal Moon Phases – For a touch of sparkle and healing energy.

Hang them above your bed, near your workspace, or in a meditation area — anywhere you want a reminder of balance and natural flow.

The Beauty and Meaning of Star Charts

While moon phases represent time and cycles, star charts capture a precise moment — the exact position of the stars at a specific date and location.

Imagine looking at a beautifully framed star map showing the sky as it appeared the night you were born, got married, or achieved a major milestone. It’s both scientific and sentimental.

Why People Love Star Maps

Highly Personal – Each star map is unique, based on a real astronomical alignment.

Perfect for Gifting – Star charts make heartfelt gifts for birthdays, anniversaries, or baby showers.

Educational and Artistic – They teach you about constellations while serving as elegant wall decor.

Customizable Designs – Choose your color, layout, and typography to match your home’s theme.

Whether displayed in a sleek black frame or printed on canvas, a custom star chart is a conversation starter and a daily reminder of a cherished moment in time.

Best Places to Find Moon Phase Wall Hangings & Star Charts

When it comes to celestial decor, quality and authenticity matter. Here are some of the best sources where you can find moon phase wall hangings, star maps, and other cosmic treasures:

1. Etsy

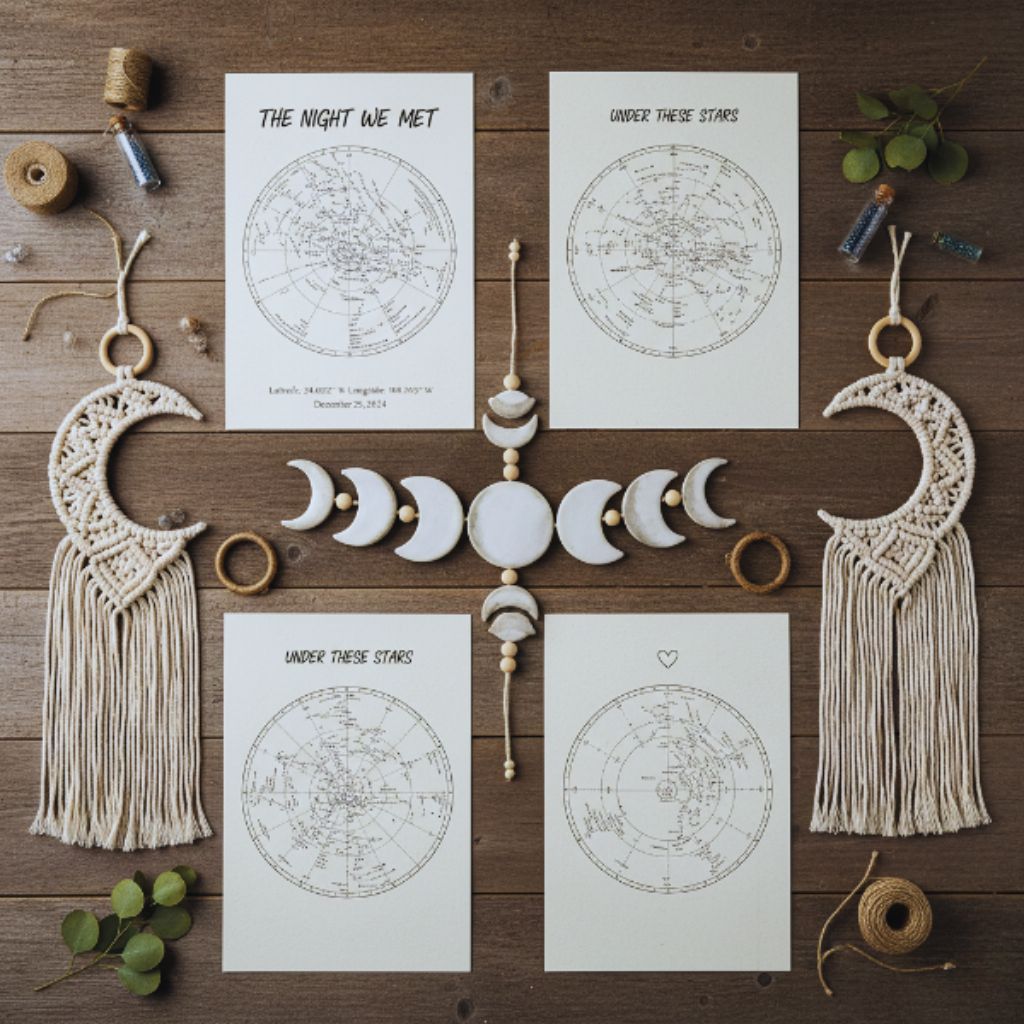
“Handcrafted moon phase garlands and personalized star map posters from Etsy artisans.”
“Etsy — the perfect place to find handmade moon phase wall art and custom star maps.”

If you love handmade or customizable decor, Etsy is a celestial paradise. You’ll find:

  • Handcrafted wooden moon phase garlands
  • Personalized star map posters
  • Macramé boho moon hangings
  • Unique metal wall sculptures

Most sellers offer custom designs, so you can add names, dates, or quotes for a truly personal touch.

2. Amazon

“Bedroom with moon phase wall mirrors, LED moon lamp, and constellation wall art from Amazon.”
“Explore Amazon’s wide range of celestial decor — from LED moon lamps to constellation wall art.”

For those who prefer quick shipping and wide variety, Amazon has an incredible range of celestial wall art. Look for:

  • Moon phase wall mirrors
  • Star constellation prints
  • LED moon lamps
  • Canvas star maps

Pro Tip: Search for “celestial wall decor” or “moon and star wall art” to explore trendy collections.

3. Society6 and Redbubble

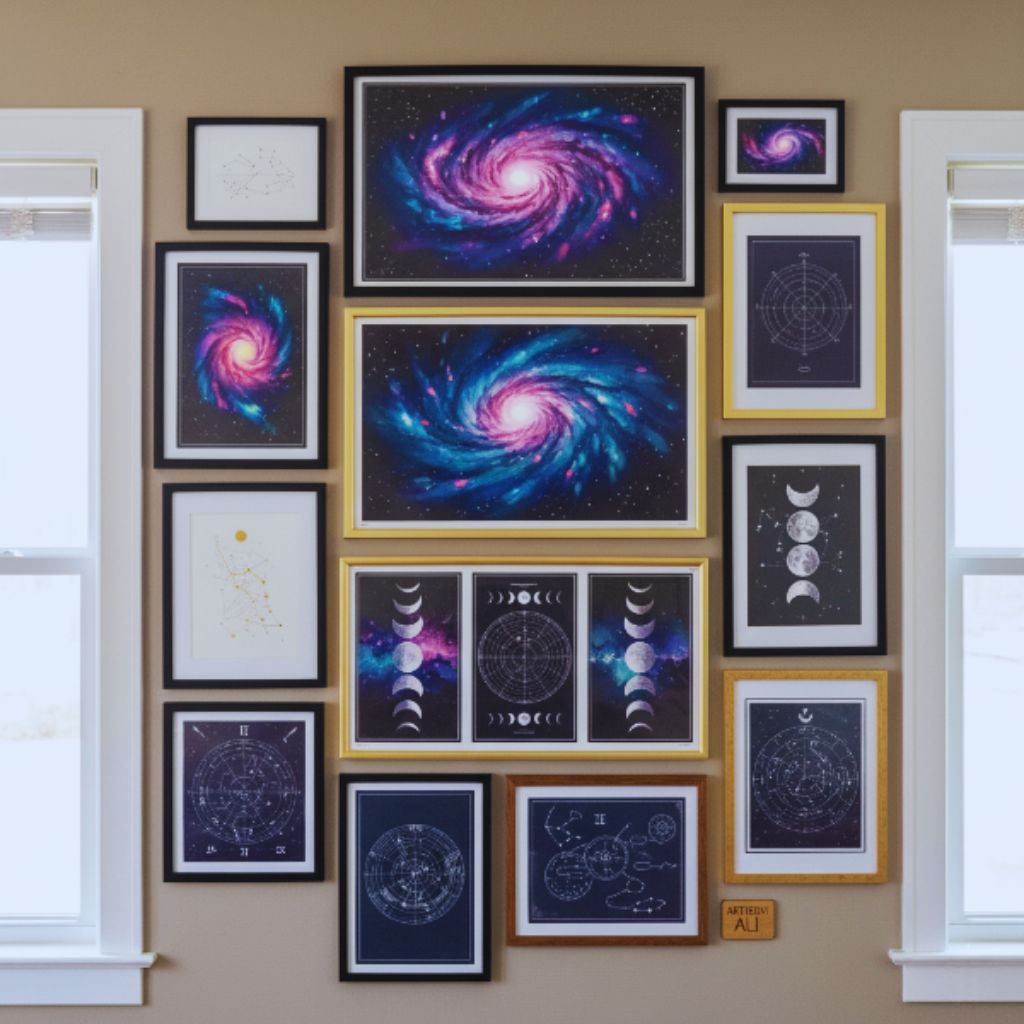
“Celestial gallery wall with galaxy illustrations and lunar cycle posters from independent artists.”
“Discover cosmic creativity on Society6 and Redbubble — art that celebrates the universe.”

These platforms feature artwork from independent creators worldwide. You’ll find artistic interpretations of:

  • Lunar cycles
  • Astronomical maps
  • Galaxy illustrations
  • Constellation designs

Their products include wall art, tapestries, posters, and even home accessories like throw pillows and blankets.

4. Uncommon Goods

“Personalized star map and moon phase clock from Uncommon Goods on a minimalist shelf.”
“Uncommon Goods offers unique, meaningful celestial decor — perfect for thoughtful gifting.”

If you want high-quality and meaningful decor, Uncommon Goods offers stunning personalized star maps, moon phase clocks, and celestial-themed gifts. Every item feels unique and thoughtfully designed.

5. Local Artisans or Boutiques

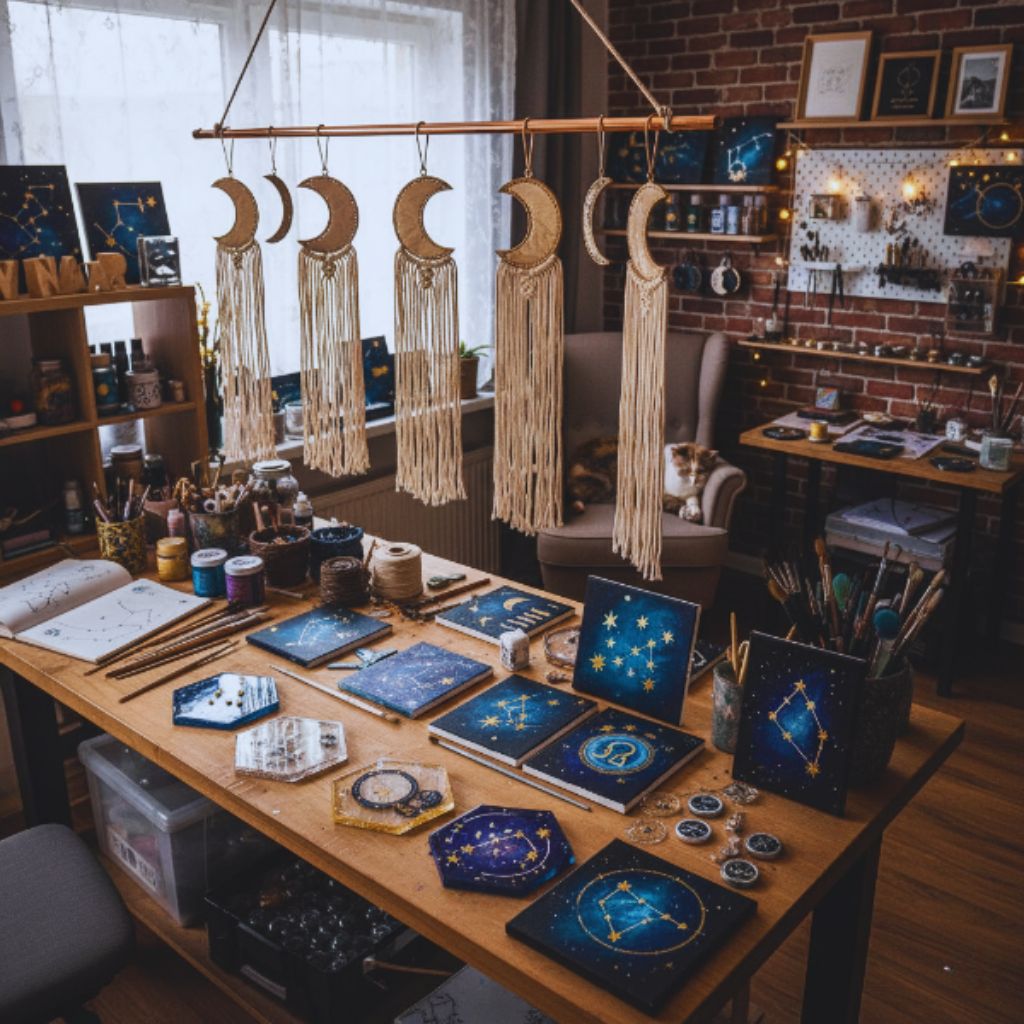
“Local artisan crafting moon phase wall decor and celestial-inspired artwork.”
“Support local creators and find one-of-a-kind celestial art pieces that tell a story.”

Don’t underestimate local creativity! Many small art shops or Instagram creators specialize in celestial-inspired handmade crafts. Buying from them not only supports local talent but also adds authenticity to your decor.

Tips for Decorating with Celestial Wall Art

Want your moon phase wall hangings and star charts to truly shine? Here are some creative ways to style them:

1. Create a Celestial Gallery Wall

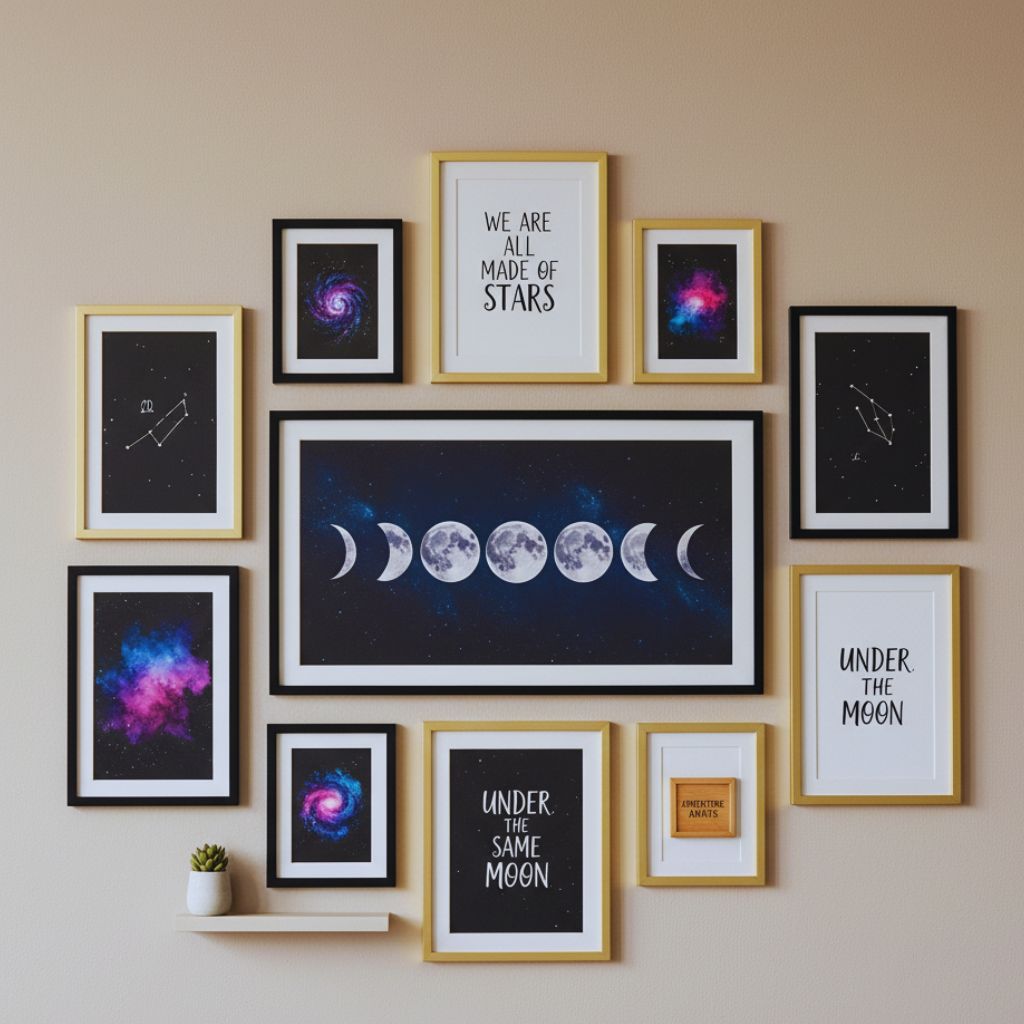
“Gallery wall featuring moon phase and constellation art in gold and navy frames.”
“Mix moon phases, constellations, and quotes to create your own celestial gallery.”

Combine different cosmic elements — moon phases, constellations, star maps, and celestial quotes — into one gallery. Use black, gold, and navy frames for an elegant touch.

2. Add Lighting Magic

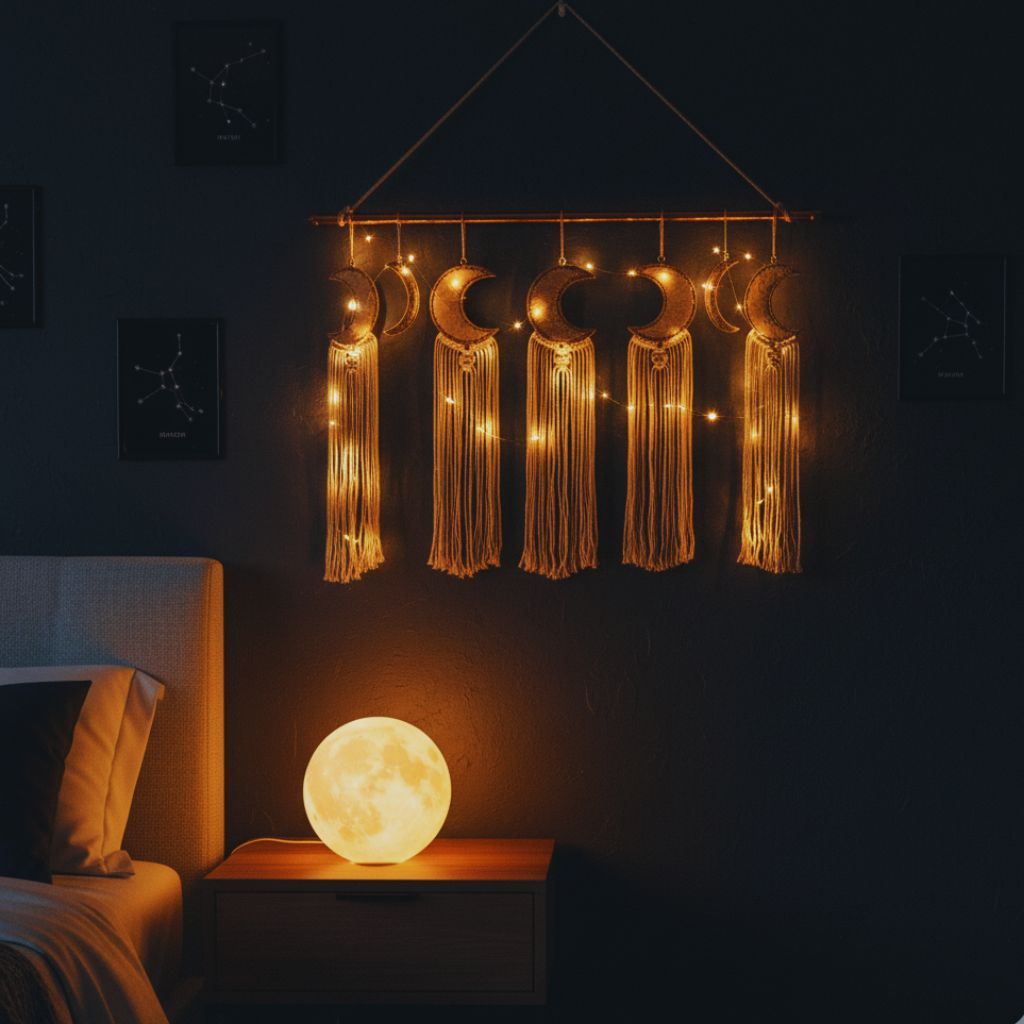
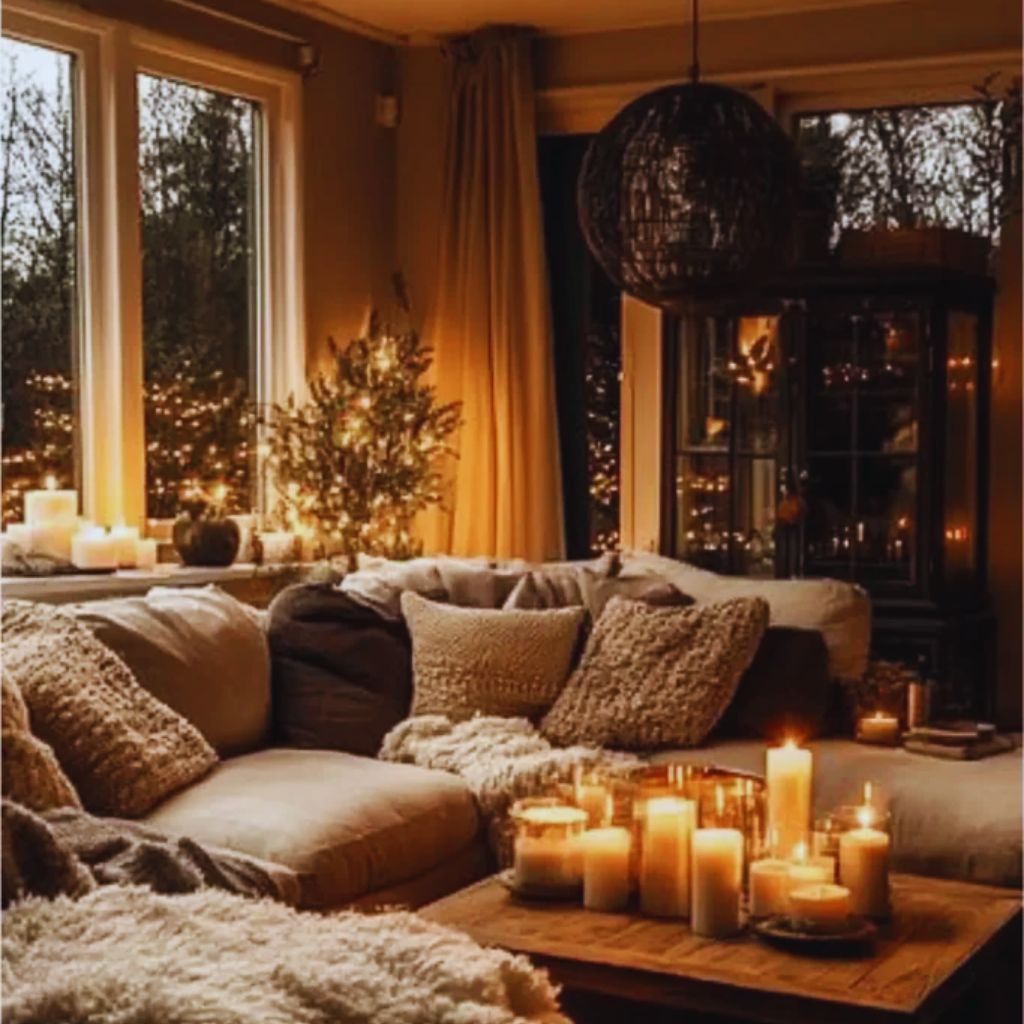
“Moon phase decor illuminated by fairy lights and a glowing moon lamp.”
“Use lighting to enhance the ethereal beauty of your celestial decor.”

Enhance the glow with fairy lights, LED moon lamps, or soft ambient lighting. The interplay of light and shadow enhances the mystical vibe.

3. Match with Natural Elements

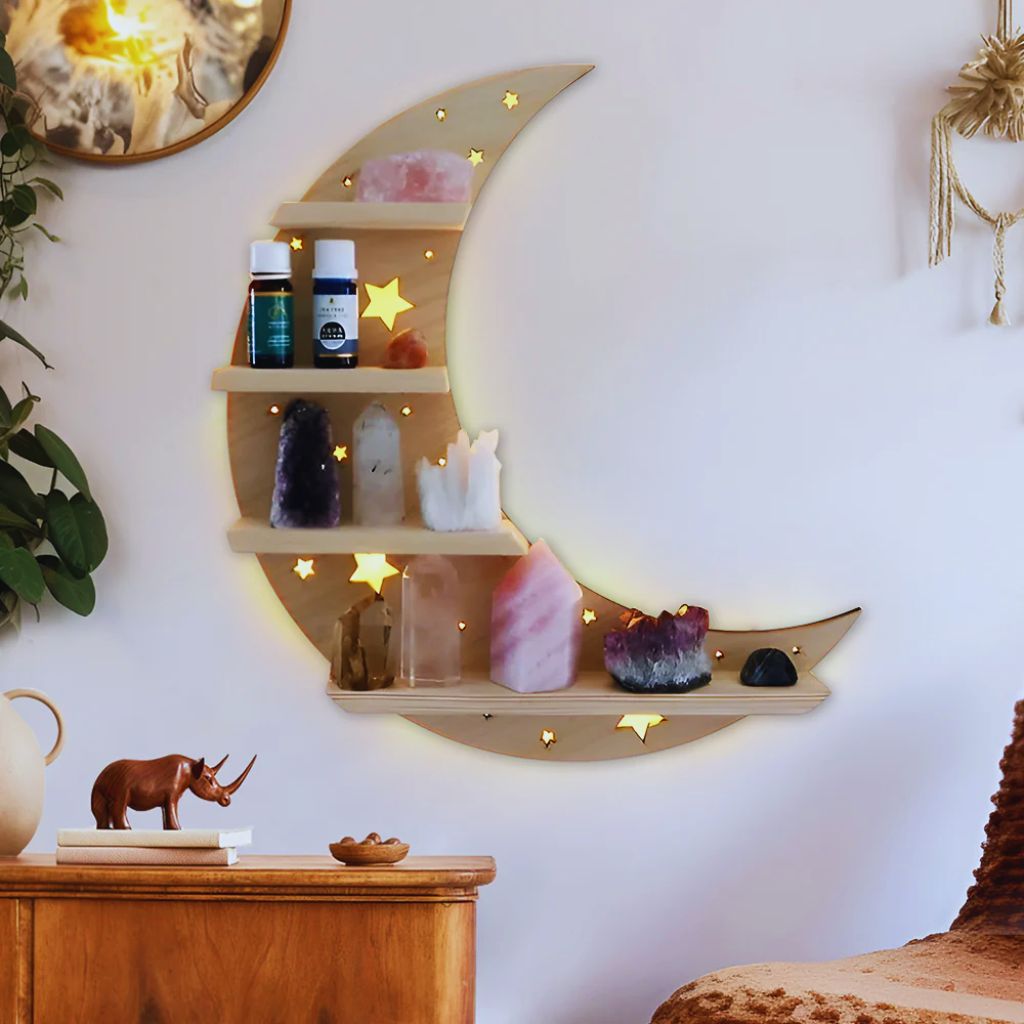
“Moon phase wall hanging styled with crystals, wood textures, and greenery.”
“Balance the cosmos with nature — pair celestial art with wood, crystals, and plants.”

Complement your celestial decor with crystals, plants, and wooden textures. They create a perfect harmony between earth and sky.

4. Use in Meditation or Relaxation Spaces

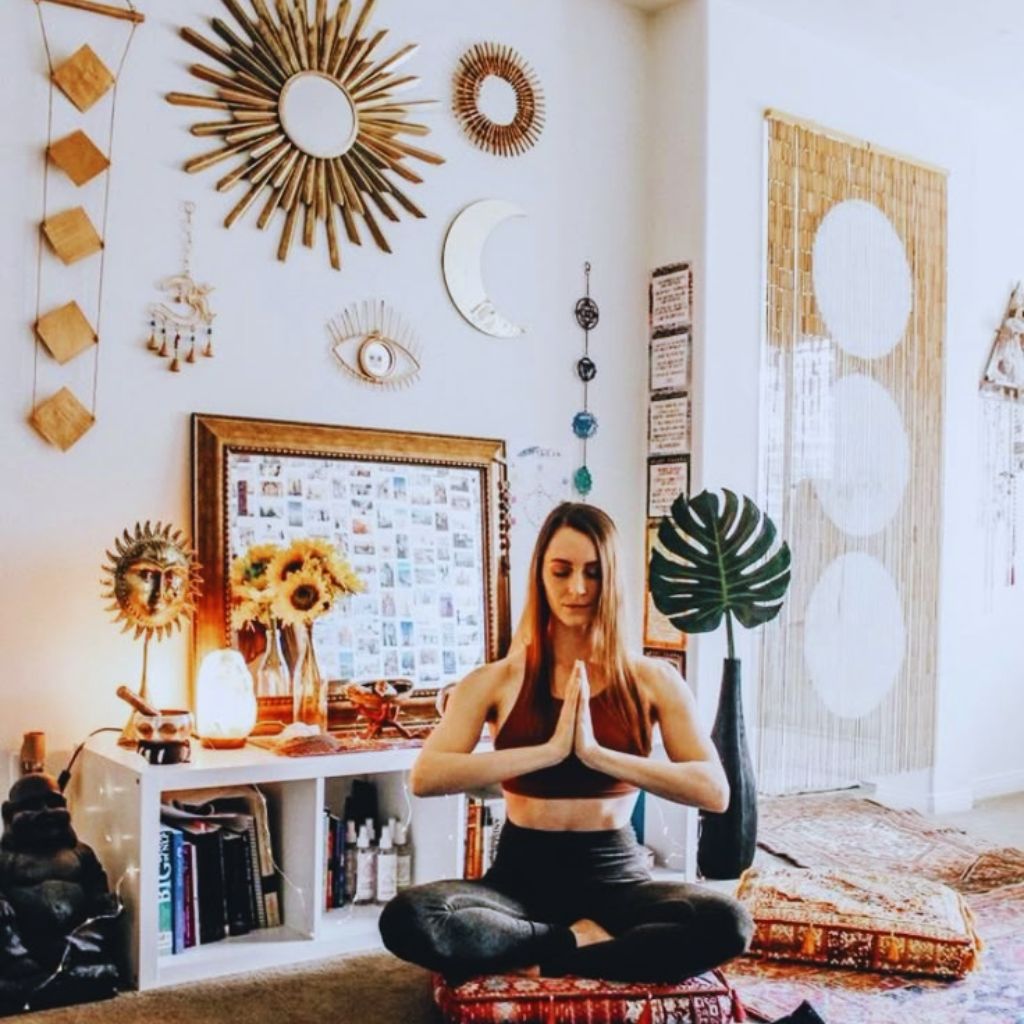
“Yoga and meditation space decorated with moon phase wall art and candles.”
“Let celestial art bring calm and focus to your meditation or yoga space.”

Celestial art enhances calmness and focus, making it perfect for yoga corners or reading nooks.

5. Pair with Mirrors and Metallic Accents

“Moon phase mirrors and metallic gold accents reflecting soft ambient light in a celestial-themed room.”
“Amplify the cosmic charm — pair celestial decor with mirrors and metallic accents.”

Mirrors reflect light and amplify space, while metallic gold or silver accents add luxury to the cosmic theme.

DIY Celestial Decor Ideas

If you enjoy crafting, try making your own moon phase wall art or constellation paintings.

  • Paint moon phases on wooden discs and hang them with twine.
  • Use glow-in-the-dark paint to create constellations on a canvas.
  • Print your own star chart using free online tools and frame it beautifully.

DIY projects not only save money but also let you infuse personal energy into your home decor.

Final Thoughts: Bring the Universe Home

The universe is vast, mysterious, and infinitely beautiful — and through celestial decor, we can bring a piece of that magic into our daily lives.

Moon phase wall hangings remind us of cycles and change. Star charts connect us to special moments frozen in time. Together, they create an environment that’s both aesthetic and meaningful.

Whether you choose a handcrafted boho moon garland, a sleek modern star map, or a gallery of celestial prints, your walls will glow with cosmic charm.
So look up at the night sky, get inspired, and start decorating — because your home deserves to shine like the stars above.

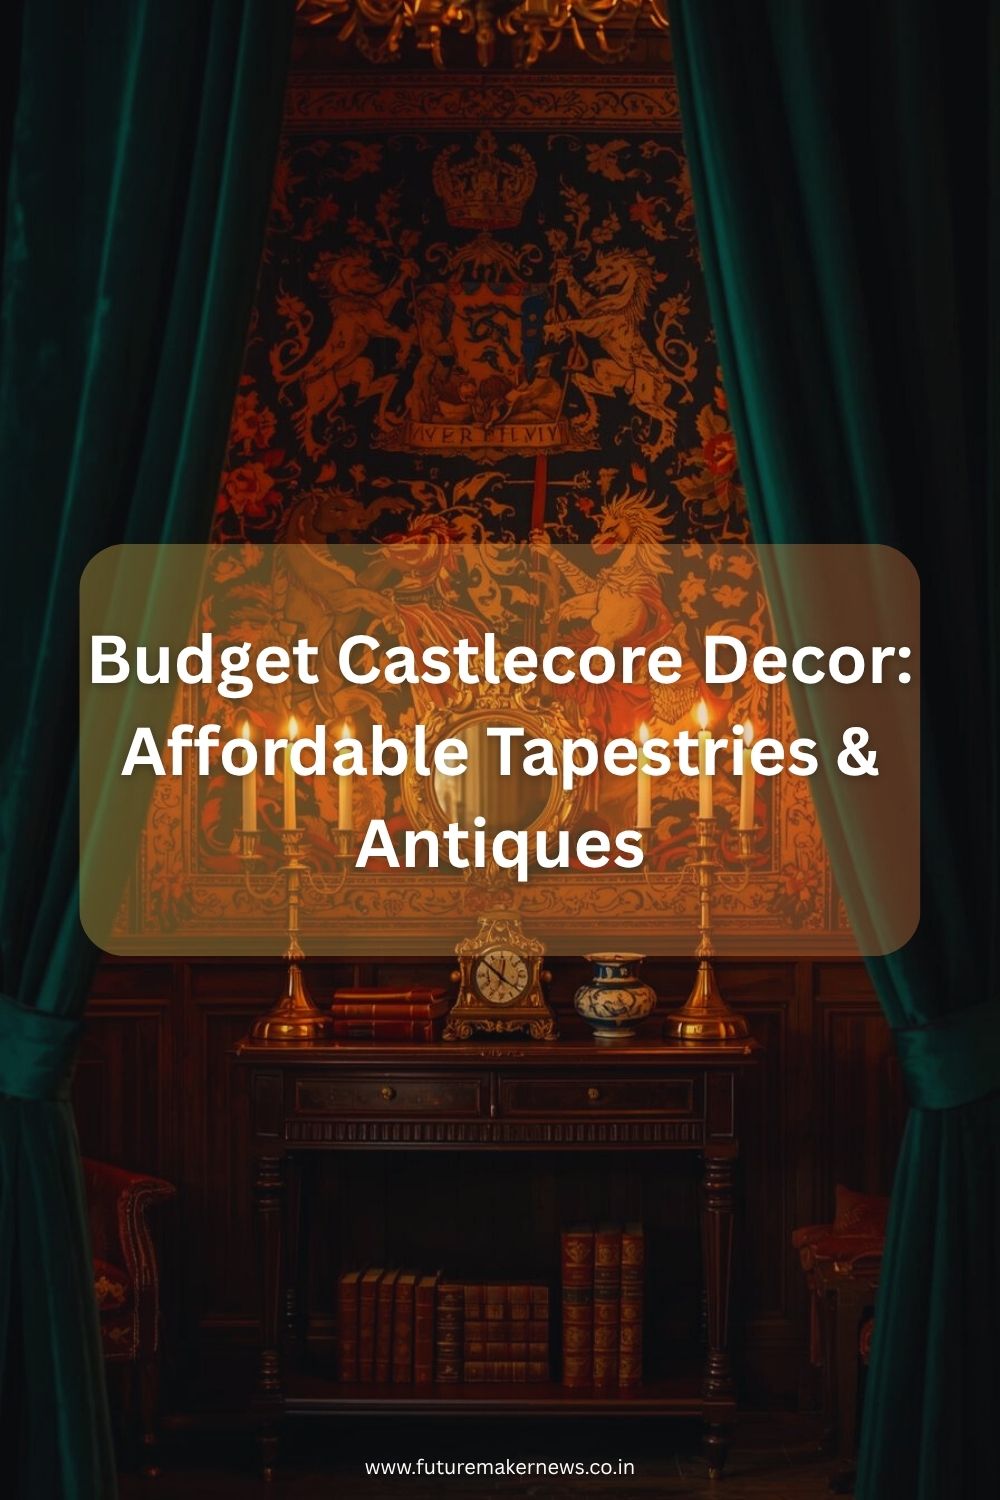
Castlecore-inspired room with a medieval tapestry, brass candleholders, vintage books, and antique decor under warm candlelight.

Step inside the enchanting world of Castlecore Home Decor — a realm of velvet drapes, stone textures, candlelit corners, and ancient tapestries that whisper stories of knights and queens.

This aesthetic is taking over TikTok, Pinterest, and cozy homes everywhere — blending old-world charm with modern comfort. Whether you live in a city apartment or a countryside cottage, you can turn your home into a mini castle sanctuary without spending a fortune.

If you’ve ever dreamed of living like royalty, surrounded by medieval tapestries and vintage antiques, keep reading — this is your guide to achieving affordable Castlecore decor step by step.

What Is Castlecore Home Decor?

Castlecore is a romantic, nostalgic aesthetic that celebrates medieval, gothic, and fantasy-inspired design. Imagine stone walls, dark wood furniture, gilded mirrors, and tapestries depicting mythical scenes — all wrapped in warm, candlelit coziness.

It’s a style that blends the elegance of a castle with the comfort of a modern home.

Key Castlecore Elements:

  • Rich fabrics: Velvet, brocade, and damask.
  • Earthy tones: Deep greens, burgundy, gold, and aged bronze.
  • Ornate decor: Antique mirrors, candelabras, and iron accents.
  • Medieval artwork: Tapestries, coat-of-arms, and stained glass.
  • Natural touches: Dried flowers, stone vases, and wooden chests.

This aesthetic is both luxurious and cozy, blending fantasy and history with modern practicality.

How to Start Decorating in Castlecore Style (Without Breaking the Bank)

Castlecore might look lavish, but it doesn’t have to cost a king’s ransom. With a few smart decor tricks and budget finds, you can capture the medieval aesthetic in your home affordably.

Here’s your step-by-step Castlecore decorating guide:

1. Start with a Royal Color Palette

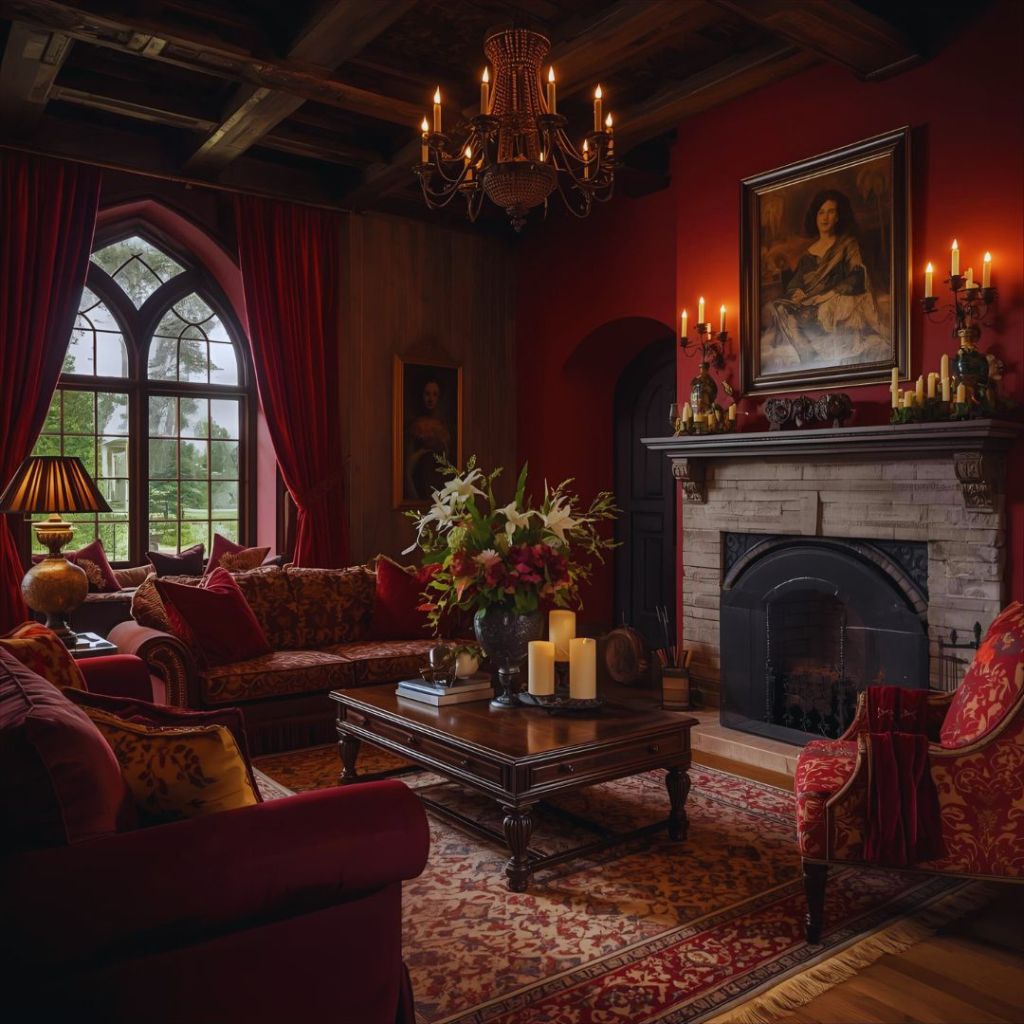
Castlecore living room with burgundy walls, velvet curtains, and warm golden lighting creating an old-world ambiance.
Begin with a royal color palette — deep, rich tones like burgundy, forest green, or navy set the Castlecore mood.

Color sets the mood for your medieval-inspired haven.

Choose deep, rich tones that evoke a sense of old-world luxury and warmth.

Castlecore Color Palette Ideas:

  • Burgundy & Gold — for regal richness.
  • Forest Green & Bronze — for an earthy, enchanted vibe.
  • Deep Navy & Silver — for a royal gothic touch.
  • Cream & Wood Brown — for a soft medieval cottage look.

Tip: Paint one accent wall in a deep shade (like wine red or moss green) to create drama without overwhelming your space.

2. Find Budget-Friendly Medieval Tapestries

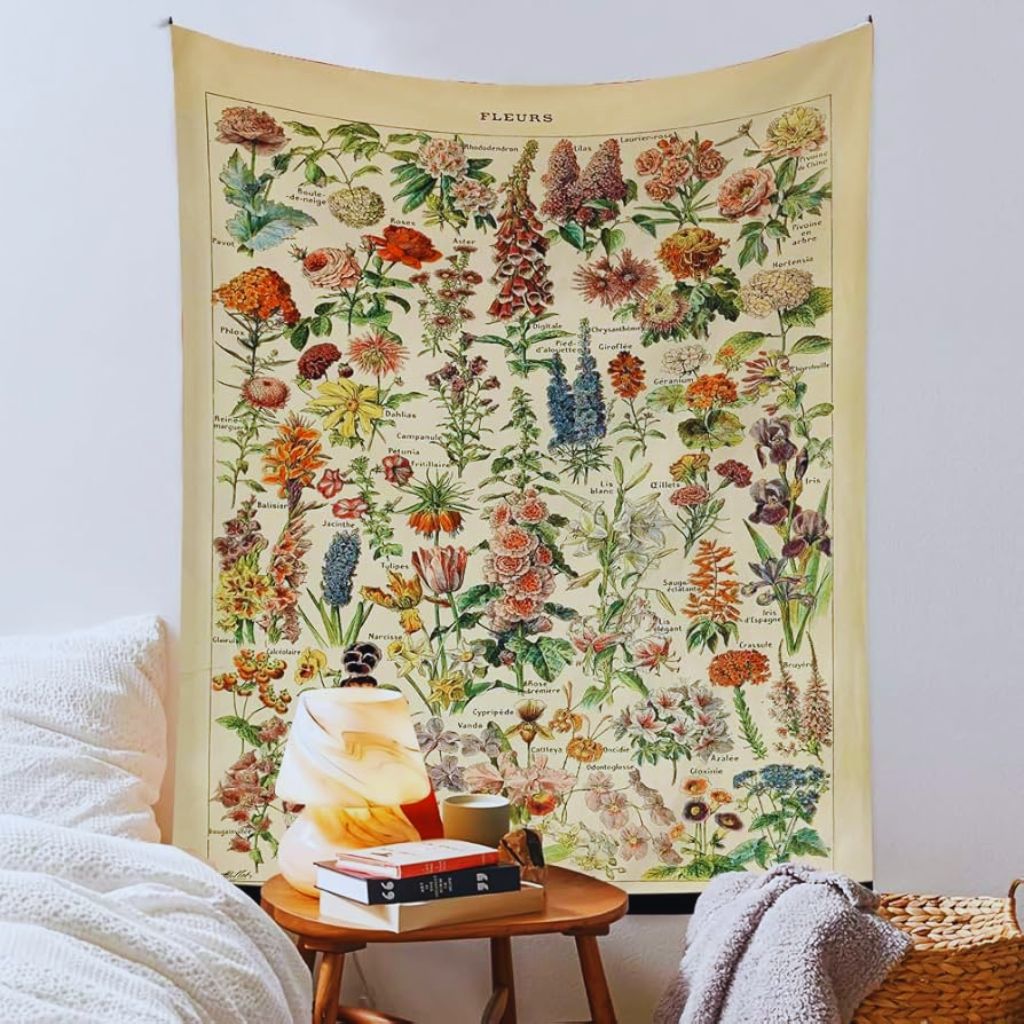
Medieval-style tapestry with floral and heraldic designs hanging on a wall in a cozy vintage room.
Add affordable “medieval” tapestries — thrift fabric panels or replica weaves to tell a timeless story.

No Castlecore home decor is complete without tapestries — those beautifully woven wall hangings that tell stories of myth, nature, and history.

But here’s the secret: you don’t have to buy real antiques to get the look.

Where to Find Affordable Tapestries:

  • Thrift stores often have vintage fabric panels or curtains that mimic medieval art.
  • Online marketplaces offer replica medieval tapestries under $20–$40.
  • Fabric stores sometimes sell baroque upholstery fabric you can stretch on a frame for a DIY tapestry look.

Choose designs with:

  • Floral borders
  • Hunting or medieval scenes
  • Celtic patterns
  • Heraldic emblems

Hang them with antique-style rods or tassel cords for that authentic castle wall effect.

3. Add Antique Accents (for Less)

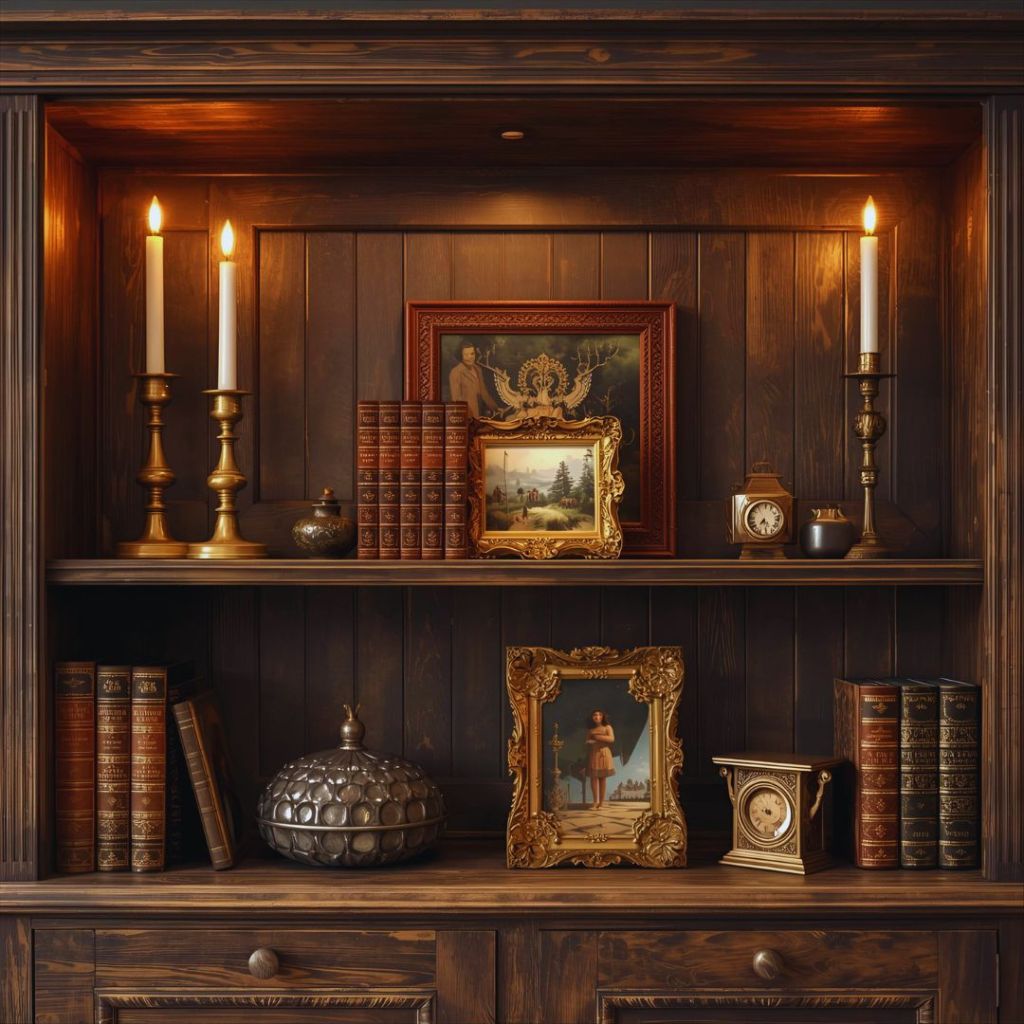
Shelf styled with brass candlesticks, vintage books, and antique picture frames in warm Castlecore decor.
Decorate with affordable antique accents — think brass candlesticks, old books, and ornate frames.

True Castlecore charm lies in the details — those aged, intricate accents that make a space feel timeless.

But here’s where the magic happens: you can find budget antiques that look centuries old without spending a fortune.

Budget Antique Ideas:

  • Vintage candleholders or brass candlesticks — add instant gothic warmth.
  • Old books with leather bindings — stack them on a wooden chest or shelf.
  • Ornate picture frames — perfect for portraits or mirrors.
  • Iron keys, goblets, or clockwork trinkets — small details, huge impact.

Pro Tip: Visit flea markets or estate sales on weekends — they’re goldmines for Castlecore decor on a budget.

4. Incorporate Texture — The Soul of Castlecore

Castlecore interior with velvet throws, layered rugs, and soft lighting highlighting rustic wood and brass textures.
Layer textures — velvet, linen, wood, and brass bring that rich, lived-in medieval charm.
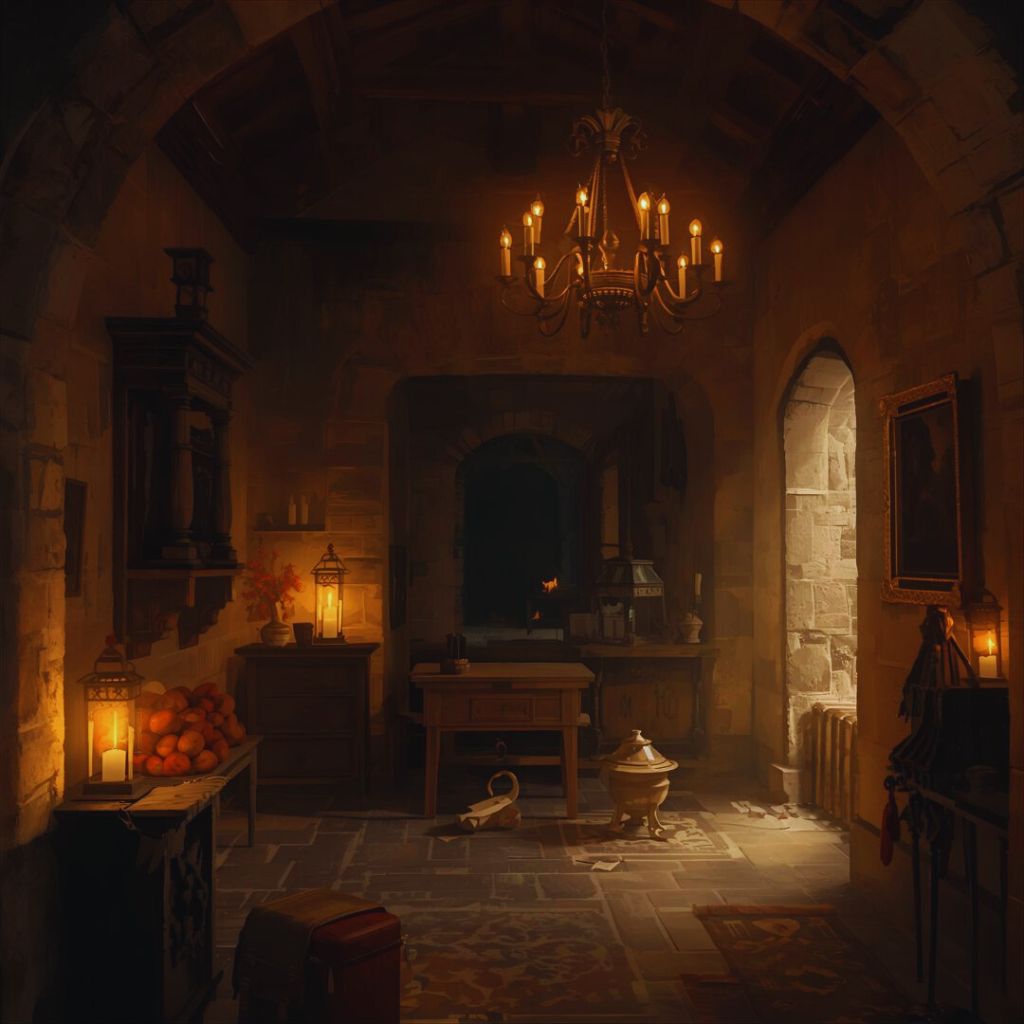
Modern homes often feel too sleek for this style. The secret to authentic Castlecore interiors lies in layered texture.

Think stone, wood, and fabric — all aged to perfection.

Ways to Add Texture:

  • Drape velvet throws over armchairs or bed frames.
  • Use linen or embroidered curtains instead of blinds.
  • Add rug layers — a Persian rug over a jute mat adds depth.
  • Mix brass, wrought iron, and distressed wood in furniture and decor.

Texture makes your space feel ancient yet alive — like a cozy, candlelit chamber in a storybook castle.

5. Light Like a Medieval Hall

Lighting sets the tone — literally. Replace harsh modern lighting with soft, ambient warmth.

Lighting Ideas:

  • Use candles and lanterns for a moody glow.
  • Choose chandelier-style lights with vintage bulbs.
  • Add wall sconces with faux candle flicker for authenticity.
  • Swap cool white bulbs for amber-toned ones to mimic candlelight.

Pro Tip: Layer lighting — use table lamps, candles, and fairy lights together to build an inviting atmosphere.

6. Furniture Fit for a Castle

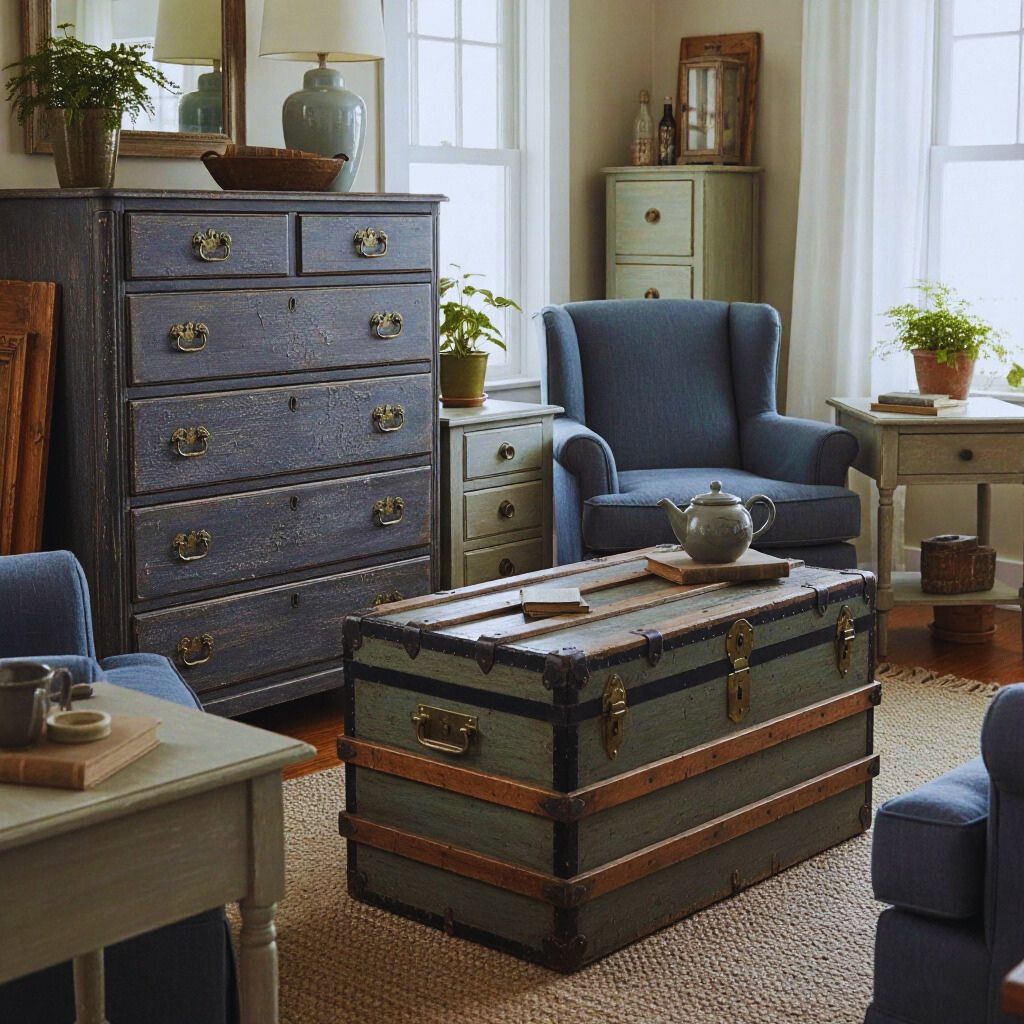
Castlecore living space with dark wood furniture, brass accents, and an antique trunk as a coffee table.
Choose budget-friendly furniture — dark wood, chalk paint finishes, and brass details create old-world elegance.

You don’t need heavy antique furniture — just pieces that feel old-world.

Budget-Friendly Furniture Tips:

  • Look for dark wood finishes in thrift stores.
  • Repaint modern furniture with chalk paint in aged tones.
  • Add brass handles or ornate knobs for an antique look.
  • Repurpose old trunks as coffee tables or storage benches.

Simple changes can transform modern furniture into medieval treasures with minimal cost.

7. Accessorize with Storytelling Details

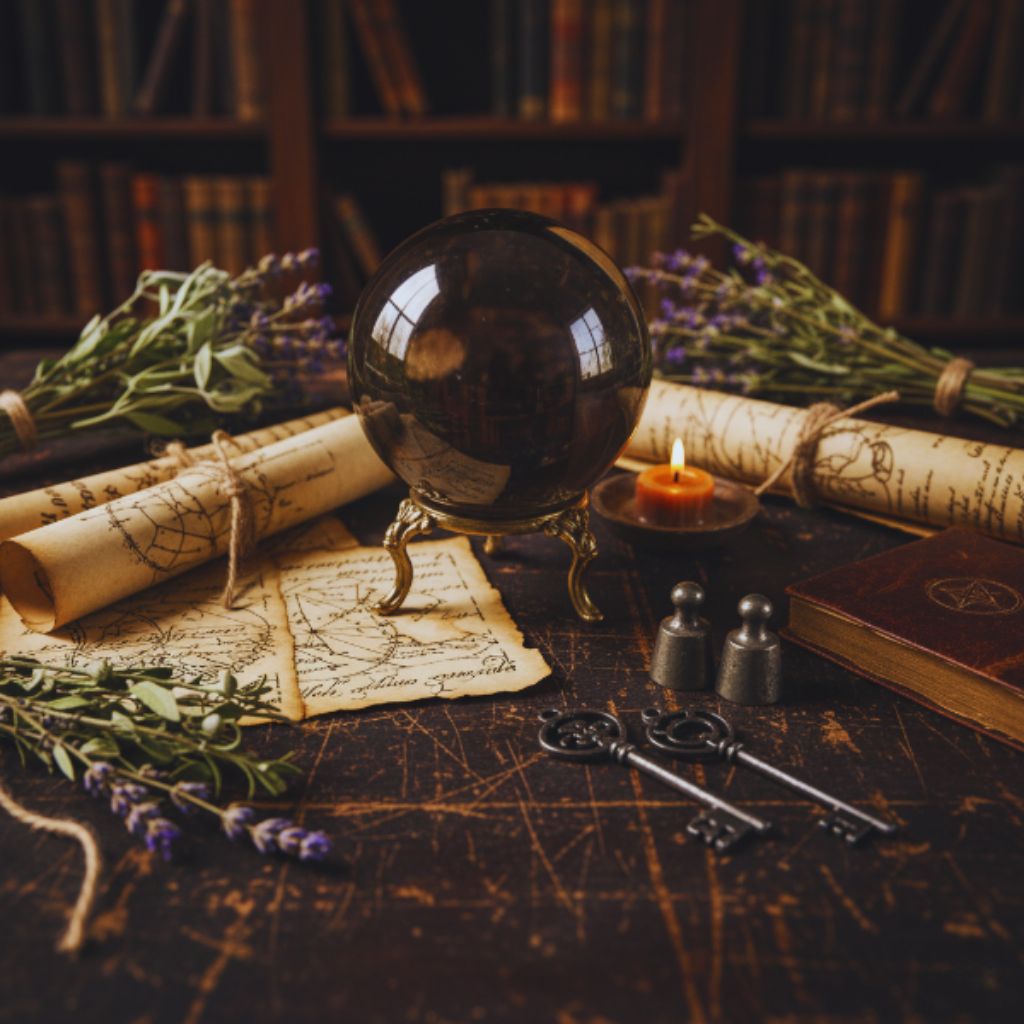
Castlecore desk decorated with old maps, scrolls, crystal balls, and dried herbs for a magical, storybook vibe.
Accessorize with storytelling details — maps, crystals, and relics make your space feel like a real-life fairytale.

Castlecore thrives on narrative and symbolism — every object should feel like it holds a story.

Decor Ideas That Add Story:

  • Display maps, scrolls, or calligraphy prints.
  • Add crystal balls, hourglasses, or antique mirrors.
  • Showcase herbal jars or dried flowers for a witchy cottagecore twist.
  • Hang wrought iron keys or small shields as wall accents.

These touches make your home feel personal, mysterious, and magical — just like a castle should.

Where to Find Budget-Friendly Castlecore Decor

If you know where to look, Castlecore doesn’t have to be costly. You just need a bit of imagination and a good eye for details.

Best Places to Shop for Affordable Medieval Decor:

  • Thrift stores — for old furniture, mirrors, and candleholders.
  • Facebook Marketplace — for vintage trunks, chests, and armchairs.
  • Flea markets & estate sales — for authentic antique accents.
  • Online marketplaces — search for “medieval wall art,” “castle decor,” or “gothic antiques.”

Pro Tip: Mix real vintage finds with replica pieces to balance authenticity and budget.

Castlecore DIY Ideas (For the Creative Royal in You)

Why buy when you can craft?

Here are a few DIY Castlecore ideas to personalize your decor even more:

  • DIY faux tapestry: Stretch patterned fabric over canvas and frame it.
  • Aged candles: Drip wax from one candle over another for that old-world effect.
  • Distressed furniture: Use sandpaper and dark wax to give wood pieces a vintage patina.
  • Potion bottles: Fill old glass bottles with colored water and label them with medieval-style tags.

Affordable, fun, and 100% Castlecore-approved.

Final Thoughts: Live Like Royalty (Without Spending Like It)

Castlecore Home Decor is more than an aesthetic — it’s an atmosphere. It’s about bringing romance, history, and a touch of fantasy into everyday life.

By choosing budget-friendly medieval tapestries, vintage antiques, and rich textures, you can create a home that feels timeless — warm, mysterious, and uniquely yours.

So light those candles, hang your tapestries, and let your imagination reign.
Your home doesn’t need to be a castle — but with Castlecore, it’ll feel like one.

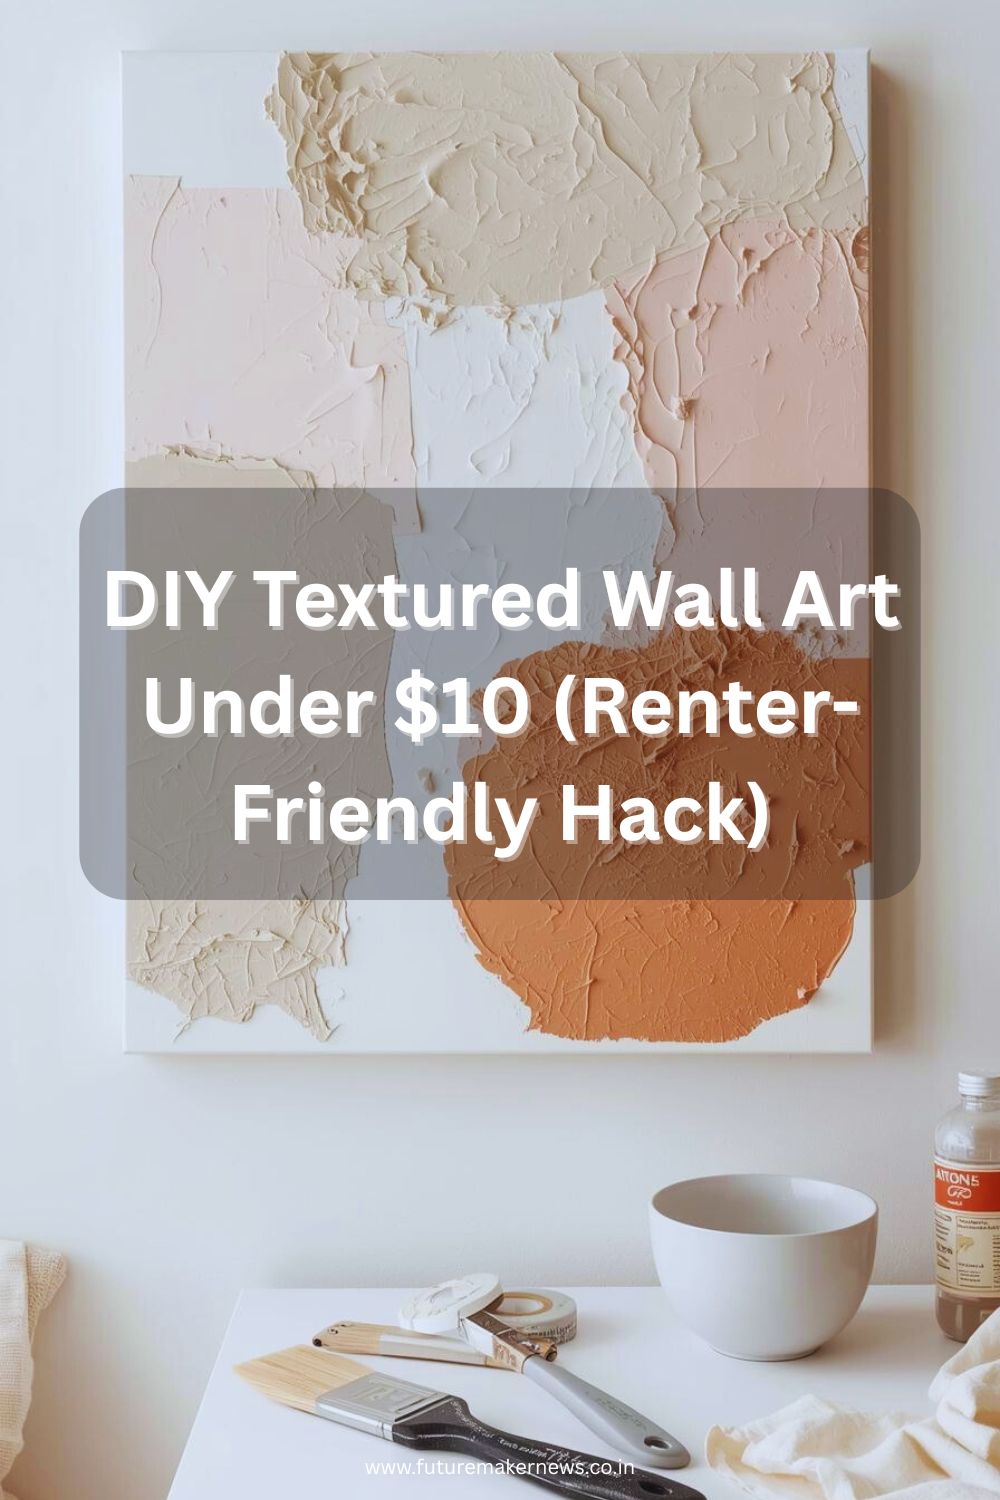
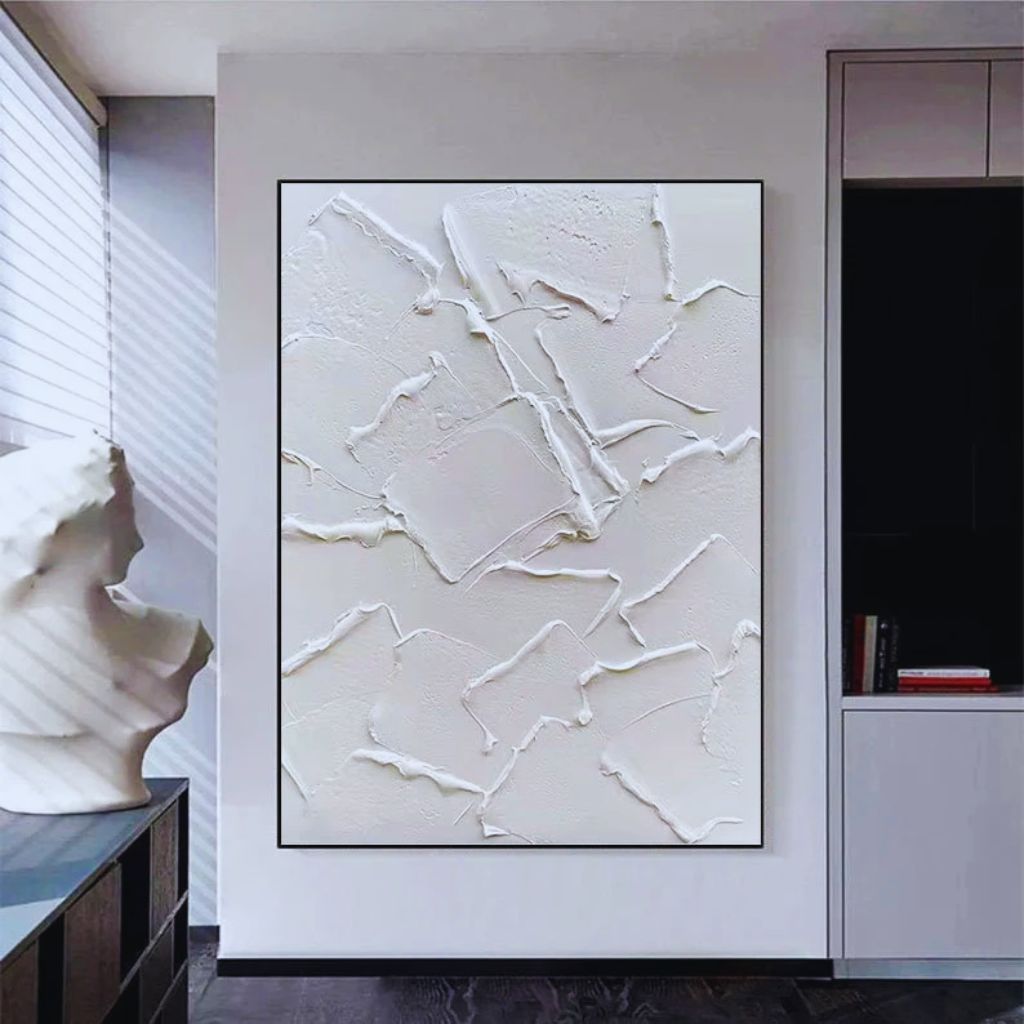
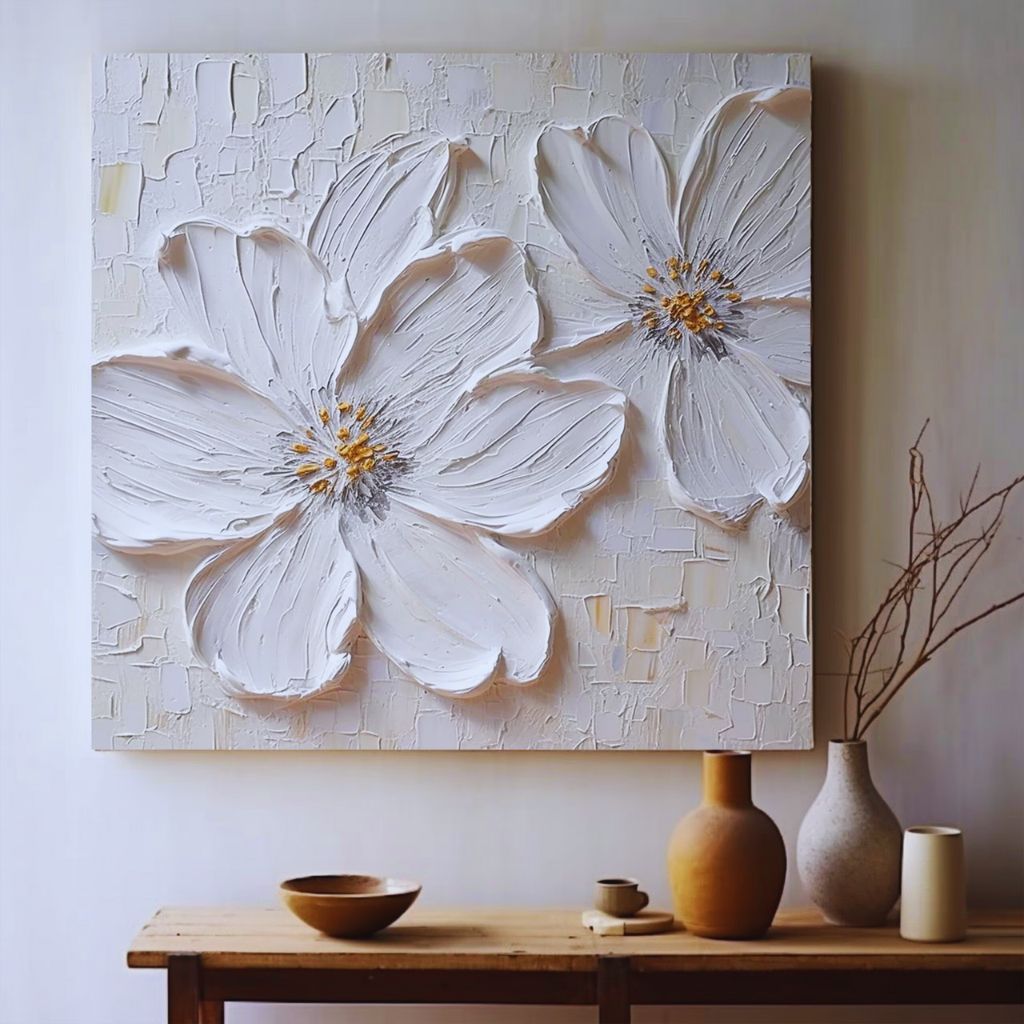
DIY textured wall art made with spackle paste on canvas in neutral tones, styled in a modern minimalist room with painting tools and materials.

If you’ve been scrolling through TikTok or Pinterest lately, you’ve probably seen this gorgeous and budget-friendly trend blowing up — the Viral DIY Wall Art Technique that costs less than $10 and completely transforms your space.

It’s minimalist, renter-friendly, and incredibly easy to make — no artistic background required! Whether you’re decorating your first apartment, a rented home, or just refreshing your room on a tight budget, this trend is your golden ticket to a stylish interior without breaking the bank.

Let’s dive into how you can recreate this viral DIY wall art step-by-step and make your walls look like they belong in a modern design magazine.

Why Everyone’s Obsessed with This Viral DIY Wall Art Trend

The beauty of this under $10 wall art idea lies in three magic words: affordable, aesthetic, and effortless.

Unlike pricey framed prints or wallpaper, this project lets you make custom wall decor using simple items you already have — like cardboard, canvas, or even old packaging materials.

What Makes It So Popular:

  • Renter-Friendly: No drilling, nailing, or wall damage.
  • Budget-Friendly: Total cost under $10 — sometimes even free if you reuse materials.
  • Highly Customizable: Choose your favorite colors, textures, and patterns.
  • On-Trend Aesthetic: Fits the viral minimalist, wabi-sabi, and neutral-toned home styles.
  • Quick and Fun: You can complete one piece in under an hour.

In short, this trend proves that you don’t need a big budget to have Pinterest-worthy decor — just creativity and a few clever materials.

Supplies You’ll Need (All Under $10!)

Before we start, gather these simple supplies. You might already have most of them lying around!

Basic Materials:

  • A canvas, foam board, or cardboard base
  • Spackle or lightweight wall putty (for texture)
  • A butter knife, paint scraper, or old spoon
  • Acrylic paint in your favorite tones (white, beige, cream, or pastels)
  • Paintbrush or sponge
  • Optional: Gold or metallic accent paint for a luxury finish

Step-by-Step Guide: How to Make This Viral $10 Wall Art

Here’s the fun part — creating your masterpiece! This is the same DIY textured art technique that’s trending across social media right now.

Step 1: Prepare Your Canvas

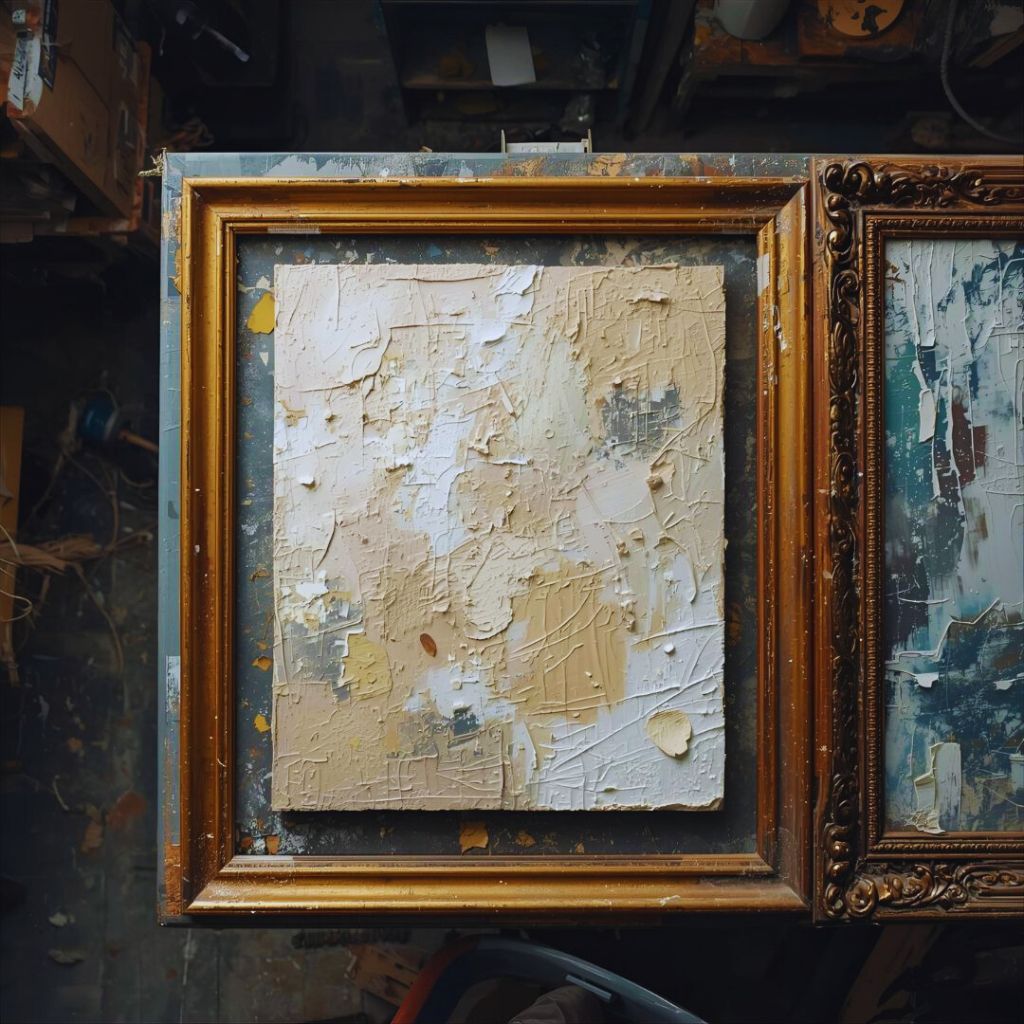
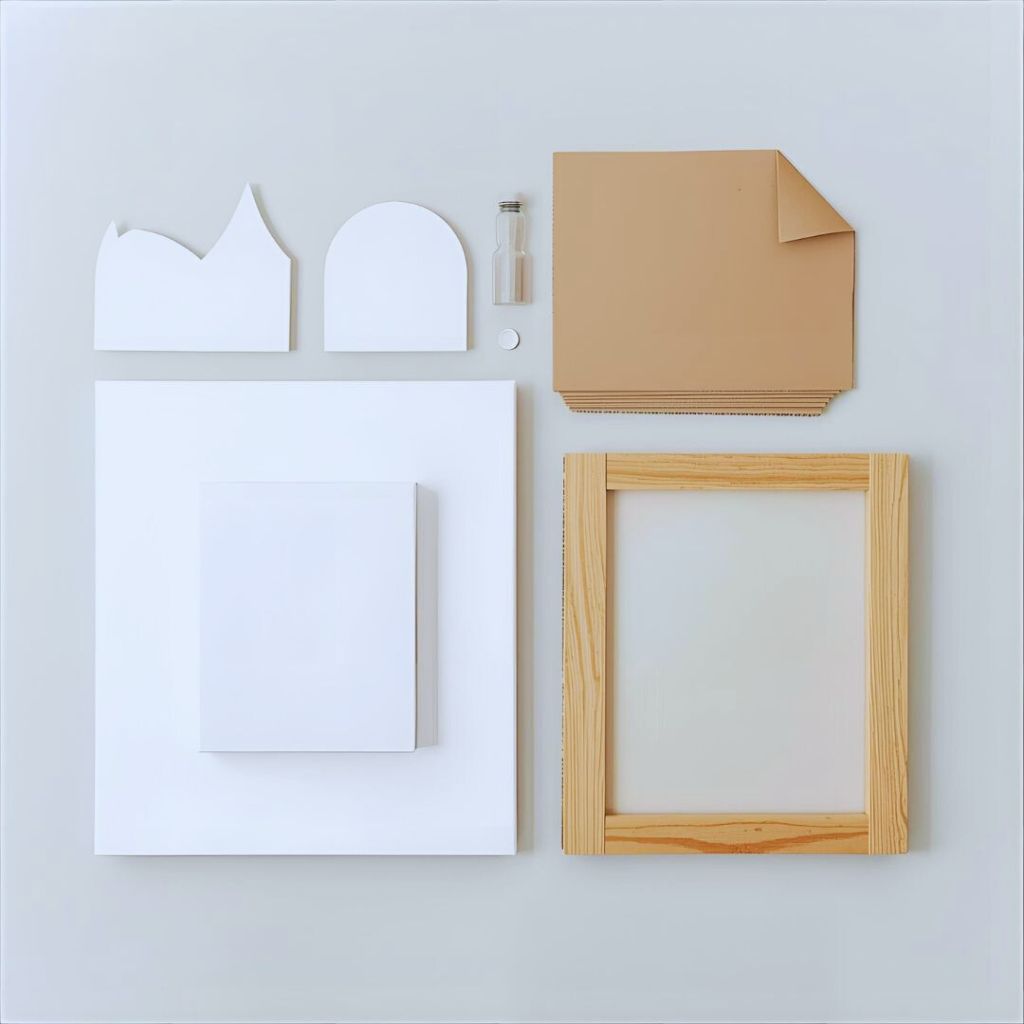
DIY art setup showing blank canvas, foam board, and photo frame ready for texture application.
Prepare your canvas — reuse cardboard, foam board, or an old photo frame as your art base!

Start with a clean, smooth surface. If you’re using cardboard, cut it to the size you want. If it’s a foam board, wipe it down gently.

You can even reuse old photo frames by removing the glass and using the backing board as your base!

Step 2: Apply Texture (The Game-Changer)

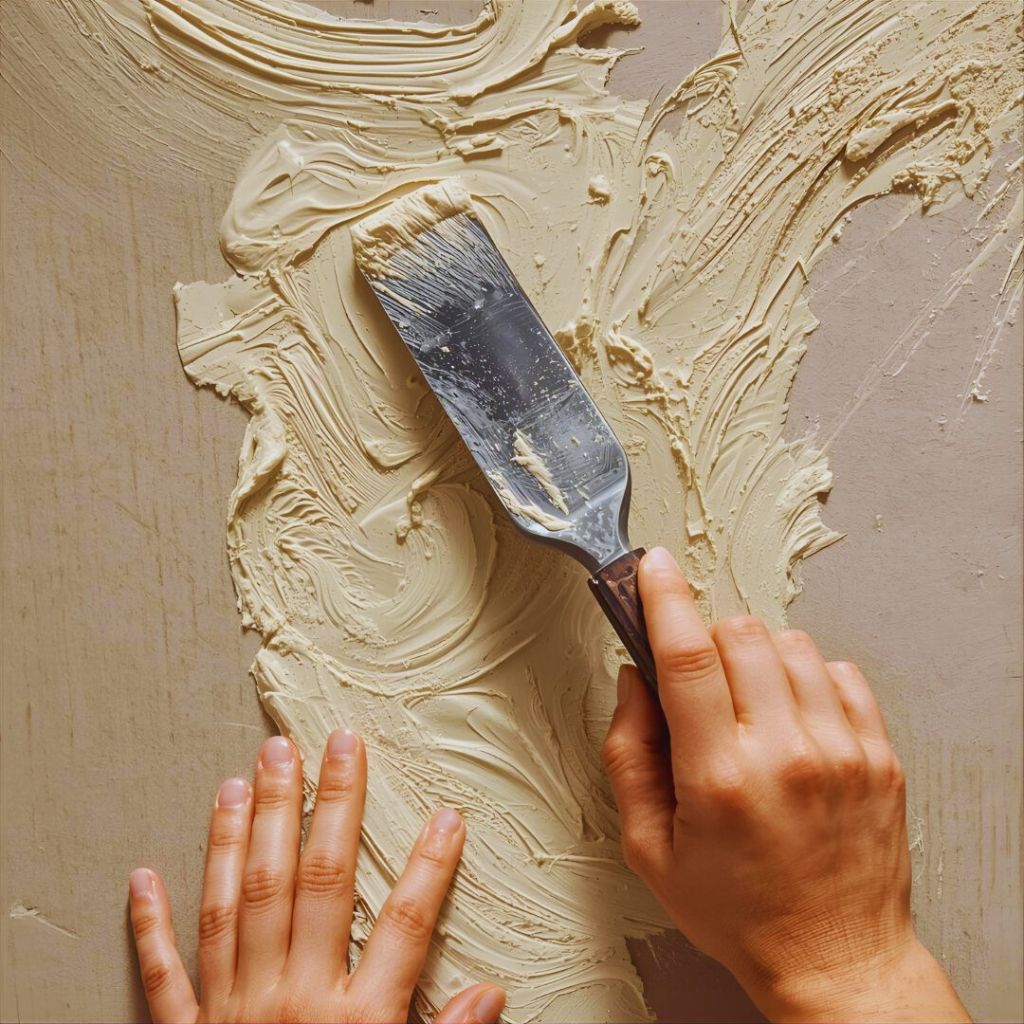
Hands applying wall putty to a board, forming textured swirls for DIY wall art.
Apply texture — use spackle or wall putty to create swirls, streaks, or abstract peaks for a 3D effect.

This is what makes your artwork look high-end. Use spackle or lightweight wall putty to create a 3D textured effect.

Spread it across your surface with a butter knife or scraper — don’t aim for perfection! The beauty of this style lies in imperfection and organic texture.

You can make:

  • Swirls for a fluid, wave-like design.
  • Diagonal streaks for a modern look.
  • Abstract peaks and valleys for a sculptural, minimalist vibe.

Let it dry for about 1–2 hours (or until firm to touch).

Step 3: Paint It to Perfection

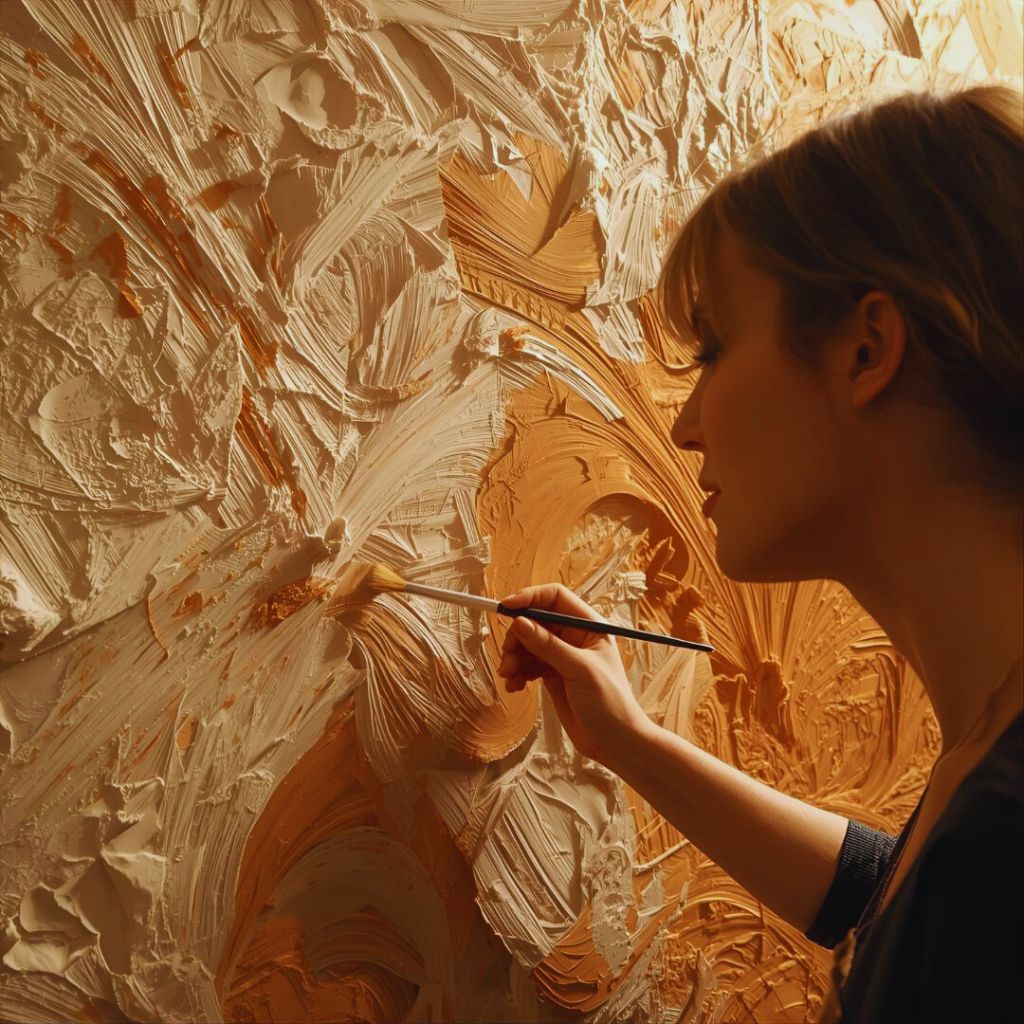
DIY artist painting over textured wall art with neutral beige and terracotta tones.
Paint your masterpiece — choose calming neutrals or bold earth tones to bring your texture to life.

Once dry, it’s time to paint your masterpiece.

Choose neutral tones for a calming aesthetic or go bold with terracotta, navy, or olive green for a statement piece.

Use a paintbrush or sponge and gently glide color across the texture — this will highlight the raised details and create depth.

Color Ideas:

  • Minimalist Neutral: Beige, ivory, and soft tan.
  • Earthy Modern: Clay, burnt orange, and sage.
  • Luxury Glam: White base with gold or metallic accents.

Optional: Add a few strokes of metallic gold or bronze paint to mimic the expensive “gallery wall art” look.

Step 4: Let It Dry and Frame It (Optional)

Textured wall art drying beside a gold frame and art supplies on a tabletop.
Let it dry and frame — thrift a frame, mount it, or lean it for an effortless designer look.

Once painted, let your piece fully dry for a few hours.

Now you can either:

  • Frame it in a thrifted or dollar-store frame.
  • Mount it using double-sided command strips.
  • Or simply lean it against the wall for a chic, effortless style.

Renter-Friendly Tip: Use removable adhesive hooks or Velcro strips to hang your art without damaging walls.

Step 5: Style It Like a Designer

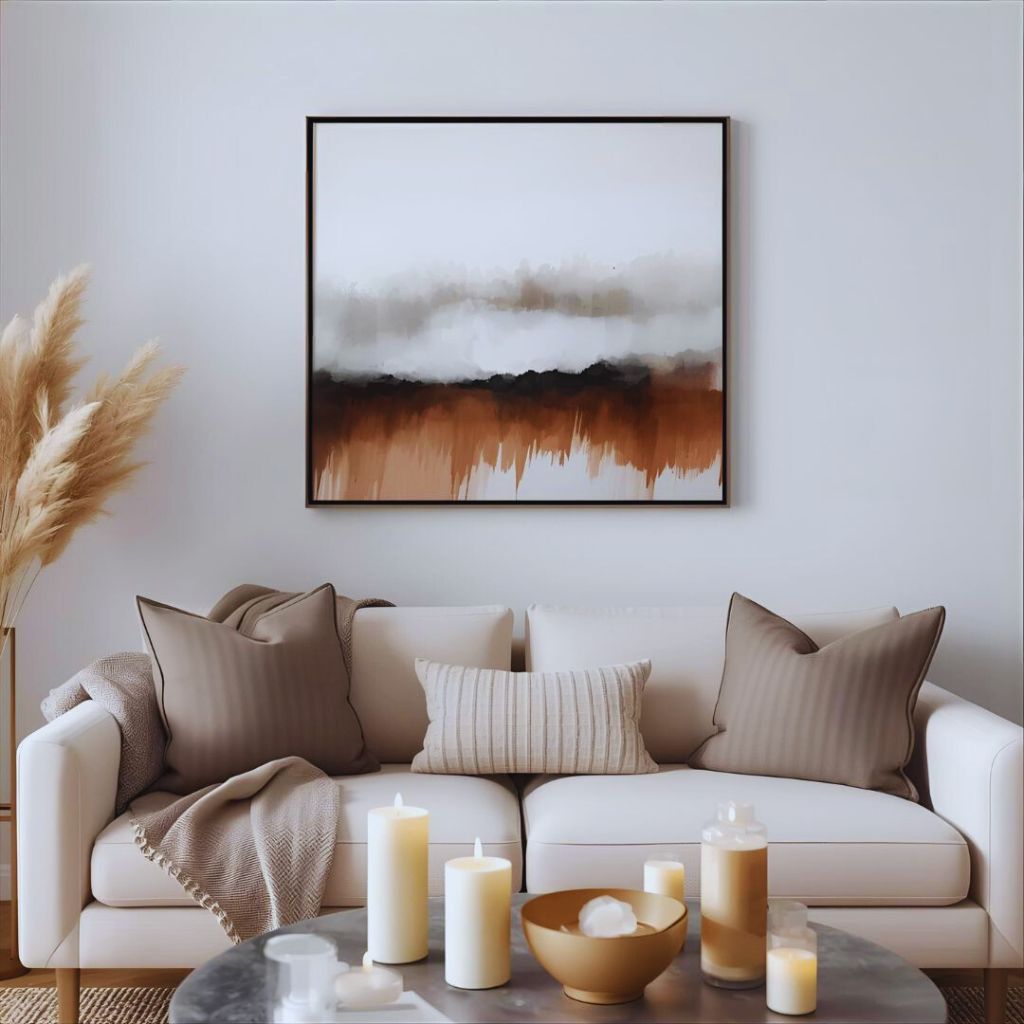
Modern living room styled with handmade textured wall art above a neutral-toned sofa.
Style it — display your $10 masterpiece as a chic focal point or part of a stylish gallery wall.

Your wall art is ready — now it’s all about placement!

Here are a few styling ideas to make your room look instantly elevated:

  • Hang it above your bed, sofa, or desk as a focal point.
  • Create a mini gallery wall with different sizes and shapes.
  • Pair it with candles, vases, and neutral décor pieces for a cozy aesthetic.

Remember, the trick is in layering textures and keeping your color palette cohesive.

Creative Variations to Try

Want to make your art even more unique? Try these DIY wall art variations that use the same under-$10 method:

1. Dual-Tone Art

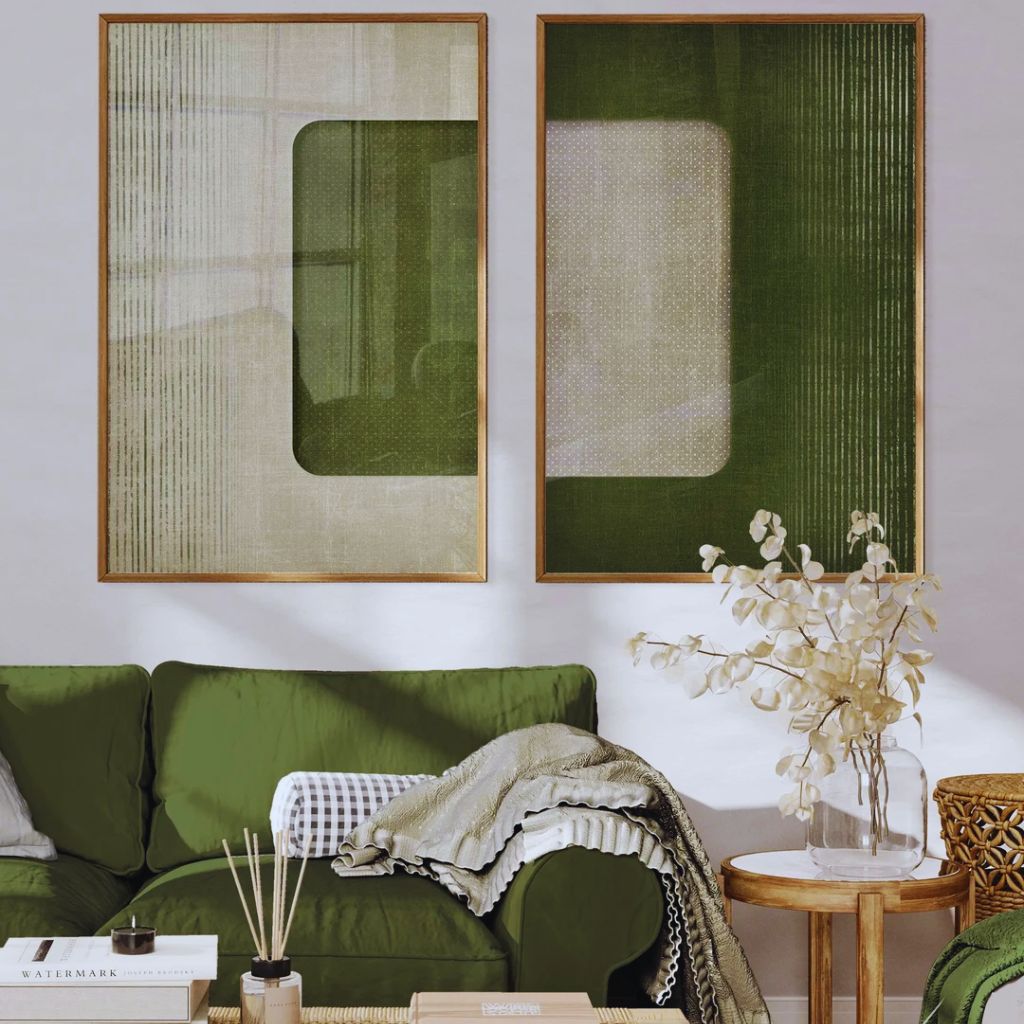
Two-tone DIY wall art with beige and olive green halves, featuring textured spackle on one side.
Split your canvas into two colors and texture just one half for a bold, modern contrast.

Apply one color on half the canvas and a complementary tone on the other half. Add texture only to one side for contrast.

2. Raised Line Art

DIY raised line art showing abstract white-on-white 3D patterns created with hot glue and paint.
Draw flowing shapes with hot glue, then paint over for stunning minimalist 3D art.

Use hot glue to draw abstract lines before applying putty and paint over it — it creates a stunning 3D line art effect.

3. Nature-Inspired Prints

DIY wall art with leaf and flower imprints pressed into textured white putty for a natural aesthetic.
Press dried leaves or flowers into the putty for a naturally beautiful, earthy design.

Press dried leaves, flowers, or twigs into the putty before it dries for a natural, organic texture.

4. Gold Leaf Magic

DIY textured wall art featuring gold leaf accents on raised areas for an elegant metallic finish.
Add gold leaf to textured highlights for that boutique, gallery-worthy shimmer.

For an upscale vibe, gently press gold leaf sheets on raised areas once the paint is tacky. It gives that “boutique gallery” touch.

Each version stays affordable, fun, and incredibly chic — proving creativity always beats cost!

Why This DIY Wall Art Is Perfect for Renters

Renters often struggle to decorate without damaging walls — and this trend solves that beautifully.

Here’s why it’s a renter’s dream project:

  • No nails or screws needed — use removable strips.
  • Lightweight materials mean no wall damage.
  • Totally customizable — repaint, retexture, or move it anytime.
  • Easily replaceable or upgradable when you change your decor.

It’s the perfect way to make your space feel personal and stylish without violating your lease or spending much.

Budget Breakdown: How It Stays Under $10

Here’s a quick look at how affordable this project really is:

ItemCost
Canvas or cardboard base$2–$3
Spackle or wall putty$3
Acrylic paint$2–$3
Tools (reuse household items)Free

Total: Around $8–$9, depending on what you already have.

You can even make multiple mini art pieces with the same supplies — creating an entire gallery wall for under $20!

Final Thoughts: Creativity Over Cost

The best thing about this viral DIY wall art technique isn’t just its price — it’s the joy of creating something with your own hands. Every stroke, texture, and color tells your story.

You don’t need to be an artist or spend hundreds of dollars to have a beautiful home. You just need creativity, a few simple tools, and a willingness to experiment.

So next time you want to refresh your space, skip the overpriced art prints — grab some spackle, paint, and imagination instead.

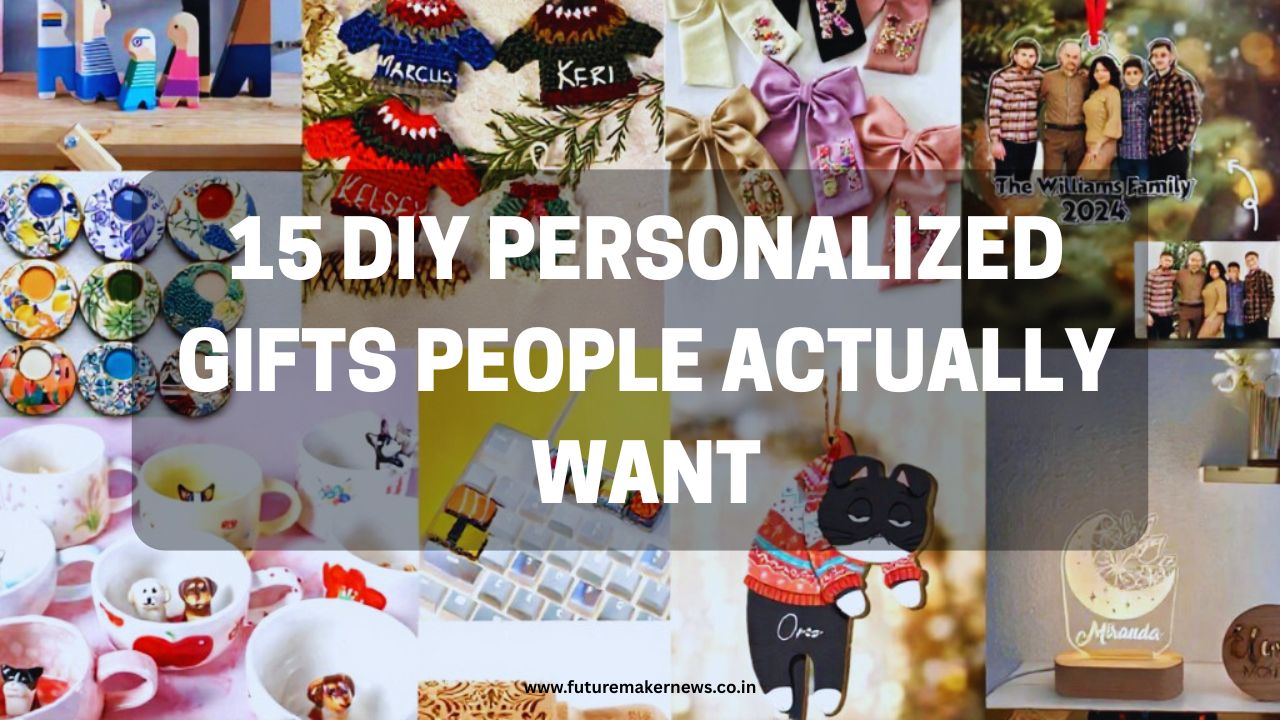
A cozy flat lay of DIY personalized gifts including handmade candles, custom mugs, photo frames, and wrapped presents with name tags — creative and thoughtful gift ideas for any occasion.

If you’ve ever felt stuck while picking out a gift — torn between something practical and something meaningful — you’re not alone. Let’s be honest: store-bought presents can feel impersonal. The best gifts are thoughtful, creative, and made with love, which is exactly what DIY personalized gifts are all about.

In 2025, it’s not just about giving something “nice.” It’s about giving something unforgettable — something that speaks to who the person truly is.

So, instead of buying another generic candle or coffee mug, try these 15 DIY personalized gift ideas that people will actually cherish and use.

Each idea below is aesthetic, creative, and budget-friendly, designed to make your gift stand out (and maybe even go viral on Pinterest.

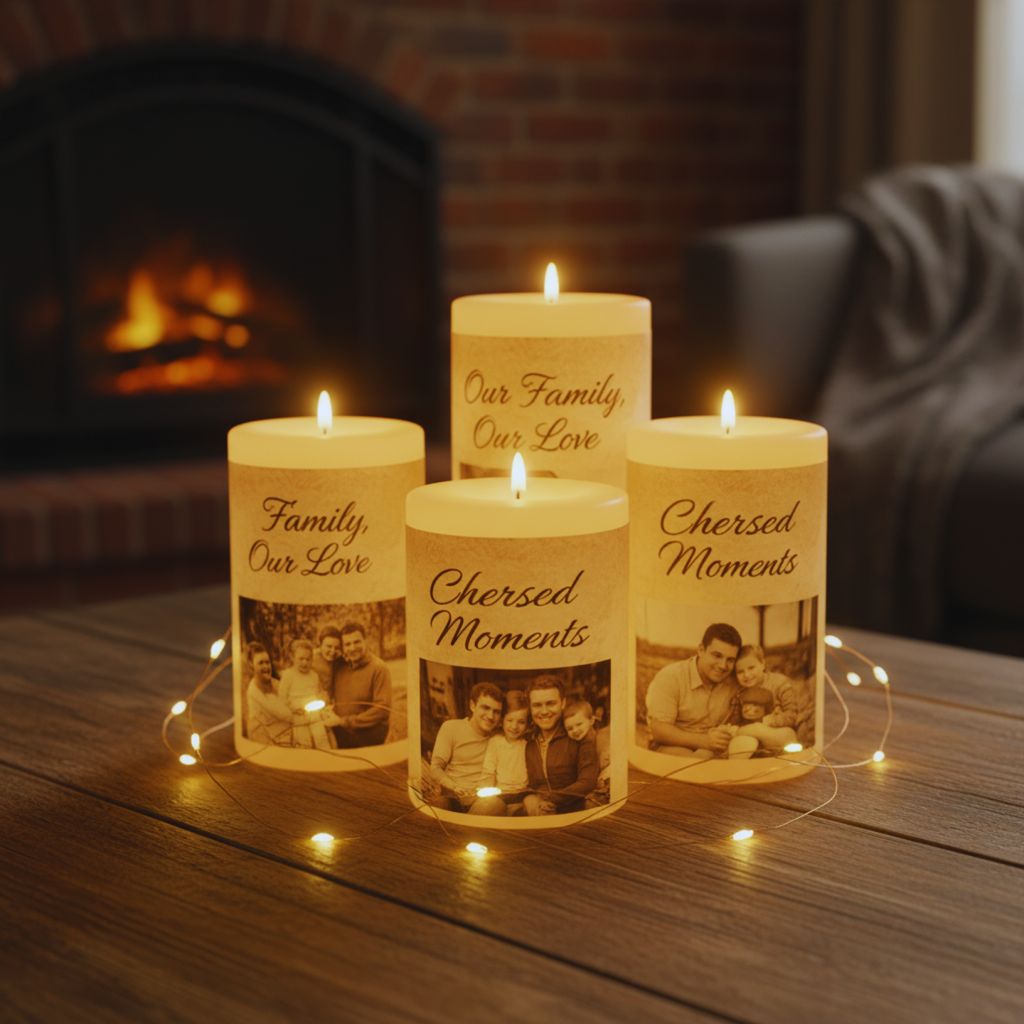
1. Custom Photo Candles

Candles decorated with printed photos and quotes glowing on a rustic table.
“Turn memories into light with custom photo candles — warm, personal, and perfect for home décor.”

Turn plain candles into memory-filled treasures by wrapping them with printed photos, dates, or quotes that mean something special.

Why It’s Perfect:

  • Combines personalization and coziness.
  • Makes for beautiful home décor.
  • Easy to craft using transfer paper and wax-safe photo sheets.

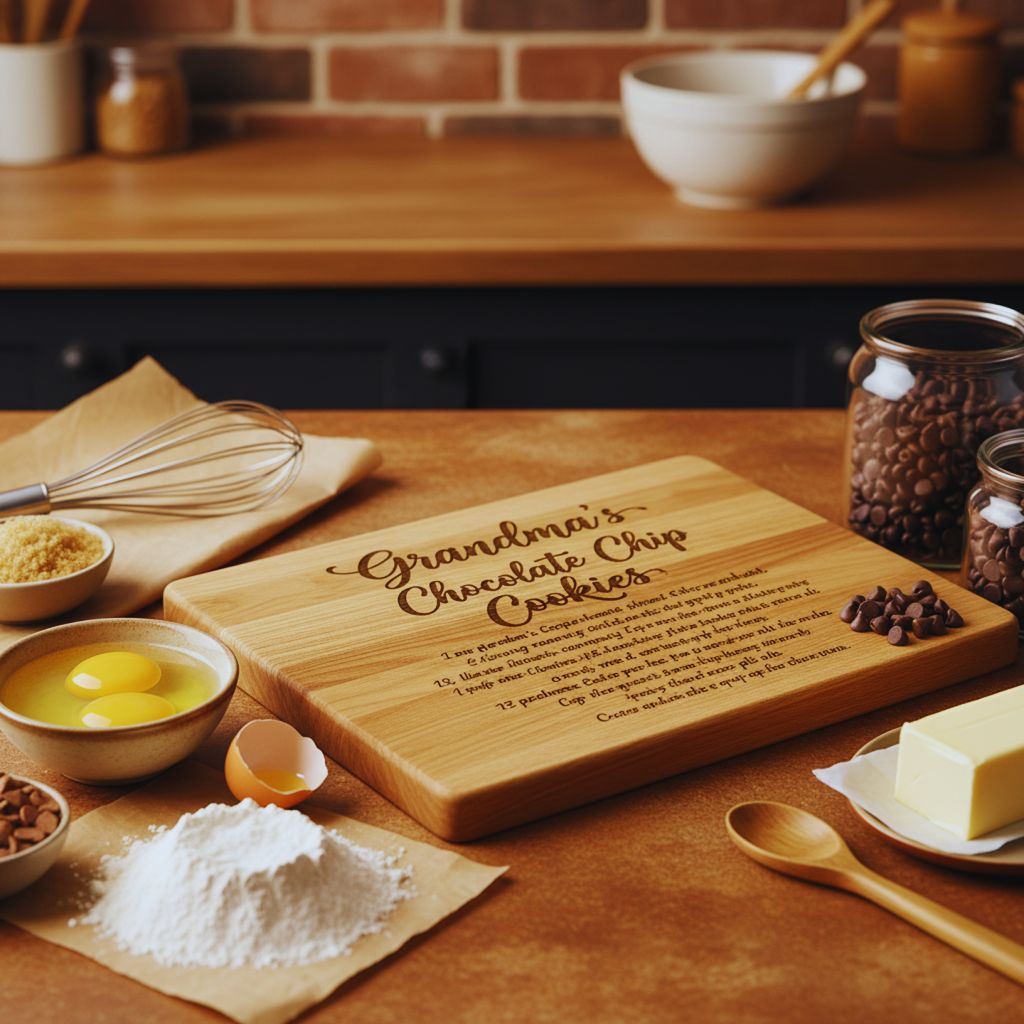
2. Handwritten Recipe Cutting Board

Engraved wooden cutting board with handwritten family recipe and baking supplies.
“Preserve family traditions with a handwritten recipe cutting board — both practical and sentimental.”

For foodies or family-oriented friends, engrave a beloved recipe — like grandma’s cookies — onto a wooden cutting board.

Why It’s Perfect:

  • Blends sentiment and utility.
  • Works beautifully as kitchen décor.
  • Easy to customize with a laser engraver or transfer method.

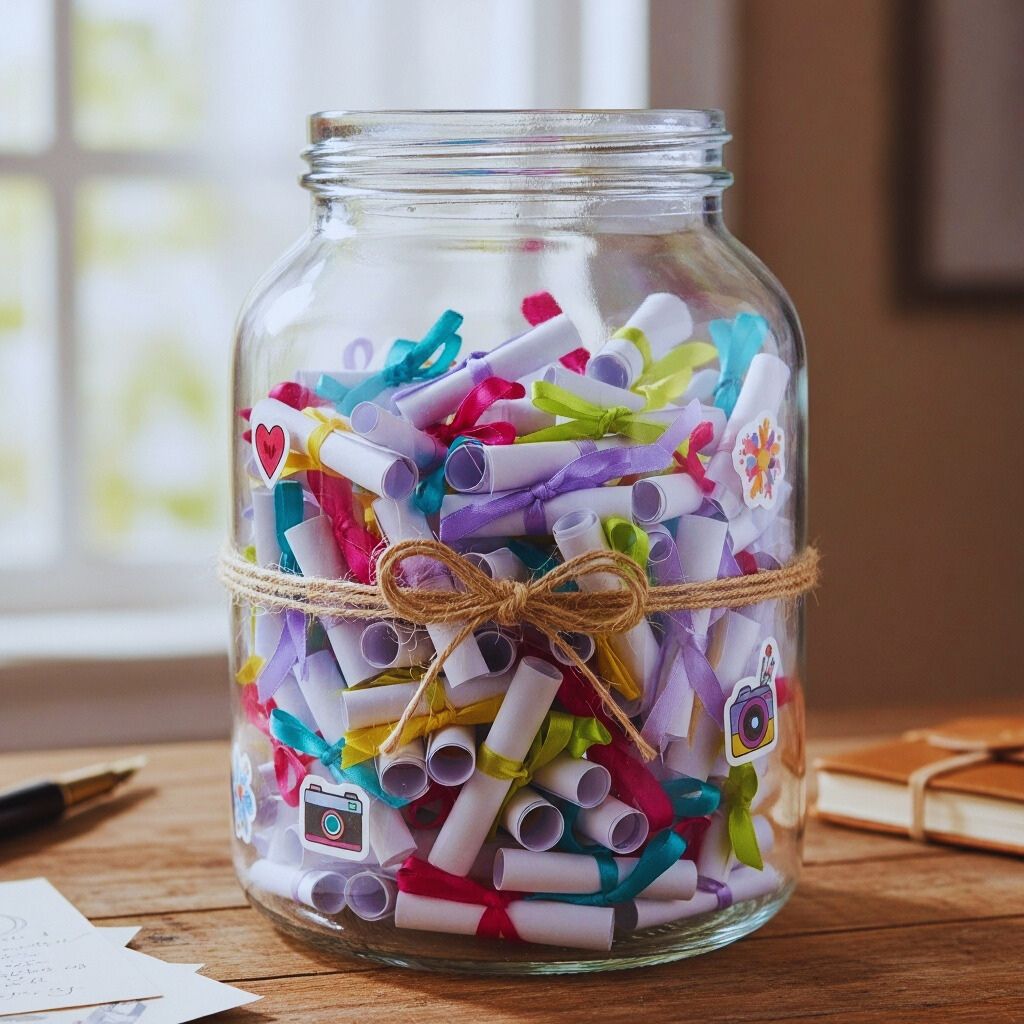
3. Memory Jar of Notes

Glass jar filled with handwritten notes tied with ribbons and decorated with twine.
“Share love and positivity with a personalized memory jar filled with heartfelt notes.”

Fill a glass jar with handwritten notes — affirmations, memories, or quotes — and decorate it with twine, stickers, or a personal tag.

Why It’s Perfect:

  • It’s emotional, thoughtful, and lasts all year.
  • Perfect for partners, best friends, or parents.

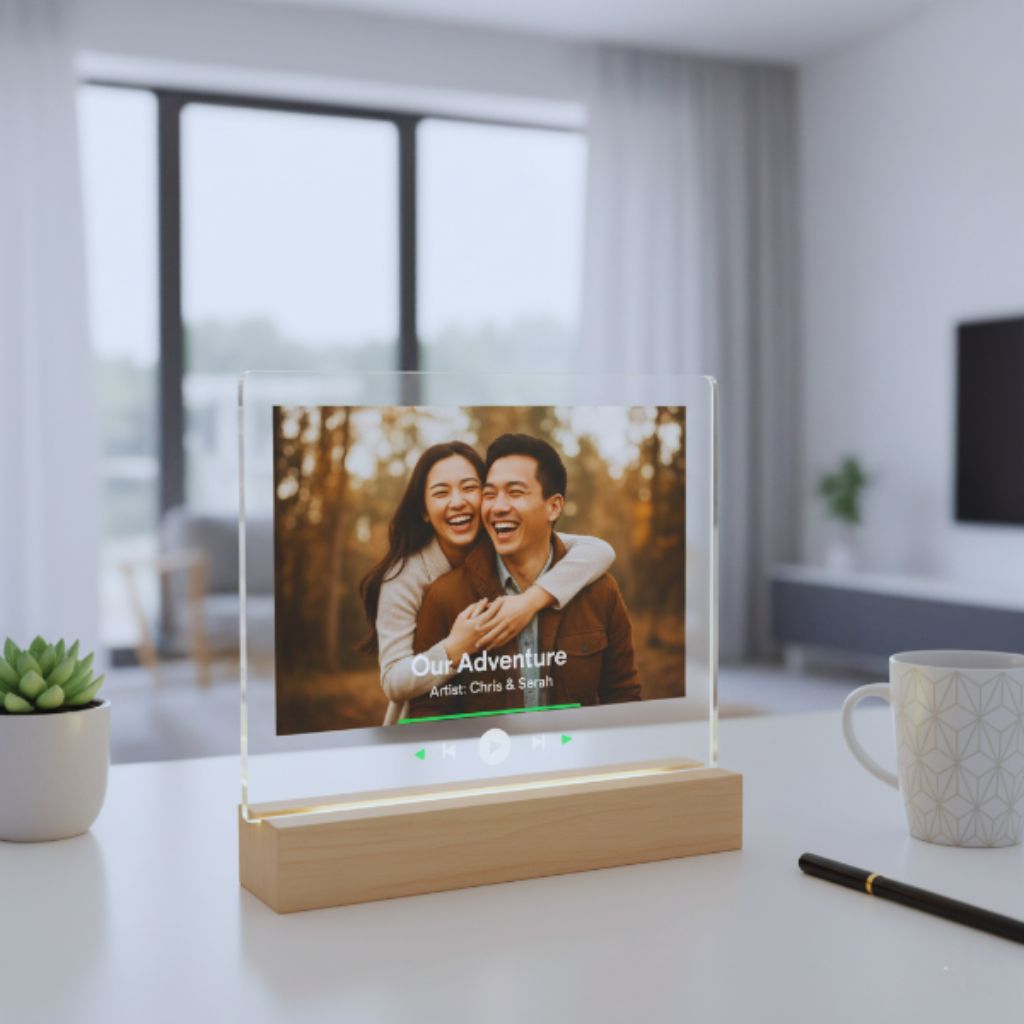
4. Customized Spotify Plaque

Clear acrylic Spotify plaque featuring a couple’s photo, song title, and music player design on a wooden stand.
“Celebrate your favorite song and memories with a trendy customized Spotify plaque — the perfect mix of music and love.”

Recreate the look of a Spotify song screen with your favorite shared song and photo. These acrylic plaques are trending hard on TikTok and Instagram!

Why It’s Perfect:

  • Modern and sentimental.
  • Great for anniversaries or birthdays.
  • Doubles as wall art.

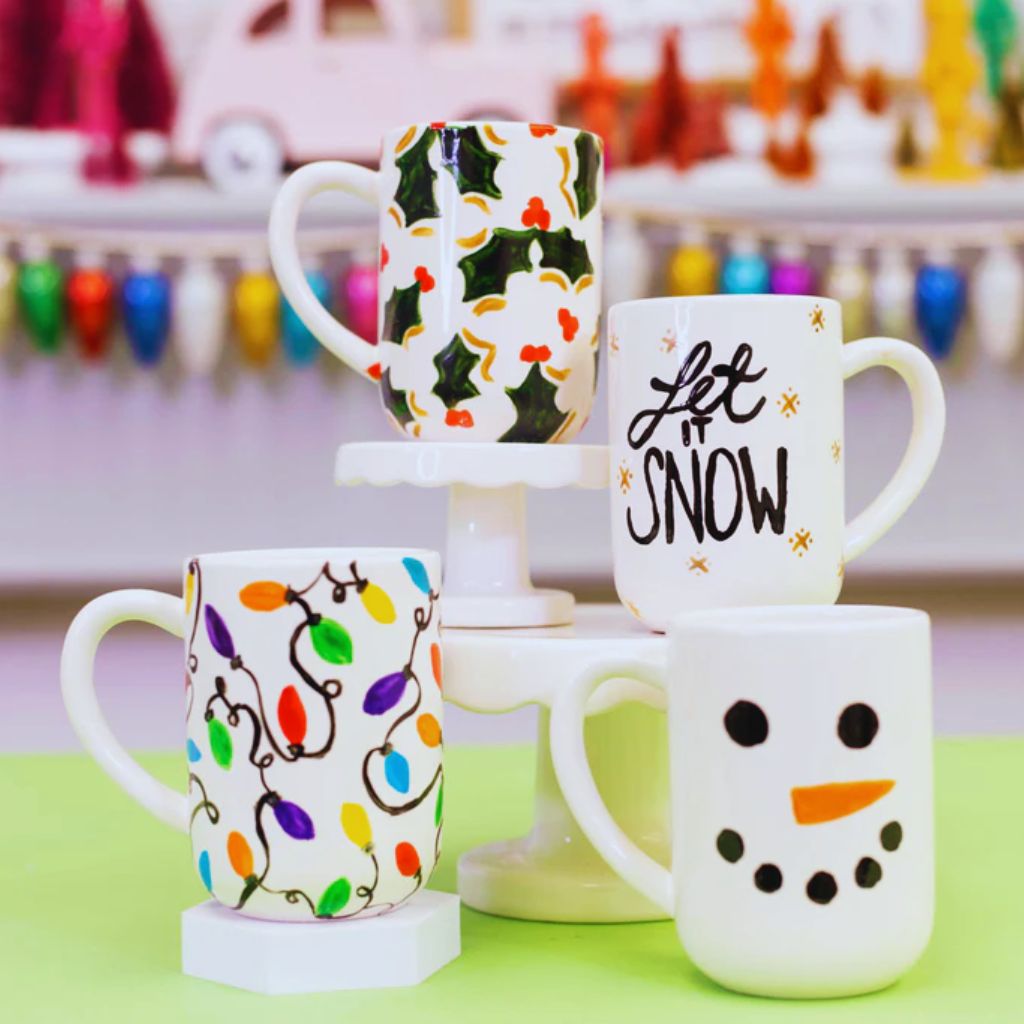
5. Personalized Mugs with Hand Painting

Hand-painted ceramic mugs with colorful doodles and names.
“Add a personal touch to your morning coffee with hand-painted mugs.”

Forget store-bought mugs! Create your own by painting names, doodles, or inside jokes with ceramic paint markers.

Why It’s Perfect:

  • Perfect for everyday use.
  • Great for couples or co-workers.
  • Totally unique and heartfelt.

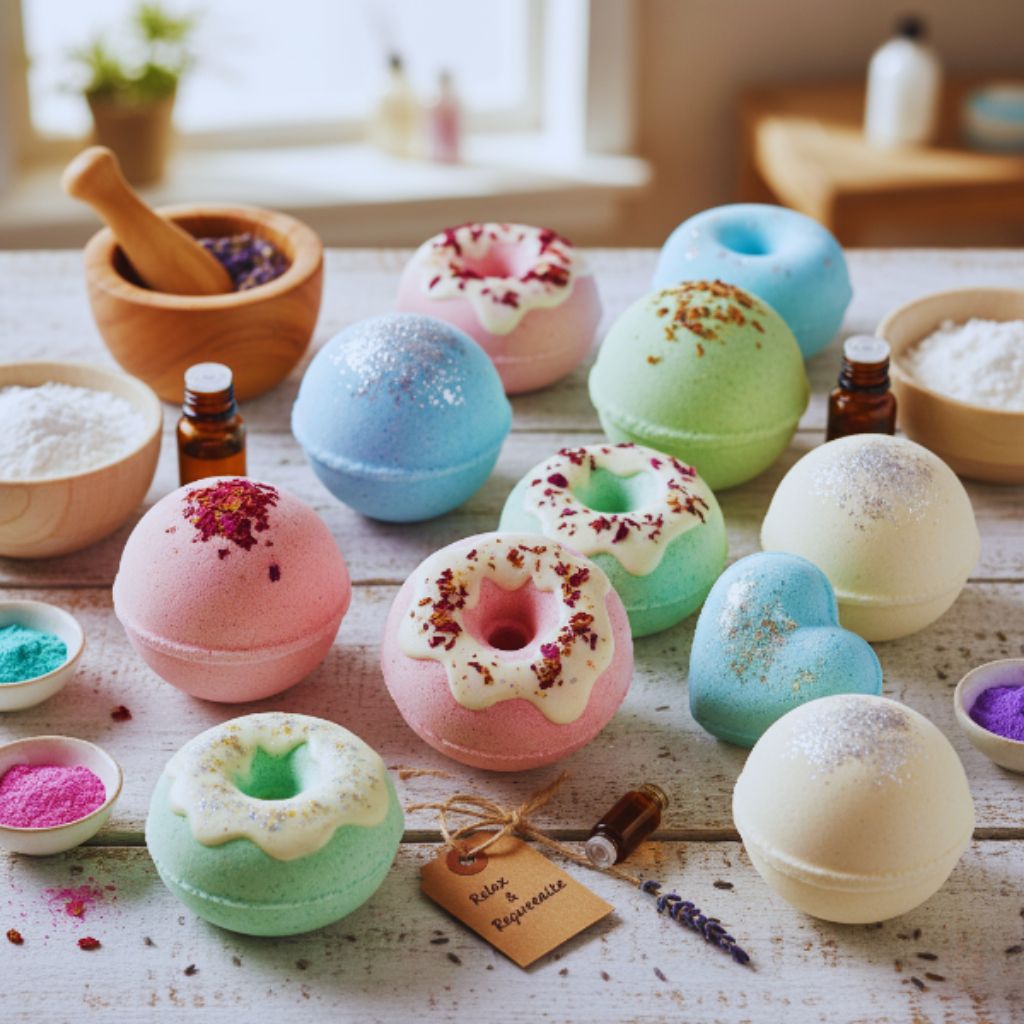
6. DIY Scented Bath Bombs

Assorted handmade bath bombs with flowers and essential oils.
“Relax and refresh with DIY bath bombs in your favorite scents and colors.”

Who doesn’t love a spa day? Create custom-scented bath bombs in your giftee’s favorite fragrance or color palette.

Why It’s Perfect:

  • Budget-friendly yet luxurious.
  • Customizable for relaxation, skincare, or stress relief.
  • Aesthetic and great for gift baskets.

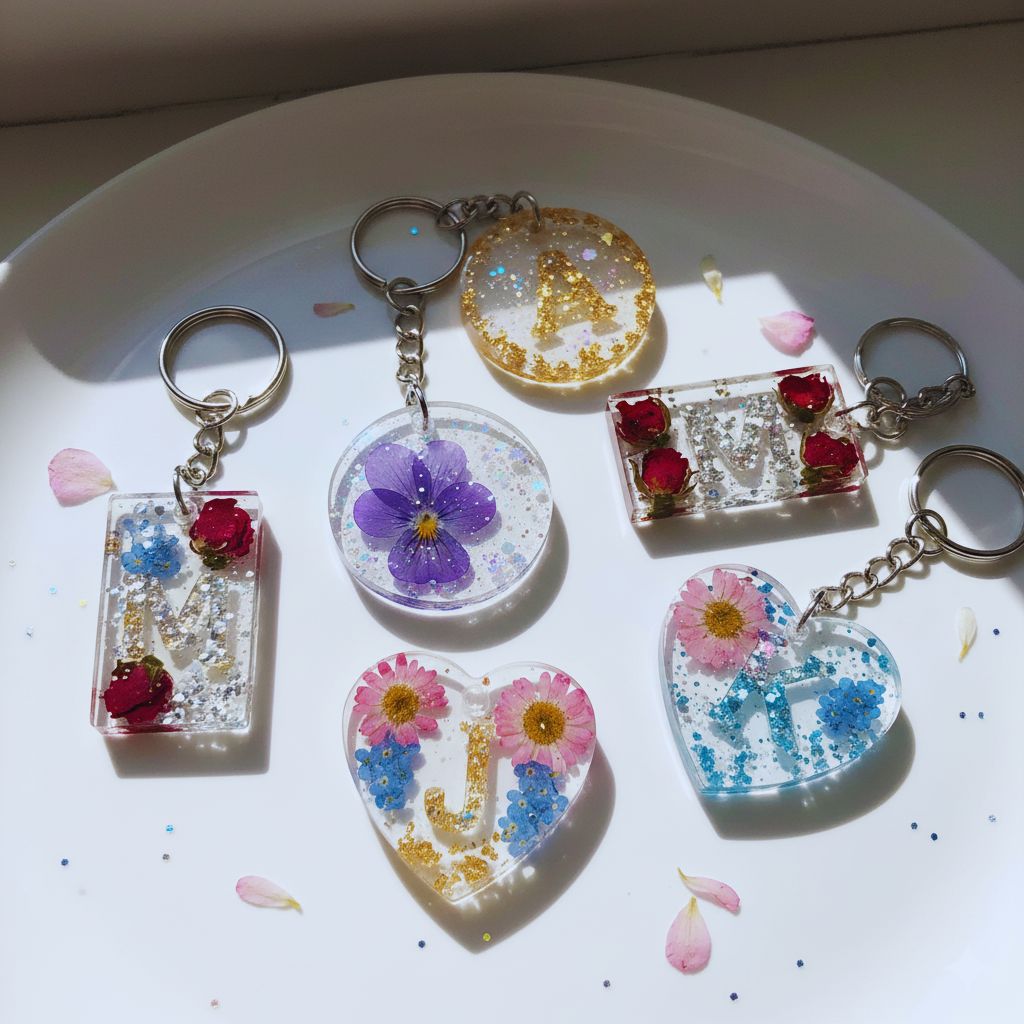
7. Personalized Name Keychains

Colorful resin name keychains with glitter and initials.
“Stylish and simple — personalized keychains that make every day a little brighter.”

Craft stylish resin or clay keychains with initials, glitter, or pressed flowers.

Why It’s Perfect:

  • Quick and inexpensive.
  • Trendy and gender-neutral.
  • Ideal for party favors or group gifts.

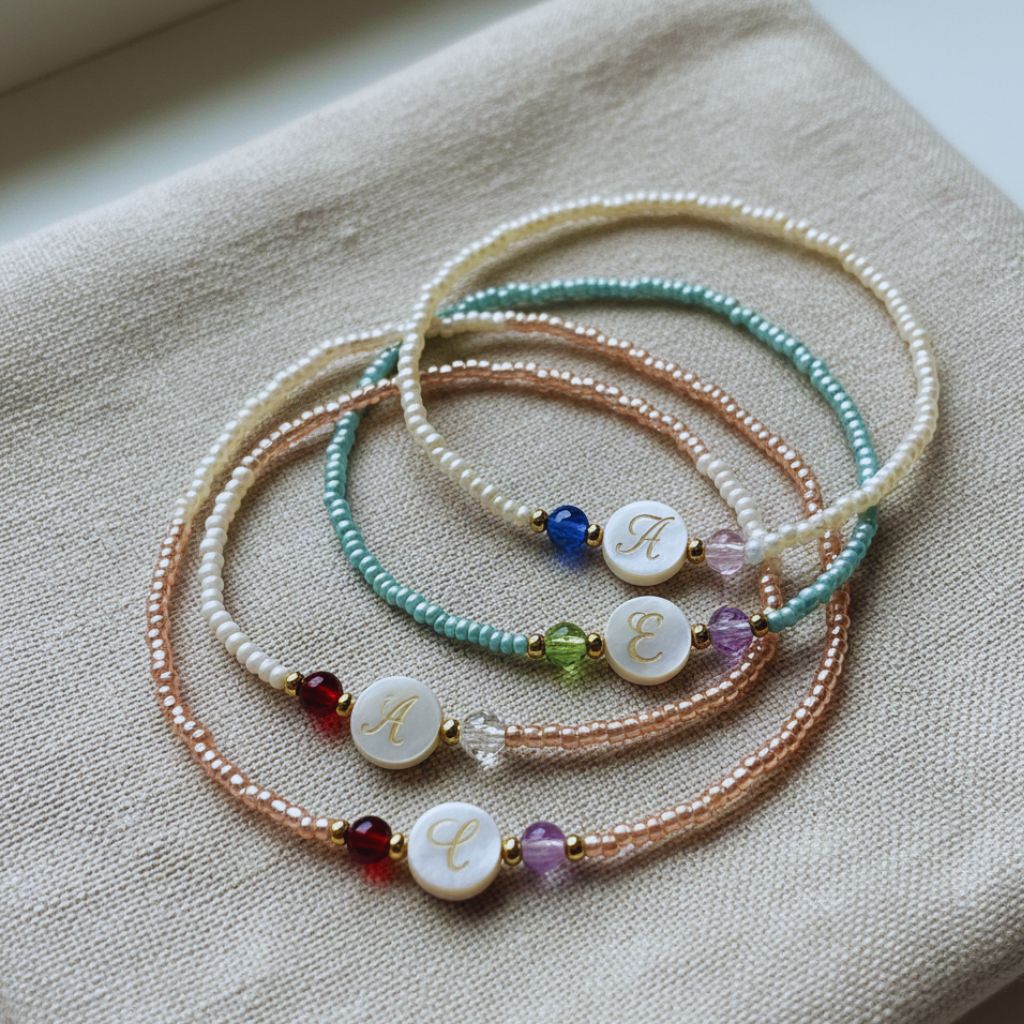
8. Handcrafted Jewelry with Meaning

Beaded bracelets with birthstones and letter charms on a fabric background.
“Wear your story — handcrafted jewelry that symbolizes love, friendship, and strength.”

Make simple yet stunning bracelets or necklaces using beads, initials, or birthstones. Each piece can symbolize something — friendship, love, or strength.

Why It’s Perfect:

  • Deeply personal and wearable.
  • Easy to craft at home.
  • Perfect for best friends or siblings.

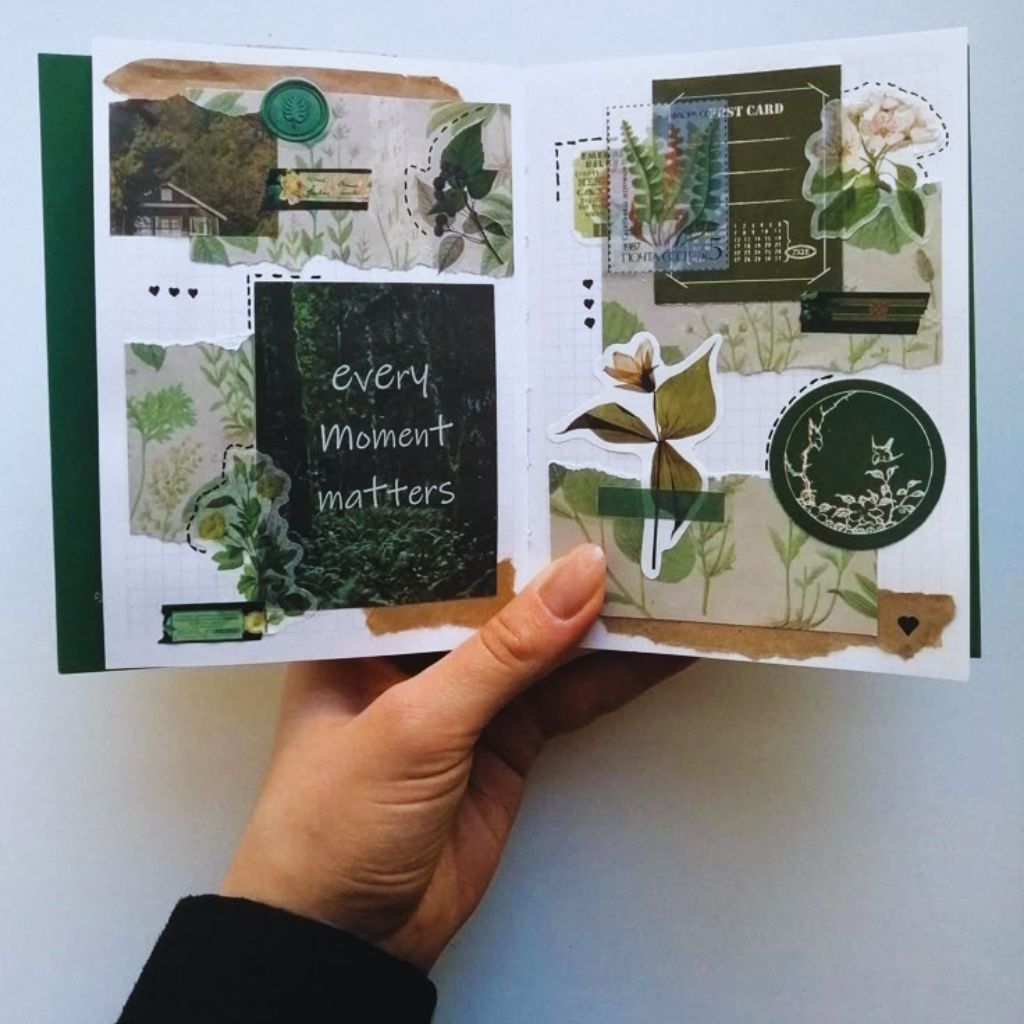
9. Photo Collage Journal

Scrapbook journal decorated with photos, doodles, and captions.
“Collect your favorite memories in a photo collage journal made with love.”

Buy a plain notebook and turn it into a photo + memory scrapbook with handwritten captions, doodles, and stickers.

Why It’s Perfect:

  • A sentimental keepsake for years to come.
  • Perfect for long-distance relationships or close friends.

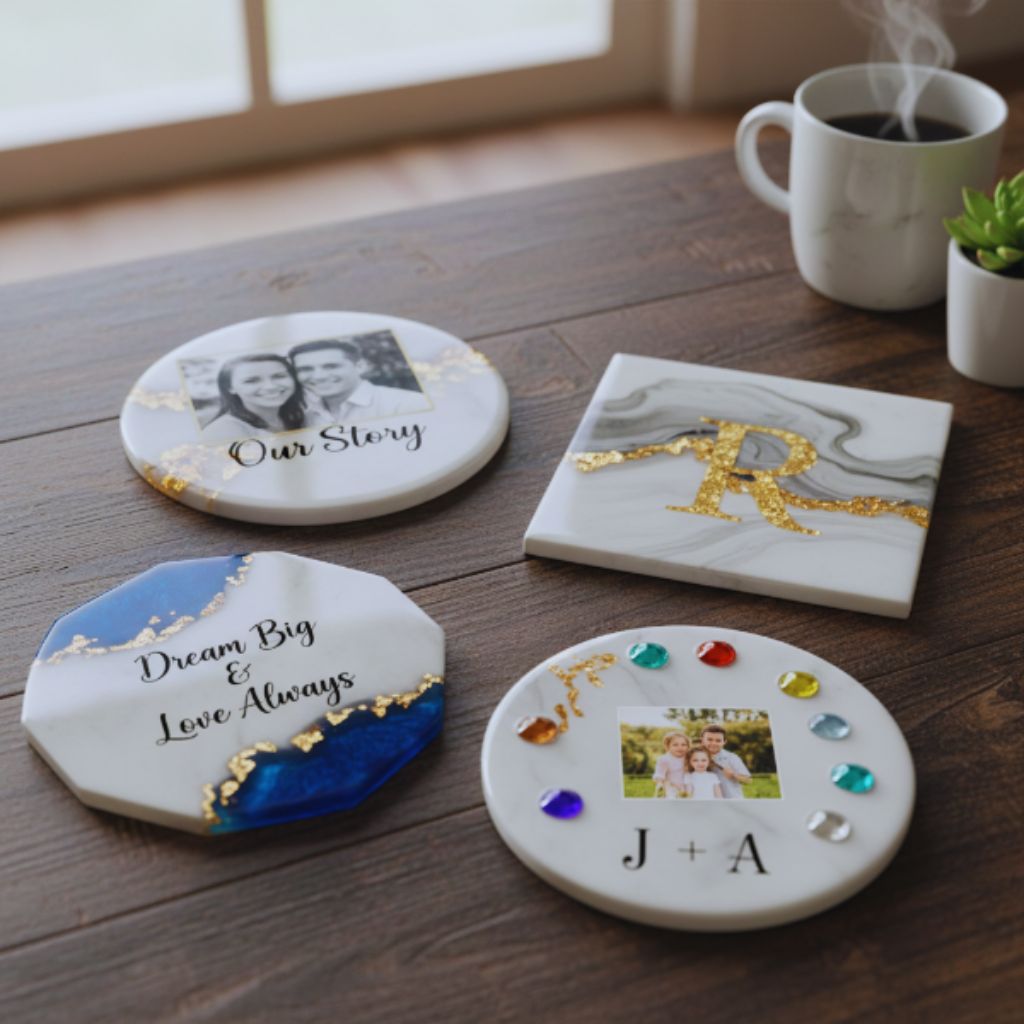
10. Custom Coasters

Custom photo and resin coasters arranged on a wooden table.
“Add personality to your home with functional yet stylish custom coasters.”

Create photo coasters or marble-look resin coasters with initials, quotes, or aesthetic designs.

Why It’s Perfect:

  • Functional and stylish.
  • Adds personality to a home.
  • Perfect for hosts or homebody friends.

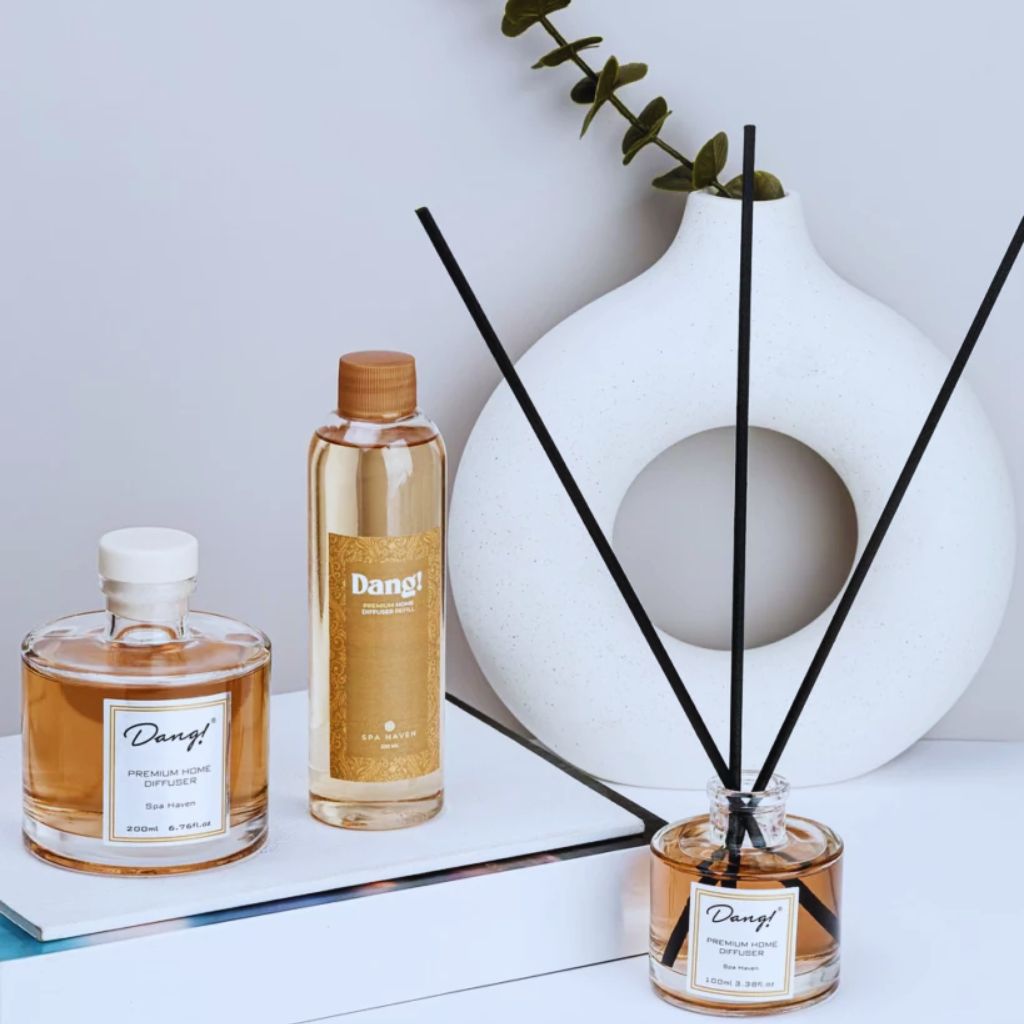
11. DIY Fragrance Diffuser

Essential oil diffuser bottle with wooden reeds and custom label.
“Bring calm to any space with a handmade fragrance diffuser.”

Mix essential oils and carrier oils in a cute glass bottle, add wooden reeds, and attach a personalized label.

Why It’s Perfect:

  • Chic and relaxing gift.
  • Adds elegance to any room.
  • Smells divine!

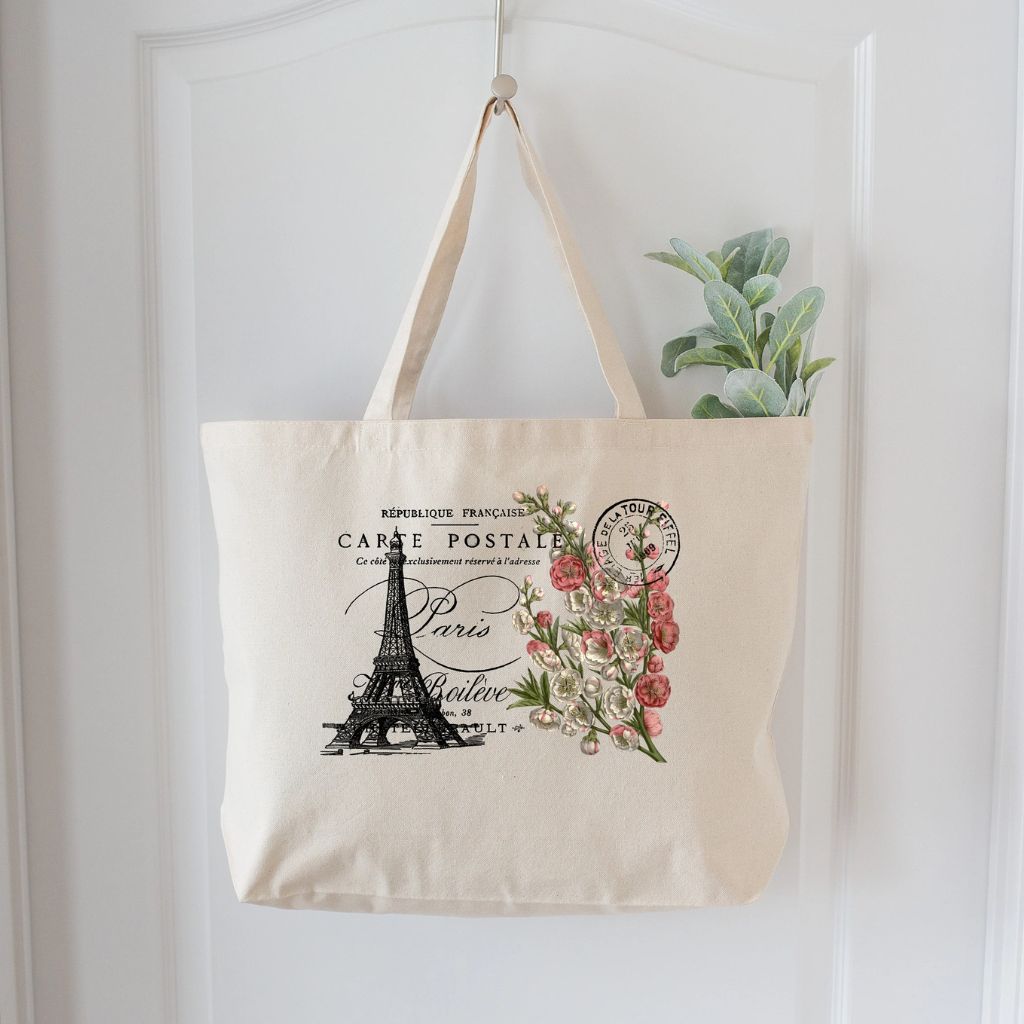
12. Personalized Tote Bags
Hand-painted cotton tote bags with floral and quote designs.
“Eco-friendly and expressive — personalize tote bags with art that speaks to you.”

Buy a plain cotton tote and paint it with a design, quote, or initials using fabric paints or vinyl letters.

Why It’s Perfect:

  • Practical and reusable.
  • Perfect for students, moms, or co-workers.
  • Eco-friendly and trendy.

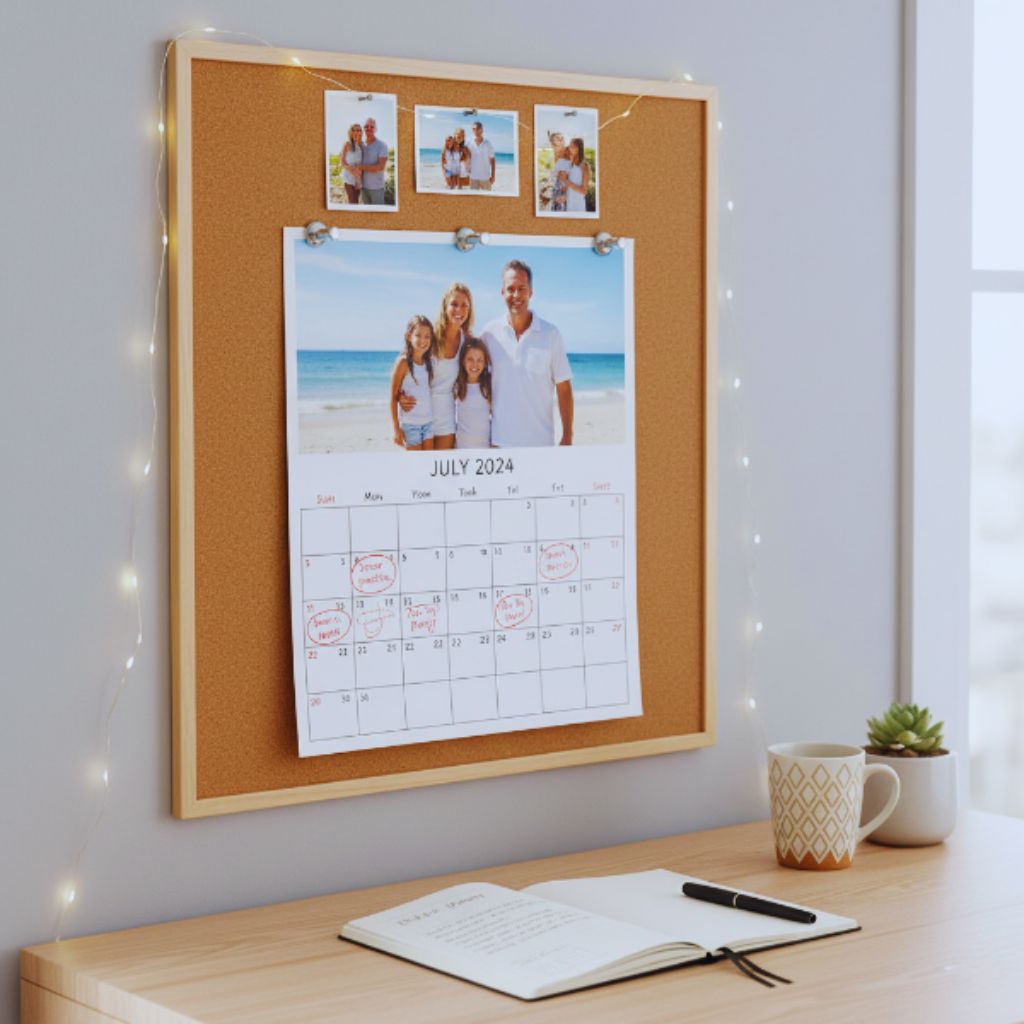
13. Customized Calendar of Memories

Photo calendar featuring personalized pictures and notes.
“Celebrate every month with a customized photo calendar full of memories.”

Create a 12-month photo calendar with pictures and little notes for each month.

Why It’s Perfect:

  • Useful all year.
  • Filled with memories and motivation.
  • Perfect for partners or families.

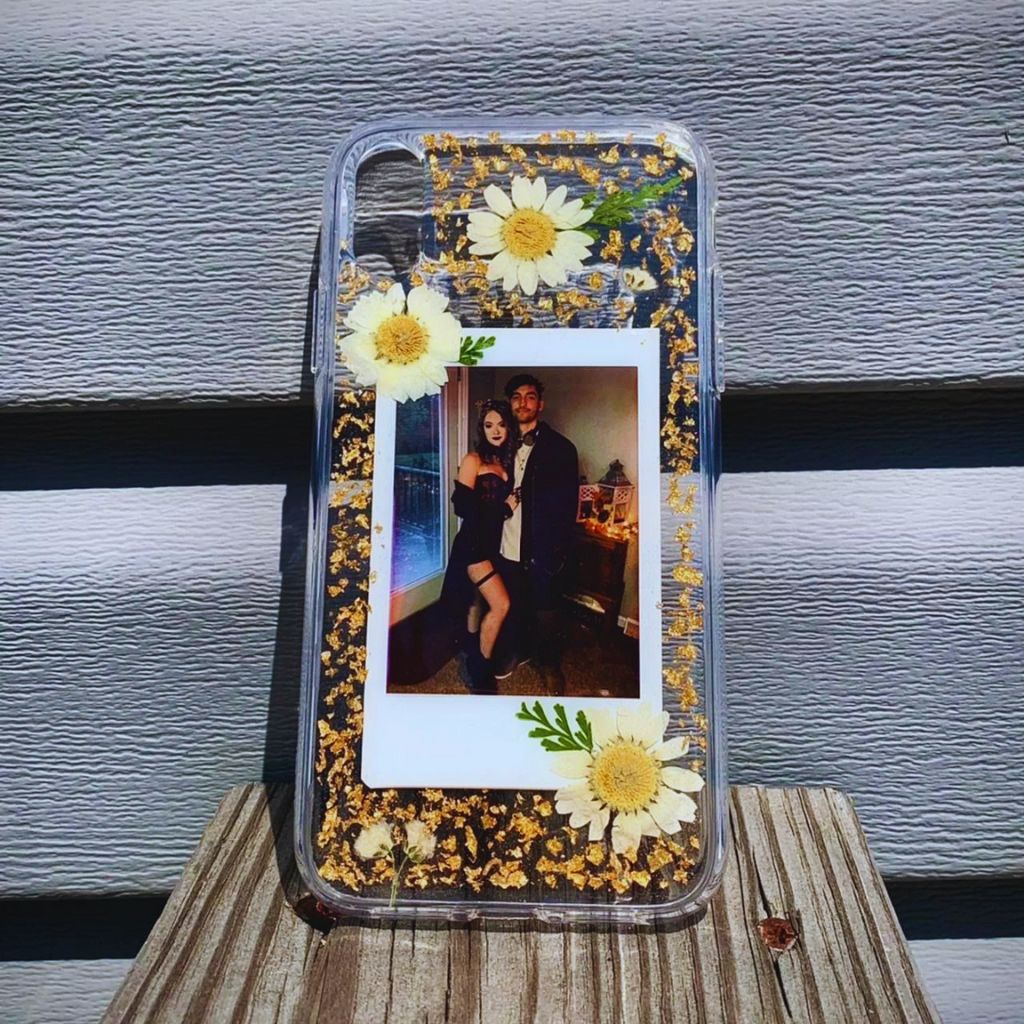
14. Personalized Phone Case

Custom phone cases with pressed flowers and photo inserts.
“Design your world — personalized phone cases for every style and story.”

Design your own phone case using printed photos, vinyl decals, or pressed flowers under clear resin.

Why It’s Perfect:

  • Always in use.
  • Easy to customize for any style.
  • Creative and trendy.

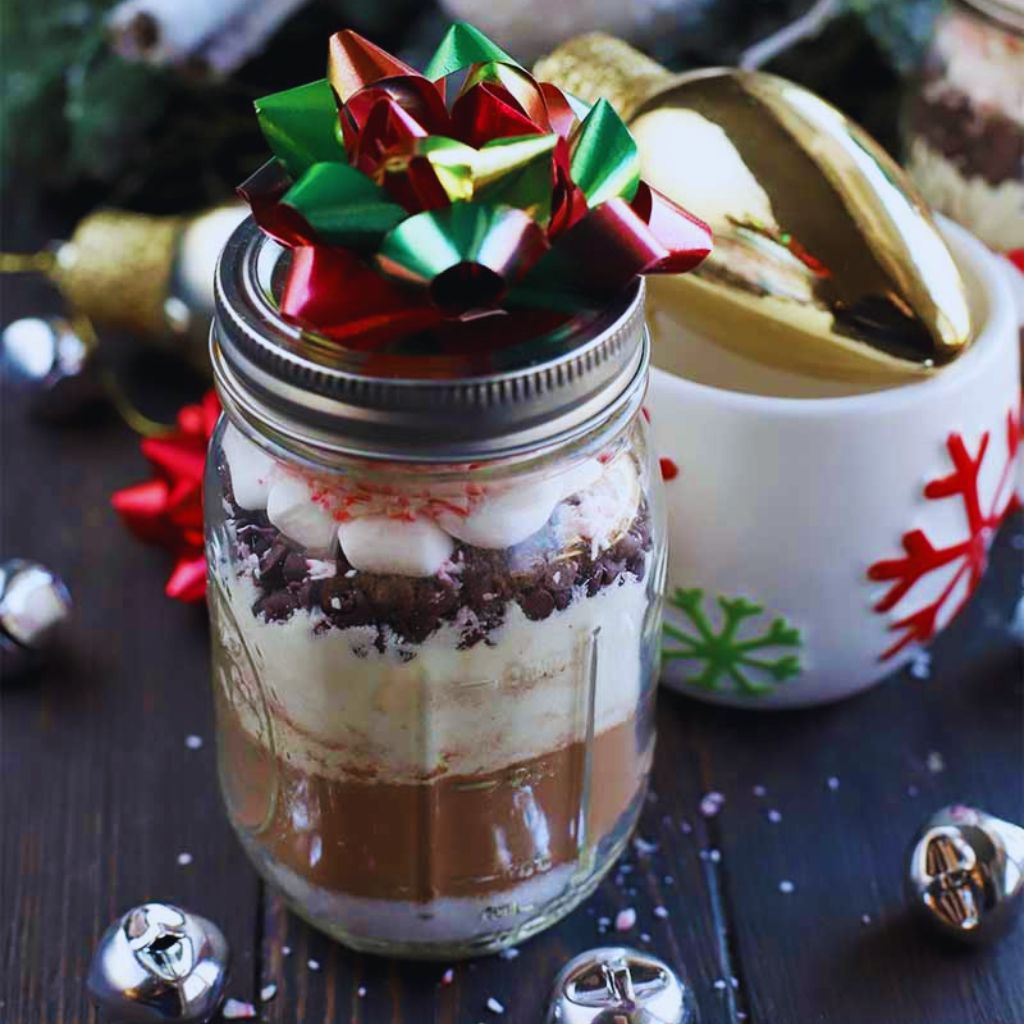
15. DIY Hot Chocolate Gift Set

Mason jar filled with cocoa mix and marshmallows tied with a ribbon.
“Sweeten someone’s day with a cozy DIY hot chocolate gift set.”

Layer cocoa mix, marshmallows, and chocolate chips in a mason jar, and tie it with a ribbon and name tag.

Why It’s Perfect:

  • Cozy, cute, and delicious.
  • Great for holidays or winter birthdays.
  • Looks beautiful when packaged.

Why DIY Personalized Gifts Always Win

DIY gifts go beyond material things — they show effort, emotion, and creativity.

They say: “I know you, I made this for you.”

Unlike store-bought gifts, these handmade treasures have a story, a memory, and a personal connection. Whether it’s for a birthday, wedding, or holiday, personalized gifts always make people feel seen and appreciated.

Final Thoughts: Make It Personal, Make It Memorable

Gift-giving shouldn’t be stressful or repetitive. With these 15 DIY personalized gift ideas, you can create something that’s both beautiful and meaningful — something they’ll actually use, love, and remember.

It’s time to stop buying boring gifts and start crafting gifts that tell a story, spark emotions, and celebrate connection.

So grab your glue gun, a bit of creativity, and your Pinterest inspo — because this year, the best gifts come from the heart.

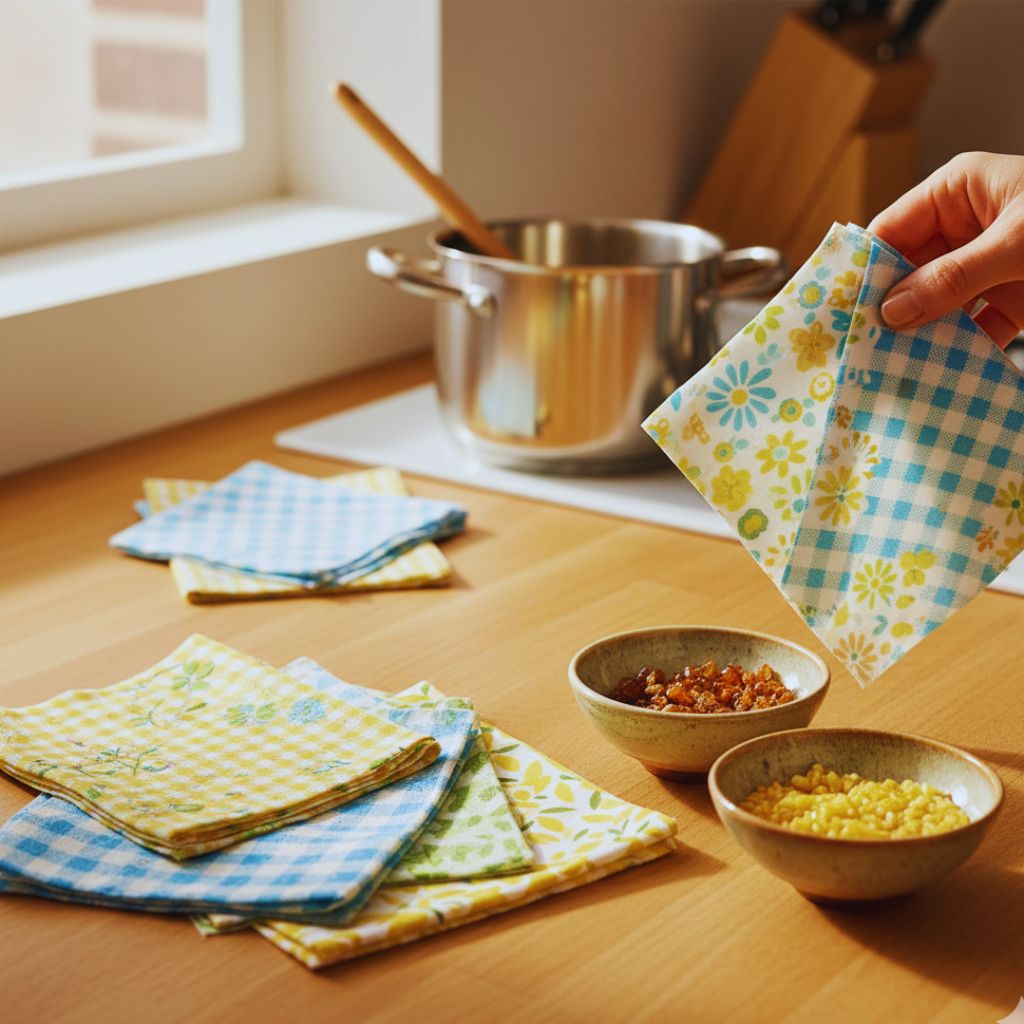
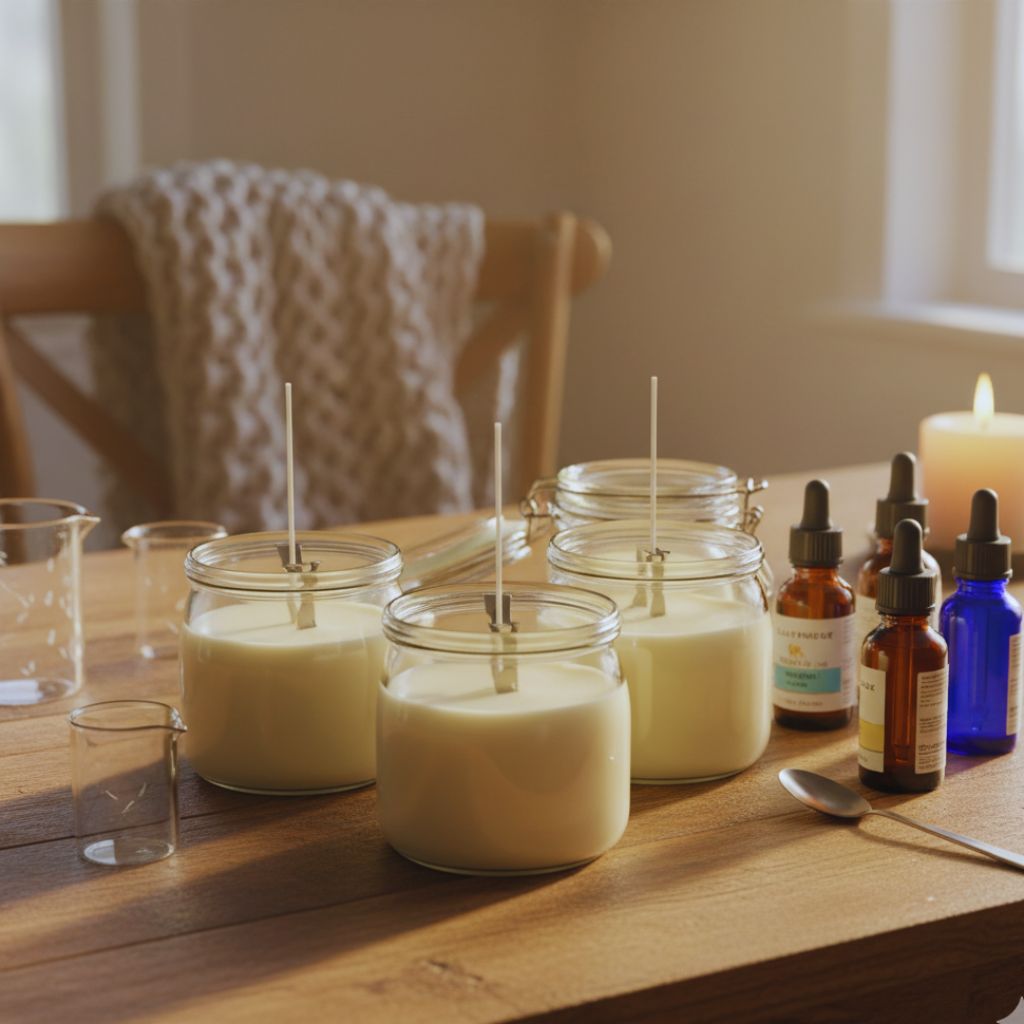
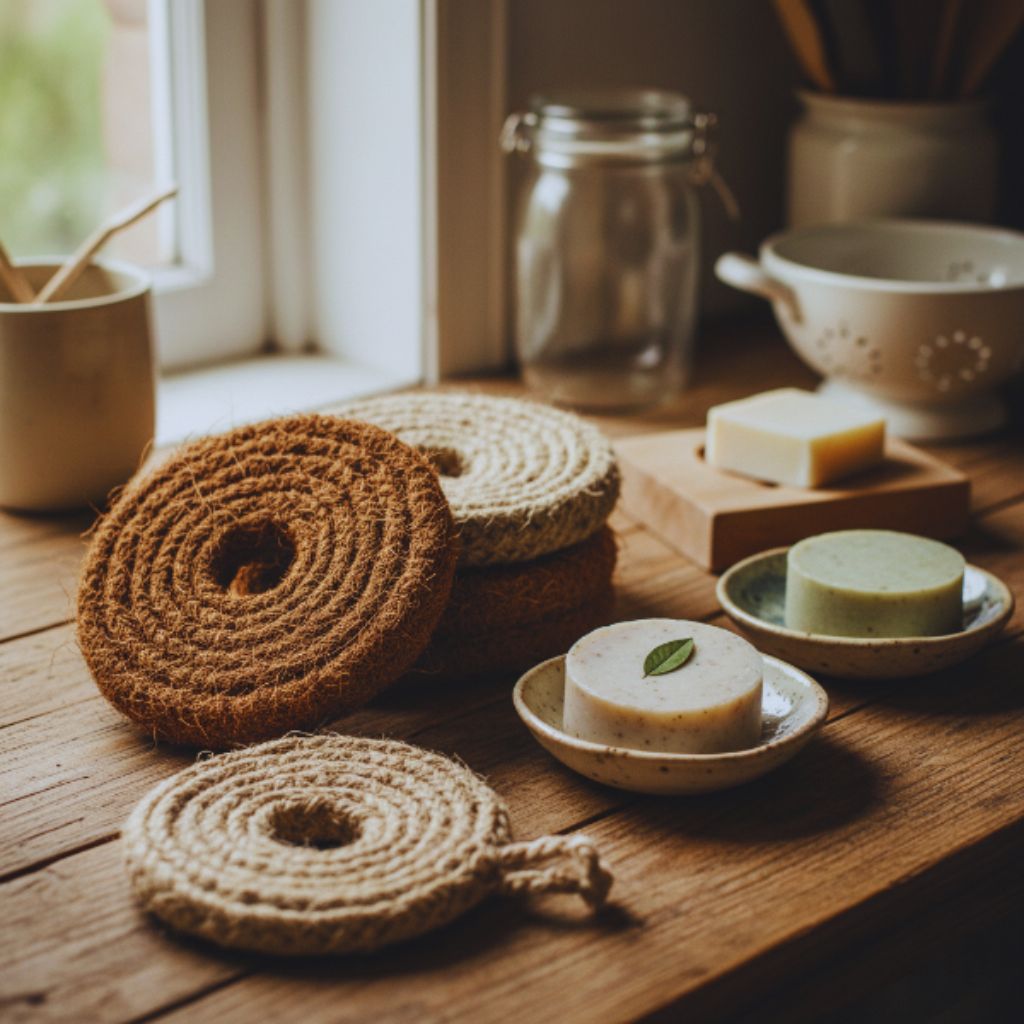
Eco-friendly DIY crafts including beeswax wraps, candles, soaps, and reusable cotton pads displayed in a cozy zero-waste setting.

In today’s world, living sustainably isn’t just trendy — it’s essential. But the idea of zero-waste living can feel intimidating. Where do you start? How do you make a difference without breaking the bank? The answer is simple: DIY projects.

Not only are zero-waste DIY projects eco-friendly, but they also save money and make thoughtful gifts. Imagine giving your loved ones something handmade, sustainable, and completely unique — all while reducing waste.

In this article, we’re sharing 5 zero-waste DIY projects that are practical, fun, and easy to create at home. Each project is designed to help you save money, minimize environmental impact, and impress friends and family with thoughtful gifts.

1. Reusable Beeswax Food Wraps

Reusable beeswax food wraps made from cotton fabric and beeswax, displayed in a bright kitchen, perfect for zero-waste DIY projects.
Ditch single-use plastic! Make your own beeswax wraps for a zero-waste kitchen. Eco-friendly, budget-friendly, and perfect as handmade gifts.

Say goodbye to single-use plastic wraps! Beeswax food wraps are a sustainable, stylish, and cost-effective alternative.

Materials Needed:

  • Cotton fabric scraps
  • Beeswax pellets
  • Pine resin (optional for extra stickiness)
  • Jojoba oil

Steps:

  1. Cut fabric into squares or rectangles.
  2. Sprinkle beeswax pellets evenly over the fabric. Add pine resin and a few drops of jojoba oil.
  3. Place the fabric on a baking sheet and melt in the oven at low heat or use an iron with parchment paper.
  4. Let cool. Your reusable wrap is ready!

Why It Works:

  • Eco-Friendly: Reduces plastic use in the kitchen.
  • Money-Saving: One wrap lasts months, replacing dozens of disposable wraps.
  • Gift-Worthy: Pair with a set of different patterns for a cute, personalized gift.

2. Homemade Natural Candles

Homemade natural candles in upcycled glass jars with essential oils, showcasing a zero-waste DIY project.
Create cozy vibes with homemade natural candles . Eco-friendly, sustainable, and the perfect personalized gift for friends or family.

Candles are a staple in many homes, but store-bought candles often come in plastic containers and synthetic waxes. Making your own zero-waste candles is fun, easy, and creative.

Materials Needed:

  • Soy wax or beeswax
  • Old glass jars or tins (repurposed)
  • Cotton wicks
  • Essential oils (for fragrance)

Steps:

  1. Melt the wax in a double boiler.
  2. Add a few drops of your favorite essential oil.
  3. Place the wick in the jar and pour the wax carefully.
  4. Let the candle cool and trim the wick.

Why It Works:

  • Cost-Efficient: Repurpose jars and tins from around the house.
  • Eco-Friendly: Avoids synthetic chemicals and reduces waste.
  • Personalized Gifts: Customize scents and colors for friends and family.

3. Upcycled Fabric Tote Bags

Upcycled fabric tote bag made from old t-shirts, held by a model at a farmers’ market, showcasing zero-waste DIY fashion.
Turn old clothes into stylish tote bags . Eco-friendly, zero-waste, and practical — perfect for groceries or gifting!

Plastic bags are one of the most common pollutants. Making a reusable tote bag from old clothing or fabric scraps is a practical and stylish zero-waste project.

Materials Needed:

  • Old t-shirts, pillowcases, or fabric scraps
  • Sewing machine or needle and thread
  • Scissors

Steps:

  1. Cut the fabric into two equal rectangles for the bag’s front and back.
  2. Sew the sides and bottom together.
  3. Create handles by cutting and folding extra fabric, then stitch onto the top.

Why It Works:

  • Eco-Friendly: Reduces single-use bag consumption.
  • Budget-Friendly: Turns old clothing into a useful item.
  • Gift Potential: Perfect for farmers’ market trips, books, or groceries.

4. DIY Compostable Scrubbers

Compostable scrubbers made from natural fibers such as coconut coir and jute, displayed in an eco-friendly zero-waste kitchen setting.
Replace plastic sponges with handmade compostable scrubbers . Sustainable, eco-friendly, and budget-friendly zero-waste solution for your kitchen.

Kitchen waste is unavoidable, but zero-waste scrubbers help reduce plastic sponges. You can make your own eco-friendly scrubbers using natural materials.

Materials Needed:

  • Coconut coir, jute, or sisal fiber
  • Scissors and string (optional for weaving)

Steps:

  1. Cut fibers into desired shapes (circle, square, rectangle).
  2. Weave or braid fibers loosely and tie ends.
  3. Use as a scrubber for dishes, pots, and pans.

Why It Works:

  • Sustainable: Biodegradable and long-lasting.
  • Cost-Saving: Replaces store-bought plastic scrubbers.
  • Gift-Worthy: Add a few with natural soaps for a zero-waste kitchen set.

5. Upcycled Jar Herb Garden

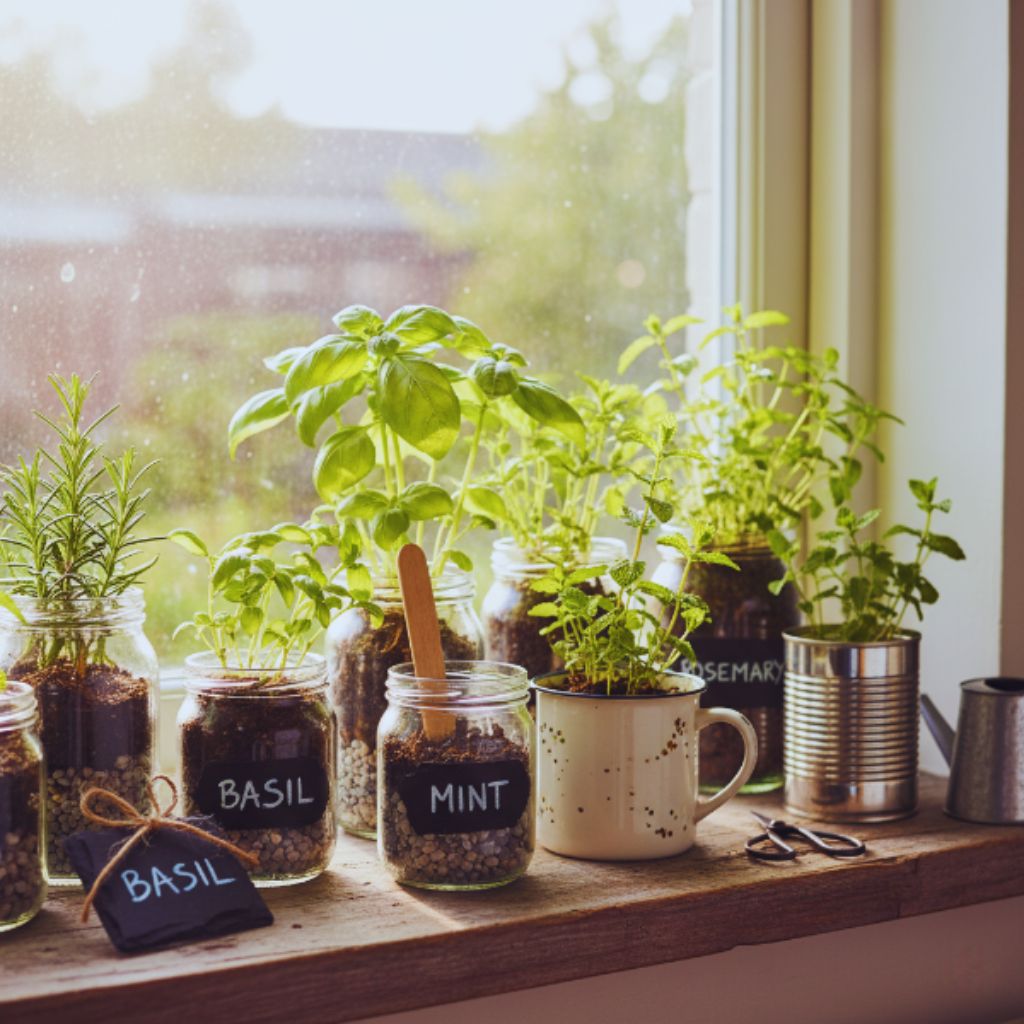
Upcycled jars used as herb garden planters, displayed on a sunlit windowsill, showcasing a zero-waste DIY project.
Grow your own herbs sustainably . Repurpose jars for a zero-waste herb garden — perfect as eco-friendly gifts or home décor!

For anyone who loves fresh herbs or indoor gardening, creating a mini herb garden in repurposed jars is an easy and eco-conscious DIY project.

Materials Needed:

  • Old jars, mugs, or tin cans
  • Soil and small pebbles for drainage
  • Herb seeds or small plants

Steps:

  1. Place a layer of small pebbles at the bottom for drainage.
  2. Add soil and plant seeds or small herbs.
  3. Decorate the jars with labels or paint for a personal touch.

Why It Works:

  • Zero-Waste: Repurposes jars and reduces packaging waste from store-bought plants.
  • Cost-Saving: Grows herbs at home instead of buying packaged ones.
  • Gift Potential: Personalize jars and herbs for eco-friendly gifts.

Why Zero-Waste DIY Projects Are Worth It

These 5 projects prove that zero-waste living doesn’t have to be boring or expensive. They offer:

  • Financial Benefits: Most projects use repurposed materials or low-cost items.
  • Environmental Impact: Reduce waste, plastic use, and chemicals in your home.
  • Creative Satisfaction: Handmade gifts carry more meaning than store-bought items.
  • Personalization: Every item can be customized with colors, scents, and designs.

DIY zero-waste projects blend practicality with creativity, making them perfect for anyone looking to live more sustainably.

Tips to Make Your Zero-Waste Projects Successful

  1. Start Small: Begin with one project to avoid overwhelm.
  2. Use Repurposed Materials: Old clothes, jars, and scrap fabrics reduce waste and cost.
  3. Personalize: Add labels, paint, or scents to make gifts memorable.
  4. Document Your Process: Share on social media to inspire others.
  5. Mix Practicality with Fun: Choose projects that are useful in daily life.

Final Thoughts: Sustainable, Creative, and Budget-Friendly

Zero-waste DIY projects are not just eco-friendly; they’re a way to express creativity, save money, and make thoughtful gifts. From beeswax wraps to mini herb gardens, each project encourages mindful living while providing tangible results.

By incorporating these 5 zero-waste DIY ideas, you’ll reduce your environmental footprint, enjoy fun hands-on activities, and impress friends and family with thoughtful, handmade gifts.

Zero-waste living doesn’t have to be intimidating — start small, get creative, and make a difference one DIY project at a time.

DIY Haunted House Decor Ideas – floating candles with eerie lighting, spooky bats, and dark ambiance, perfect for budget-friendly Halloween home decorating.

The moment I see a $50 plastic spider at a big-box store, I physically cringe. Like—why? It’s literally hollow plastic, and it’ll break before you even pull it out again next year. Halloween is supposed to be creepy and fun, not a second mortgage.

The problem? Store-bought Halloween decor is expensive, tacky, and honestly, your neighbors all have the same exact stuff. The solution? Get creative with Creepy DIY Halloween Decor that looks way more professional, using things you already own or can score for dirt-cheap at a thrift shop.

And here’s the best part—I promise you, if you try even one of these ideas, your house will look so legit your neighbors will assume you hired a Hollywood set designer. All while you sit back, smugly counting the money you didn’t spend.


The “Thrift Store is Your Best Friend” Mindset

So how do you pull off Professional Halloween Decor DIY without spending actual cash? The secret isn’t brand names—it’s texture, lighting, and volume.

Think about it: nobody’s scared of a plastic bat still in its packaging. But old lace curtains with holes, a chipped mirror with “something” in it, or a stack of creepy old books? That’s instant haunted house.

Here’s what I hunt for at thrift stores (and what you should keep an eye out for too):

  • Old books (bonus points if the covers are falling apart—hello spellbooks!)
  • Broken picture frames (perfect for “haunted portraits”)
  • Cheap lace curtains or tablecloths (distress them and boom—spiderweb vibes)
  • Cracked mirrors (or even intact ones you can distress yourself)
  • Random candlesticks (you don’t even need the candles—DIY coming up below)
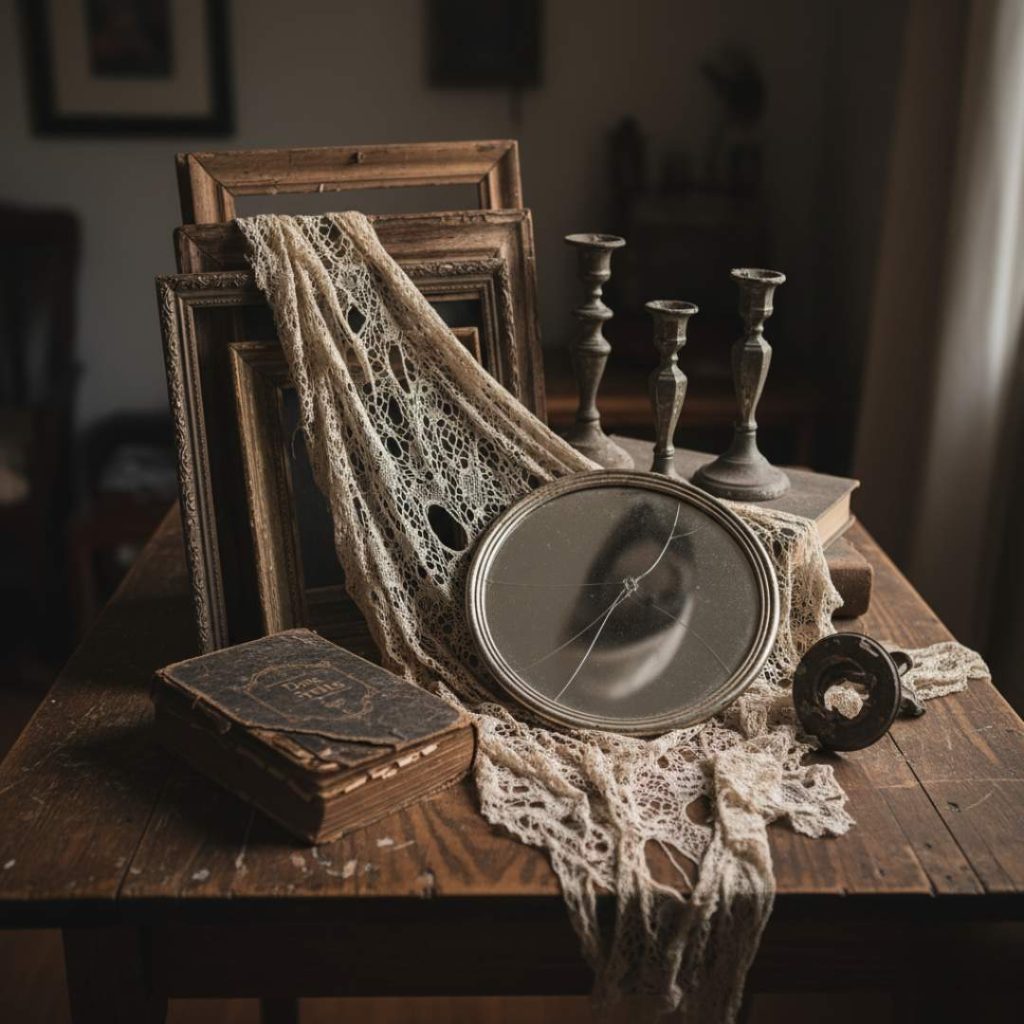
A rustic Halloween still life featuring a broken vintage mirror, old candlesticks, a weathered book, and tattered lace draped over antique frames on a wooden table.
Every crack tells a story—this broken mirror and forgotten book whisper of a past that refuses to fade, perfect for setting a truly haunted atmosphere.

With just a few of these, you’ll have the raw ingredients for a haunted house that looks way more “creepy chic” than “Spirit Halloween clearance bin.”


Three High-Impact, Low-Cost DIY Tutorials

Alright, let’s get into the fun part. Three Thrift Store Halloween Hacks that will make your space look like you hired a special effects team—without even touching your wallet too hard.

1. The “Aging Mirror” Hack

What you need:

  • A mirror from the thrift store (the cheaper and uglier, the better)
  • Spray bottle filled with water and vinegar
  • Black or gold spray paint (or both)

Steps:

  1. Lightly spray the back of the mirror with your vinegar/water mix.
  2. Spray over it with your paint—black for depth, gold for that “antique haunted mansion” vibe.
  3. Let it dry, then wipe away the vinegar spots.
  4. Hang it back up. Now you’ve got a mirror that looks like it’s hiding ghosts instead of your reflection.
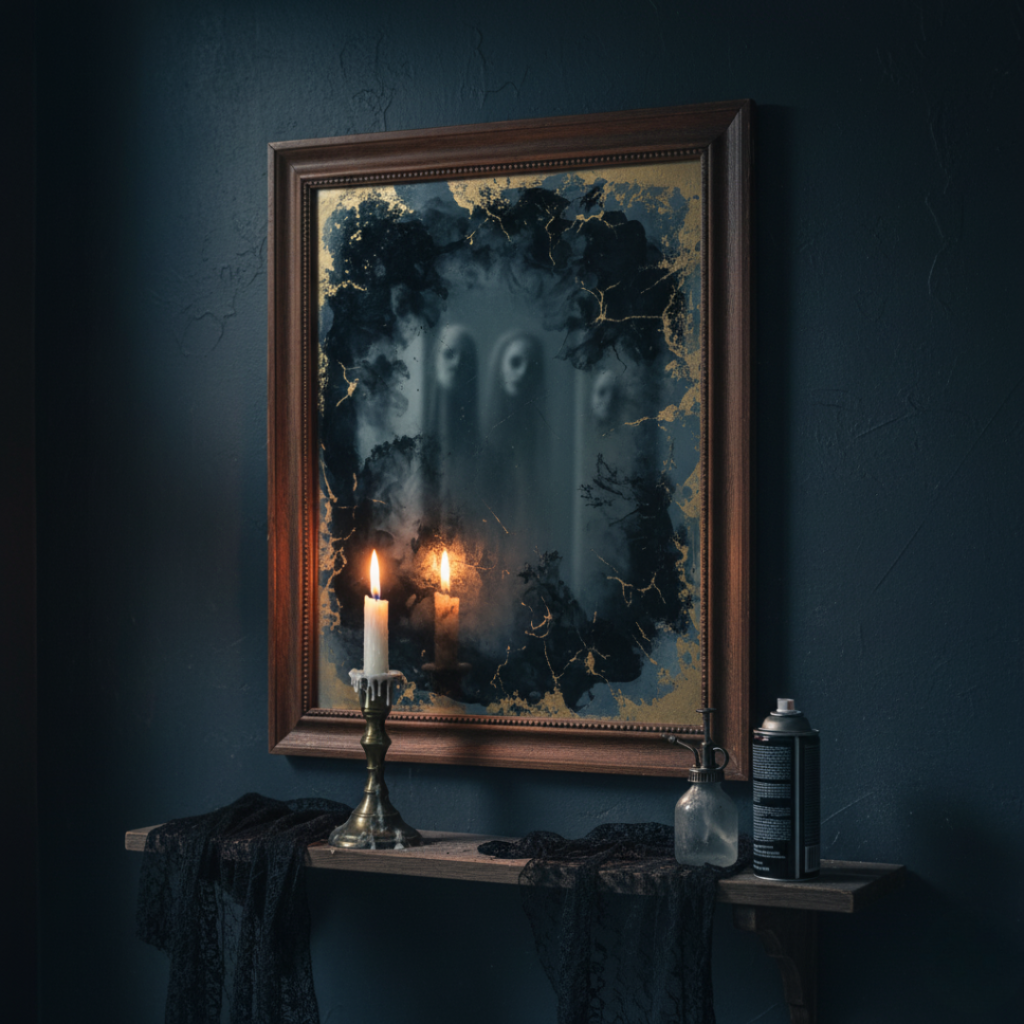
A spooky DIY aged mirror with ghostly reflections, candlelight, and cracked textures, perfect for a haunted house Halloween decor project.
Sometimes the scariest reflections aren’t in what we see, but in what we imagine

This trick is one of my favorite DIY Haunted House on a Budget hacks—everyone who sees it swears it’s an antique.


2. Floating Candle Effect

What you need:

  • Empty toilet paper rolls (yes, the trash ones)
  • Hot glue gun
  • White paint
  • LED tea lights
  • Clear fishing line

Steps:

  1. Hot glue some wax “drips” around the top of the tube.
  2. Paint the whole thing white.
  3. Drop in a tea light.
  4. Thread fishing line through and hang from the ceiling.
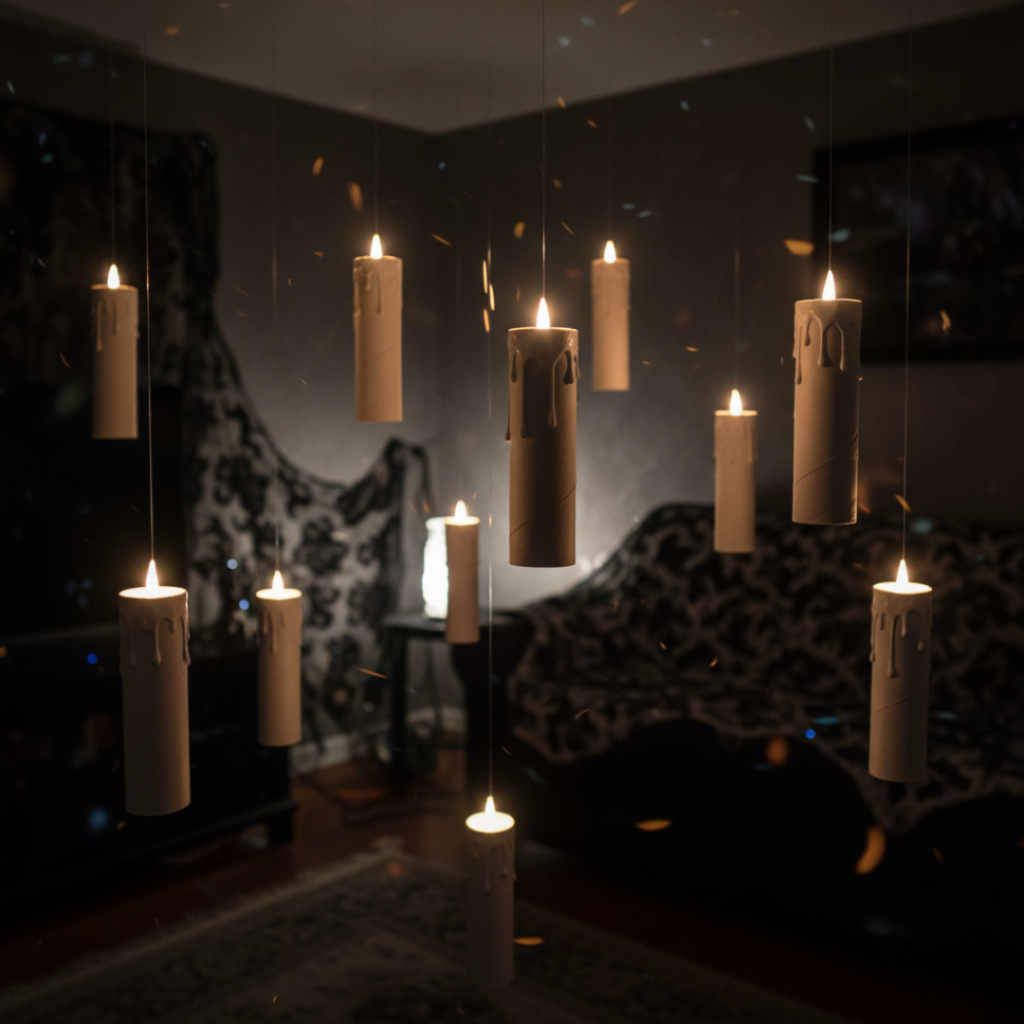
Floating DIY Halloween candles made from paper tubes with LED lights, creating a magical haunted house vibe.
these floating candles cost pennies but bring a professional haunted house effect.

Instant floating candles. These fill up vertical space in a room like nothing else and cost basically zero. It’s the ultimate Creepy DIY Halloween Decor trick.


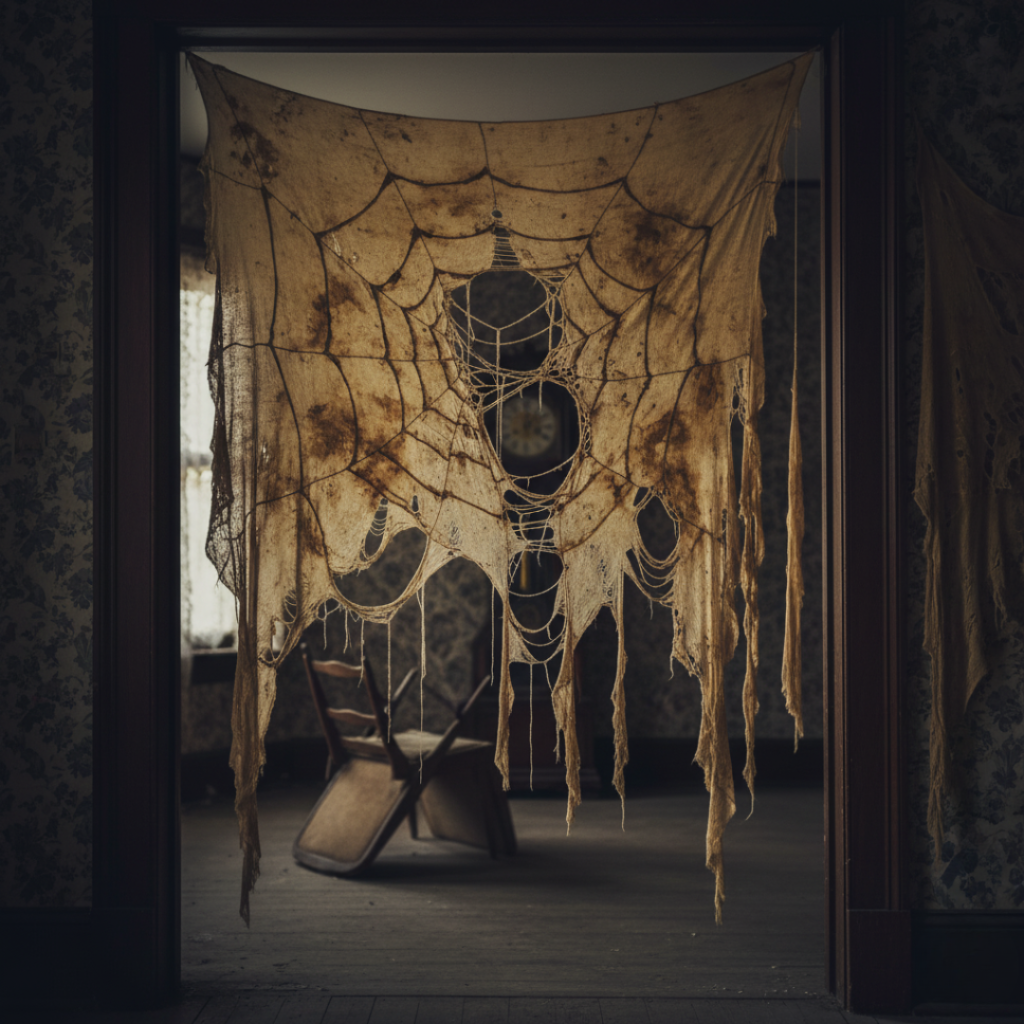
3. Lace Spiderweb Curtains

What you need:

  • Old lace curtains or a sheet
  • Tea bags
  • Scissors

Steps:

  1. Brew a strong pot of tea and soak the fabric to give it that yellowed, old look.
  2. Rip a few holes here and there (be messy—it’s creepier).
  3. Hang them across windows or doorways.
Distressed lace curtain styled as a giant spiderweb, hanging in an old haunted house doorway for spooky DIY Halloween decor
cheap, creepy, and unforgettable.

They look like abandoned cobwebs from some Victorian mansion. Plus, you can drape them in layers for maximum drama.


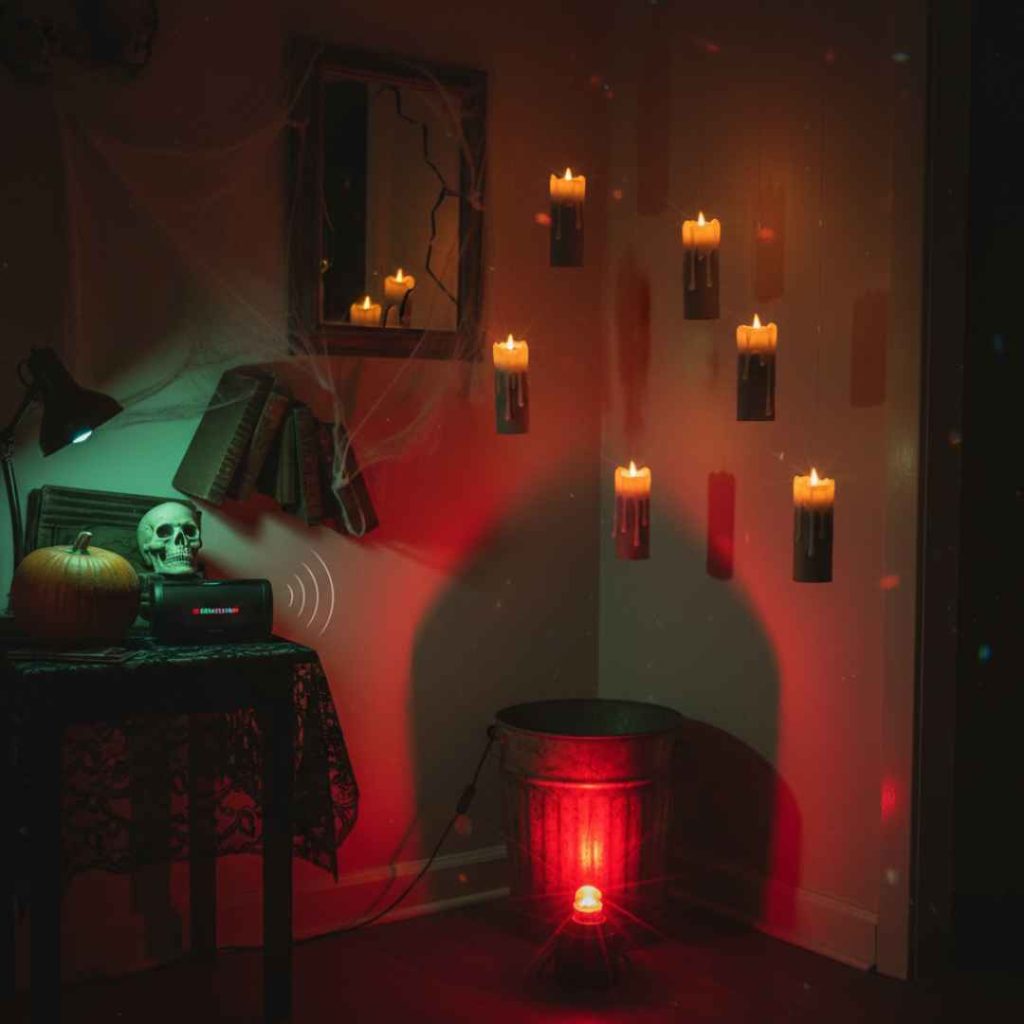
The Final Touch: Lighting and Sound

Here’s the truth: lighting is what separates Thrift Store Halloween Hacks from “Did you hire an event company?” status.

Cheap tricks that work:

  • Swap a regular bulb for a $2 red or green one.
  • Place a lamp on the floor shining upward—it instantly looks spooky.
  • Add a Bluetooth speaker in a hidden spot with creaky door or storm sounds.
A spooky Halloween corner with glowing candles, eerie red and green lights, a skull, pumpkin, and music speaker creating a chilling atmosphere.
Where sound meets shadows—music and lighting can turn any room into a haunted story.

True story: one year, I stuck a red bulb behind my trash can, and it legit looked like a monster was glowing inside. The kids on my block still talk about it.


Wrap-Up: You Don’t Need a Massive Budget—You Just Need a Plan

So, there you go. With just a thrift store run and some basic supplies, you can pull off Professional Halloween Decor DIY that looks creepier, cooler, and way more expensive than the store-bought stuff.

Now, I challenge you: pick just one of these hacks this weekend—make your mirror haunted, your candles float, or your curtains webbed. Then, show it off! Drop a picture of your Creepy DIY Halloween Decor in the comments, because I wanna see how spooky you get.

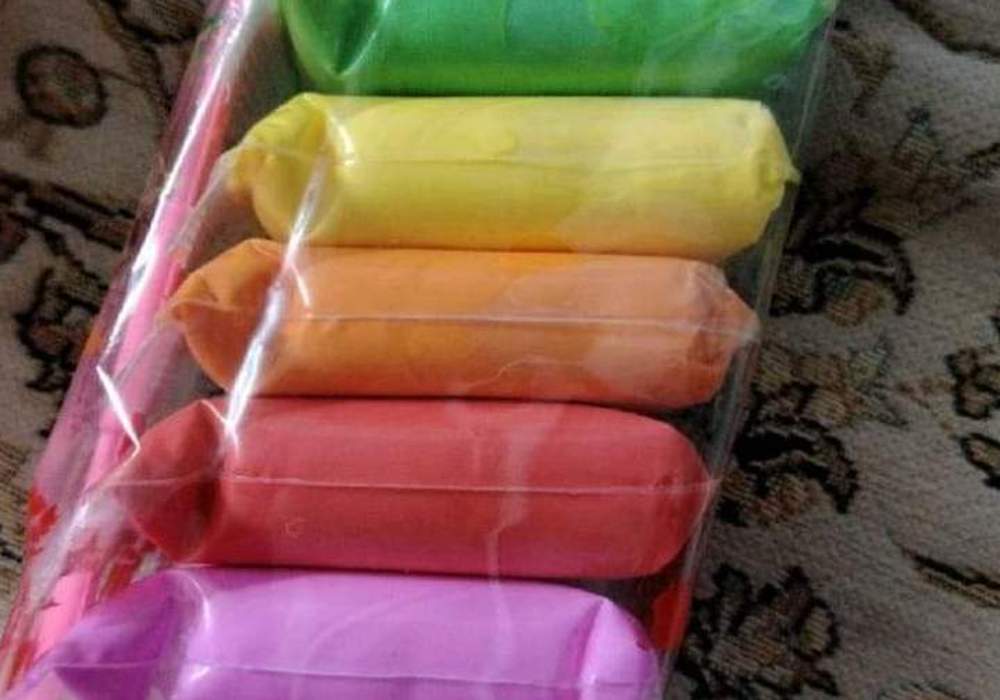
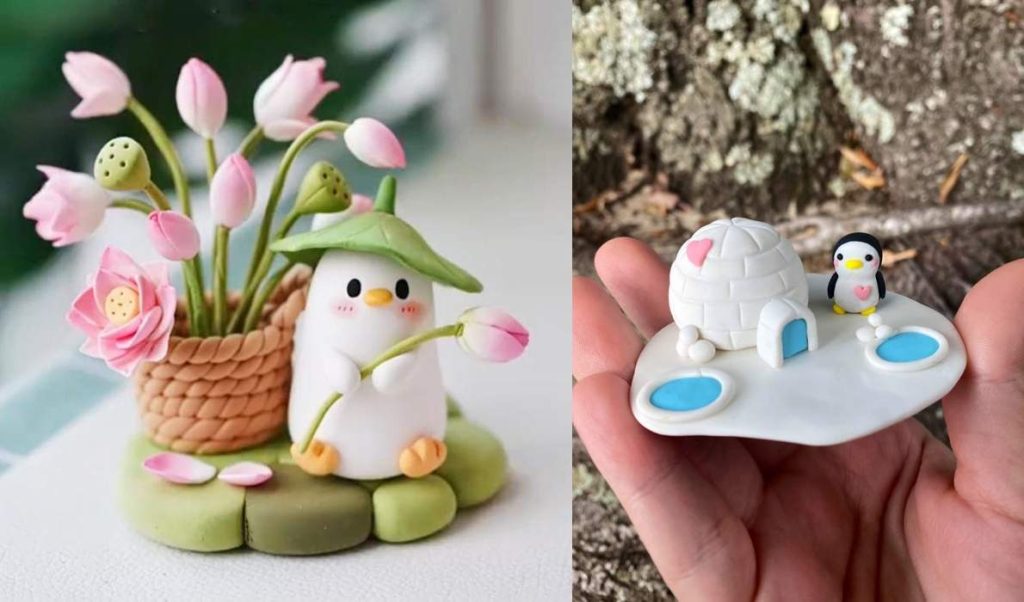
Colorful foam clay sticks with decorative clay penguin and flowers, used as a blog banner for a beginner’s guide to foam clay art and crafts.

If you’ve ever walked through a craft store or scrolled Pinterest lately, you might have seen colorful little tubs labeled foam clay. At first glance, it looks like Play-Doh. But foam clay is way more versatile. It’s soft, stretchy, lightweight, and it dries without cracking into a surprisingly durable finish. No oven, no kiln, no complicated setup — just pure hands-on creativity.

Over the last few years, foam clay has become a favorite for kids’ projects, DIY lovers, and even serious crafters who use it to make miniatures, jewelry, or home décor pieces. In this blog, we’ll break down everything you need to know about foam clay: how it works, what makes it special, beginner mistakes to avoid, and plenty of project ideas you can try at home.


What Exactly Is Foam Clay?

Foam clay is a lightweight, air-dry modeling clay made from tiny foam beads mixed into a sticky, moldable base. When fresh out of the tub, it’s soft, bouncy, and easy to shape. As it sits exposed to air, it gradually firms up and turns into a slightly flexible solid.

Unlike ceramic or polymer clay, you don’t need to bake it in a kiln or oven. It hardens naturally in 24–48 hours depending on thickness. Once dry, you can paint, sand, or seal it just like other clays.

In short: foam clay is the low-stress, high-fun option for crafters who want results without heavy tools or specialized equipment.


Foam Clay vs. Other Types of Clay

Many beginners get confused: is foam clay the same as air-dry clay? Or Play-Doh? Here’s a quick comparison:

TypeKey FeaturesBest ForDrawbacks
Foam ClayLightweight, textured, air-dries, slightly flexibleKids’ crafts, miniatures, home décor, wearable artLimited fine detail, may shrink slightly
Air-Dry Clay (traditional)Dense, smooth, dries hard & brittleSculptures, pottery lookalikesCracks if too thick; heavier pieces
Polymer ClaySmooth, oven-baked, professional finishJewelry, detailed modelsNeeds baking; heavier; not as beginner-friendly
Play-DohSuper soft, non-drying (unless left out)Toddler play, temporary craftsDoesn’t harden permanently

The main takeaway? Foam clay sits in the sweet spot — light, durable enough, safe for kids, and flexible for hobbyists.


Why Choose Foam Clay for Crafts?

  1. Beginner-friendly: You don’t need any special setup. Shape it, leave it, done.
  2. Safe for kids: Most foam clay is non-toxic, making it perfect for supervised play.
  3. Lightweight: Great for ornaments or jewelry that shouldn’t weigh down.
  4. Versatile: Sticks to paper, wood, plastic, glass, or cardboard.
  5. Paintable & customizable: Once dry, you can decorate it with acrylics, metallics, or glitter.
  6. Mess-free: No dust or powder. Just keep your hands slightly damp, and cleanup is easy.

Tools & Materials You’ll Need

Collage of toothpicks in a ceramic holder, transparent zip bags, and wooden clay sculpting tools arranged for pottery work.
Essential Clay Sculpting Tools Every Beginner Should Know

You don’t need a full artist’s studio to start with foam clay, but a few simple tools make crafting smoother:

  • Basic sculpting tools (plastic or wooden)
  • Rolling pin (or even a glass bottle works)
  • Toothpicks / skewers for fine details
  • Acrylic paints for decoration
  • Clear varnish or sealer (optional, for a glossy finish)
  • Zip-lock bags or airtight boxes to store unused clay
  • Small water spray bottle or damp sponge to keep clay moist while working

Beginner Tips for Foam Clay Success

  • Knead before shaping: It warms up the clay and removes air bubbles.
  • Work in thin layers: Thick chunks may dry unevenly.
  • Don’t rush drying: Leave it untouched for at least 24 hours; 48 for larger items.
  • Seal it airtight: Foam clay dries fast once exposed — always reseal leftovers.
  • Smooth with water: A wet brush or fingertip can remove rough textures.
  • Experiment with color blending: Mix two colors before shaping for cool gradients.
  • Avoid overworking: Stretching it too much can weaken the final piece.

Easy Foam Clay Project Ideas

Here are some beginner-friendly ideas to get your hands moving:

1. Decorative Photo Frame

“Collage of two foam clay frames: one decorated with teddy bears, cupcakes, and stars; the other with pink octopus figures and white flower designs
Creative foam clay photo frames decorated with teddy bears, cupcakes, flowers, and octopus characters
  • Roll small flowers, hearts, or stars with foam clay.
  • Stick them on the edges of a plain wooden or plastic frame.
  • Once dry, paint and varnish for a lasting effect.

2. Miniature Animals

Collage of two foam clay crafts: a pink octopus figure with a flower on its head, and a panda holding a green bamboo stick
Cute foam clay creations – from mini octopus to panda – showcasing the charm of DIY clay art
  • Start with simple shapes: balls and sausages.
  • Combine them to make tiny dogs, cats, or cartoonish creatures.
  • Kids love this one — it’s like making edible fondant figures.

3. Festival Crafts

Collage of two foam clay projects: a pink lotus incense holder on a blue base, and a green Christmas tree with colorful ornaments on a wooden stand.”
Foam clay crafts – a lotus-shaped incense holder and a festive Christmas tree made with colorful clay.
  • For Diwali, make colorful diyas with clay petals around.
  • For Christmas, create lightweight ornaments like bells, stars, or mini Santas.
  • For Rakhi, try unique foam clay embellishments on rakhi bases.

4. Customized Storage Jars

Collage of two foam clay jars: one with a sculpted octopus on the lid and coral reef decorations, the other featuring a pink lotus flower lid with a golden koi fish and green leaves.”
Foam clay decorated jars – one with an octopus and coral reef theme, another with a lotus flower and koi fish design
  • Cover old glass jars with colorful foam clay designs.
  • Add patterns like flowers, mandalas, or cartoon faces.
  • Perfect for gifting or organizing pens and brushes.

5. Jewelry & Accessories

“Collage of three foam clay jewelry pieces: rainbow earrings with heart details, floral succulent ear studs, and a pink flower pendant necklace displayed with dried flowers.”
Handmade foam clay jewelry – rainbow earrings, floral ear studs, and a delicate flower pendant
  • Create earrings, pendants, or brooches.
  • Use molds for consistent shapes.
  • Paint metallic finishes once dry.

Common Mistakes Beginners Make

  • Leaving the tub open: The clay hardens quickly, even if you’re just “taking a break.”
  • Too much water: A damp sponge helps, but too much will make it mushy.
  • Making pieces too thick: They may crack or take forever to dry.
  • Not planning ahead: Foam clay is forgiving, but once it dries, reshaping is hard.

Advanced Foam Clay Projects

If you’ve mastered the basics, push further:

  • 3D Wall Art: Build textured patterns on canvas for a mixed-media effect.
“Collage of two foam clay art frames: one with colorful flowers, pumpkins, and leaves in autumn shades, and the other featuring yellow ducklings decorated with orange and white flowers.”
Foam clay framed art – a vibrant sunflower and pumpkin flower arrangement paired with a playful yellow duckling design
  • Foam Clay + Resin: Encapsulate foam clay miniatures in resin for glossy décor.
“Collage of two resin artworks: one is a framed koi pond with colorful fish and green lily pads, and the other is a clear resin vase embedded with white daisies and yellow centers.”
Foam clay meets resin art – a koi pond frame with floating lilies alongside a floral resin vase filled with daisies.
  • Detailed Sculptures: Combine with wire armatures for larger figurines.
“Collage of two foam clay penguin crafts: one featuring a penguin holding a pink lotus flower beside a woven basket, and the other showing a small penguin next to a white igloo with blue ponds and a pink heart.”
Adorable foam clay penguin crafts – a penguin with lotus flowers and a tiny igloo scene with heart details.
  • Themed Lamps: Add flowers or stars to lamp bases; once light shines through, it looks magical.
Foam clay decorative lamp designed with flower shapes, glowing with a warm yellow light on a white table.
Handmade foam clay flower lamp glowing warmly with soft floral patterns
  • Phone Cases: Decorate covers with characters or initials; seal for durability.
Collage of two foam clay phone cases: the first is white with a pink bow designed like a gift box, and the second is a black case decorated with bright multicolored foam clay flowers.”
Creative foam clay phone cases – one styled as a gift box with a bow, and another decorated with colorful 3D flowers.

FAQs About Foam Clay

Q: How long does foam clay take to dry?
A: Typically 24–48 hours. Thin pieces dry faster; thicker ones need patience.

Q: Can I paint foam clay?
A: Yes! Acrylic paints work best. You can also spray paint once sealed.

Q: Is foam clay safe for kids?
A: Most brands are non-toxic, but supervision is recommended for younger children.

Q: Does it crack?
A: Rarely, unless you make it too thick or dry it unevenly.

Q: Can I reuse it after drying?
A: No, once hardened, it can’t be re-softened. Store leftovers airtight.


Where to Buy Foam Clay

  • Online: Amazon, Craftslane, or stationery e-shops often stock foam clay kits.
  • Local art stores: Many stationery shops now carry multi-color tubs.
  • DIY Kits: Brands like BOHS offer starter kits with tools and colors for beginners.

Tip: Buy smaller packs if you’re just starting. For larger projects, go for bulk sets.


Final Take

Foam clay might look like child’s play at first, but once you explore its possibilities, it can become your go-to material for lightweight, versatile, and creative crafts. From a simple flower frame to festival ornaments or detailed jewelry, foam clay opens a door to endless imagination.

If you’re looking for a fun hobby that’s safe, mess-free, and rewarding, this is the perfect medium to start with. All you need is a small pack of foam clay, some basic tools, and a little patience — the rest is pure creativity.

So, roll up your sleeves, pick your colors, and let foam clay bring your art ideas to life!