
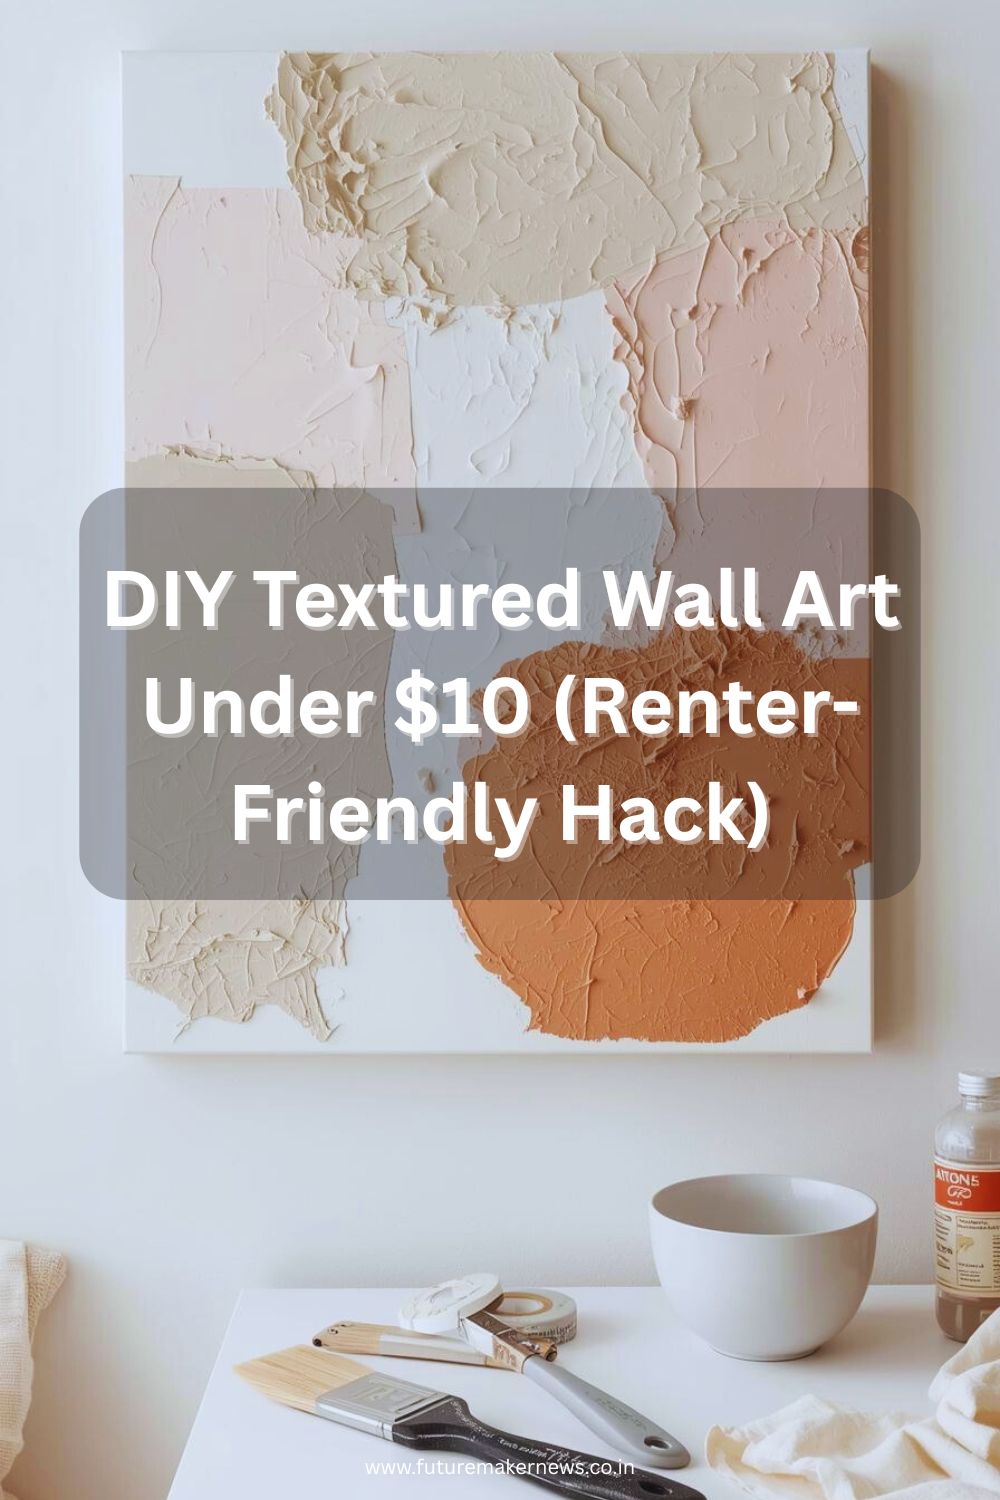
If you’ve been scrolling through TikTok or Pinterest lately, you’ve probably seen this gorgeous and budget-friendly trend blowing up — the Viral DIY Wall Art Technique that costs less than $10 and completely transforms your space.
It’s minimalist, renter-friendly, and incredibly easy to make — no artistic background required! Whether you’re decorating your first apartment, a rented home, or just refreshing your room on a tight budget, this trend is your golden ticket to a stylish interior without breaking the bank.
Let’s dive into how you can recreate this viral DIY wall art step-by-step and make your walls look like they belong in a modern design magazine.
Why Everyone’s Obsessed with This Viral DIY Wall Art Trend
The beauty of this under $10 wall art idea lies in three magic words: affordable, aesthetic, and effortless.
Unlike pricey framed prints or wallpaper, this project lets you make custom wall decor using simple items you already have — like cardboard, canvas, or even old packaging materials.
What Makes It So Popular:
- Renter-Friendly: No drilling, nailing, or wall damage.
- Budget-Friendly: Total cost under $10 — sometimes even free if you reuse materials.
- Highly Customizable: Choose your favorite colors, textures, and patterns.
- On-Trend Aesthetic: Fits the viral minimalist, wabi-sabi, and neutral-toned home styles.
- Quick and Fun: You can complete one piece in under an hour.
In short, this trend proves that you don’t need a big budget to have Pinterest-worthy decor — just creativity and a few clever materials.
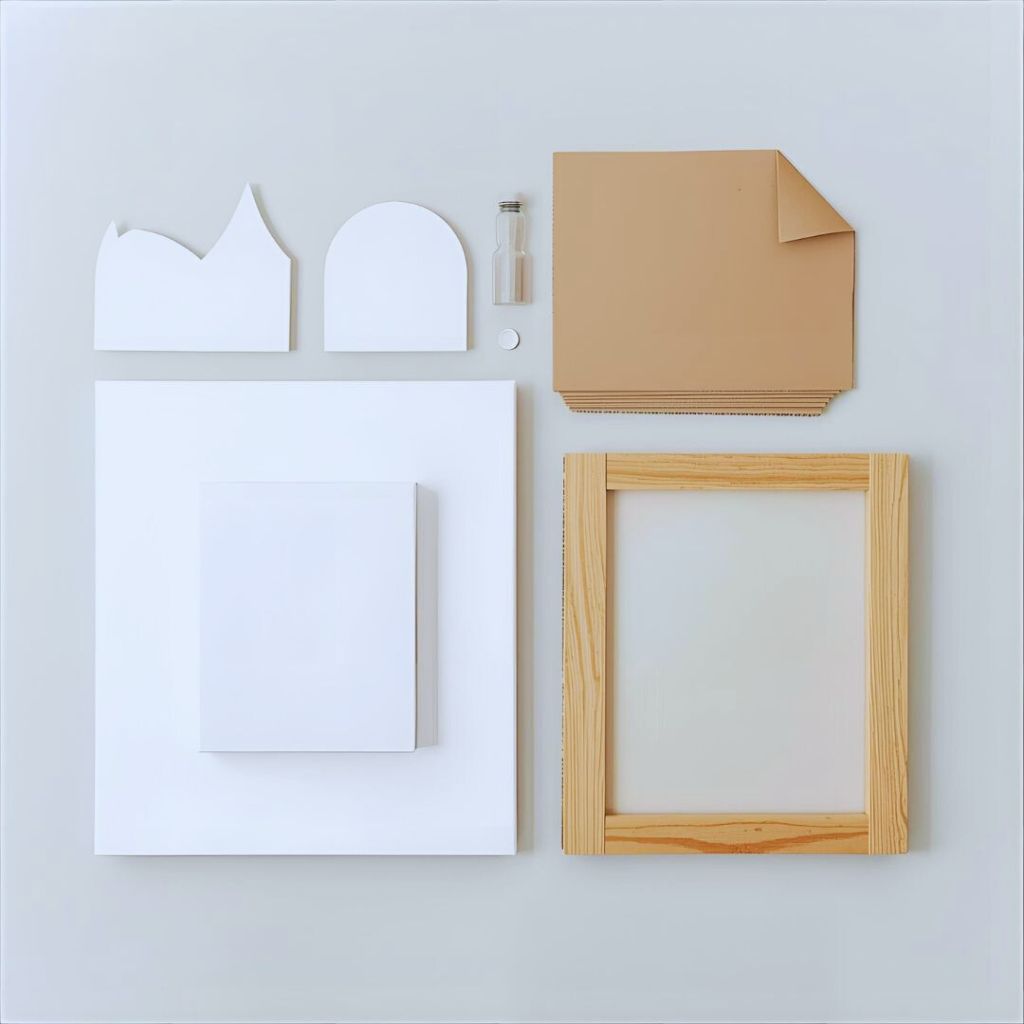
Supplies You’ll Need (All Under $10!)
Before we start, gather these simple supplies. You might already have most of them lying around!
Basic Materials:
- A canvas, foam board, or cardboard base
- Spackle or lightweight wall putty (for texture)
- A butter knife, paint scraper, or old spoon
- Acrylic paint in your favorite tones (white, beige, cream, or pastels)
- Paintbrush or sponge
- Optional: Gold or metallic accent paint for a luxury finish
Step-by-Step Guide: How to Make This Viral $10 Wall Art
Here’s the fun part — creating your masterpiece! This is the same DIY textured art technique that’s trending across social media right now.
Step 1: Prepare Your Canvas
Start with a clean, smooth surface. If you’re using cardboard, cut it to the size you want. If it’s a foam board, wipe it down gently.
You can even reuse old photo frames by removing the glass and using the backing board as your base!
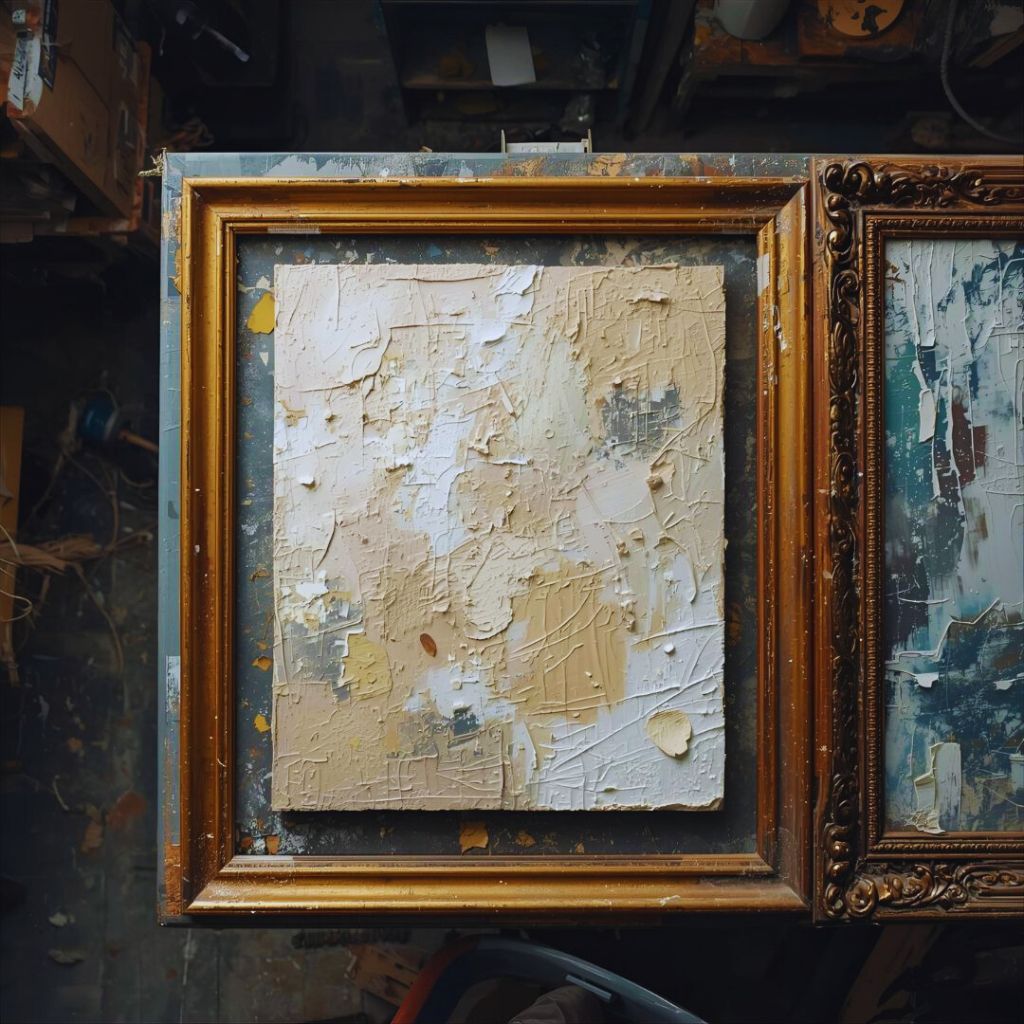
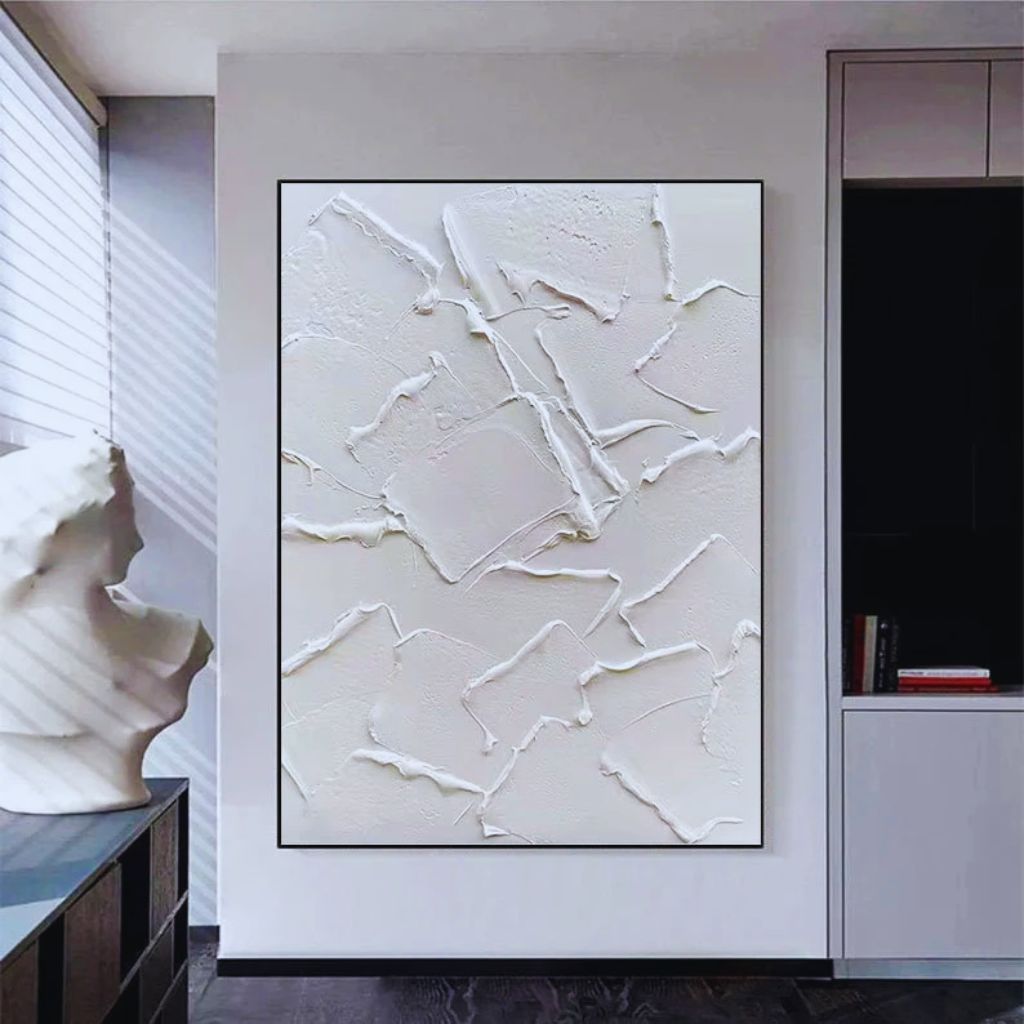
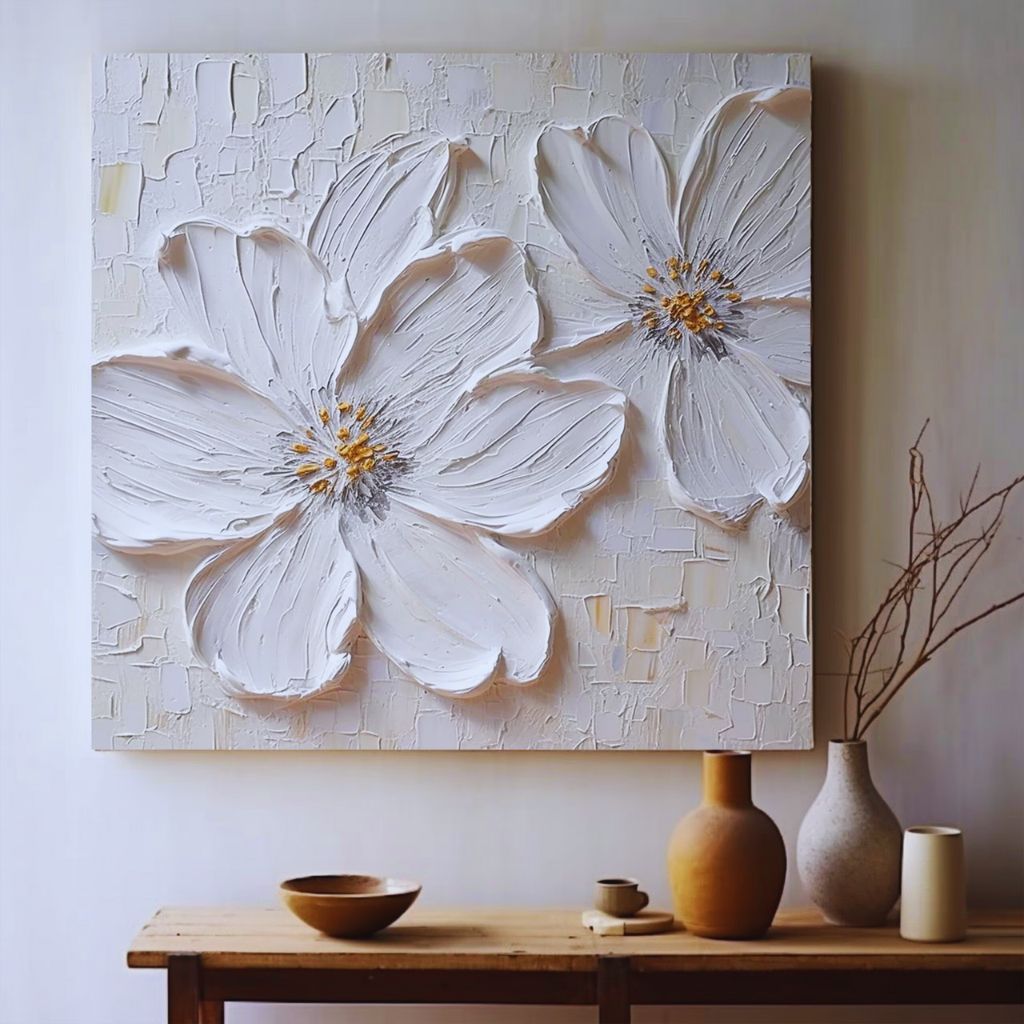
Step 2: Apply Texture (The Game-Changer)
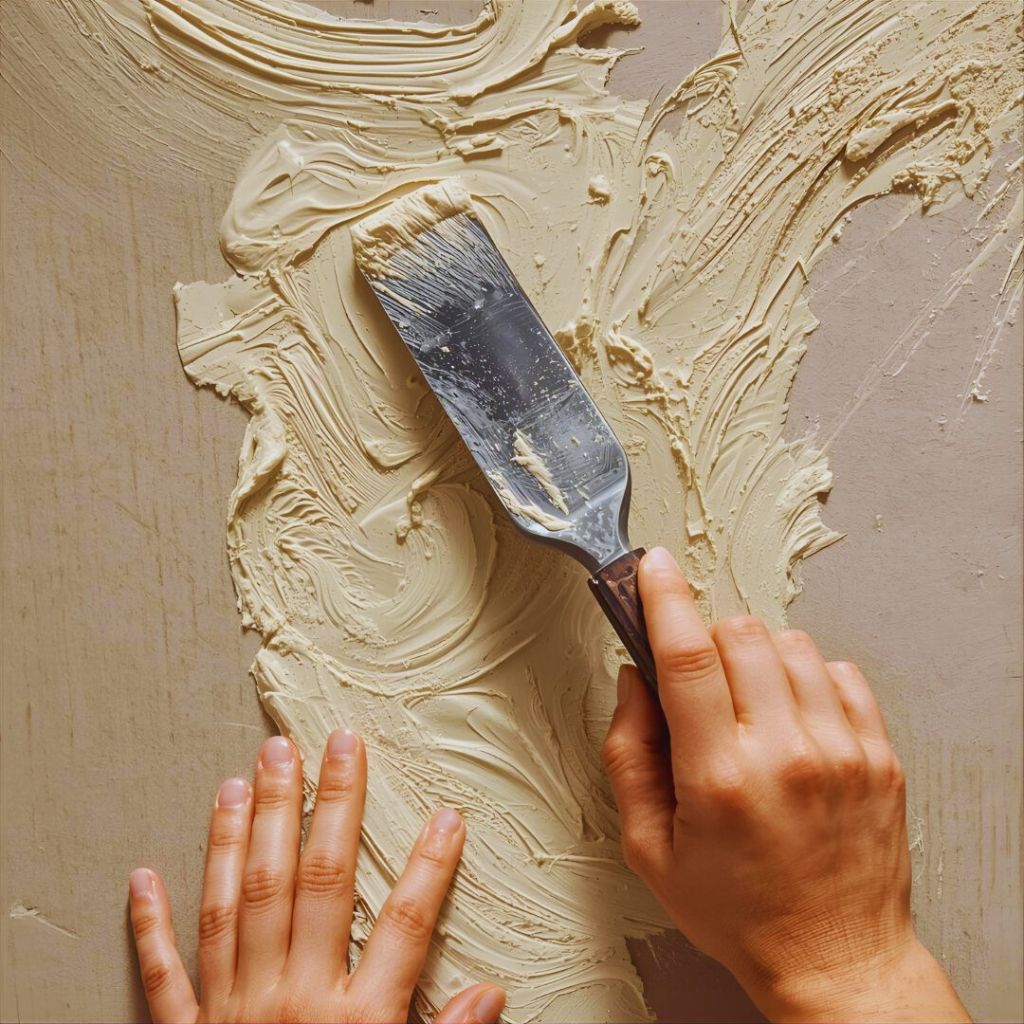
This is what makes your artwork look high-end. Use spackle or lightweight wall putty to create a 3D textured effect.
Spread it across your surface with a butter knife or scraper — don’t aim for perfection! The beauty of this style lies in imperfection and organic texture.
You can make:
- Swirls for a fluid, wave-like design.
- Diagonal streaks for a modern look.
- Abstract peaks and valleys for a sculptural, minimalist vibe.
Let it dry for about 1–2 hours (or until firm to touch).
Step 3: Paint It to Perfection
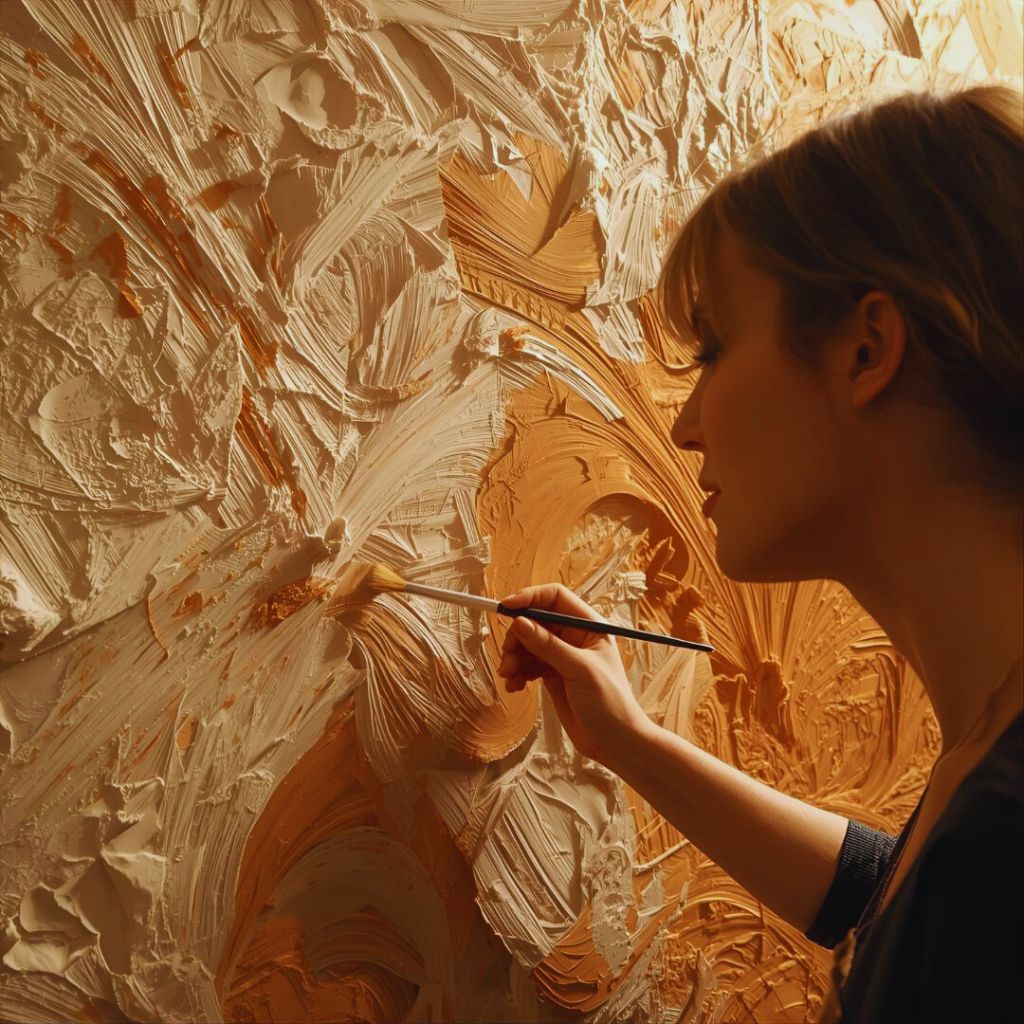
Once dry, it’s time to paint your masterpiece.
Choose neutral tones for a calming aesthetic or go bold with terracotta, navy, or olive green for a statement piece.
Use a paintbrush or sponge and gently glide color across the texture — this will highlight the raised details and create depth.
Color Ideas:
- Minimalist Neutral: Beige, ivory, and soft tan.
- Earthy Modern: Clay, burnt orange, and sage.
- Luxury Glam: White base with gold or metallic accents.
Optional: Add a few strokes of metallic gold or bronze paint to mimic the expensive “gallery wall art” look.
Step 4: Let It Dry and Frame It (Optional)
Once painted, let your piece fully dry for a few hours.
Now you can either:
- Frame it in a thrifted or dollar-store frame.
- Mount it using double-sided command strips.
- Or simply lean it against the wall for a chic, effortless style.
Renter-Friendly Tip: Use removable adhesive hooks or Velcro strips to hang your art without damaging walls.
Step 5: Style It Like a Designer
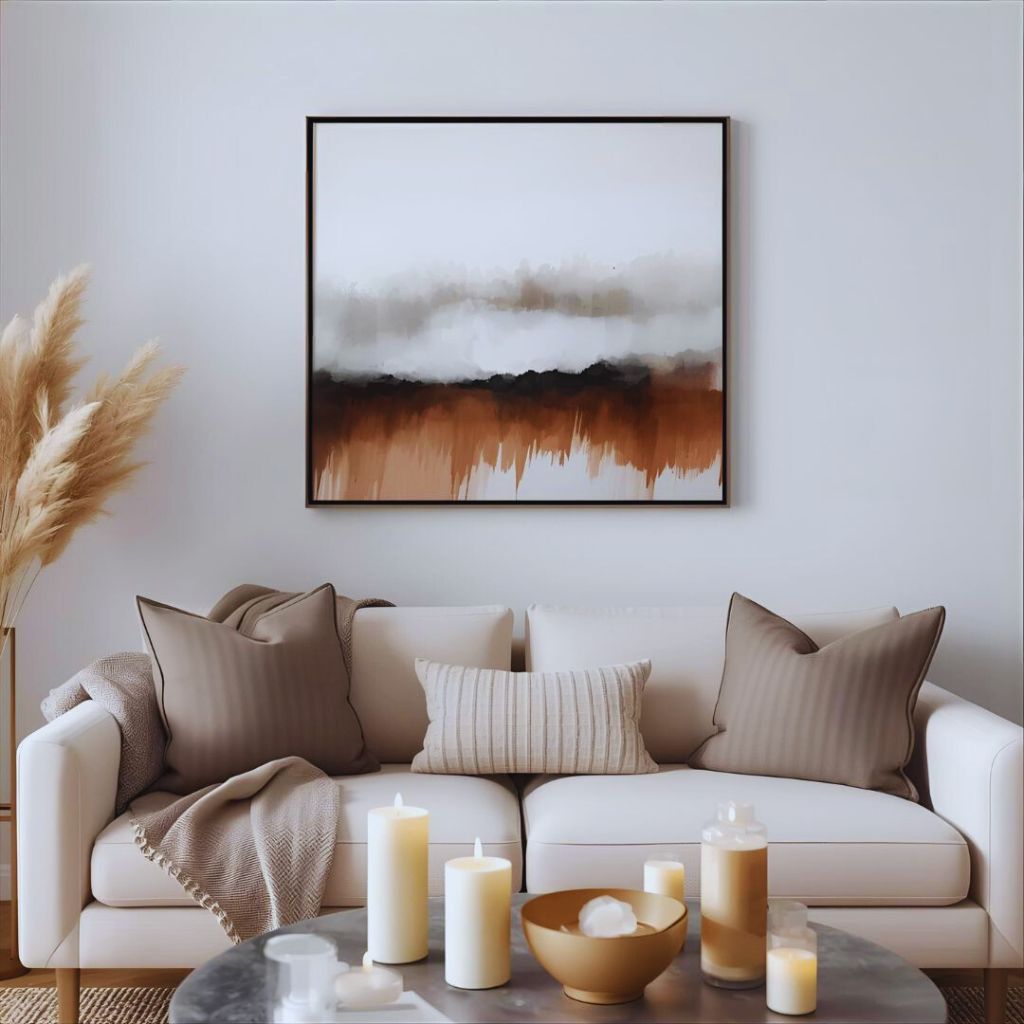
Your wall art is ready — now it’s all about placement!
Here are a few styling ideas to make your room look instantly elevated:
- Hang it above your bed, sofa, or desk as a focal point.
- Create a mini gallery wall with different sizes and shapes.
- Pair it with candles, vases, and neutral décor pieces for a cozy aesthetic.
Remember, the trick is in layering textures and keeping your color palette cohesive.
Creative Variations to Try
Want to make your art even more unique? Try these DIY wall art variations that use the same under-$10 method:
1. Dual-Tone Art
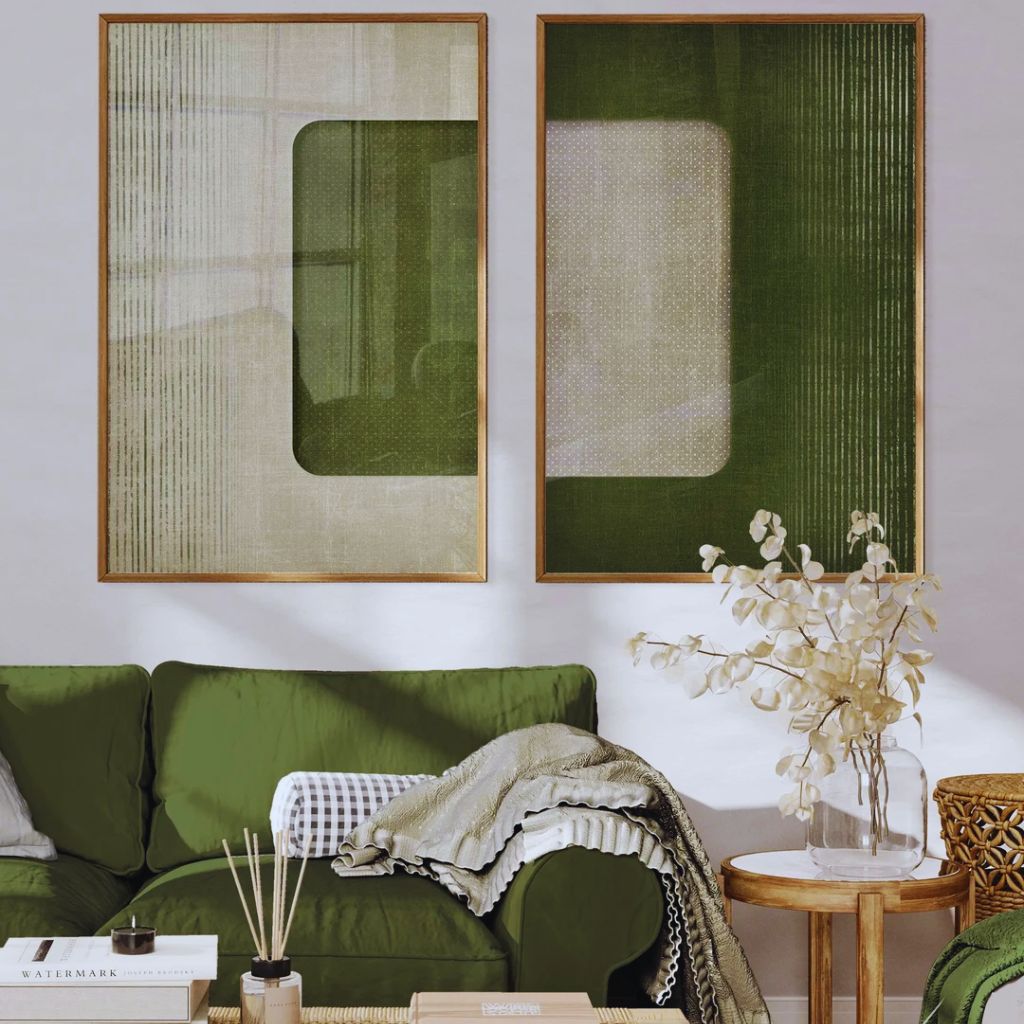
Apply one color on half the canvas and a complementary tone on the other half. Add texture only to one side for contrast.
2. Raised Line Art
Use hot glue to draw abstract lines before applying putty and paint over it — it creates a stunning 3D line art effect.
3. Nature-Inspired Prints
Press dried leaves, flowers, or twigs into the putty before it dries for a natural, organic texture.
4. Gold Leaf Magic
For an upscale vibe, gently press gold leaf sheets on raised areas once the paint is tacky. It gives that “boutique gallery” touch.
Each version stays affordable, fun, and incredibly chic — proving creativity always beats cost!
Why This DIY Wall Art Is Perfect for Renters
Renters often struggle to decorate without damaging walls — and this trend solves that beautifully.
Here’s why it’s a renter’s dream project:
- No nails or screws needed — use removable strips.
- Lightweight materials mean no wall damage.
- Totally customizable — repaint, retexture, or move it anytime.
- Easily replaceable or upgradable when you change your decor.
It’s the perfect way to make your space feel personal and stylish without violating your lease or spending much.
Budget Breakdown: How It Stays Under $10
Here’s a quick look at how affordable this project really is:
| Item | Cost |
|---|---|
| Canvas or cardboard base | $2–$3 |
| Spackle or wall putty | $3 |
| Acrylic paint | $2–$3 |
| Tools (reuse household items) | Free |
Total: Around $8–$9, depending on what you already have.
You can even make multiple mini art pieces with the same supplies — creating an entire gallery wall for under $20!
Final Thoughts: Creativity Over Cost
The best thing about this viral DIY wall art technique isn’t just its price — it’s the joy of creating something with your own hands. Every stroke, texture, and color tells your story.
You don’t need to be an artist or spend hundreds of dollars to have a beautiful home. You just need creativity, a few simple tools, and a willingness to experiment.
So next time you want to refresh your space, skip the overpriced art prints — grab some spackle, paint, and imagination instead.