Gift wrapped in banana leaves with fresh orchids and natural greenery.

Let’s be real—half the excitement of receiving a gift is in the unwrapping. The surprise, the texture, the creativity—it’s all part of the story. That’s why people worldwide are ditching boring store-bought wrapping paper and experimenting with eco-friendly gift wrapping techniques that double as art.

From Japanese furoshiki wrapping to Scandinavian minimalist kraft paper vibes, these styles are buzzing all over Pinterest and Instagram. They’re not just stylish—they’re sustainable, quirky, and unforgettable.

In this blog, we’ll unwrap (pun intended) 8 unique gift wrapping styles that are trending globally right now—with cultural backstories, DIY hacks, and ideas you can try at home.


1. Japanese Furoshiki Cloth Wrapping
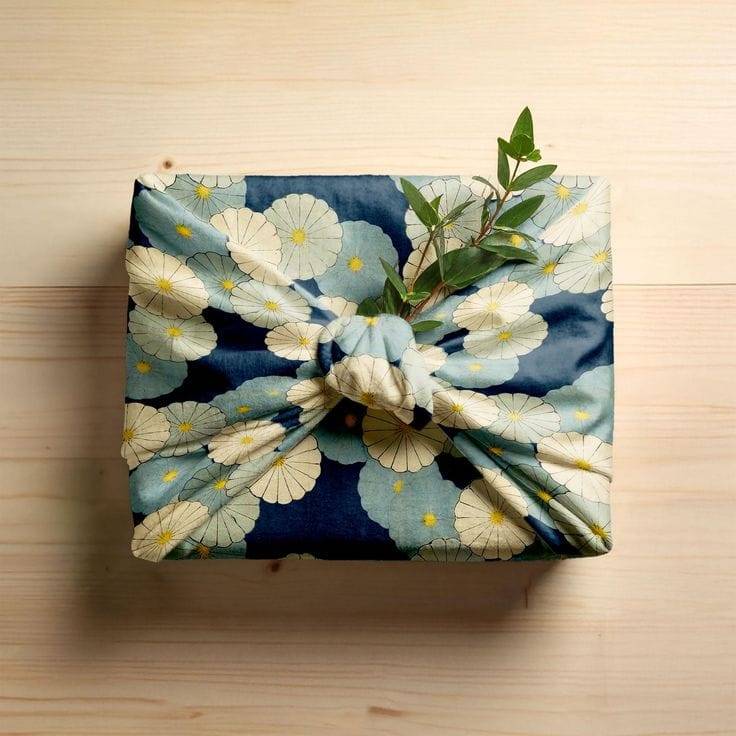
Japanese furoshiki cloth gift wrapping with floral fabric tied neatly with greenery.
Japanese furoshiki cloth wrapping – a reusable, eco-friendly art of gifting.
  • Basically, what it is: A traditional Japanese technique using a square cloth to wrap gifts.
  • Why everyone’s into it: Zero waste, reusable, and the fabric itself becomes part of the present.
  • How to DIY:
    • Grab a scarf, dupatta, or any upcycled fabric.
    • Place your gift diagonally, tie two opposite corners in a knot, then do the same with the remaining corners.
  • Pro Tip: Play with fabrics—silk for luxury, cotton for casual vibes, or quirky prints for birthdays.

2. Korean Bojagi Wrapping
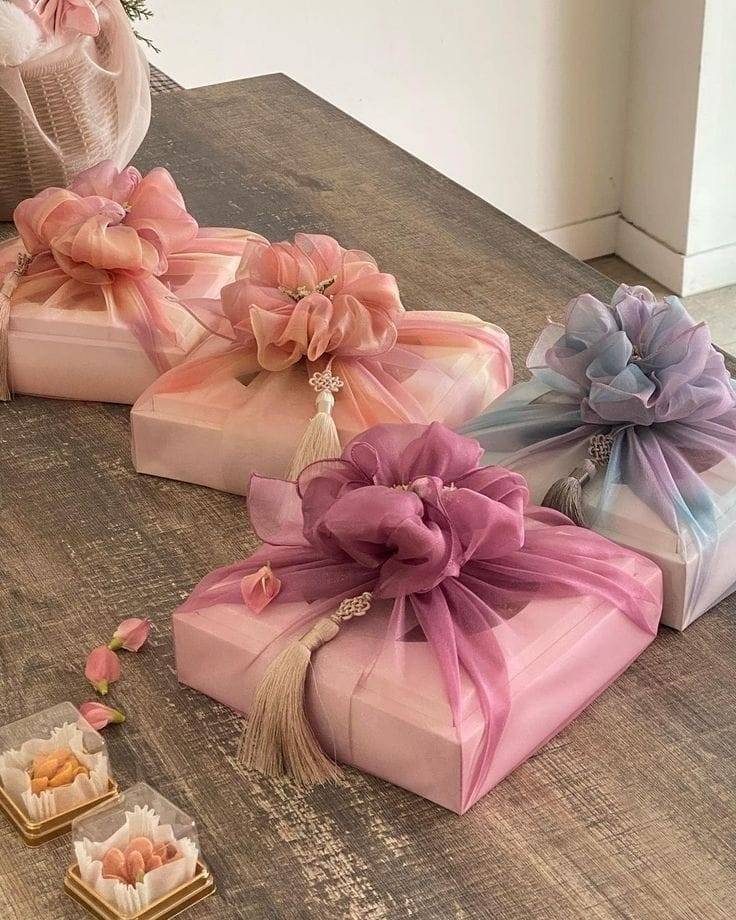
Korean bojagi wrapping with sheer pastel fabrics and tassel embellishments.
Korean bojagi gift wrap – elegant sheer layers and tassels for festive celebrations.
  • What it looks like: Think bright-colored or embroidered wrapping cloths, traditionally used in Korea.
  • The modern twist: Organza bojagi that’s slightly see-through, teasing the gift inside.
  • DIY hack: Use lightweight dupatta pieces or sheer fabric for that layered, dreamy effect.

3. Scandinavian Minimalist Wrapping

Scandinavian minimalist wrapping using kraft paper, cotton ribbon, and pine sprigs.
Scandinavian minimalist style – rustic kraft paper with natural greenery.
  • The vibe: Brown kraft paper, twine, and a sprig of pine or rosemary tucked in.
  • Why it works: It’s rustic, earthy, and absolutely Pinterest-worthy.
  • DIY hack: Instead of plain kraft paper, stamp your own designs using carved potatoes, leaves, or even cookie cutters dipped in paint.

4. Indian Dupatta & Saree Wrapping
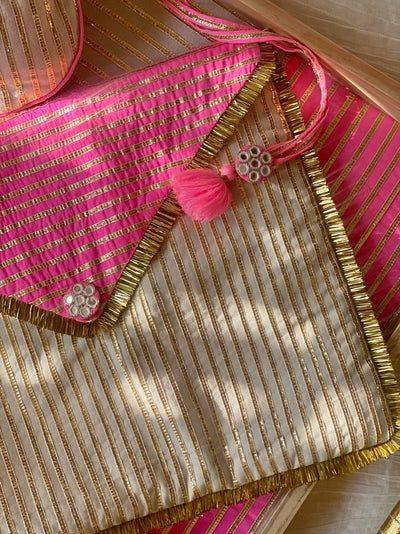
Indian wrapping using bright pink and gold embroidered festive fabric.
Indian fabric wrapping – bold colors and embroidery for vibrant gifting.
  • Cultural inspo: In India, fabric has always been tied to gifting traditions.
  • How to DIY: Use sari borders, silk dupatta scraps, or colorful jute fabric to wrap.
  • Upgrade idea: Attach tassels, bangles, or tiny mirrors to the wrap—so it looks festive even before the gift is opened.

5. Origami Wrapping (Japan-inspired)
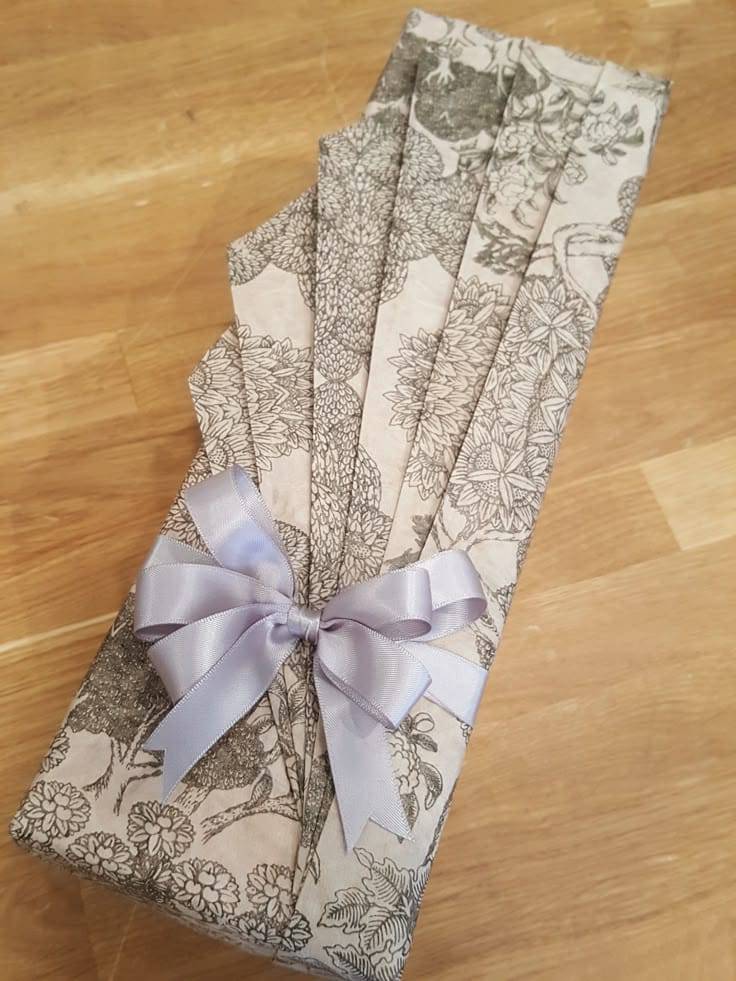
Origami-inspired gift wrapping with folded patterned paper and ribbon bow.
Origami wrapping – folded paper turns ordinary wrapping into art.
  • Basically: It’s wrapping paper folded origami-style—pouches, folds, and flaps instead of plain folds and tape.
  • DIY hack: Two-tone wrapping paper works best—contrasting colors highlight the folds beautifully.
  • Pro Tip: Perfect for gift cards, jewelry, or envelopes with cash.

6. Plant-Based Wrapping (Eco-Friendly Trend)
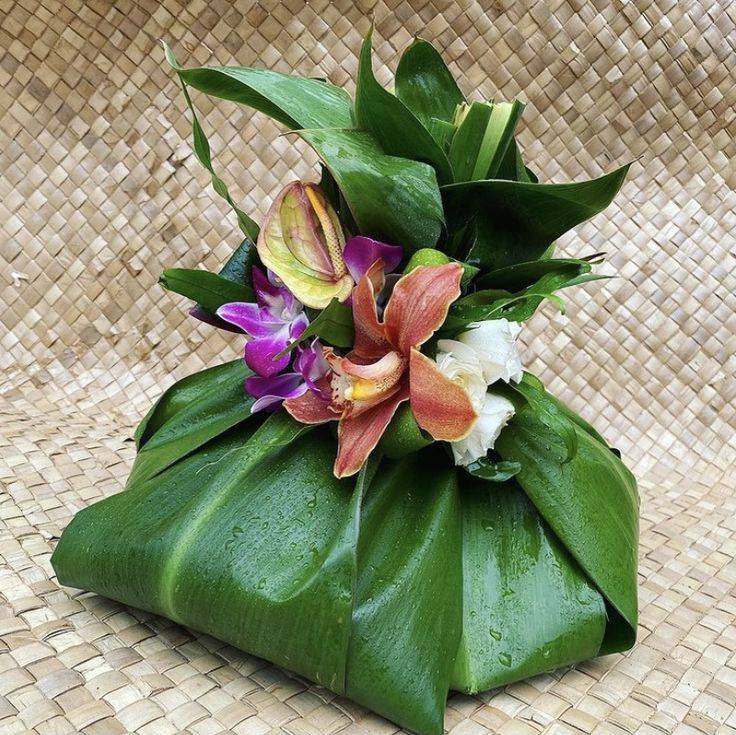
Gift wrapped in banana leaves with fresh orchids and natural greenery.
Plant-based gift wrapping – banana leaves and flowers for an eco-luxury touch.
  • What you use: Banana leaves, corn husks, palm leaves, or even dried flowers.
  • Why people love it: It’s sustainable, exotic, and gives serious “earthy chic” vibes.
  • DIY hack: Wrap with a banana leaf, tie with jute rope, and finish with a dried orange slice for a festive holiday look.

7. Upcycled Wrapping with a Twist
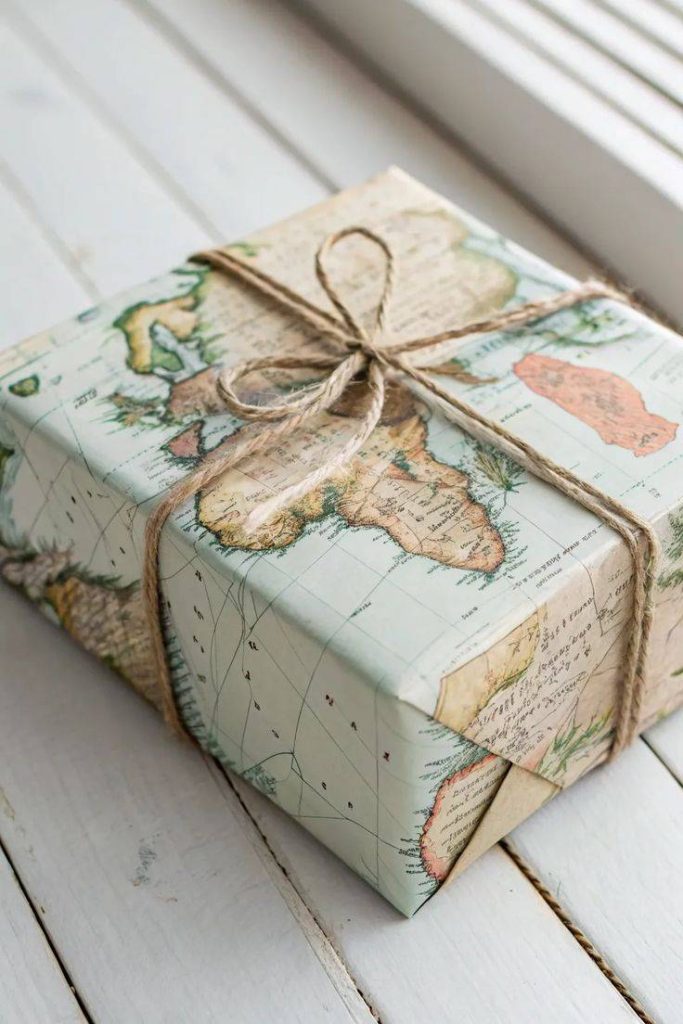
Upcycled wrapping using old map paper tied with rustic twine rope.
Upcycled wrapping – old maps and twine give gifts a quirky vintage style.
  • What’s trending: Old maps, comic book pages, sheet music, or fashion magazine cutouts.
  • Why it’s viral: It’s quirky, nostalgic, and has that vintage Instagram aesthetic.
  • DIY hack: Pair with colorful yarn, recycled ribbons, or even safety pins for a punk-style finish.

Bonus Trend: Interactive Wrapping

  • The idea: The wrapping itself becomes part of the fun.
  • Examples: Print crossword puzzles, riddles, or QR codes that lead to a surprise video message.
  • Why it’s a hit: It transforms unwrapping into an experience instead of just a formality.

The Last Knot: DIY Wrapping Ideas to Try

Gift wrapping is no longer just about concealing what’s inside—it’s about making the outside just as memorable. Whether you fall in love with the elegance of Japanese furoshiki wrapping, the rustic charm of Scandinavian minimalist wrapping, or the fun of upcycled gift wrap ideas, there’s no limit to how creative you can get.

These DIY gift wrapping ideas aren’t just pretty—they’re sustainable, cultural, and uniquely personal. So, next time you’re wrapping a gift, ask yourself: why stop at paper when the wrap itself can tell a story?

Which of these creative gift wrapping techniques are you excited to try first?
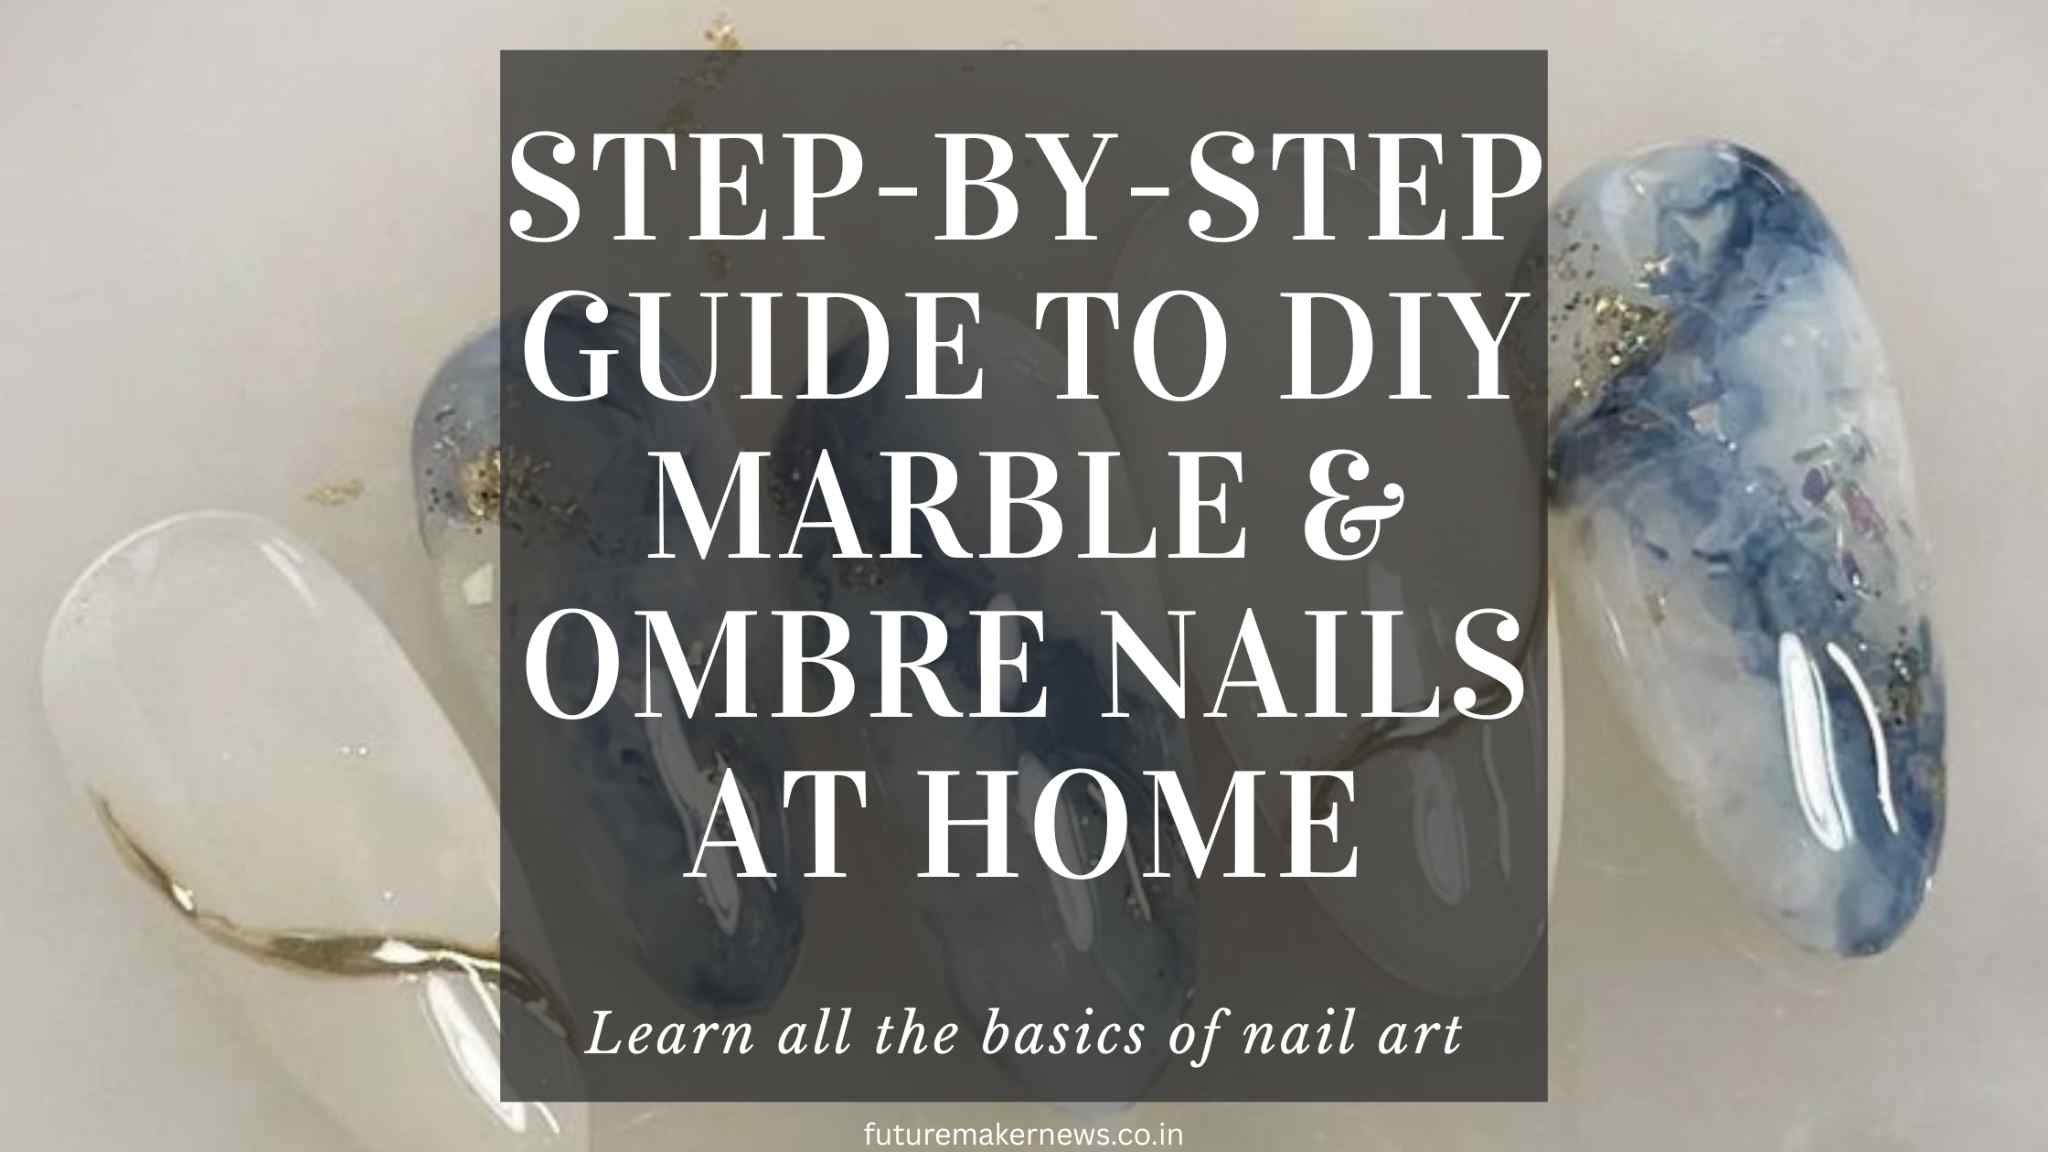
Alt Text: Step-by-step guide to DIY marble and ombre nails at home - nail art basics

There’s something about marble and ombre nails that just look expensive. The good news? You don’t need a salon visit or a pro nail artist to get them. With the right tools, patience, and a steady hand, you can recreate these trending nail designs at home. This guide is your no-nonsense breakdown on how to do DIY marble nails and DIY ombre nails step by step.


What You Need Before You Start

  • Base coat and top coat
  • 2–3 nail polish colors (for ombre, choose shades that blend well; for marble, a solid base plus a contrasting shade)
  • Makeup sponge (for ombre)
  • Thin nail brush or toothpick (for marble)
  • Small piece of plastic wrap (optional, for marble effect)
  • Nail polish remover and cotton pads for cleanup

How to Do DIY Ombre Nails at Home

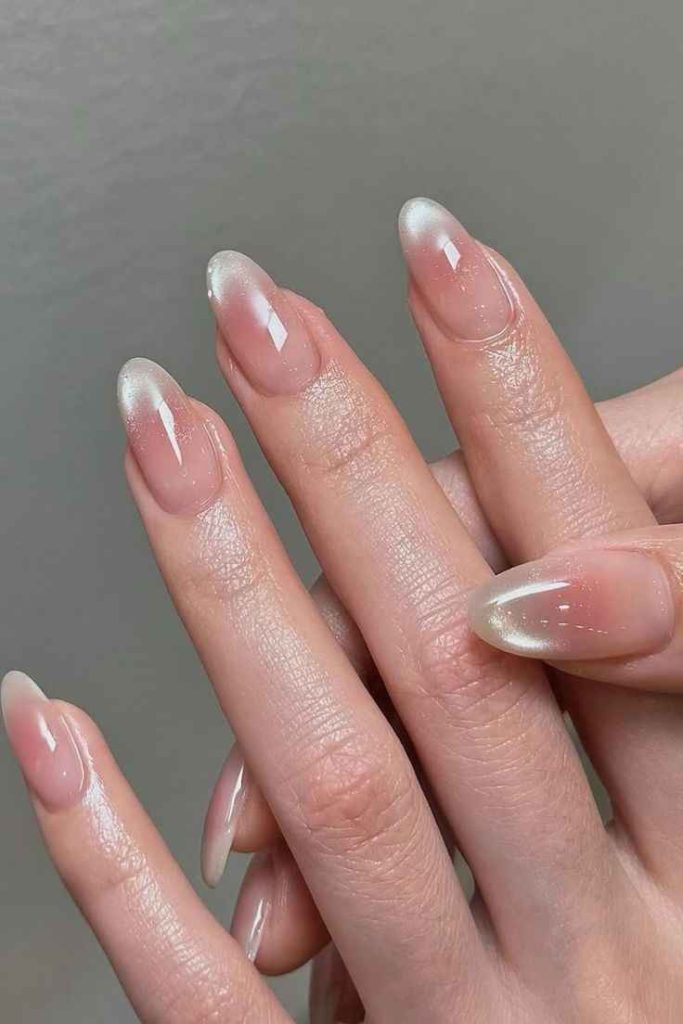
Soft pink and white ombre nails with a glossy finish
Elegant soft pink ombre nails fading into white tips, perfect for a chic minimalist look.

1. Prep Your Nails
File, buff, and apply a thin base coat. Let it dry completely.

2. Apply Base Shade
Paint nails with your lightest color. This helps with smoother blending.

3. Create the Gradient
Paint two polish colors side by side on a sponge. Dab gently onto nails, moving slightly up and down to blend.

4. Repeat for Depth
Add 2–3 layers until the ombre effect looks seamless. Clean cuticles afterward.

5. Seal It
Finish with a glossy top coat to blend and lock in color.


How to Do DIY Marble Nails at Home

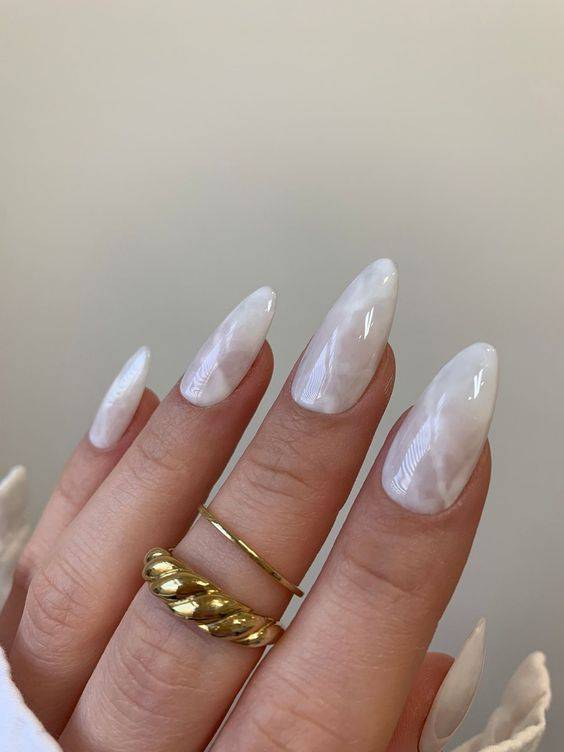
White marble ombre nails with glossy finish, close-up of hand wearing gold rings.
DIY white marble ombre nails at home – simple, elegant, and salon-worthy.

1. Base Color First
Choose white, nude, or pale pink as your foundation.

2. Add Contrast Lines
Dip a thin brush or toothpick into gray or black polish. Draw light, uneven lines across the nail.

3. Soften the Lines
While polish is still wet, dab with plastic wrap to blur and create a natural stone-like pattern.

4. Finish Strong
Apply a glossy top coat. For extra shine, add two layers.


Pro Tips for Long-Lasting DIY Nails

  • Let each layer dry fully before the next.
  • Use Vaseline or a peel-off barrier around cuticles for easy cleanup.
  • Stick to 2–3 shades for ombre—too many colors can look messy.
  • For marble, practice on a nail tip first before doing all fingers.

Takeaway

DIY marble nails and DIY ombre nails aren’t as complicated as they look. With basic tools, patience, and these step-by-step techniques, you can achieve salon-worthy results at home without spending $60+.

Next time you want a fresh look, grab your sponge, polish, and plastic wrap—because now you’ve got the know-how to nail both marble and ombre designs at home.

Love nail art? Check out my guide on Trending TikTok Nail Hacks You Can Actually Try for more at-home designs.

“Aesthetic blog banner featuring a glowing golden moon with book illustrations and stars, text overlay reads ‘7 DIY Journaling Prompts for Mental Clarity’.”

There’s something about pen and paper that clears the noise in your head. When your mind feels foggy, journaling works like a reset button—helping you release emotions, sort through stress, and create space for fresh ideas.

The truth is, you don’t need a perfect notebook or fancy system. What you need are the right DIY journaling prompts for mental clarity—simple yet powerful questions that guide your thoughts toward healing and focus.

Here are 7 journaling prompts you can try at home to create calm and clarity.


# 1. Write Down What’s Taking Up Space in Your Mind

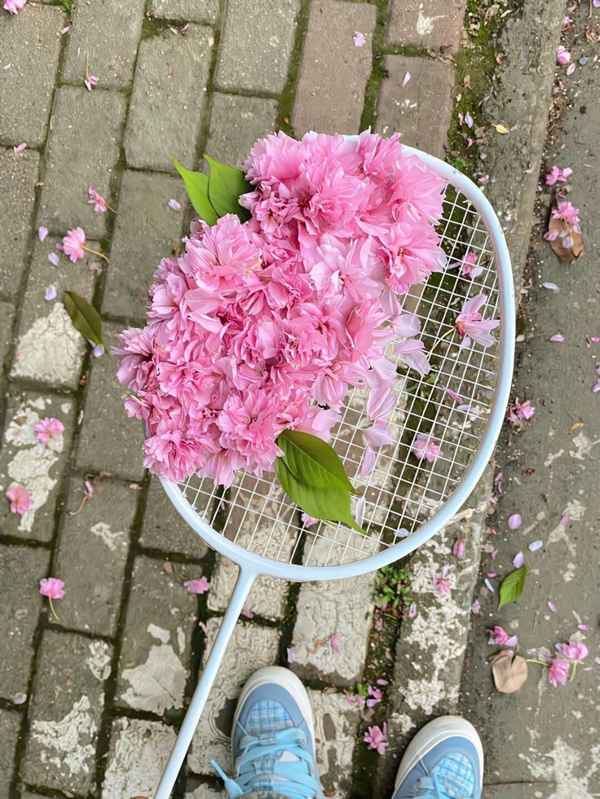
Pink flowers on a white racket placed on the ground with scattered petals.
A calming symbol of mindfulness—small details reminding us to slow down.

This is a “mental dump.” List everything circling in your thoughts—unfinished tasks, worries, random reminders. Seeing them on paper immediately lightens your mental load.


#2. Describe How You’re Feeling in This Exact Moment

Empty coffee cup with quote “bad days are part of a good life.”
Journaling inspiration: even difficult days belong to a bigger, brighter life.

Self-care journaling starts with awareness. Label your emotions, no matter how messy they feel. Even a line like “I feel restless because…” begins untangling what’s inside.


#3. What’s One Thing I Can Control Today?

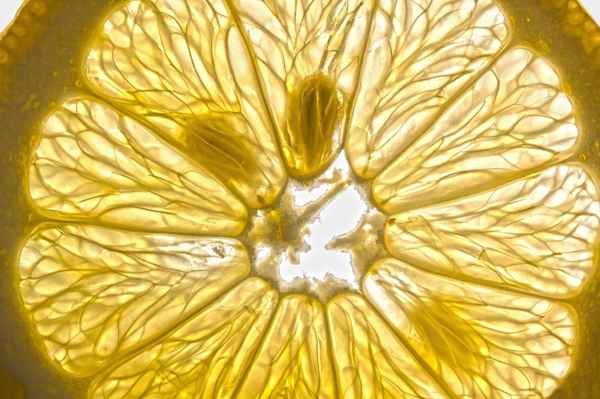
: Close-up of a fresh lemon slice glowing under light.
A refreshing visual reminder that clarity often comes in small, simple things.

When anxiety builds, clarity comes from narrowing focus. Write down one single thing you can influence today. It may be as small as preparing a meal or stepping outside for fresh air.


#4. Gratitude in Three Lines

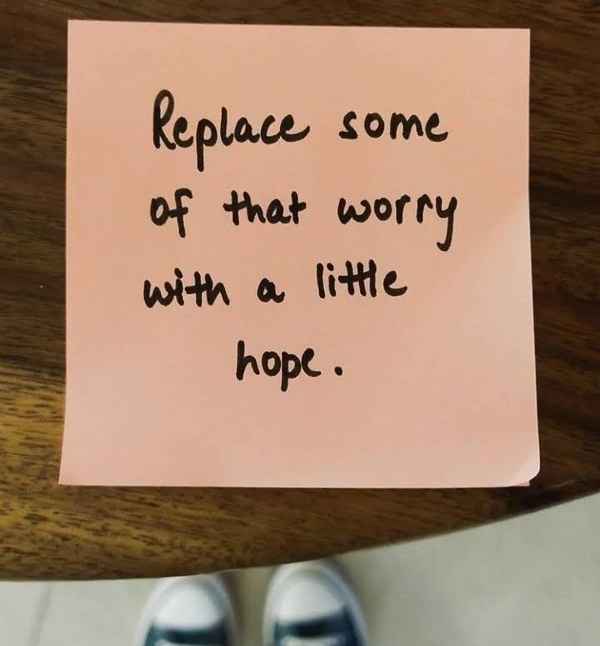
Alt: Sticky note with handwritten words: “Replace some of that worry with a little hope.”
Healing words worth journaling when the mind feels heavy.

Journaling for clarity doesn’t need to be long. Write three short sentences of gratitude daily. Over time, this tiny ritual reshapes how your mind scans for positivity.


#5. Rewrite a Negative Thought Into a Kinder One

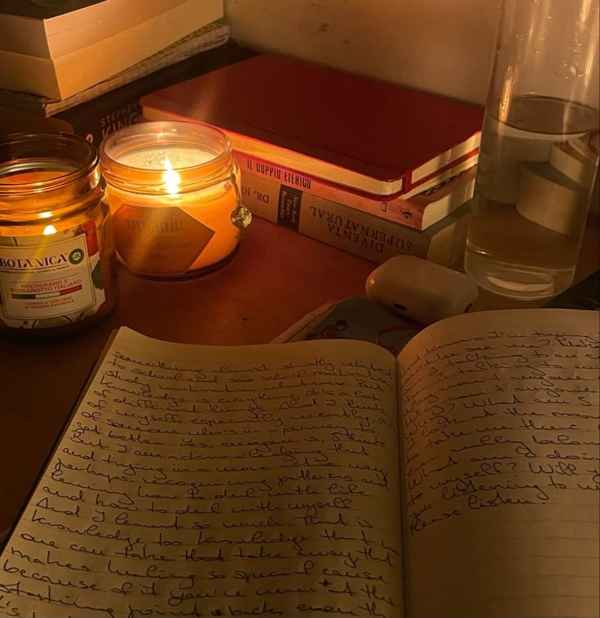
Open journal with candlelight and books in a cozy setup.
Late-night journaling with candles—turning thoughts into calm.

We all carry harsh self-talk. Pick one negative thought, write it down, and reframe it as if you were speaking to a friend. This practice softens inner criticism and supports emotional healing.


#6. What Do I Need to Let Go of Right Now?

Open journal with rose petals and a cup of tea on a bed.
Journaling practice paired with tea—rituals that heal the heart.

Clarity often comes from release. It could be an expectation, guilt from yesterday, or pressure to be perfect. Naming it in your journal is the first step toward letting go.


#7. Visualize Your Tomorrow Morning

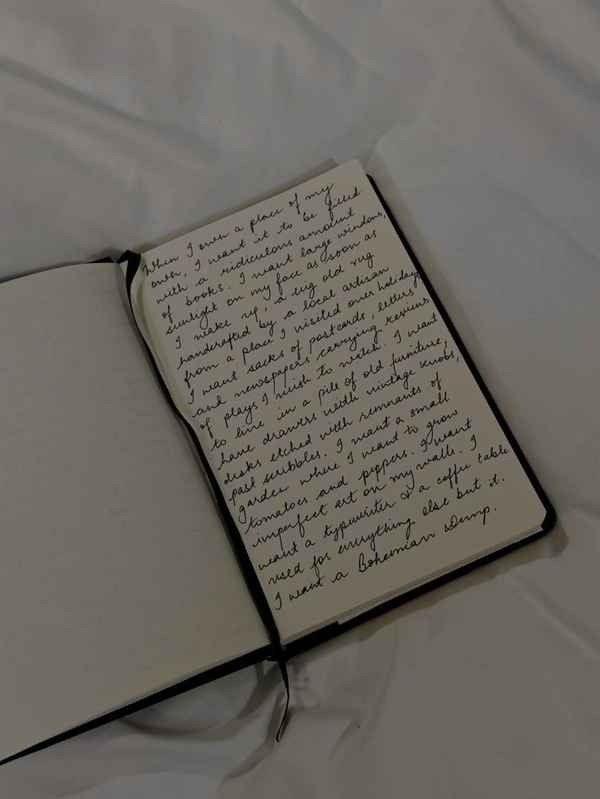
Journal with long handwritten notes lying on a white sheet.
A page of reflection—writing to bring mental clarity and peace.

End your session with a forward-looking prompt: “How do I want to feel tomorrow morning?” Write in detail yet calm, energized, or steady. This directs your mind to create a softer landing for the next day.

Reflection

Daily journaling practices for mental clarity don’t need more than 10 minutes. Over time, these prompts become a personal toolkit , helping you reduce stress, release clutter, and reconnect with yourself.

If you’ve been searching for a healing yet practical self-care habit, try picking one prompt tonight. Journaling doesn’t just record your life , it clears the mental space you need to truly live it.

Healing Scents: A DIY Guide to Aromatherapy at Home

There’s something magical about how a familiar scent can instantly shift your mood. Think of lavender drifting through the air before bed, sandalwood grounding you in a quiet room, or lemon adding that fresh zing when you’re feeling sluggish. These aren’t just fragrances—they’re medicine for the mind. Welcome to the world of healing scents and DIY aromatherapy, where your home transforms into a personal wellness retreat.


What is Aromatherapy and Why Does It Work?

Aromatherapy uses essential oils—concentrated plant extracts—to support emotional, mental, and even physical health. Unlike synthetic room sprays, essential oils contain compounds that directly interact with the brain’s limbic system, the area that controls mood, memory, and stress response.

That’s why the right scent doesn’t just smell nice—it can calm you down, lift your energy, or even help you focus.


Popular Healing Scents and Their Benefits

  • Lavender – Calms anxiety, improves sleep, reduces tension headaches.
  • Peppermint – Boosts energy, sharpens focus, eases nausea.
  • Lemon – Uplifts mood, fights fatigue, naturally cleanses the air.
  • Eucalyptus – Clears sinuses, strengthens immunity, refreshes breathing.
  • Sandalwood – Grounds the mind, aids meditation, relieves restlessness.
  • Rosemary – Supports memory, improves concentration, reduces mental fog.

Tip: Invest in small 10ml bottles of these oils for your wellness kit. They last months and are far more cost-effective than store-bought candles.


DIY Aromatherapy Recipes You Can Try Today

1. The Sleep Mist

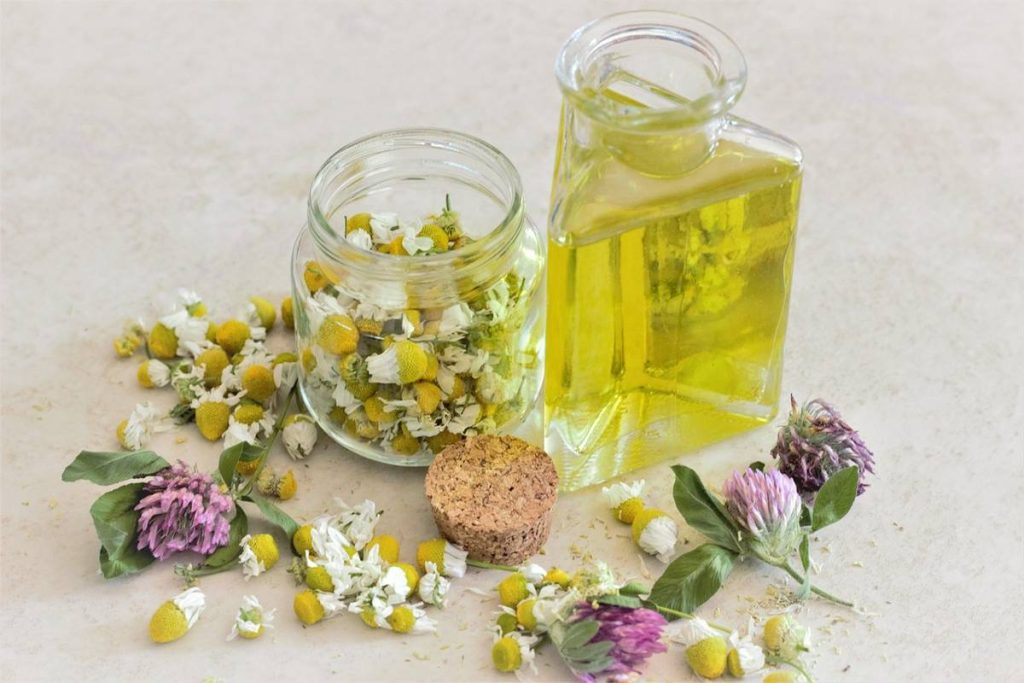
Alt Text: Chamomile essential oil with dried chamomile flowers and glass jar.
  • 10 drops lavender oil
  • 5 drops chamomile oil
  • 50ml distilled water

Mix in a spray bottle, shake well, and spritz on your pillow before bed.


2. The Morning Boost Diffuser Blend

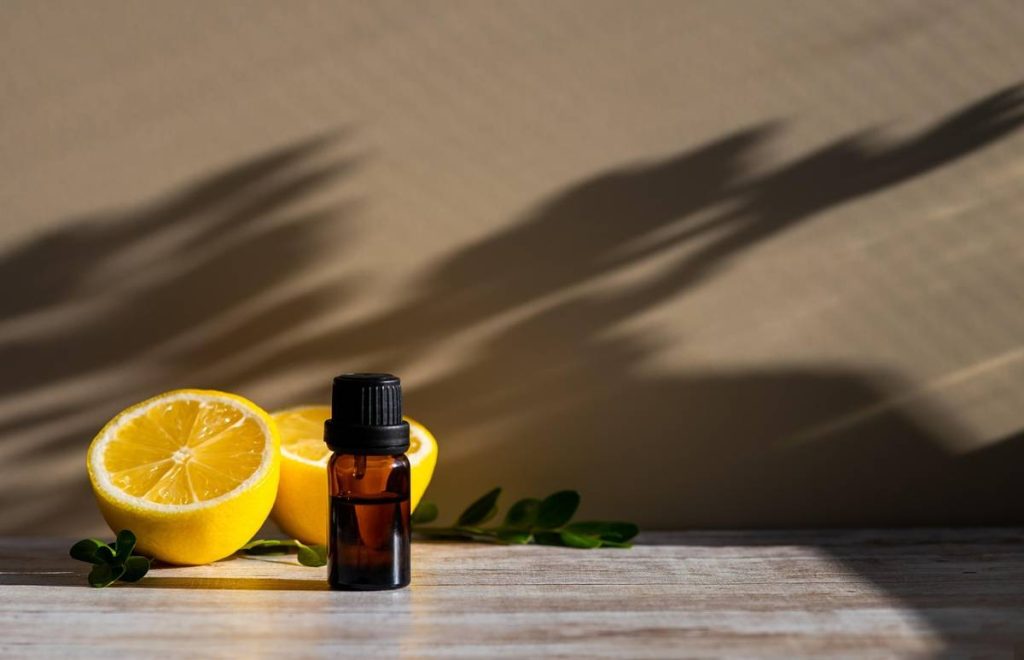
Citrus essential oil with lemon slices for mood lifting and stress relief.

  • 3 drops peppermint
  • 3 drops lemon
  • 2 drops rosemary

A natural wake-up call that feels brighter than your first cup of coffee.


3. The Stress-Less Bath Soak

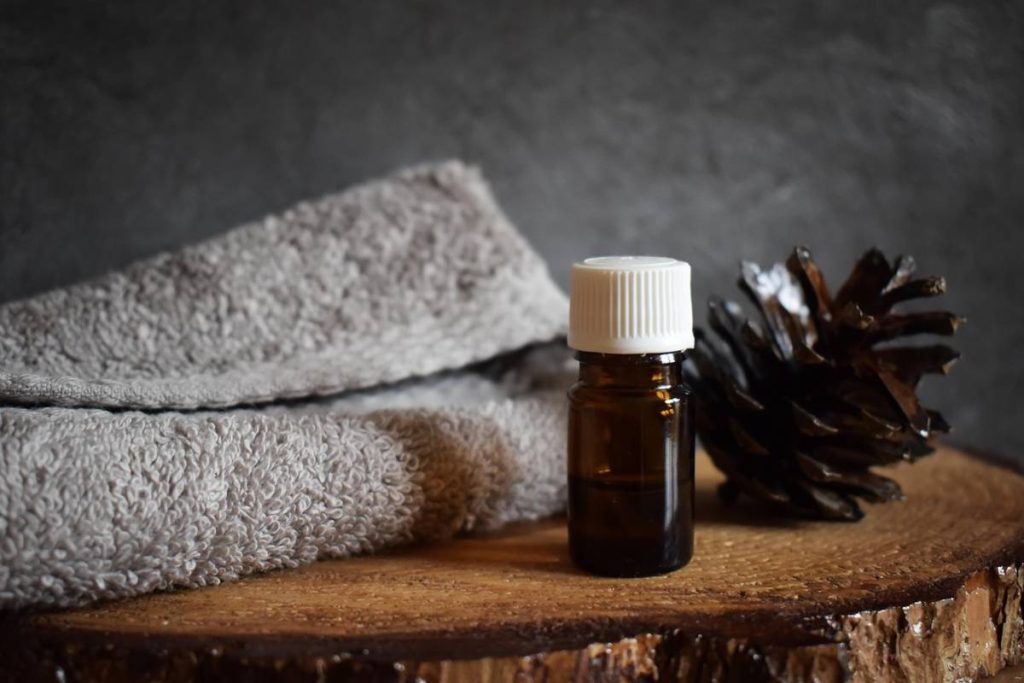
Alt Text: Brown essential oil bottle with pine cone and towel on wooden surface.
  • 1 cup Epsom salt
  • 5 drops sandalwood
  • 4 drops lavender

Add to warm bathwater and soak for 20 minutes to release tension.


4. DIY Roll-On Calm

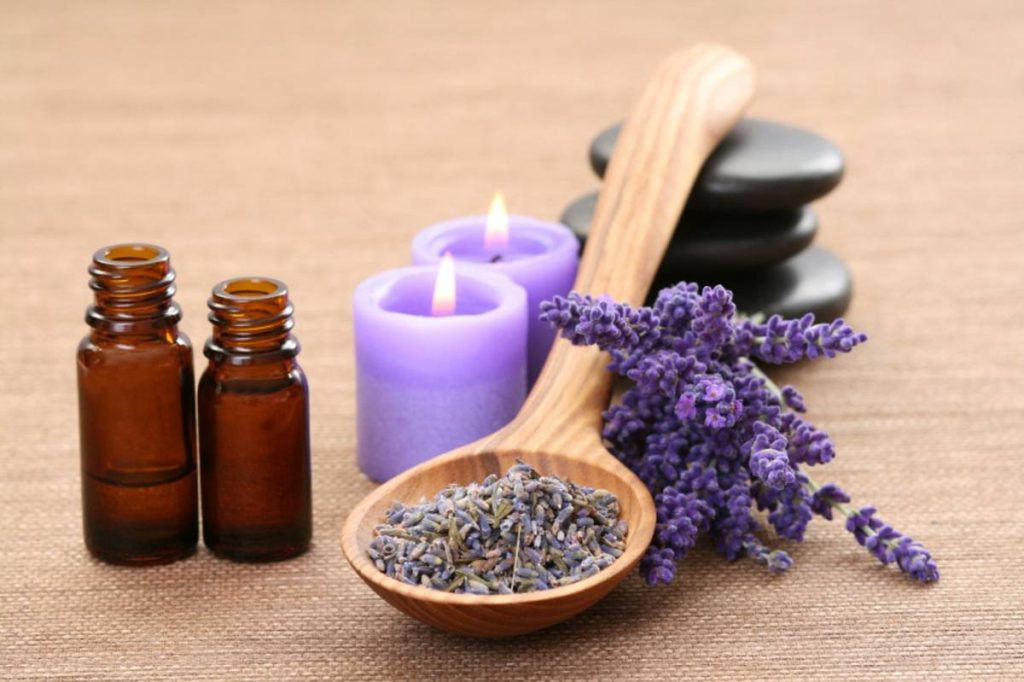
Lavender essential oil with flowers and candles for calming the nervous system.
  • 10ml roller bottle
  • 2 drops eucalyptus
  • 2 drops lavender
  • Fill with jojoba or coconut oil

Roll onto wrists, temples, or the back of your neck when stress creeps in.


Safety Tips for Using Essential Oils

  • Dilute always: Essential oils are potent. Blend with a carrier oil like coconut, almond, or jojoba before skin contact.
  • Don’t ingest oils unless a certified practitioner advises it.
  • Check sensitivities: Pregnant women, kids, and pets can react differently—do a patch test first.

Why DIY Aromatherapy is Better Than Store-Bought Scents

Many store candles or sprays are loaded with synthetic “fragrance oils” that mimic scent without offering therapeutic benefits. DIY blends, on the other hand, are:

  • Pure and natural
  • Customizable for your needs
  • Safer for daily use
  • A mindful, creative practice in themselves

Alt Text: Olive oil bottles lined up on shelf with golden glow lighting.

Healing scents aren’t just about nice aromas—they’re practical tools for balance and self-care. Whether you’re craving deeper sleep, sharper focus, or just a moment of calm, DIY aromatherapy brings nature’s remedies into your daily life.

So the next time you feel stressed, tired, or distracted, remember: a few drops of lavender, peppermint, or sandalwood might just change your day.

Your Turn: What’s one scent that instantly changes your mood? Drop it in the comments—I’d love to know.

DIY projects to upgrade your backyard in a weekend – featured blog image

Let me be real with you : most of us dream of that Pinterest-worthy backyard, but when the weekend hits, Netflix takes over. I get it. But here’s the truth: you don’t need thousands of dollars or a full renovation team to make your outdoor space look magical. You just need a free weekend, a trip to Home Depot (or even Walmart), and a little creative push.

In this blog, I’m sharing the exact DIY outdoor projects that I tried myself (and trust me, I’m no carpenter). They’re simple, budget-friendly, and instantly make your backyard feel like a cozy retreat. Ready to transform your space by Sunday night? Let’s dive in.

Build Your Own Patio Furniture (Yes, It’s Possible!)

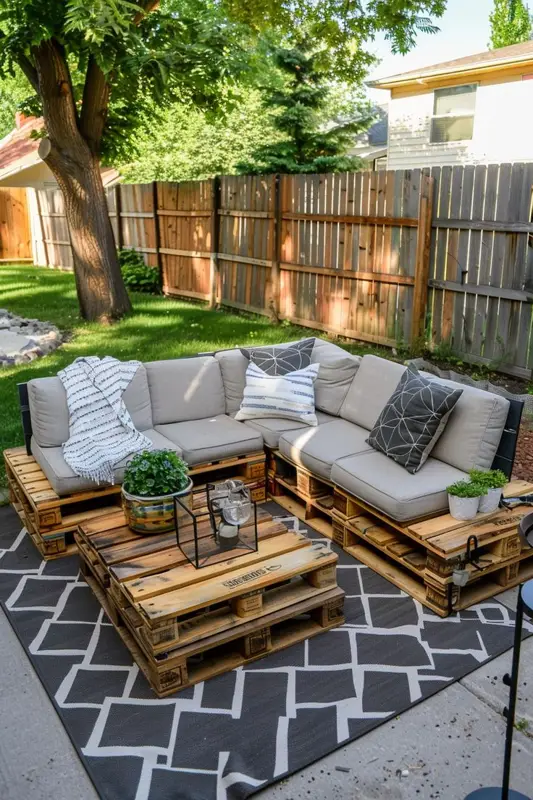
Cozy pallet furniture with soft cushions and a patterned rug — a budget-friendly backyard upgrade.

When I first decided to build my own DIY patio furniture, I had visions of a Pinterest board come to life… and then reality hit me. Those wooden pallets? Yeah, they don’t move themselves. I dragged one across the yard and immediately realized I was in over my head. My cousin had to come over because I nearly threw out my back trying to lift them solo (pro tip: don’t try to look strong in front of your neighbors—ask for help).

But here’s the surprise twist—once the pallets were stacked, a couple of cushions tossed on top, it actually looked good. Like, “hey, maybe I can actually pull off a backyard makeover” kind of good. Honestly, it’s one of the easiest projects because it gives your space personality without torching your wallet. And if you want it to look like you splurged at a designer store? Just sand the pallets, add some weather-proof paint, and suddenly your DIY setup feels showroom-worthy.

DIY Outdoor Lighting That Changes Everything

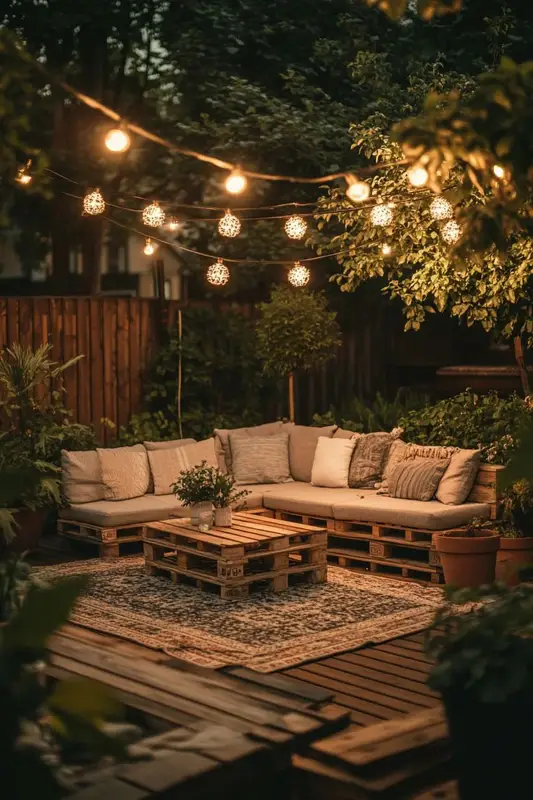
Backyard with pallet sofa and fairy lights creating a cozy outdoor space.
String lights can completely transform a simple backyard into a warm evening retreat.

You know that dreamy backyard you see in movies? Honestly, 90% of the magic is just lighting. And the best part? It doesn’t drain your wallet.

I hung fairy lights from Amazon, popped solar lanterns along the path, and dropped candles in mason jars. In no time, my backyard went full “Brooklyn rooftop cafe” mode. And yeah, worth every second. (If you’re into more hacks like this, check out my post on Easy DIY Ideas for Home and Art Lovers 2025).

Weekend Planters That Make You Look Like a Green Thumb

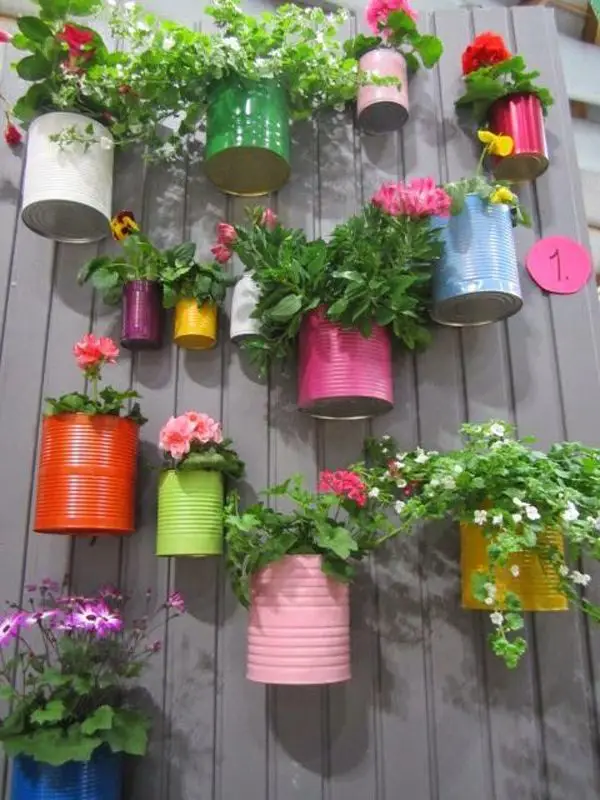
DIY vertical planters made from painted tin cans with flowers and greenery.
Turn old tin cans into colorful hanging planters for herbs and flowers — easy and fun DIY project.

Not gonna lie — I’ve killed more plants than I’d like to admit. But DIY backyard planters saved me.

Grab some old buckets, paint cans, or even wooden crates, and turn them into chic planters. The trick? Spray paint them matte black or white for that minimalist Instagram vibe.

I planted lavender and basil — easy to grow, smell amazing, and make me look way more “put-together” than I really am. “And honestly? Worth every minute.”

Small Backyard Design Ideas That Actually Work

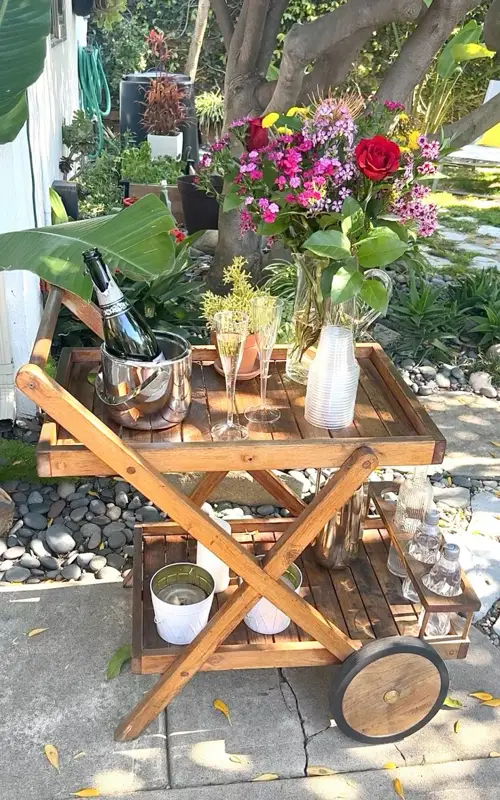
: DIY backyard bar cart with flowers, champagne, and summer drinks.
A thrifted table or cart makes the perfect outdoor drink station for weekend vibes.

Okay, let’s say you’re working with a tiny outdoor space. Don’t panic. Small backyard design ideas are about vertical hacks.

  1. Hang planters on your fence. ( like herbs, flowers or even succulents )
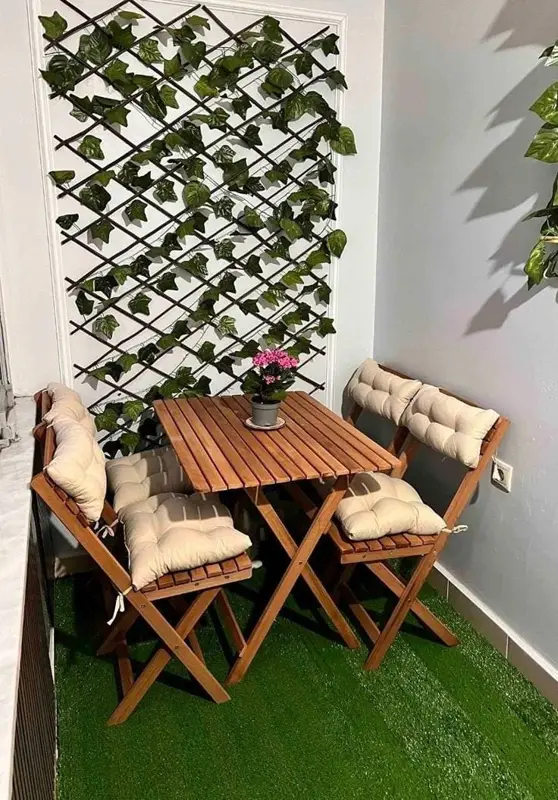
  2. Use foldable chairs + tables. ( or even regular ones, as long as they look good and don’t overwhelm the space. The trick is keeping it sleek. )
  3. Create a mini “bar cart” with a thrifted table for summer drinks. ( my personal favorite )

It’s not about the size of your yard — it’s about how creative you get with the space.

The Secret to a Cozy Vibe? Layer Textures.

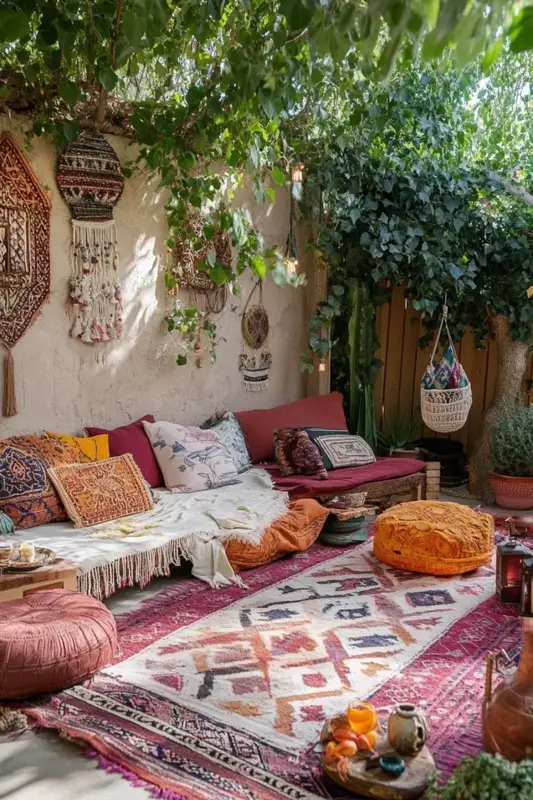
DIY backyard makeover with layered rugs, pillows, and cozy boho-style seating.
Layer textures like rugs and cushions to create a cozy outdoor living room vibe.

Here’s the secret nobody mentioned: cozy = layers.

Lay down an outdoor rug (yep, they actually make rugs for outside), toss on some pillows, and keep a blanket handy for those breezy nights. Suddenly your backyard isn’t just grass and chairs anymore—it’s giving full-on “outdoor living room” energy.

Your Backyard, Your Weekend Project

Small backyard setup with folding chairs, table, and vertical green plant wall.
Compact backyard design idea — foldable chairs and vertical planters maximize small spaces.

By Sunday night, you could be sipping a cold drink under fairy lights, feet up on your DIY pallet sofa, with planters you actually pulled off yourself.

The truth is, a backyard makeover doesn’t have to feel like a big project. These DIY outdoor ideas turn a plain yard into your own little escape.

So seriously—why scroll all weekend when you can give your backyard the glow-up it’s been waiting for? Need more inspo? Check out my post on Easy DIY Ideas for Home and Art Lovers 2025.

❓ Frequently Asked Questions (DIY Backyard Projects)

What is the cheapest DIY backyard project?

Honestly, the cheapest backyard makeover is string lights + planters. You can grab fairy lights for under $20 and repurpose old buckets, crates, or even coffee cans as planters. Add a few herbs or flowers, and suddenly your space feels intentional without spending big.

How do I decorate my backyard on a budget?

Think layering + creativity. Use what you already own—like an old table that can double as a bar cart, thrift-store chairs, or leftover paint for a fresh look. Add cozy touches like an outdoor rug or throw pillows, and focus on lighting. These budget backyard makeover ideas are what truly change the vibe.

Can I DIY outdoor furniture without tools?

Yes, 100%! Pallet furniture is the easiest hack. You don’t need fancy tools—just sandpaper, paint, and outdoor cushions. Stack pallets to create a couch or coffee table. I did this myself and trust me, if I can pull it off without a workshop, so can you.

Easy DIY Jewelry Ideas You Can Make at Home

I’ll be honest: I’ve always had a soft spot for jewelry. It’s the one thing that can take a plain outfit and make it feel like you. But here’s the thing—I never wanted to spend $50 on a pair of earrings I could probably make myself. That’s how I got hooked on DIY jewelry.

Over the years, I’ve learned that making your own pieces isn’t just budget-friendly—it’s ridiculously fun and surprisingly calming. There’s something about sitting down with beads, wire, or even scrap fabric and watching a unique little accessory come to life in your hands.

If you’ve ever thought, “I wish I could make my own jewelry”, trust me, you can. And I’m going to show you how.

Why I Think DIY Jewelry is Worth It

Let me tell you, once you start making your own pieces, shopping at the mall feels different. Instead of buying, you’ll catch yourself thinking, “I could totally make that for half the price.”

Here’s why I swear by it:

  • It’s personal. You’re not wearing something hundreds of other people own—you’re wearing your idea.
  • It’s affordable. I once made six pairs of earrings for under $10. Yes, really.
  • It’s a stress-buster. Crafting is basically therapy with beads.
  • It makes the sweetest gifts. A handmade bracelet says “I thought of you” in a way store-bought never can.

My Go-To Tools and Materials (Beginner-Friendly)

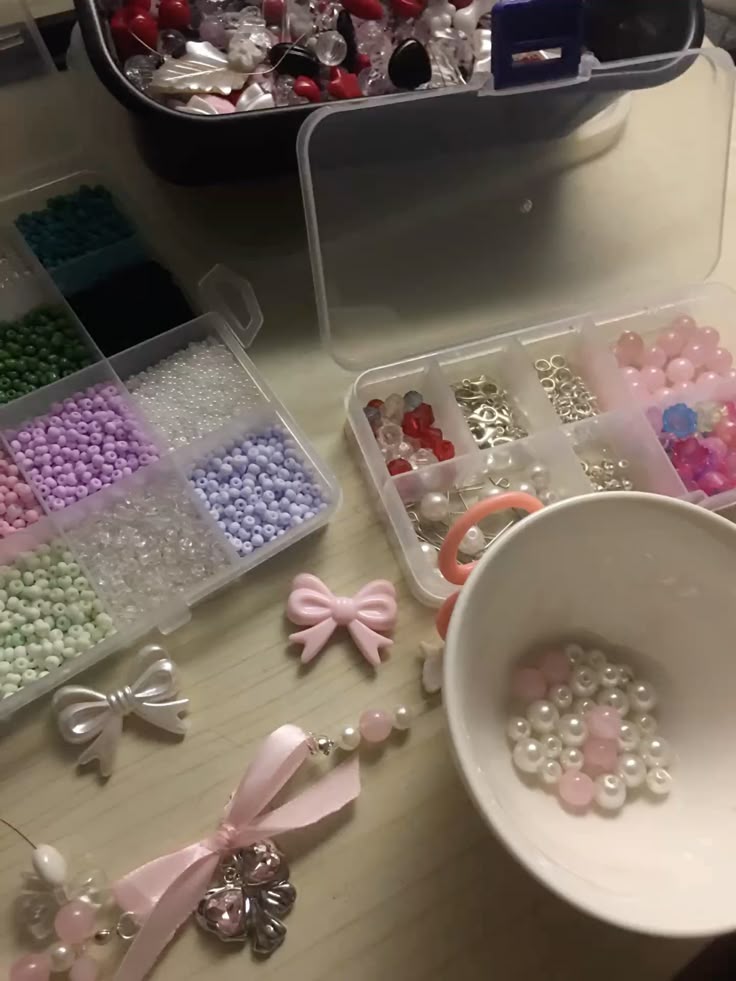
You don’t need a fancy setup to get started. Honestly, my first bracelet was made on my couch with a pair of dollar-store pliers. Here’s what I recommend:

  • Elastic cord (for easy bracelets—game changer for beginners)
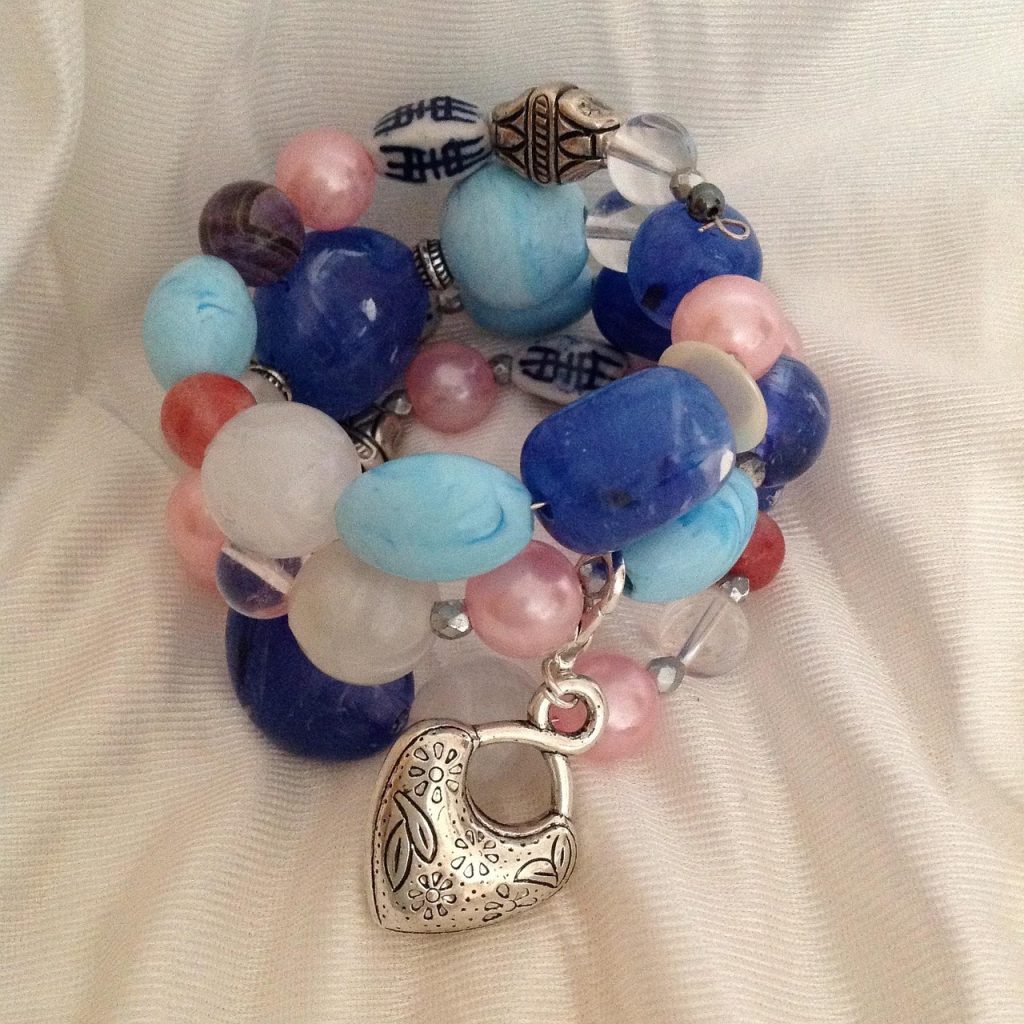
  • Beads: I’m a sucker for seed beads and gemstone chips, but even wooden beads look chic
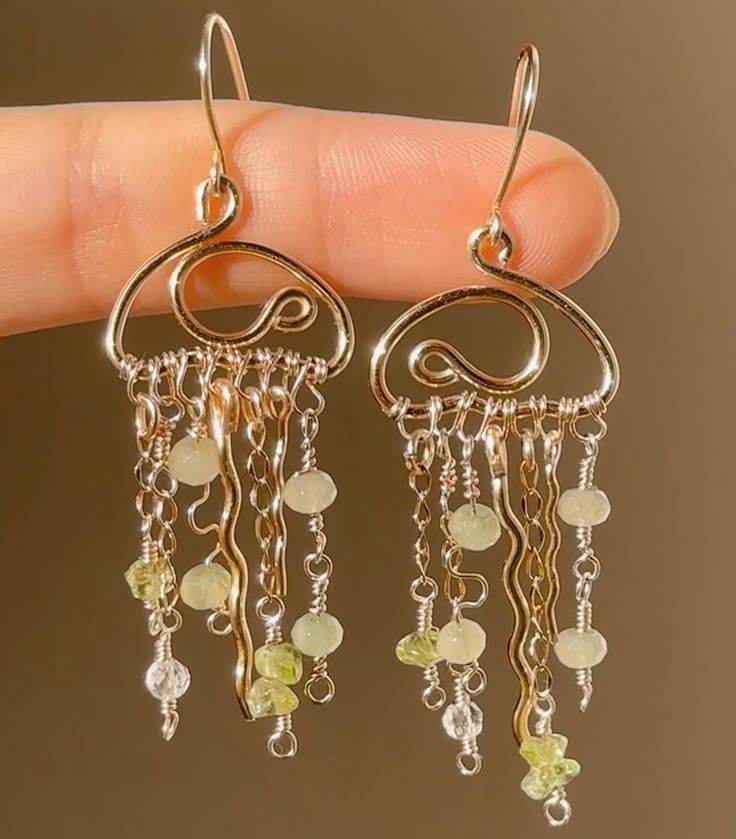
  • Wire & jump rings (the backbone of most projects)
  • Earring hooks & clasps (you can grab a pack online for a few bucks)
  • Basic tools: round-nose pliers, flat pliers, scissors

Hack: Don’t overbuy. A starter kit from Amazon or Michaels is plenty to test the waters.

My Favorite DIY Jewelry Projects

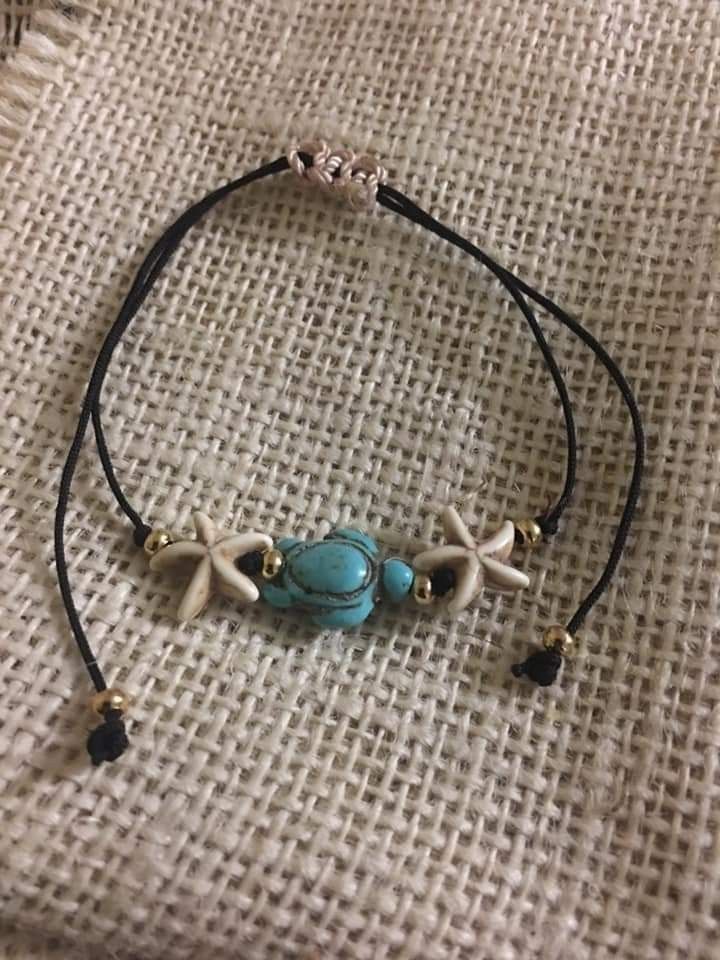
1. The “Netflix Bracelet” (So Easy You Can Make It While Watching a Show)

This is literally how I started. Grab elastic cord, string some beads, knot it tight, and boom—you’ve got a bracelet. I call it the “Netflix Bracelet” because you don’t even need to look up while doing it.

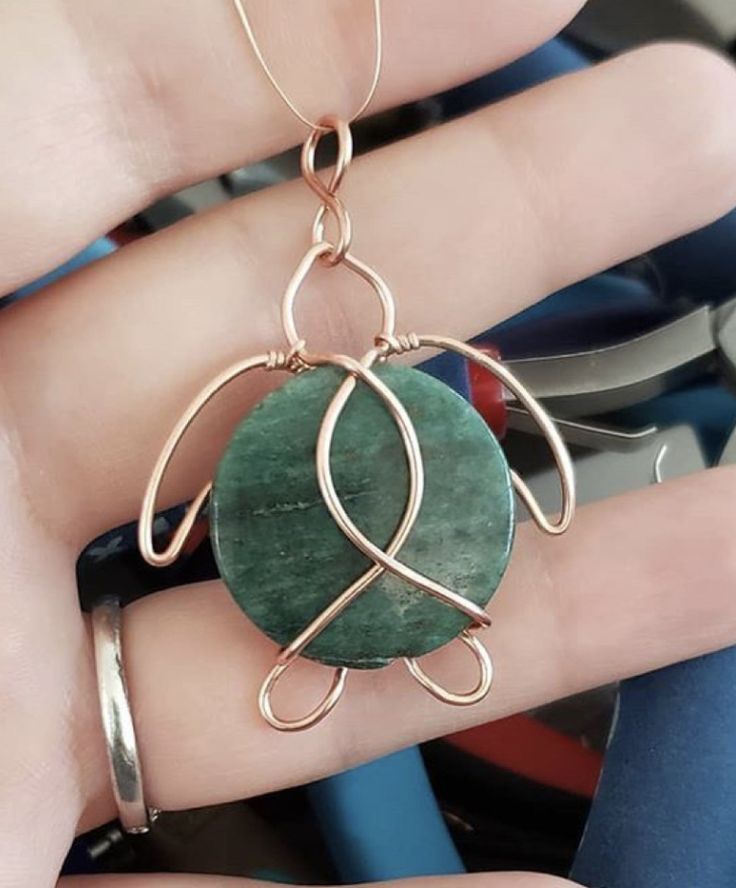
2. Wire-Wrapped Pendants (They Look Fancy but Aren’t)

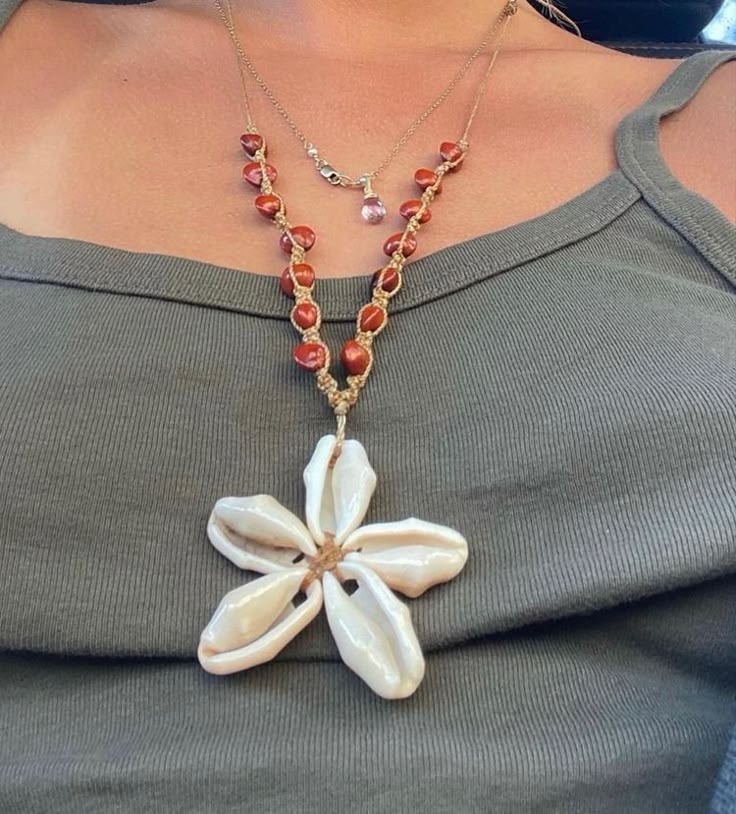
I once turned a random seashell I found at the beach into a pendant—and it’s still one of my favorite necklaces. All you need is thin wire and a stone, crystal, or shell. Wrap it a few times, make a loop at the top, and slide it onto a chain. People will assume you bought it at a boutique.

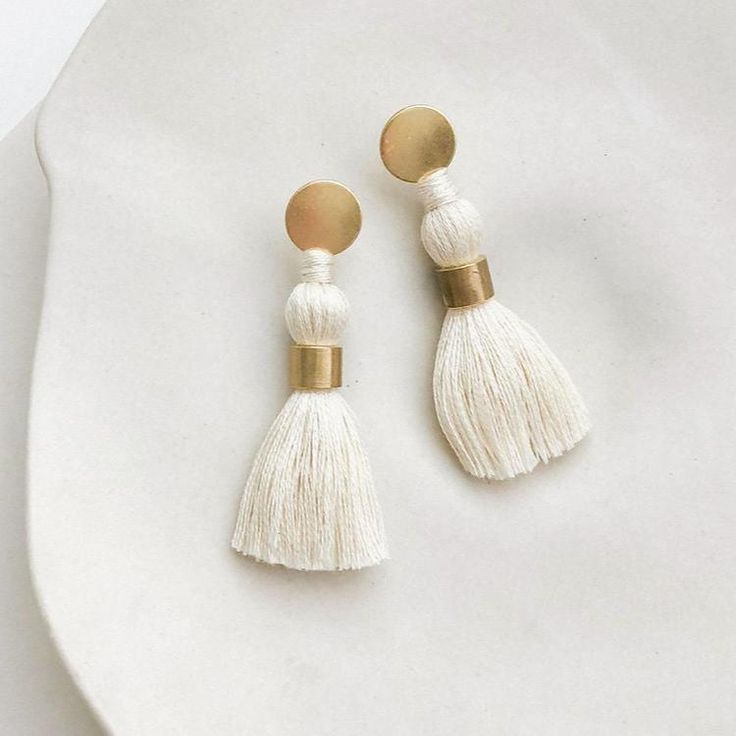
3. Tassel Earrings (For the Color Lovers)

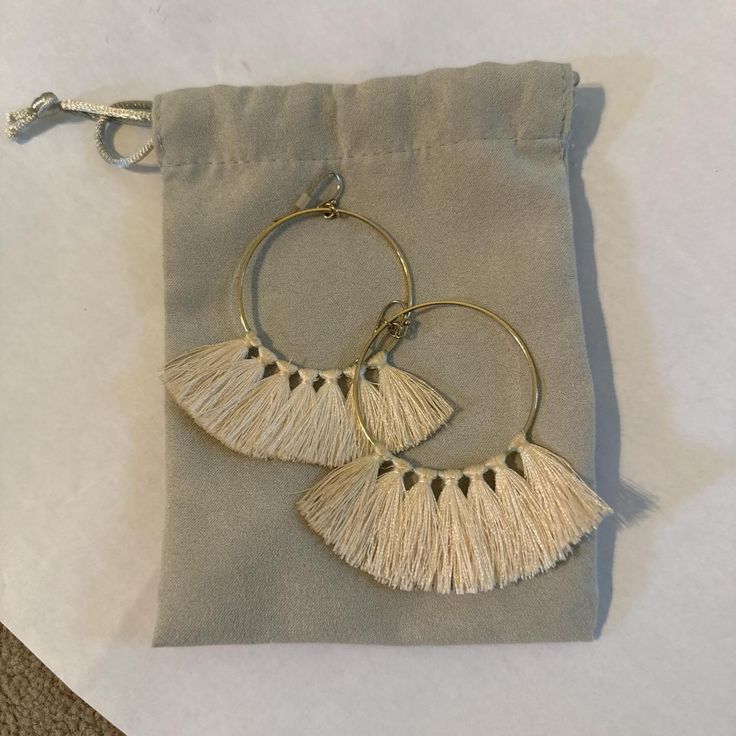
These are my go-to when I want to look like I “tried” without actually trying. Wrap embroidery thread around cardboard, tie, trim, attach to earring hooks. Done. They’re lightweight, bold, and always get compliments.

Hack: Use leftover thread or even fabric strips—instant boho vibes.

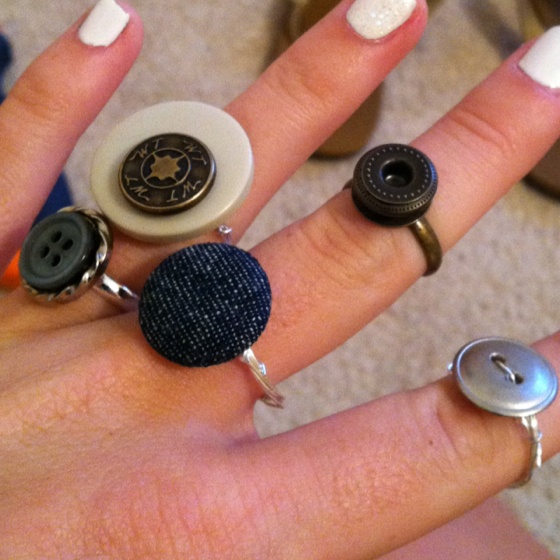
4. Button & Fabric Scrap Rings (The Upcycling Gem)

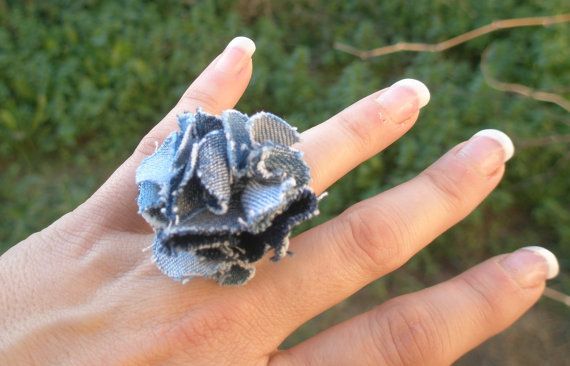
I keep a jar of old buttons and fabric scraps just for this. Hot glue a pretty button or fabric rosette onto a simple ring base (they’re cheap online), and you’ve got a quirky, eco-friendly statement ring.

Hack: Denim scraps make surprisingly cool rings.

5. Layered Chain Anklets (Beach Vibes Anytime)

Summer favorite! Grab two or three thin chains in different lengths, add small charms if you want, and attach clasps. Worn with sandals, they instantly give that laid-back, coastal look.

Hack: Use a safety pin to help thread tiny charms saves a lot of frustration.

How to Make Your Jewelry Look “Expensive” (Even When It’s Not)

Here are tricks I’ve picked up after a dozen trial and error pieces:

  • Stick to two or three colors-less chaos, more class.
  • Swap plastic beads for glass or gemstone chips when you can.
  • Invest in gold or silver-plated findings (they cost a little more, but don’t tarnish as fast).
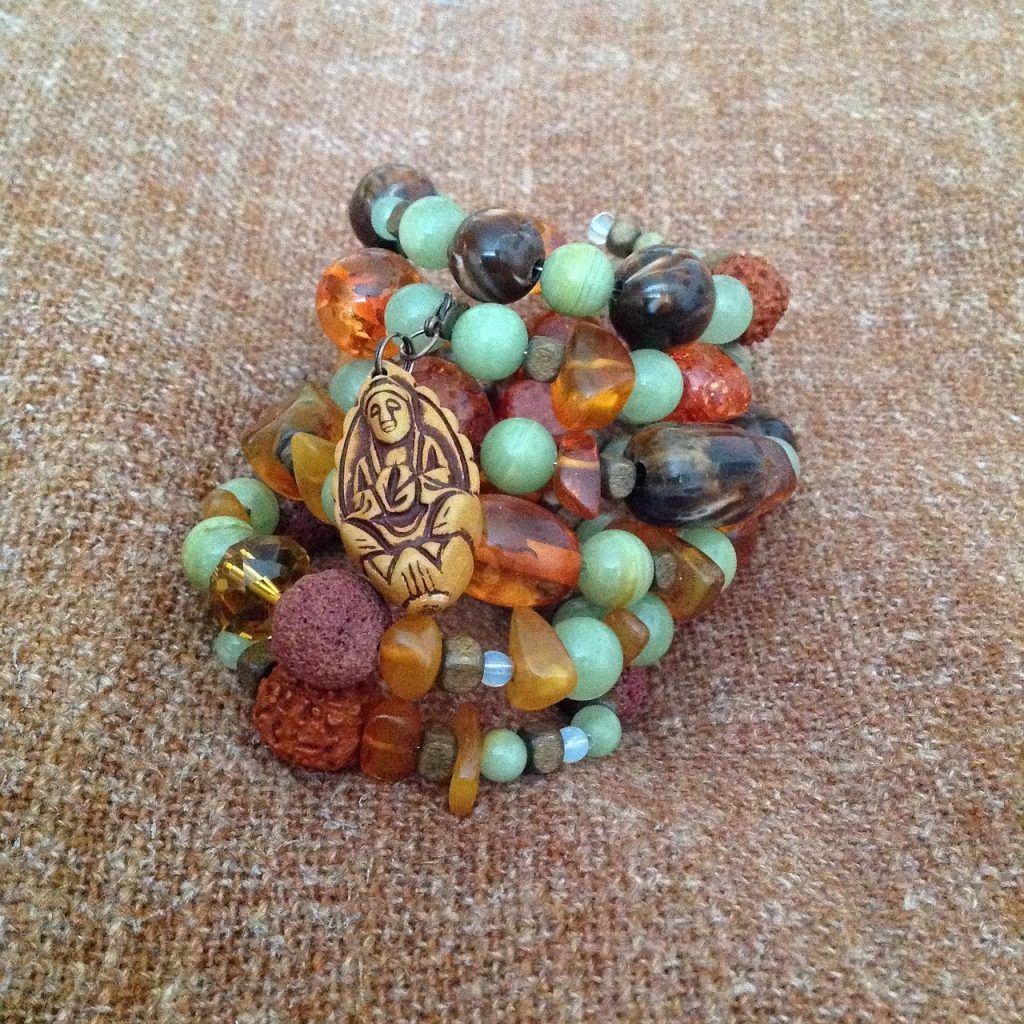
  • Mix textures : wood + metal, leather + beads, thread + shells.

Caring for Your Handmade Pieces

Here’s the truth: homemade jewelry can last years if you treat it right.

  • Keep it away from water (especially elastic bracelets).
  • Store earrings in little Ziploc bags or soft pouches.
  • Wipe with a dry cloth after wearing.

I learned the hard way that leaving beaded pieces in a steamy bathroom is a death sentence. Don’t do it.

Ready to Start Crafting?

DIY jewelry isn’t about perfection, it’s about expression. Some of my “mistakes” ended up being my favorite designs (like that uneven denim ring I now wear proudly). If you love the idea of accessories that feel personal, affordable, and fun to make, I promise this hobby will hook you.

So go ahead—grab some beads, put on a playlist, and see what happens. Worst case? You’ve spent an hour creating. Best case? You just made your new favorite necklace.

15 DIY Creative Projects to Try in 2025 – Easy Ideas for Home & Art Lovers”

DIY projects are really making a comeback in 2025—and honestly, I’m not surprised. These days, everyone’s looking for ways to slow down a little, save money, and just create something that feels personal. For me, DIY has become more than just making “cute stuff.” It’s a way to relax, clear my head, and do something with my hands after being stuck on screens all week. There’s just this satisfying little moment when you step back and thinkwow, I actually made this.

I’ll admit, I started small. Painted plant pots, homemade candles, a few wall hangings here and there. And the funny thing? My kids love it even more than I do. What began as “just something to try” has turned into our little weekend ritual—we pull out scraps, paints, or whatever’s lying around, and make something together. It doesn’t always look perfect, but it always feels special.

The best part? DIY doesn’t have to cost much or require fancy tools. With a few basic supplies, you can create things that feel one-of-a-kind. So in this post, I’m sharing some of my favorite easy, practical, and creative DIY ideas. Whether you’re a total beginner or someone who already loves crafting, there’s something here you can try at home.!

Quick Prep Before Starting Your DIY Projects

Before you dive into painting, gluing, or crafting, a little prep makes all the difference. Here’s a quick checklist that will save you time, money, and a few headaches:

  • Keep Essential Tools Handy: Basic supplies like scissors, glue gun, measuring tape, paint brushes, and a craft knife will cover most beginner DIY projects. Having a small kit ready means you won’t stop mid-project hunting for tools.
  • Plan Your Budget: DIY is affordable, but costs can add up if you buy supplies you don’t need. Make a quick list of what each project requires and reuse materials where possible—recycling jars, old fabric, or cardboard can save money and reduce waste.
  • Follow Safety Basics: Even small projects need care. Wear gloves when handling adhesives or paint, work on a flat surface, and always use sharp cutting tools carefully. A little safety prep keeps DIY fun and stress-free.

By checking off these simple steps, you’ll be ready to focus on the fun part—creating something personal and unique.


DIY Home Decor Projects

Home decor is one of the most popular areas of DIY in 2025. These small projects instantly upgrade your space while letting your personality shine.

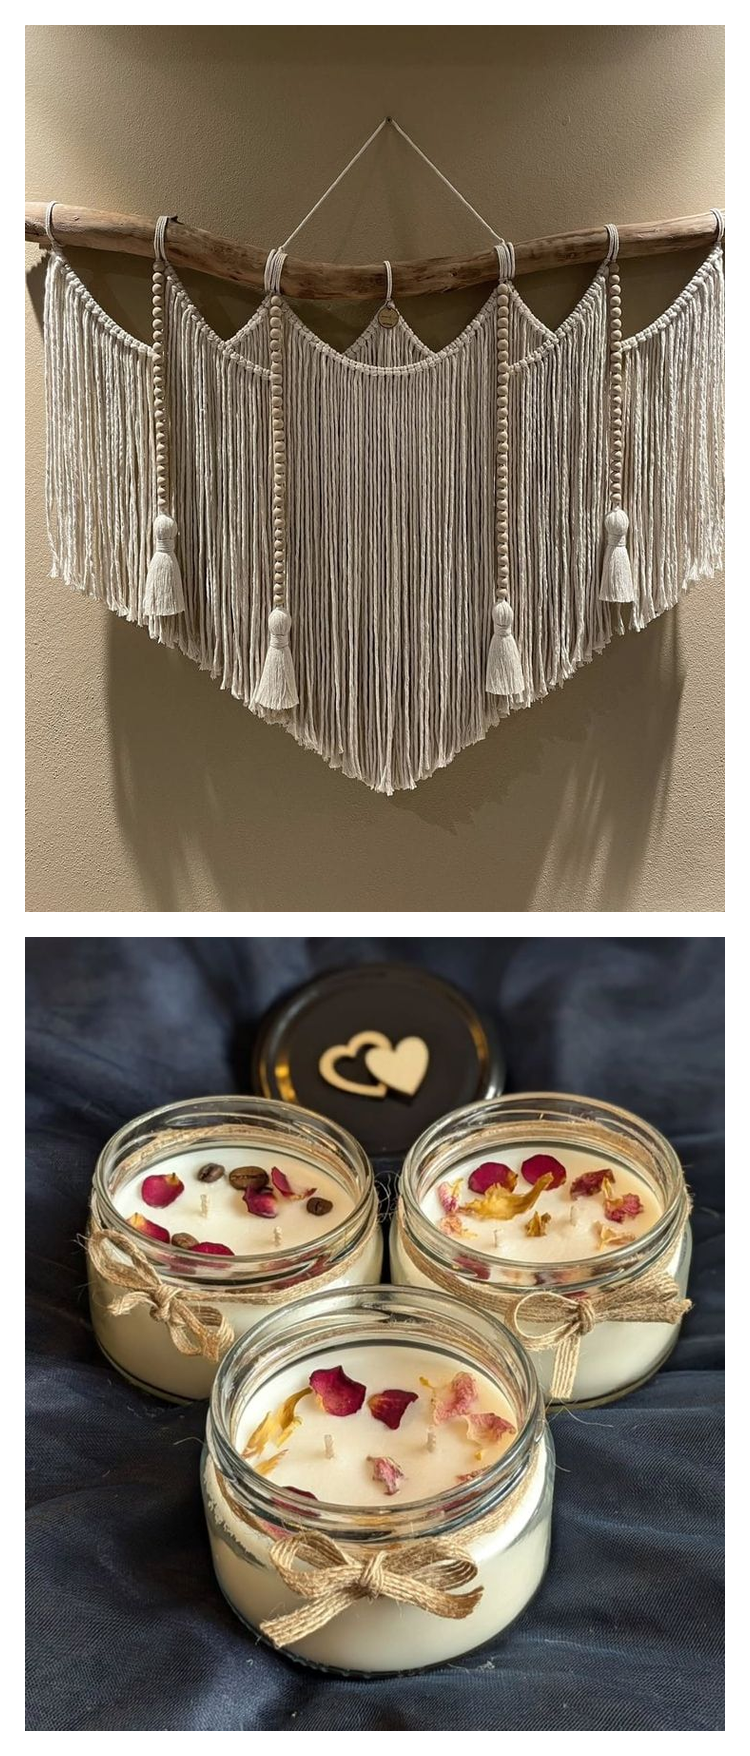
  • Macrame Wall Hanging: The boho look isn’t going anywhere. With just rope and a wooden dowel, you can create stunning wall hangings that add texture and warmth to your living room or bedroom. Perfect for beginners—plenty of easy tutorials are online.
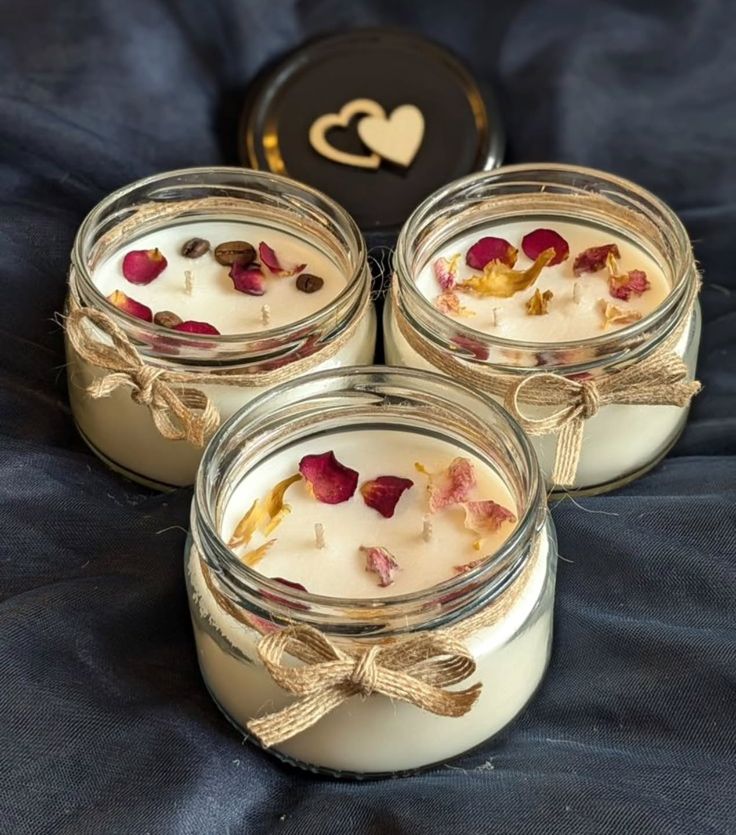
  • Recycled Jar Candle Holders: Instead of tossing old jars, transform them into stylish candle holders. A little paint, lace, or twine makes them sustainable, affordable, and aesthetic. They look great on coffee tables or as gifts.

DIY Fashion & Accessories

Fashion lovers are leaning toward upcycled and handmade accessories that feel unique.

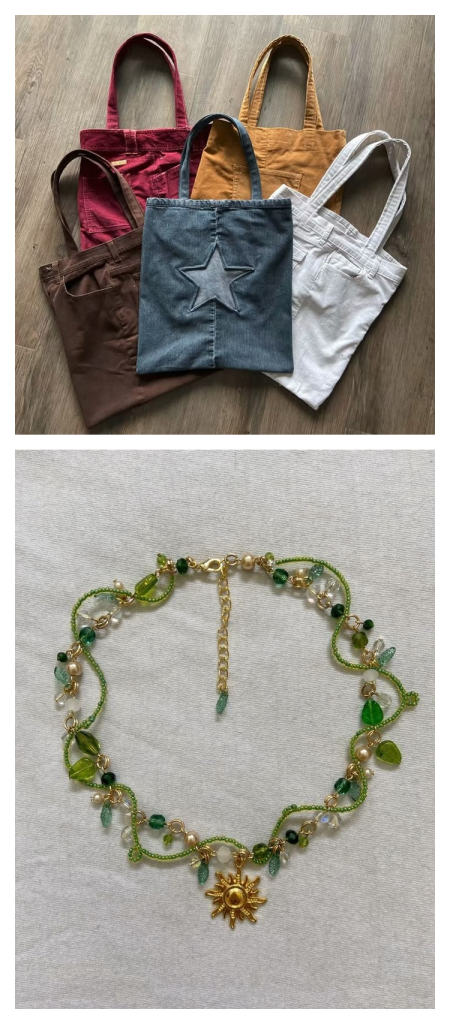
  • Handmade Beaded Jewelry: Affordable, trendy, and customizable. From bracelets to earrings, you can mix colors, beads, and charms to match your style. They also make thoughtful gifts.
  • Upcycled Old Jeans: Don’t throw away denim—turn it into tote bags, organizers, or even quirky coasters. Upcycling denim is both eco-friendly and creative, giving old clothes a brand-new life.

DIY Art & Craft Projects

Art-inspired DIY is perfect for relaxing weekends or when you want to add a personal touch to your space.

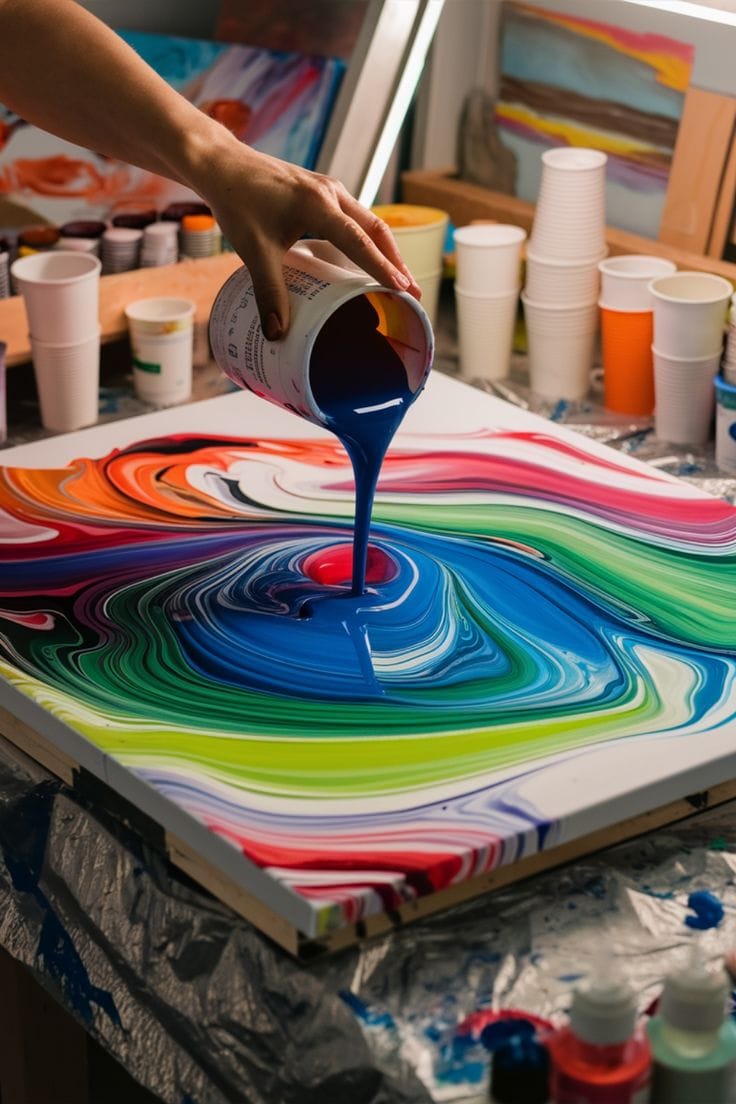
  • Acrylic Pour Paintings: This modern art trend is all about mixing colors and letting them flow on canvas to create abstract wall art. No artistic background needed—just pour, tilt, and watch patterns form.
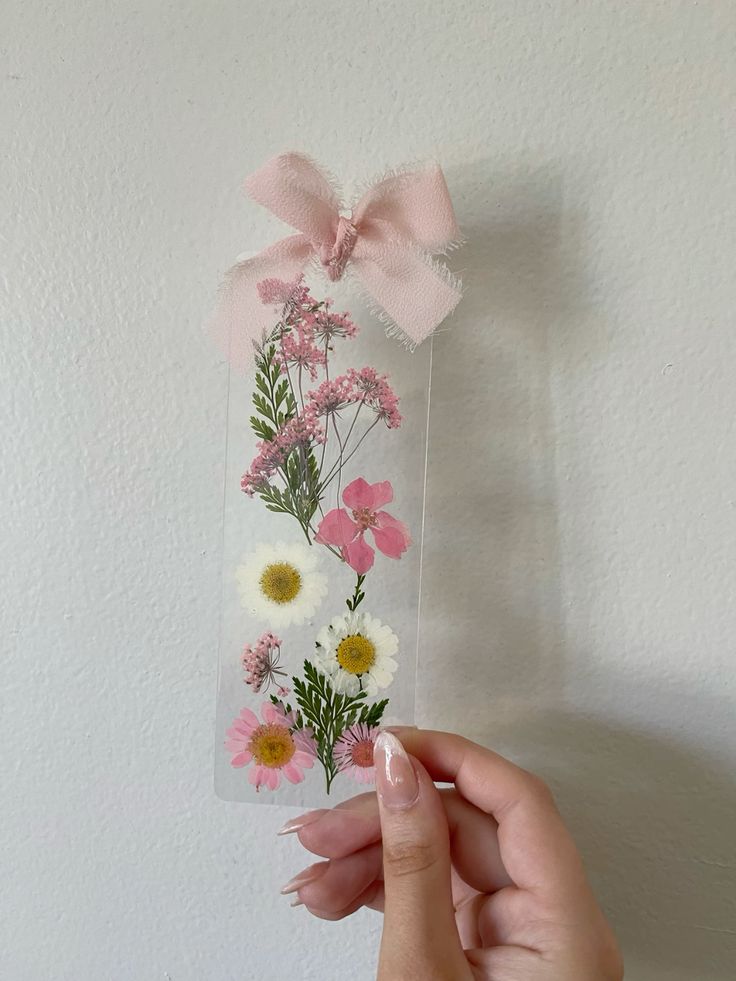
  • Pressed Flower Bookmarks: A minimal yet beautiful craft. Collect flowers, press them, and seal them into bookmarks using laminate or clear tape. Great as gifts or for personal use.

DIY Seasonal & Festive Projects

Festivals and holidays always inspire creativity, and DIY makes them even more personal.

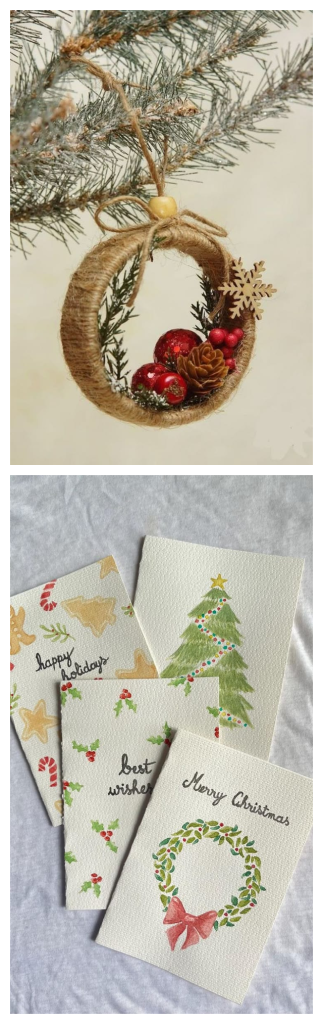
  • Homemade Holiday Ornaments: Whether it’s Christmas, Diwali, or any festival, handmade ornaments add a unique touch. Use clay, paper, or fabric to create decorations that reflect your family’s style.
  • Handmade Greeting Cards: Store-bought cards can’t beat the charm of handmade ones. With cardstock, stamps, or even recycled paper, you can design cards that are sustainable and heartfelt.

DIY Kids & Family Crafts

DIY projects aren’t just for adults—kids love them too. These ideas bring families together while sparking creativity.

  • Paper Mache Fun: A classic school project that never gets old. Use balloons, newspapers, and glue to shape masks, animals, or fun props.
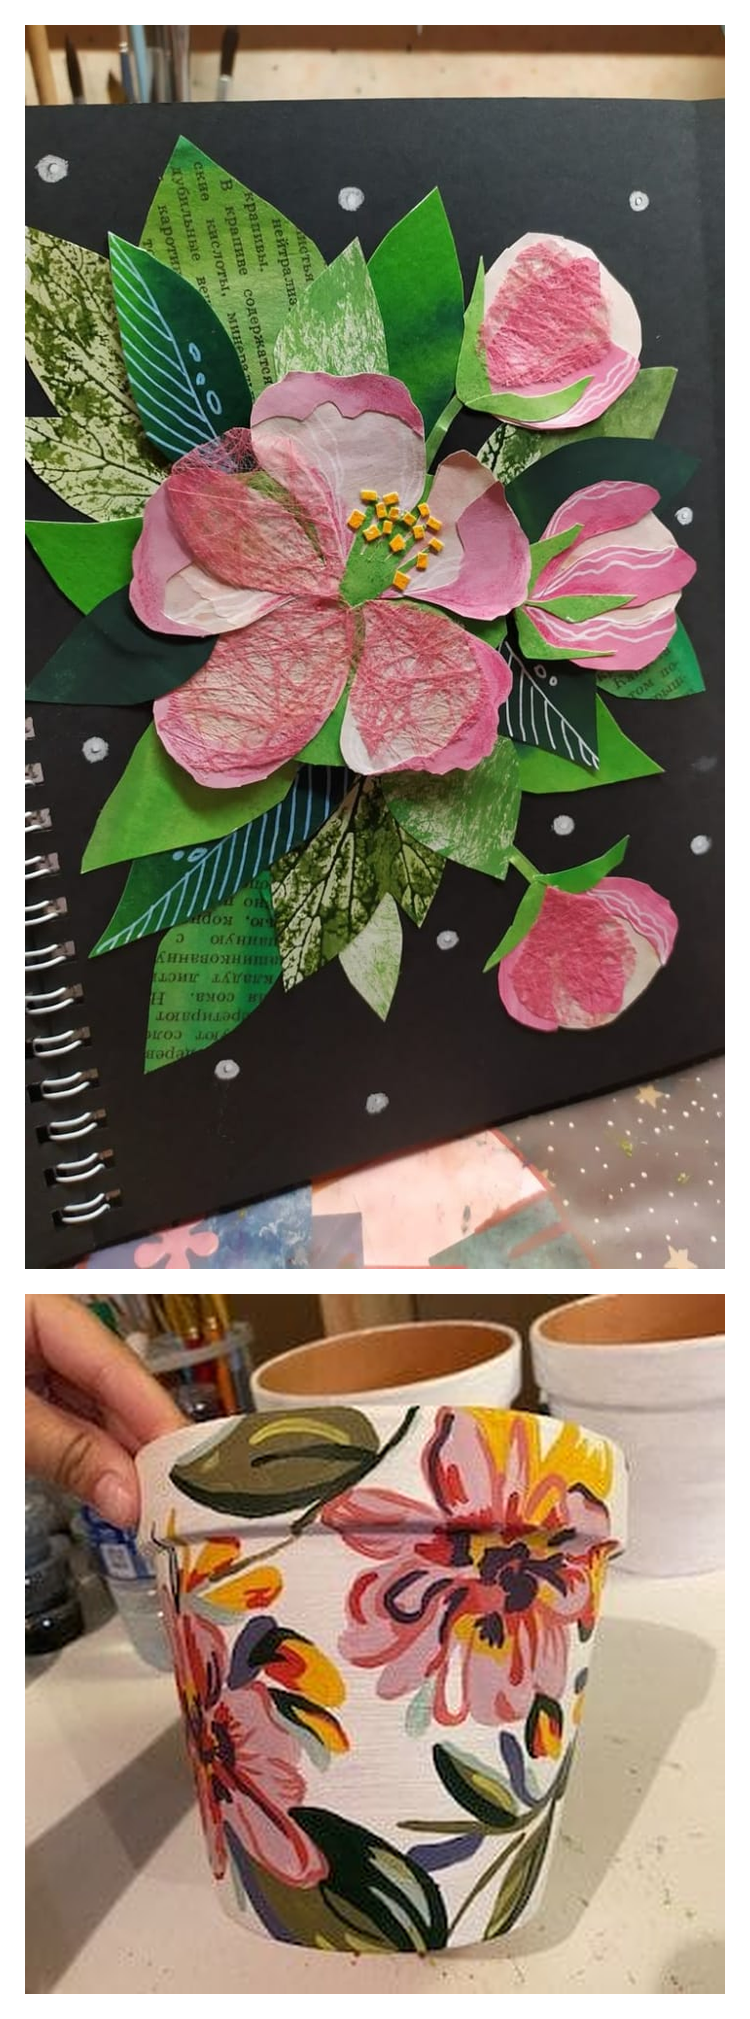
  • Painted Plant Pots: Grab some terracotta pots, let kids paint them however they like, and then plant flowers or herbs. It’s fun, colorful, and encourages gardening.

Care & Longevity Tips for Your DIY Projects

Putting time and love into DIY crafts means you’ll want them to last as long as possible. With a little extra care, your handmade projects can stay beautiful for years. Here are some easy tips:

  • Store Supplies in a Dry Space: Moisture can damage paper, fabric, and paints. Keep your craft supplies in airtight boxes or drawers to protect them from humidity. This also makes your tools easy to find when inspiration strikes.
  • Use Sealants or Varnish for Painted Crafts: A clear sealant or varnish is the secret to making painted pots, wooden decor, and even paper mache projects last longer. It prevents fading, chipping, and water damage while keeping colors vibrant.
  • Try Simple Maintenance Hacks: Dust wall hangings or decor regularly, wipe jars and candle holders with a soft cloth, and refresh fabrics with a gentle wash if needed. Small care steps can keep DIY projects looking like new.

A little maintenance goes a long way—your creativity deserves to shine for years, not just weeks!

Conclusion

At the heart of it, DIY is more than just crafts—it’s a way of expressing yourself, slowing down, and adding a personal touch to everyday life. Whether you’re making a simple painted pot, a beaded necklace, or a full-on home décor piece, every project tells a little story about your creativity.

If you’re new to DIY, don’t feel pressured to start big. Begin with small, fun projects and let your confidence grow over time. The beauty of DIY lies in experimenting—sometimes the “imperfections” end up being the most charming details.

✨ So, what about you? Which DIY project would you love to try first? Share your thoughts in the comments below—I’d love to hear what you’re planning to create!