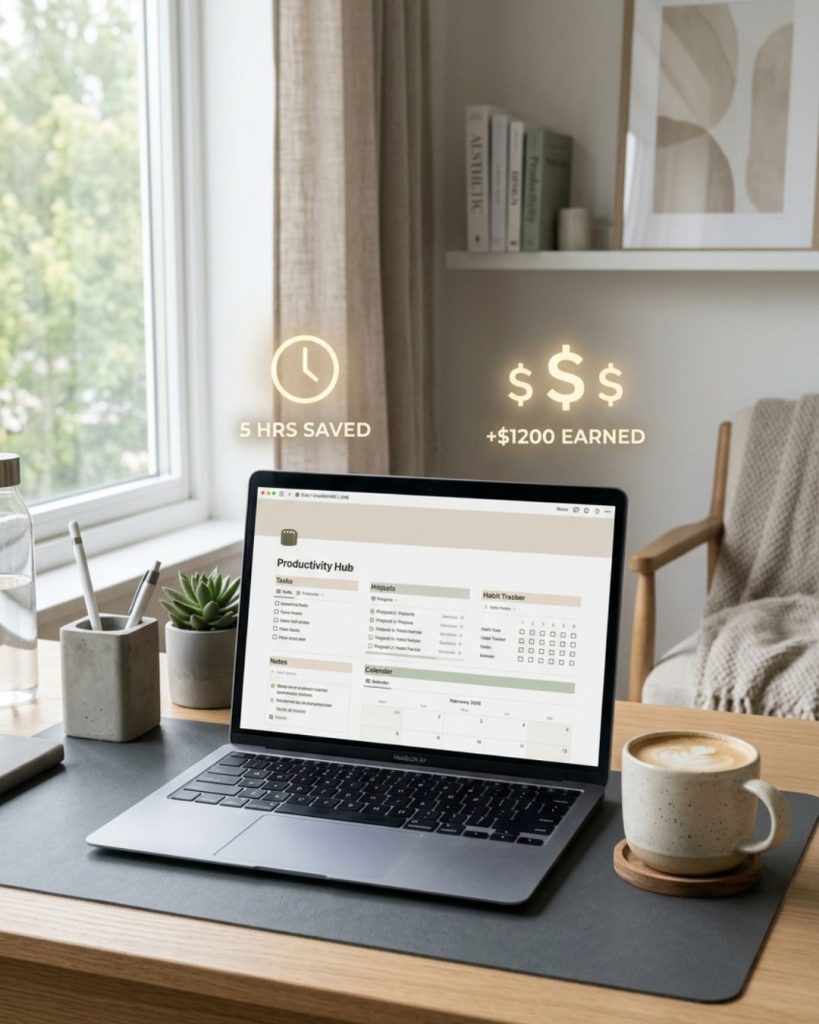
The “dream” of waking up to notification pings from Stripe or PayPal isn’t a myth reserved for the lucky few. In 2026, the digital economy has matured, and the most reliable way to generate passive income is through a high-authority, search-optimized blog.
I didn’t build this by “writing what I felt like.” I built it by treating my blog like a piece of high-yield real estate. By mastering SEO structure, strategic internal linking, and the power of pillar posts, I created a machine that attracts micro-traffic and converts it into revenue 24/7.
If you are tired of the content treadmill and want to build a long-term traffic asset, this is the exact technical and creative framework I used.
1. The Foundation: Why Structure Beats Content
Most bloggers fail because they treat their site like a diary. Success in 2026 SEO requires you to treat your site like a library.
- Logical Hierarchy: A search engine needs to know exactly what your site is about within seconds. If your structure is messy, your rankings will suffer.
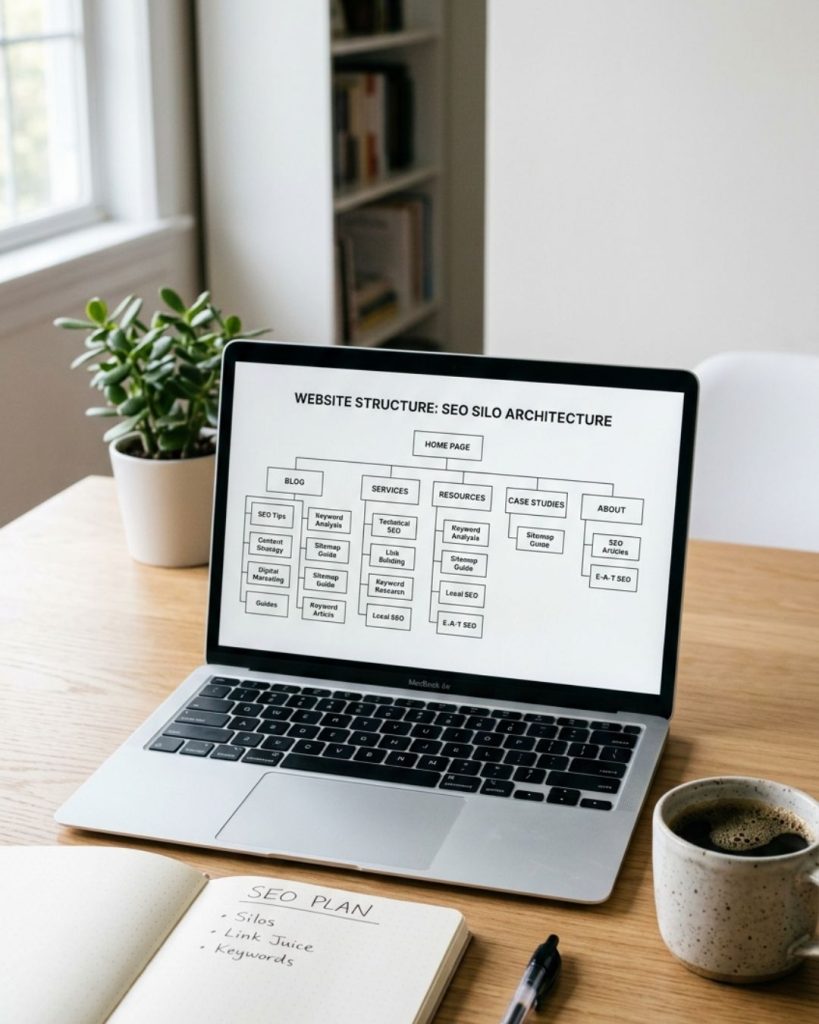
- The “Silo” Method: Group your content into clear categories. If you write about “Personal Finance,” your silos should be “Investing,” “Budgeting,” and “Debt Recovery.”
- User Experience (UX): A clean structure isn’t just for robots. When a human can find what they need in two clicks, your dwell time increases, signaling to Google that your site is valuable.
- Crawl Budget: By organizing your site properly, you ensure that search engine bots find your most important “money pages” first.
2. The Power of Pillar Posts: Your Content Skyscrapers

A pillar post (also known as a cornerstone content piece) is a massive, comprehensive guide that covers a core topic in your niche from A to Z.
- Deep Value: These posts are usually 3,000+ words. They provide so much value that they become the “go-to” resource for that specific high-intent keyword.
- Topical Authority: When you write the definitive guide on a subject, you prove to AI search engines that you have the E-E-A-T (Experience, Expertise, Authoritativeness, and Trustworthiness) required to rank #1.
- The “Hub” Concept: Your pillar post acts as the “hub.” All smaller, more specific articles (the “spokes”) will link back to this giant resource.
- Evergreen Nature: A well-researched pillar post on a topic like “How to Start a Faceless YouTube Channel” will stay relevant for years with only minor updates.
3. Mastering Internal Linking: The Secret “SEO Juice”
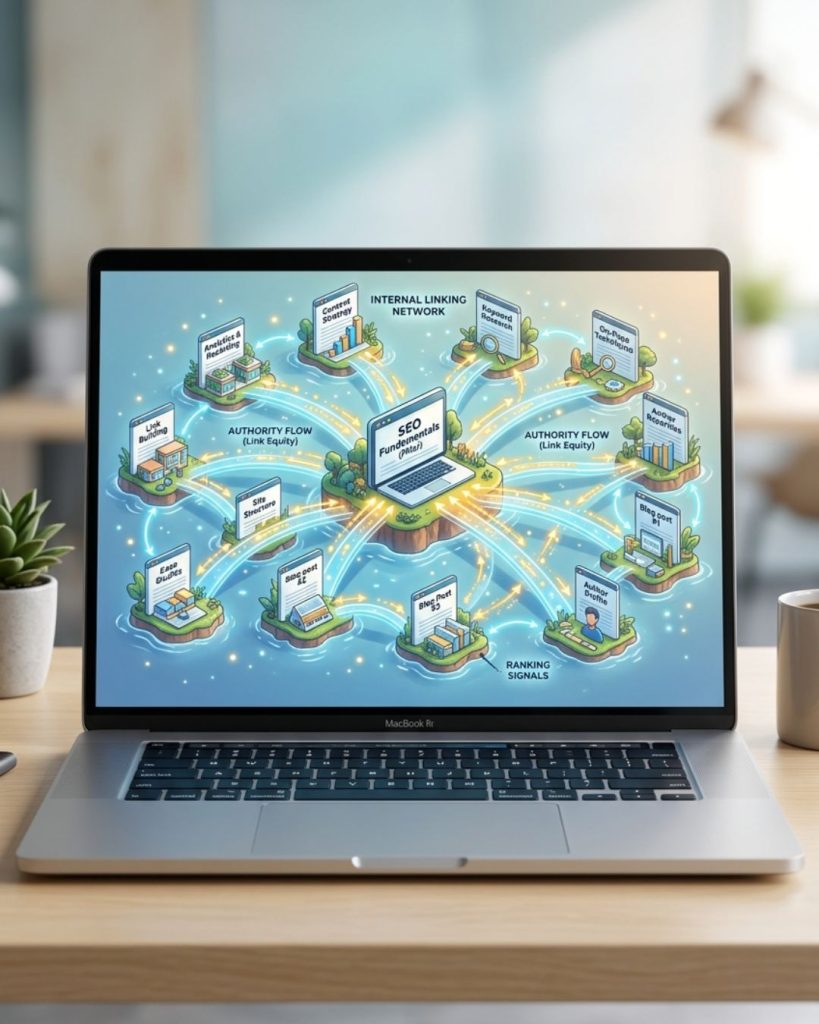
If your blog posts are islands, they will sink. Internal linking is the bridge system that keeps your “SEO juice” flowing throughout your entire site.
- Distributing Authority: When an old post gets a backlink from an external site, you can “pass” that authority to your new posts by linking to them.
- Contextual Relevance: Use descriptive anchor text. Instead of “click here,” use “advanced keyword research strategies.” This tells the search engine exactly what the next page is about.
- Reducing Bounce Rate: Strategic links keep readers on your site longer. If they finish an article on “SEO Structure,” give them a link to “Internal Linking” to keep them in your ecosystem.
- The “Link Circle”: Ensure your pillar posts link to your sub-topics, and every sub-topic links back to the pillar. This creates a closed loop of authority.
4. Keyword Research for High-Intent Traffic
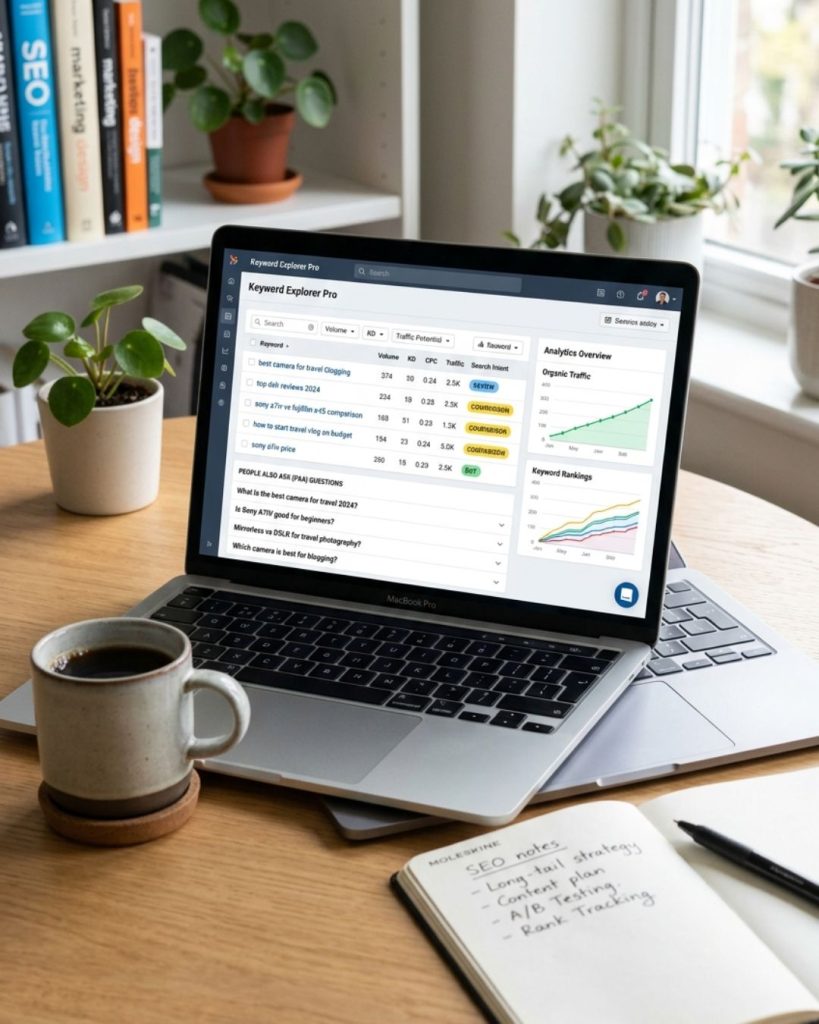
I stopped chasing “high volume” and started chasing “high intent.” I’d rather have 100 visitors who want to buy than 10,000 who just want to browse.
- Long-Tail Keywords: These are specific phrases like “best budget cameras for faceless channels 2026.” They have lower competition and much higher conversion rates.
- Commercial Intent: Focus on keywords that include words like best, review, vs, comparison, or how to. These users are at the bottom of the funnel.
- The “People Also Ask” Goldmine: Use Google’s own data to find the exact questions your audience is asking and answer them in your sub-headings.
- Semantic SEO: Use LSI keywords (latent semantic indexing) to help AI models understand the context of your writing without keyword stuffing.
5. On-Page SEO: The 2026 Checklist
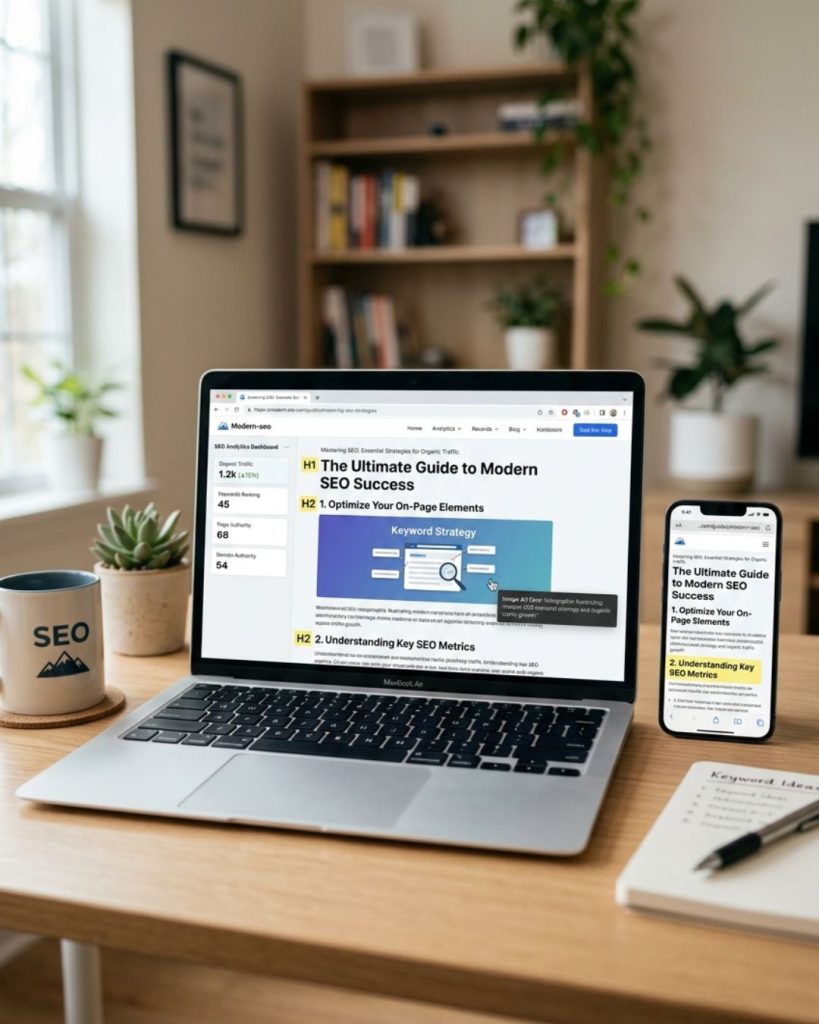
To rank in 2026, your on-page technicals must be flawless. The competition is too high for “good enough.”
- H1, H2, and H3 Tags: Use your headers to create an outline. Your primary keyword should be in the H1, and secondary keywords in the H2s.
- URL Slugs: Keep them short and descriptive.
/seo-structure-guideis better than/blog/post/2026/04/01/how-to-do-seo-structure. - Mobile Optimization: More than 80% of your “sleep income” will come from mobile users. If your site doesn’t load in under 2 seconds, you’re losing money.
- Image Alt Text: Don’t just describe the image; use it as an opportunity for semantic keywords to help you show up in visual search.
6. Monetization: Turning Traffic into “Sleep Income”

A blog that pays you while you sleep needs a diversified monetization strategy that doesn’t require active selling.
- Affiliate Marketing: This is the king of passive income. By recommending products within your pillar posts, you earn a commission every time someone clicks and buys.
- Display Ads: Once you hit a certain traffic threshold, platforms like Mediavine or AdThrive (Raptive) will pay you premium rates just for people viewing your content.
- Digital Products: Sell what you know. A $29 SEO checklist or a $99 content calendar template can be sold an infinite number of times with zero overhead.
- Automated Email Funnels: Use your blog to capture emails. An automated sequence can then sell your high-ticket courses or consulting services on autopilot.
The 28-Day “Update” Cycle
The internet moves fast. To keep your blog paying you, you have to keep your assets “fresh” in the eyes of the algorithm.
- Content Refreshing: Every few months, go back to your top-performing pillar posts. Update the dates, check for broken links, and add new data or insights.
- Link Audits: Ensure your internal linking is still pointing to your most relevant and profitable pages.
- User Feedback: Look at your comments and “time on page” metrics. If people are leaving a page quickly, it means the content isn’t hitting the mark. Fix it.
- AI Integration: Use AI tools to help you summarize your long posts for “Featured Snippets,” ensuring you take up the most real estate on the Search Engine Results Page (SERP).
Why “Skin in the Game” (E-E-A-T) is Your Moat
In a world full of AI-generated fluff, personal experience is the only thing that cannot be automated.
- Case Studies: Don’t just say “SEO works.” Show a screenshot of your traffic growth.
- Personal Tone: Use “I” and “Me.” Share your failures. Readers in 2026 crave authenticity over corporate perfection.
- Unique Data: If you can conduct your own small experiments and share the results, you become a “source” that other blogs will link to, skyrocketing your authority.
The Snowball Effect: From $0 to $10,000+
Building a blog is slow at first, then incredibly fast. It is the definition of exponential growth.
- The 6-Month Ghost Town: Most people quit here. This is when you are building your pillar posts and nobody is reading them yet.
- The Tipping Point: Around month 9-12, Google starts to trust your SEO structure. Your older posts start to rank, and your traffic begins to double every few months.
- The Authority Phase: This is when you can rank for new keywords within days because your site is a recognized leader in your evergreen niche.
Final Thought: Build Assets, Not Just Content
If you want to make money while you sleep, stop thinking like a writer and start thinking like a developer. Every post you publish should be a long-term traffic asset designed to solve a problem and lead to a conversion.
Master the SEO structure, weave a tight web of internal linking, and invest your time in pillar posts. The work you do today can pay your rent three years from now. That is the true power of a well-built blog.